by Scott Martin Photography | Mar 29, 2012 | Birds, Blog, Shore Birds & Waterfowl
While vacationing in Florida two weeks ago, Deb and I visited the Orlando Wetlands Park in Christmas Florida. The park is actually about 45 minutes North East of Orlando, approximately twenty miles East of Merritt Island. It’s a fabulous wetland area that is 1650 acres in size and contains over twenty miles of hiking trails. Bicycles are allowed however cars are not, so be prepared to do a lot of walking when you are there. Deb and I didn’t have a lot of time available so we did an enjoyable six-mile loop seeing everything from rattle snakes, to alligators, to garpike and many different bird species, including the America Bittern shown in this post.
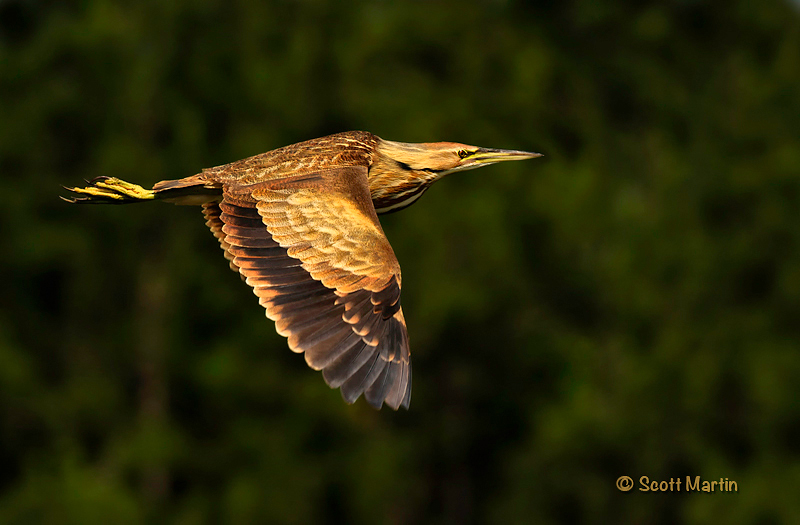
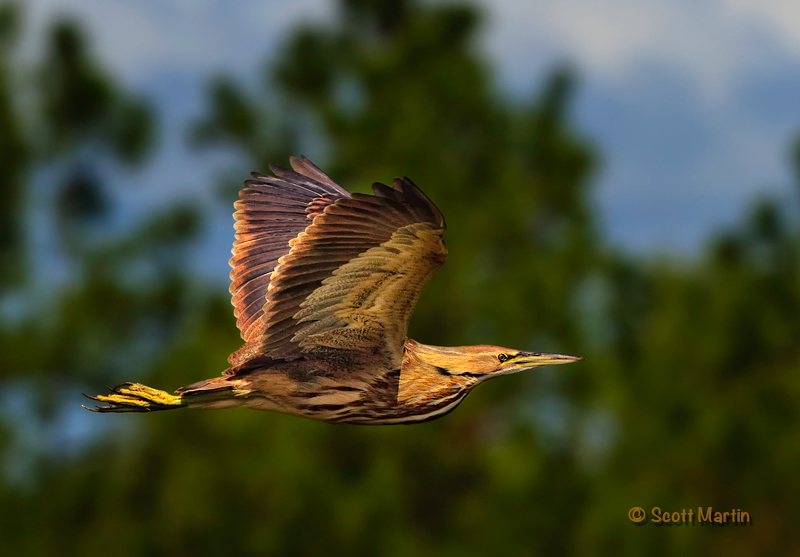
The American Bittern is a member of the Heron Family and in the summer months can be found in Canada. It winters in the south. Although the American Bittern is a common bird it is not often seen as it has the unique ability to blend well into the reeds in which it spends most of its time. They are typically solitary birds and when approached they often stay in one spot, extend their neck and point their head straight up into the air and in doing so blend right into their surroundings. They will even slowly sway their necks back & forth simulating the reeds moving in the wind. Consequently they are birds that are more often heard than seen which makes every nature and bird photographer happy when they finally get to capture one ‘on film’.
The Bittern below didn’t follow the usual pattern and flushed when Deb and walked by without knowing it was there. In fact we were startled when it flew up about ten feet beside us and headed to another location. Fortunately I had just enough time to get about six frames of the bird as he passed by us. Having a dark back ground for one of the shots was a bonus!

The wing detail in the American Bittern is impressive whether viewed from above or below.
by Scott Martin Photography | Mar 17, 2012 | Blog, Educational, Wildlife
Sitting by the pool at our timeshare in Kissimmee, Florida with an iPad and playing with the Snapseed app that I’ve been referring to in the last few blog posts. I can’t recommend this app more highly and though it does cost $4.99 from the app store it is well worth the investment. Typically I use the app to fine tune images that by iPhone camera standards are already pretty good to start with. It has been my experience that post processing images does not often take poor images and make them acceptable but rather makes already good shots even better. Post processing rarely saves an image from the round file. That said I’ve been looking for an image that will take the post processing ability of an app to the limit, just to see what it’s capable of. I think this image fits the bill so before deleting it, it became a good test for Snapseed.
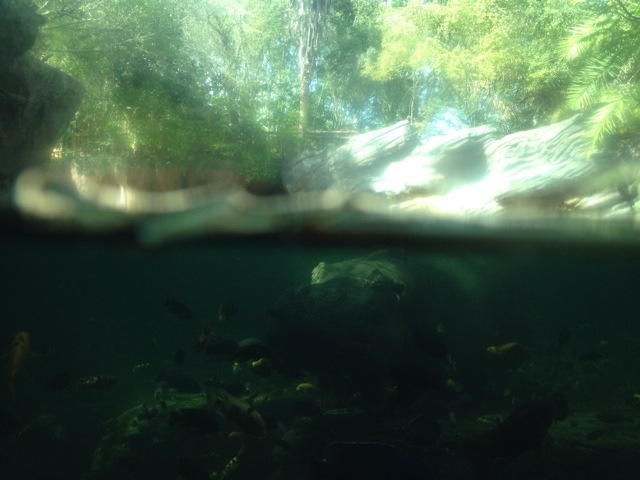
This shot is a challenge even with the best of gear. Normally you would expose for the dark water in the bottom of the image and use (in this case) at least a three stop hard edged ND Grad filter above the water line. With the iPhone 4S camera that is not possible so to take this image I focused over the hippo’s head with the focus point (which is also the metering point) half above and half below the water. The result creates severely blown highlights above the water and very underexposed shadows below the water, but at least there is some detail above and below the water line.
So, here is the original image as taken, clearly a ‘delete only’ capture.

Now, what could Snapseed do with this image? Although I have the app installed on both my phone and iPad, this image was processed on the iPad but could have easily been done directly from the phone. The time to process this image was about five minutes which is one of the advantages of Snapseed, it is very user friendly yet powerful in its scope.
Although this post is not intended as a Snapseed tutorial, in short this is how the shot was processed; water line leveled, image cropped, three different selections above the water level to reduce the blown highlights as much as possible, increase the contrast, adjust the saturation and white balance; one selection below the water line to brighten the water as much as possible, alter the contrast and tweak the white balance. The entire image was then adjusted for ambiance and structure. As is always the case, brightening shadows brings out the noise, which is very evident in the processed image. To date Snapseed has no way of noise reduction but hopefully that will come via way of a future update (NIK software has a fantastic NR program called Define which I use all the time as a CS 5 plug in, so hopefully it will show up some day in Snapseed). As a result of the noise, this image was not sharpened.
So here is the processed image. Still not a ‘keeper’ but a good example of what Snapseed can do when pushed well beyond what is normally necessary. It was a great image to play with and it’s not often you get the opportunity to photograph a hippo under water!
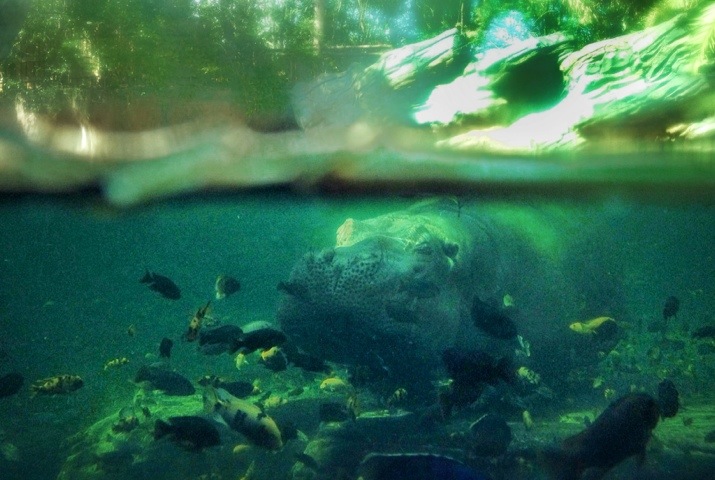
This image was taken in Disney’s Animal Kingdom Theme Park.
28.336041-81.533891
by Scott Martin Photography | Mar 16, 2012 | Birds, Blog, Shore Birds & Waterfowl, Travel
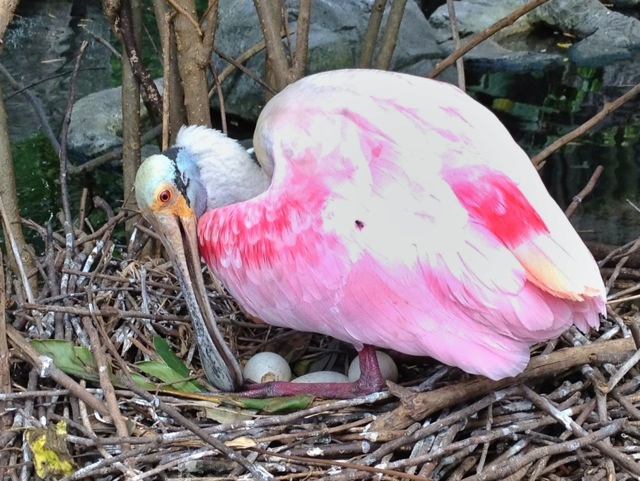
The Roseate Spoonbill has always been a favourite of mine and every trip to Florida we try to get a few shots of them. This year provided an interesting opportunity to photograph a Spoonbill with an iPhone. So please excuse the blown highlights in this image, but exposure control on the iPhone is not as user friendly as it should be 🙂
The Roseate Spoonbill is a bird who’s beak is ideally designed to allow it to eat effectively. The Spoonbill eats by waving the broad spoon shaped end of its beak in shallow water, disturbing the water and silt beneath it. It has very sensitive nerve cells that cause the beak to reflexly snap shut when prey is detected. The vibrant pink colours the Spoonbill takes on as it matures (they are born white) is a result of carotenoid pigments in algae which are consumed by crustaceans and then in turn eaten by the spoonbills. The Spoonbill’s nostrils are located at the base of their beaks so they are able to breath while the spoon end of the bill is submerged while foraging.
The following image was shot with the iPhone 4S and processed with the Snapseed app designed by NIK Software.

28.335975-81.53299

by Scott Martin Photography | Mar 13, 2012 | Blog, Educational, General
The wonderful world of apps for your smartphone has produced thousands of apps for the photographer; some to add quirky text balloons to your pics, some to make you smile by distorting the people in your images but fortunately some provide serious horsepower to improve your images and expanding the versatilty of the smartphone camera. Photosynth and Snapseed are two of the latter and every photographer serious about using your smartphone camera needs these apps.
Photosynth is a free app designed by Microsoft to make the taking of panoramic images a breeze, and it does exactly that. You can take 360 degree panos as well as taking ‘multi-level’ panoramas meaning you can take a matrix of images and have Photosynth seamlessly stitch them together into one image. When viewed in the Photosynth viewer you can use your finger to scan from left and right and up and down within the image. It is very impressive. After saving the panorama to your photostream you can then edit and crop the image using Snapseed. Snapseed is a powerful image editor developed by NIK Software, famous for their suite of plug-ins for Photoshop, Lightroom and Aperture. The beauty of Snapseed is that it brings NIK’s patented U-point technology to the smartphone and tablet. U-point technology allows for selective editing of brightness, contrast and saturation within an image based on the colour and texture of the part of the image you select. Besides selective editing, Snapseed performs many other essential post processing effects including, sharpening, structure, ambiance, white balance, special effect filters and even tilt shift conversions to name just a few. Snapseed costs $4.99 but I can assure you that it will become the only smartphone/tablet photo editor you will use once you have downloaded it.
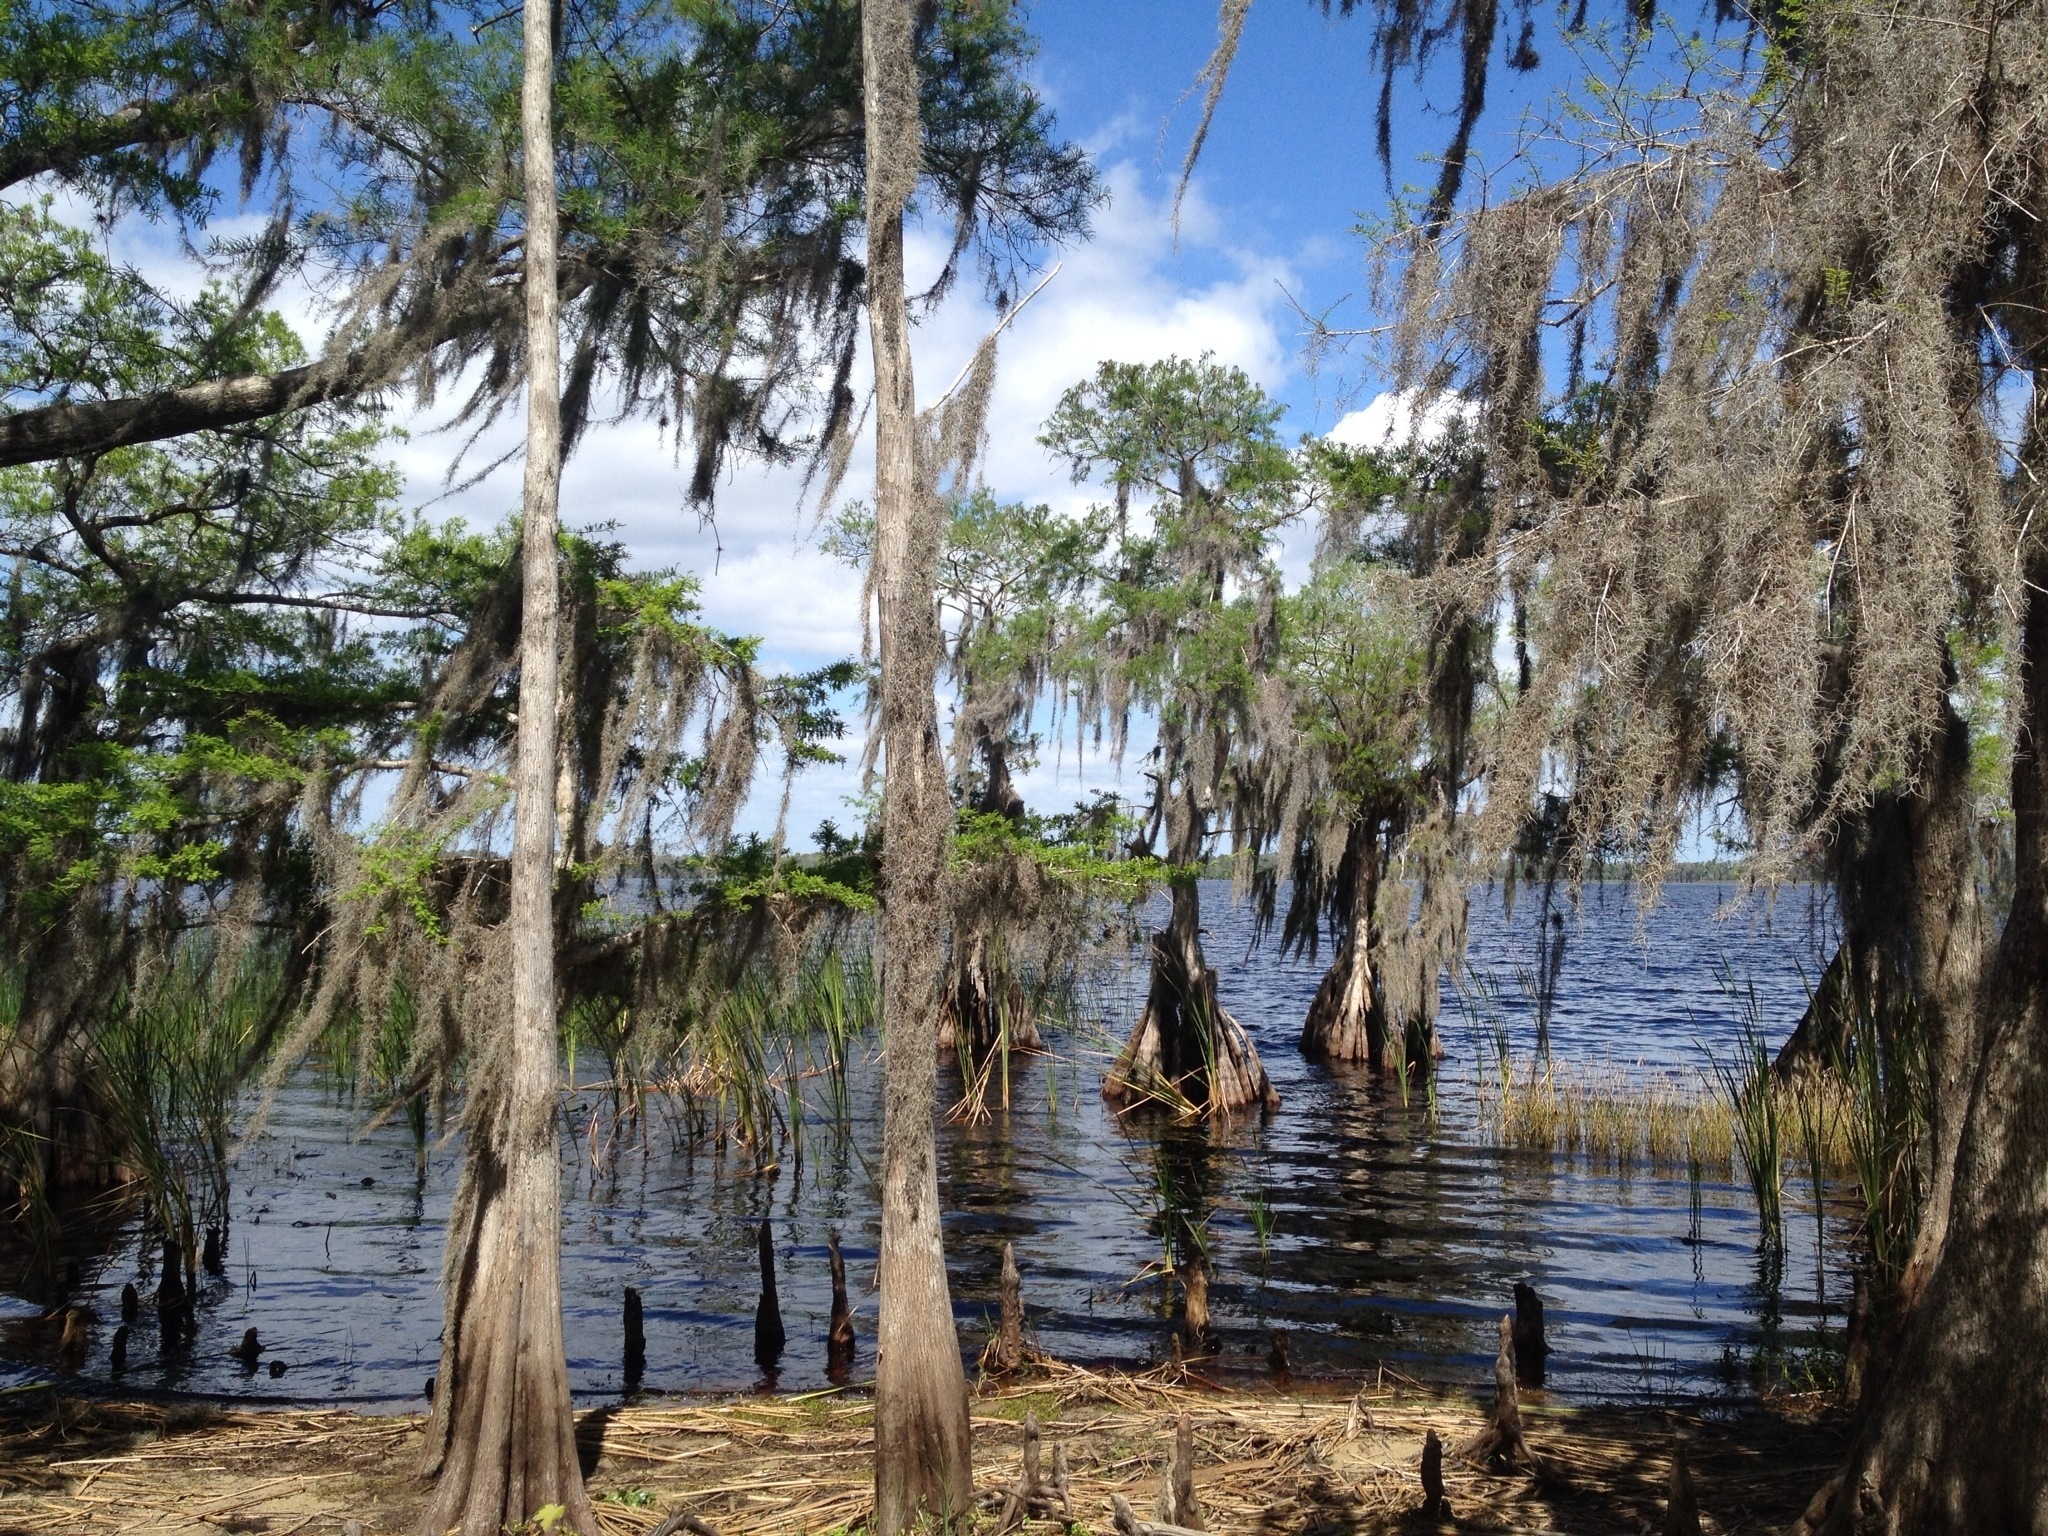
Here is a photo taken earlier today of Lake Russel in the Disney Nature Conservancy south of Kissimmee Florida. This shot was captured with an iPhone 4S (8 megapixel camera) without any zoom in landscape orientation. The image is un-cropped.
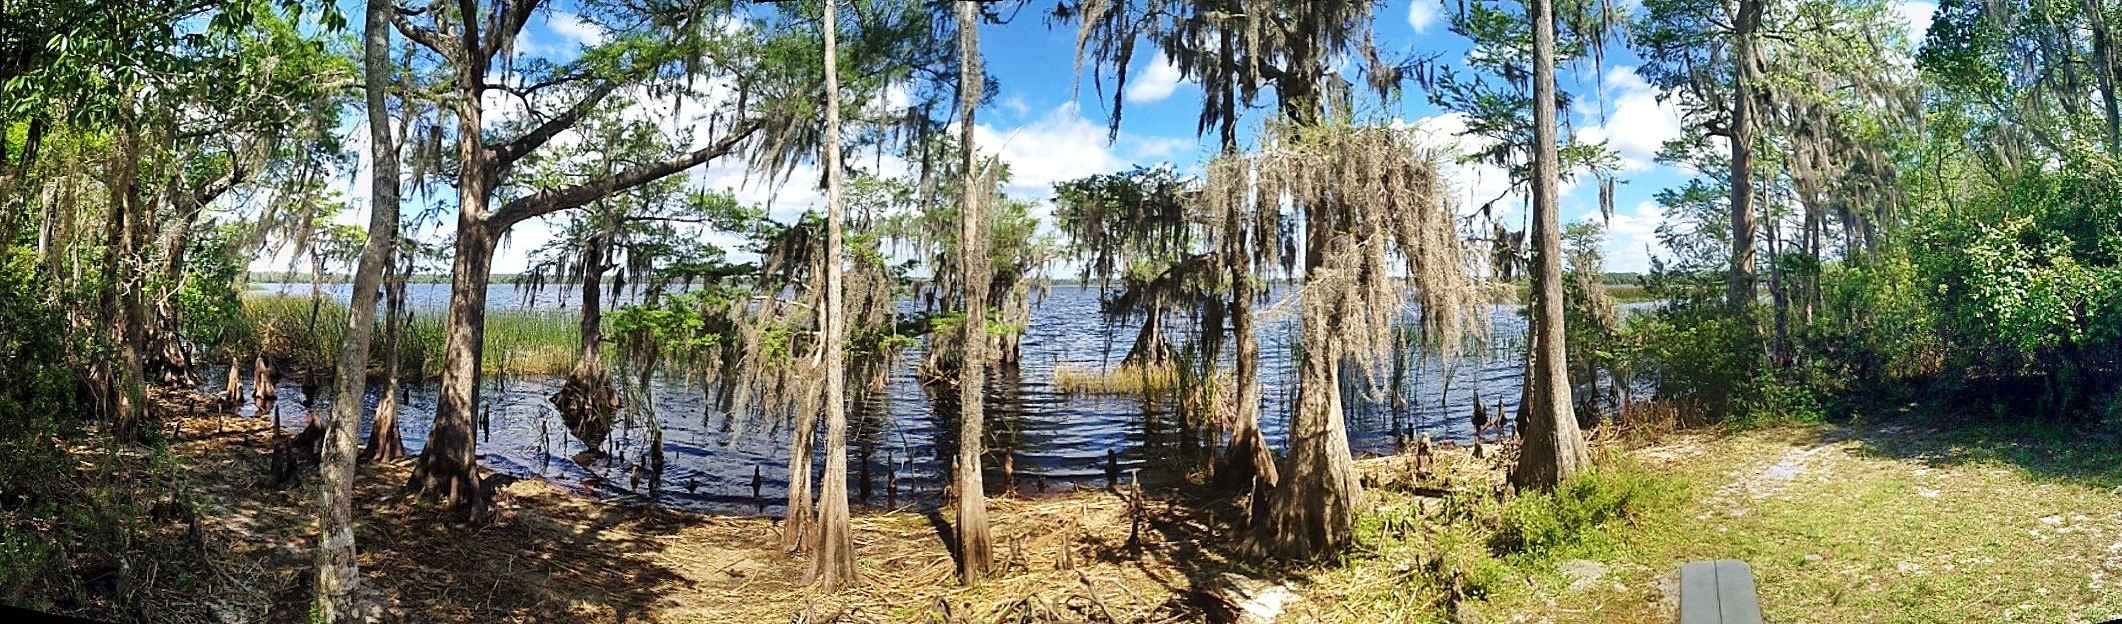
Here is six shot panorama taken from the same position with Photosynth and the camera in portrait orientation. It took Photosynth less than ten seconds to seamlessly stitch the images together. The resultant picture was cropped and edited using Snapseed.
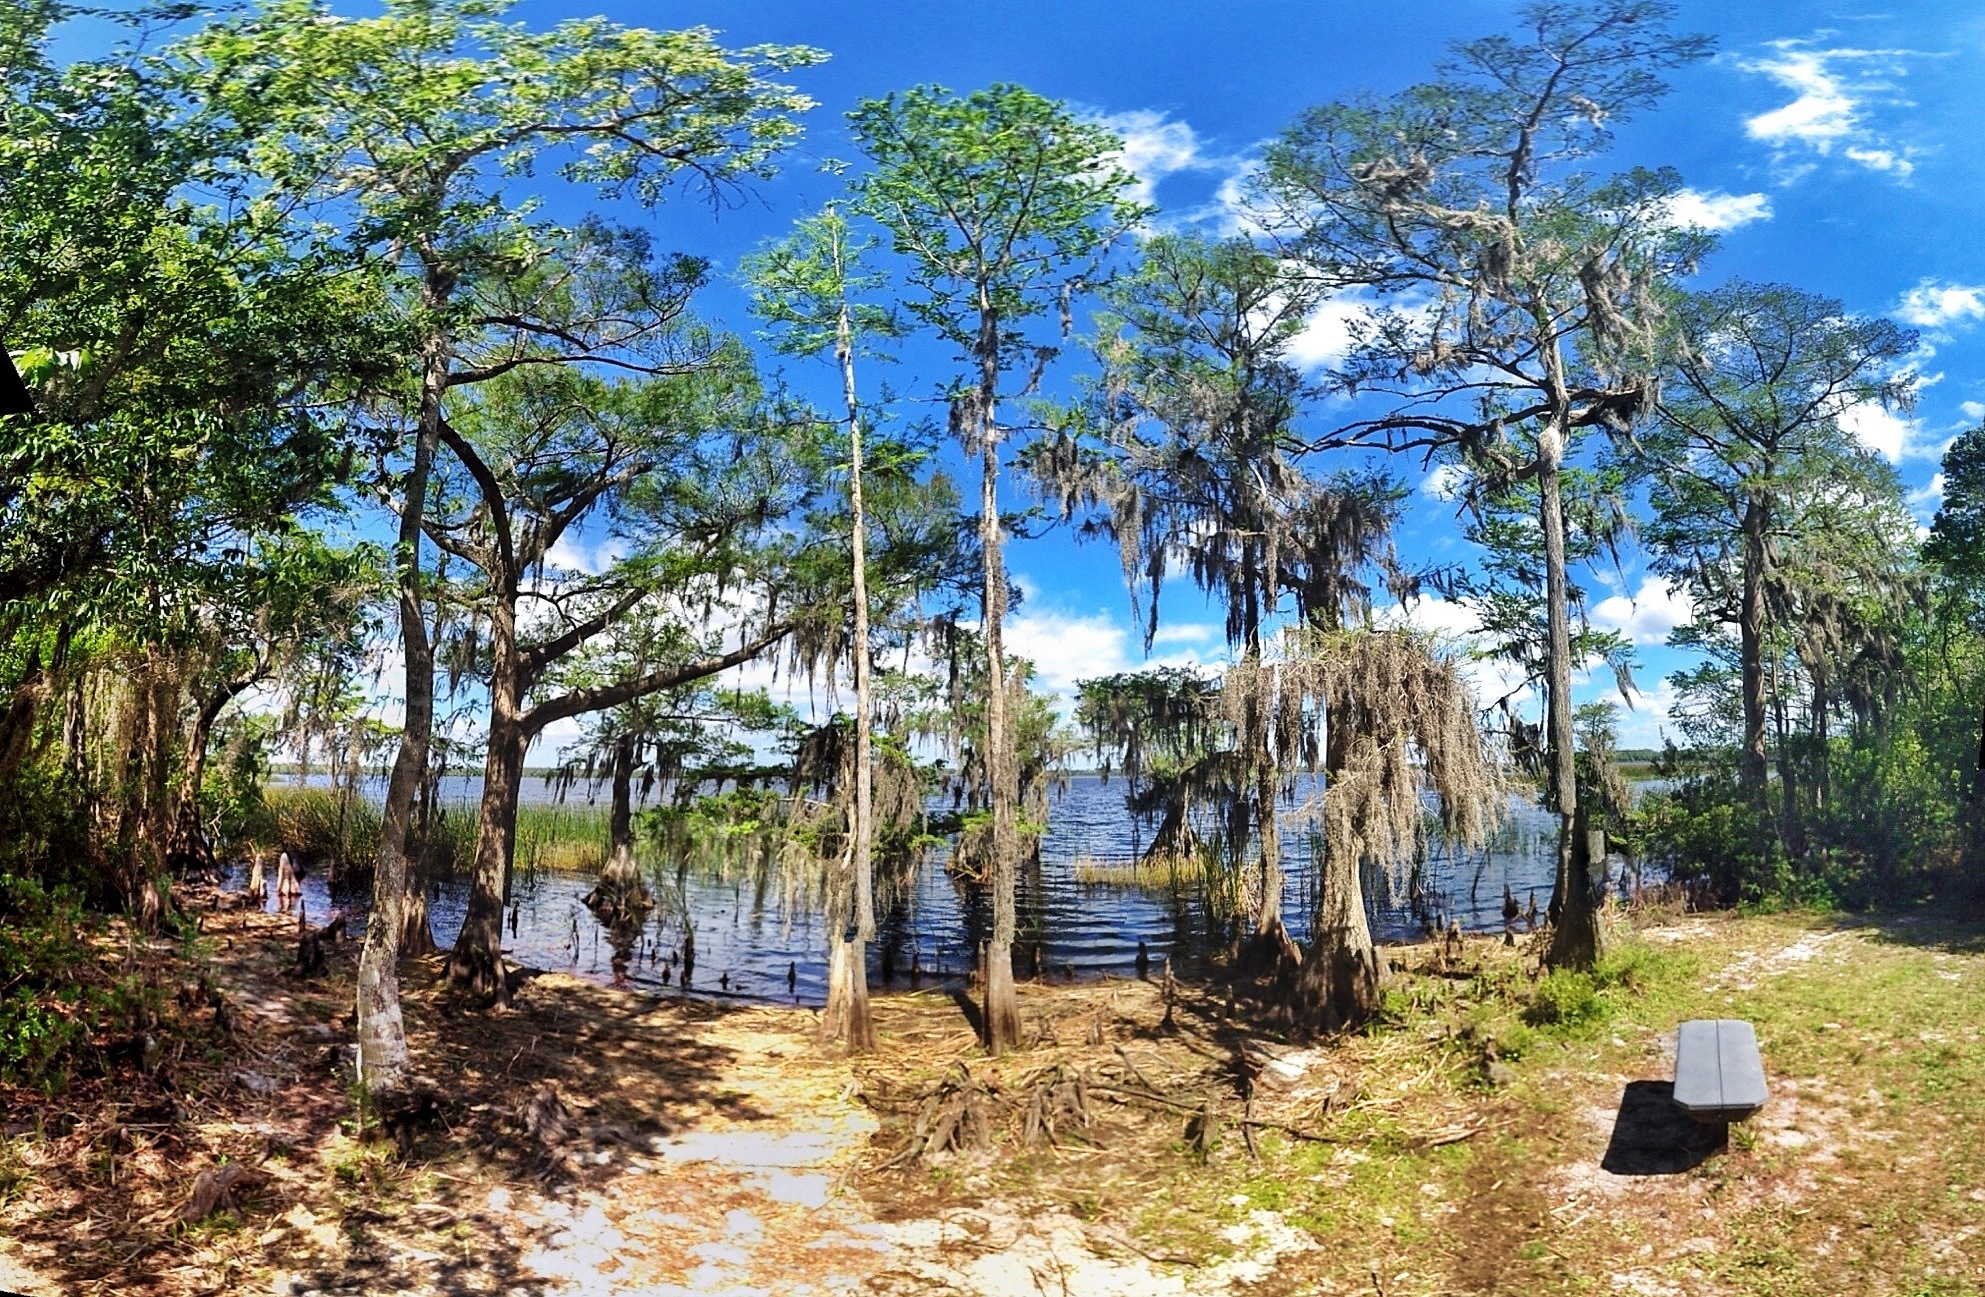
Finally, this is an eighteen image panorama taken as a 6×3 matrix. Photosynth stitched this panorama in about fifteen seconds. This image was taken from the same spot as the previous one and was processed with Snapseed.
In keeping with the theme of this blog post, it is being written and posted from Florida on an iPad 2 using the WordPress app. The photos, all taken earlier today with an iPhone 4S, showing up on the iPad via the cloud! How technology has changed over the part few years.
I would like to thank my good friend Arni who told me about Photosynth. You can see his superb photography at www.pixelz.ca
Note: After posting the blog images it became apparent that I cannot use the iPad to resize the photos as I usually do with WordPress. Please accept my apologies and I’ll fix the problem when I’m back in front of the computer. In the mean time the new technology still impresses!
by Scott Martin Photography | Mar 2, 2012 | Blog, Landscapes, Naturescapes, Travel
Photographing the Mesa Arch at sunrise is something every serious landscape photographer wants to do before hanging up the camera gear. In order to be there on time requires a bit of effort however that effort is richly rewarded as you watch the sun break over the horizon and under the arch, illuminating the La Sal mountain range some thirty-five miles away and the Colorado River Basin two thousand feet below. It was 34°F when Deb & I left our hotel in Moab Utah around 4:30 a.m. for the forty mile drive to the Mesa Arch trail head which is in the Island In The Sky region of Canyonlands National Park. From the trailhead we hiked the rather short trail (half of a mile) in the dark but didn’t require flashlights all of the way as the moon light was wonderful that morning. Once we claimed a spot for the tripod and set things up we had about 45 minutes before sunrise during which we got a chance to chat with the twenty or so others who arrived before the sun came up. Make sure to arrive early if you want a good spot!
The exposures for the images posted today range from less than a second to more than thirty seconds and were all taken with a Canon 1D MK III and 16-35/2.8 or 24-105/4 lenses. Most were taken with Lee and Singh-Ray 4×6 ND grad filters.
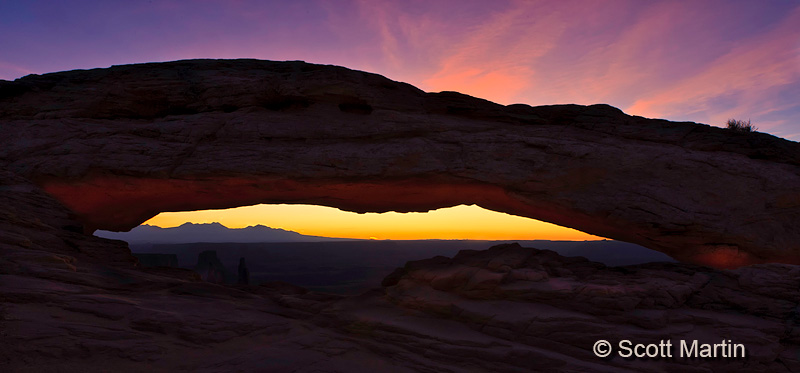
Before the sunrise.

Sunrise….at one of the prettiest places on earth to watch the sun come up. When photographing sunrises, always use a small aperture of f/18 or smaller which creates the starburst look of the sun. This is true for any bright light source in your image (street lights, stars, Christmas lights, candles etc). If you want the starburst effect, use the smallest aperture possible. This means using a tripod because of the longer exposures required but it is worth the effort and creates excellent results.

.

After the sunrise we had some time to explore around the arch and photograph it from many different angles. The following are a few of our favourites as well as some general shots to give you a sense of the area.
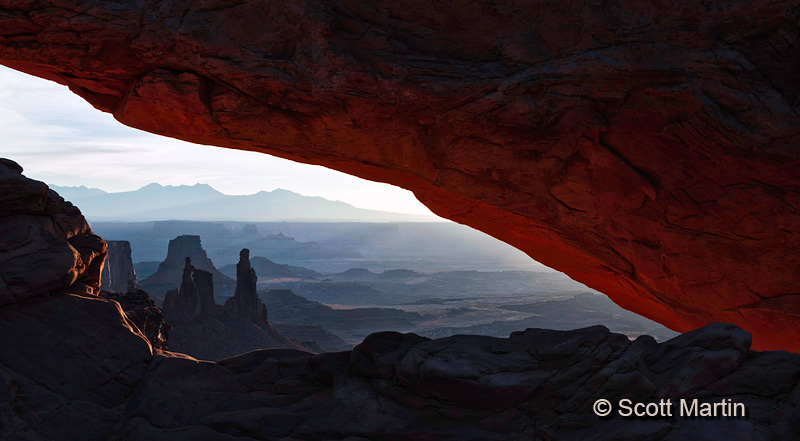
The underside of the arch literally starts to glow a few minutes before sunrise and is amazing to watch. In looking at the arch, my theory is that the glowing phenomenon is created by the early light reflecting off the cliff face upwards onto the underside of the arch which overhangs the 1800 foot precipice. The oxide rich sandstone makes the warm early light take on the even richer red & orange shades seen in the images. I think this next shot illustrates the point.

From the other direction.

A group shot!

The arch from above (you can see a person at the top of the arch for perspective).

Finally some close-ups. The Mesa Arch is one of the most photographed arches on the planet so there are no unique or original shots to be taken, that said, you always try to take something that is a little bit different.
It seems that many of the rock formations have their own descriptive names. In the right central portion of the image below you can see three local landmarks. The ‘Washer Woman Arch’ is in silhouette in front of ‘Airport Tower’ and immediately left of ‘Monster Tower’.

.

.
.

I trust these images have inspired you to plan a trip to Canyonlands National Park to experience a sunrise at the Mesa Arch.
Follow Scott Martin Photography