
by Scott Martin Photography | Oct 10, 2014 | Birds, Blog, Educational, Shore Birds & Waterfowl, Travel
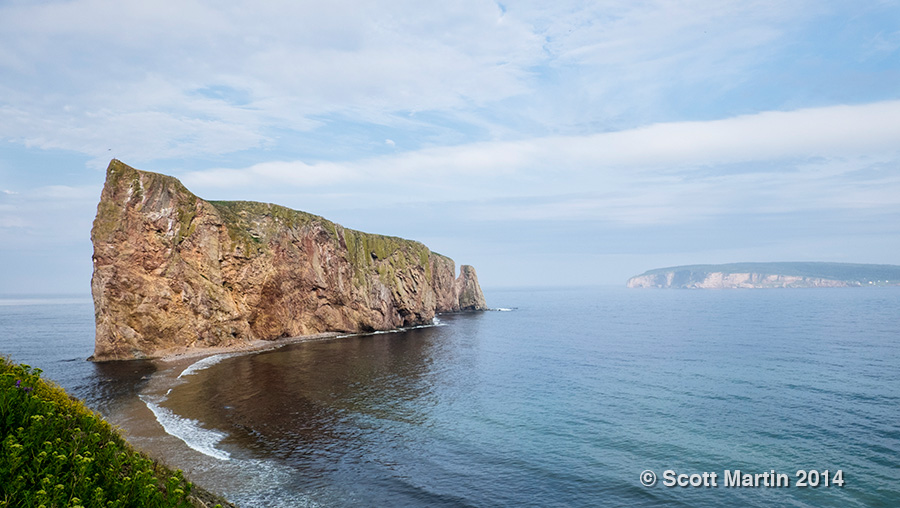
This summer my parents and Deb & I travelled around the Gaspé Coast of Quebec and as part of the vacation stayed in the little hamlet Percé, famous for the rock from which it takes its name, Percé Rock. Not far from Percé Rock lies Bonaventure Island which is well known in the birding world as it is home to the world’s second largest, and most accessible, nesting site of the Northern Gannet. You can see Bonaventure Island in the back ground of this image of Percé Rock.
We were in Percé for two and a half days, so we could be reasonably assured to be able to take the short ferry ride over to the island to photograph the Gannets in community and maintaining their nests. Unfortunately heavy rains on the first day and high winds on the second precluded us from getting to there…..it was a classic case of “so close but yet so far”, which is often the nature of wildlife and landscape photography. The upside is that we can plan a return trip to once again see the beauty of the Gaspé Coast.
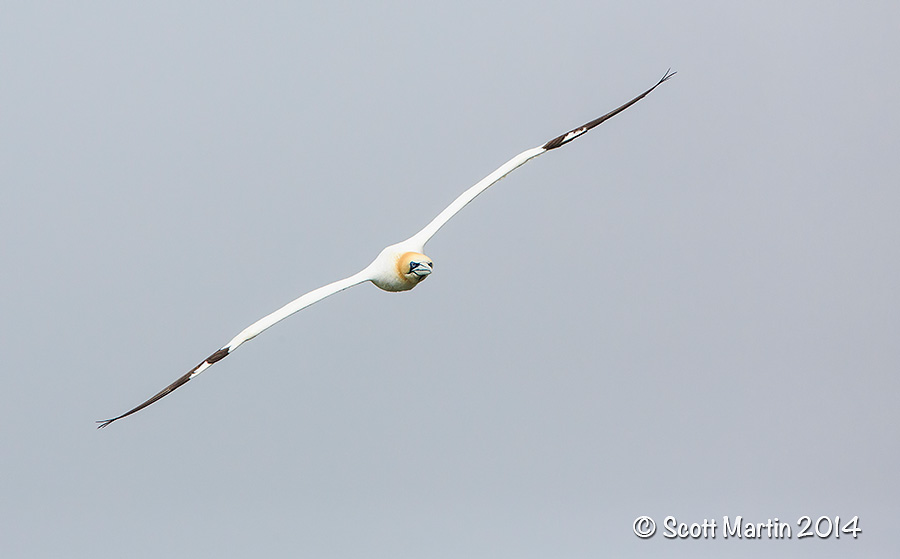
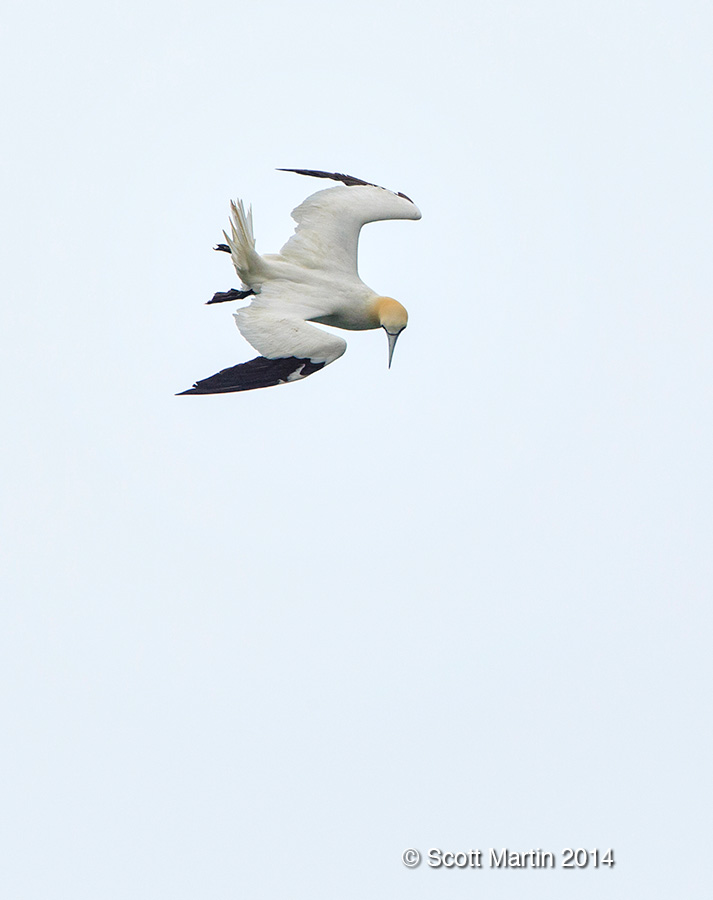
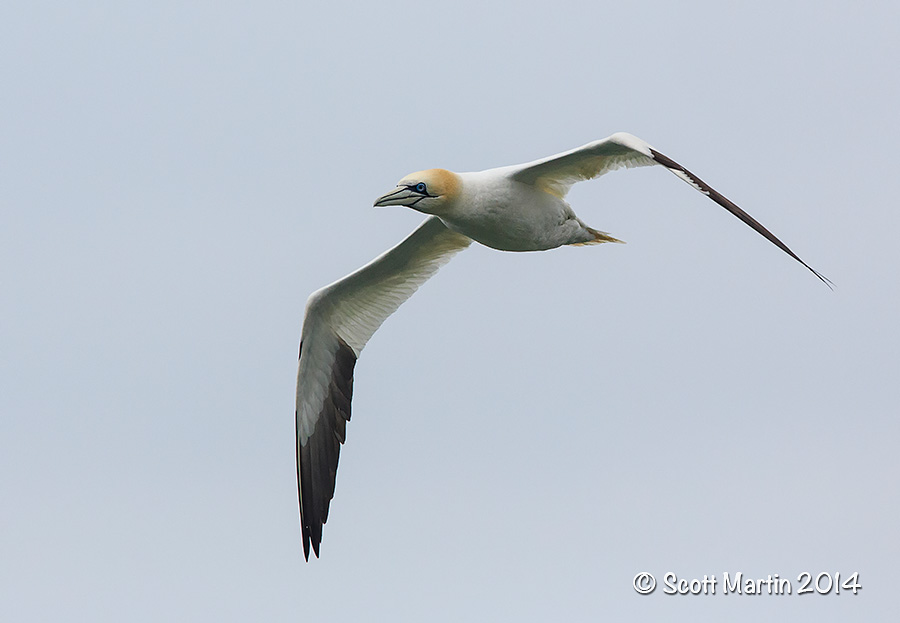
In terms of the Gannets, all was not lost as I was able to spend a couple of hours on the end of the ferry pier enjoying the high winds and photographing the odd Gannet that flew overhead while looking for fish! They are a truly a beautiful bird.
.
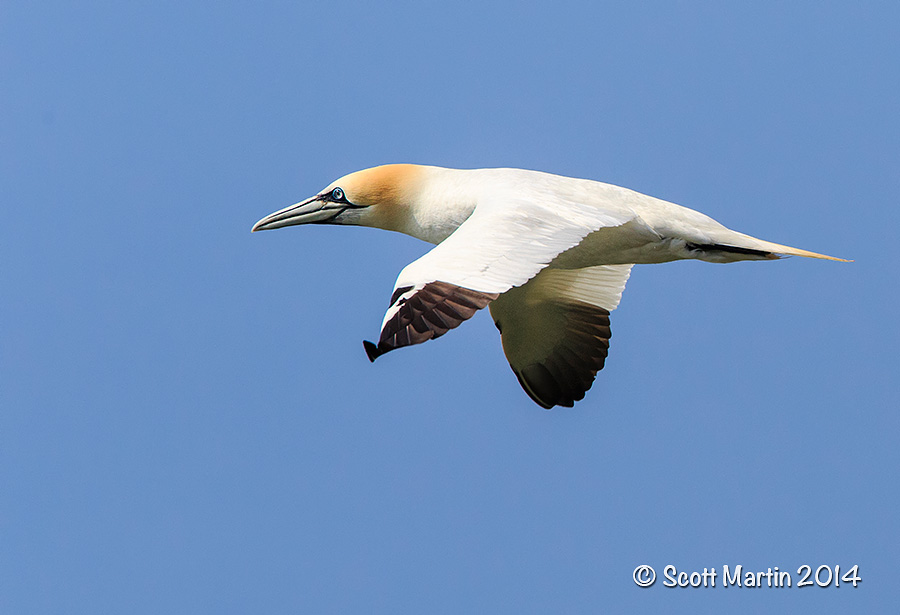
The Northern Gannet is a rather large bird measuring up to 43″ long, weighing almost eight pounds and enjoying a six foot wingspan. Although large, it is famous for its torpedo like diving style which allows it to strike the water surface at speeds up to sixty miles per hour. As noted above Gannets are primarily white with black wing tips in their adult plumage. When younger they are a uniformly brown colour and gradually take on the adult colouration when they are fully mature at about five years of age. In adults the colour of the head, cheeks and upper neck is variable depending on the time of year and during breeding season they become a beautiful golden yellow colour, which perfectly compliments their aqua blue eyes.
.
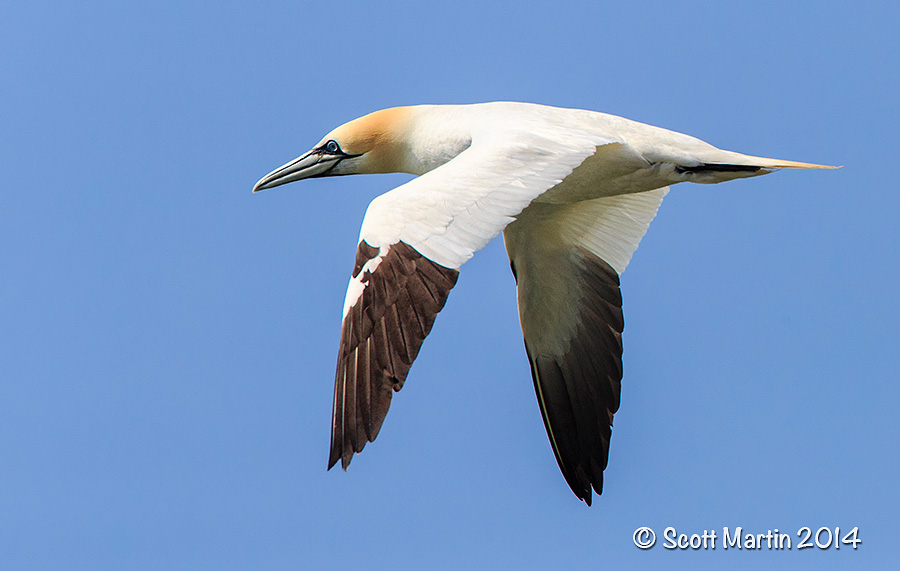
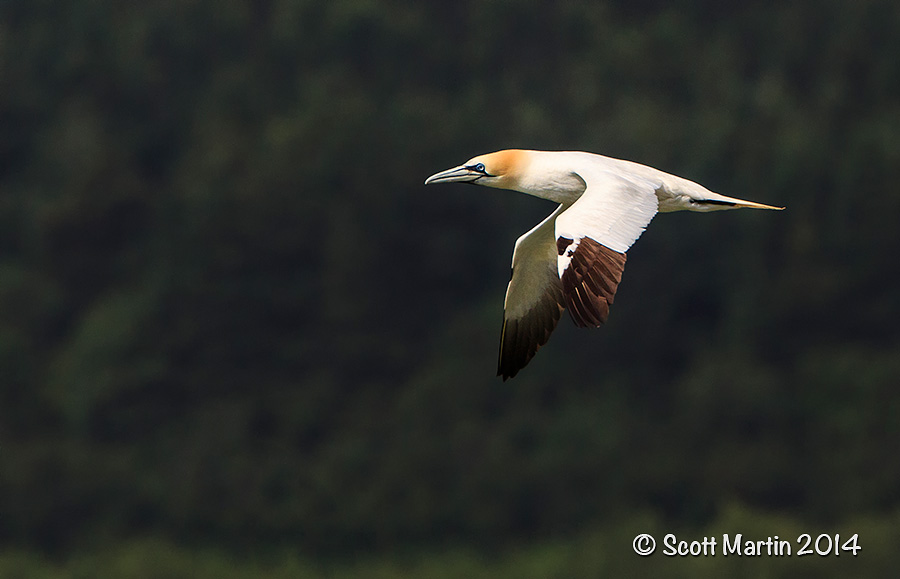
When photographing sea birds, the typical background is water & sky, however it was a pleasure to capture one bird against the greenery of the forest as if flew behind me on the pier.
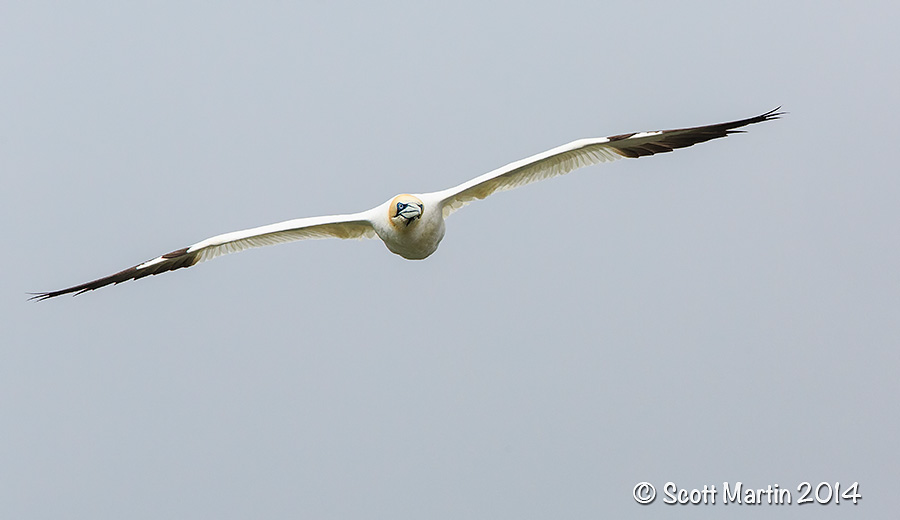
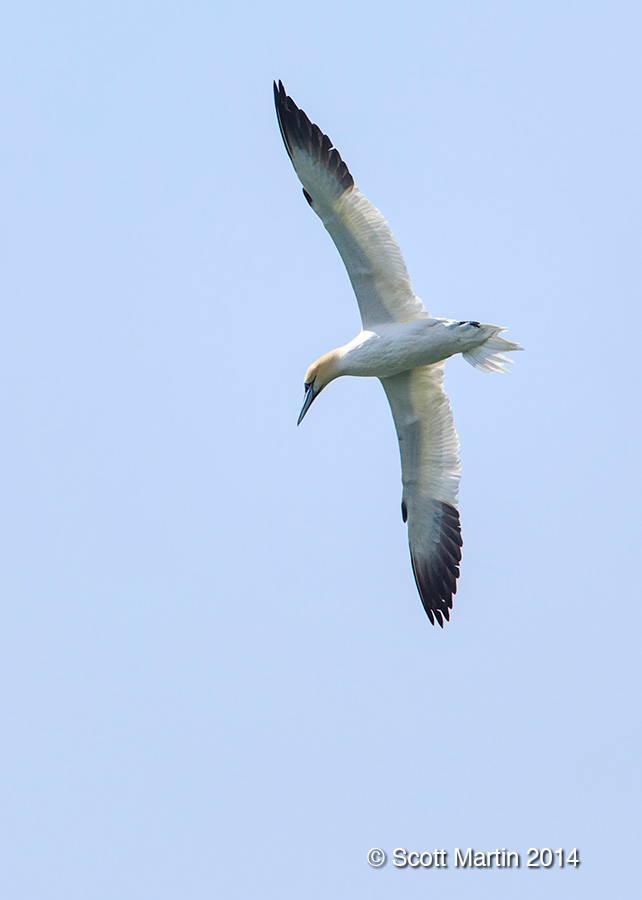
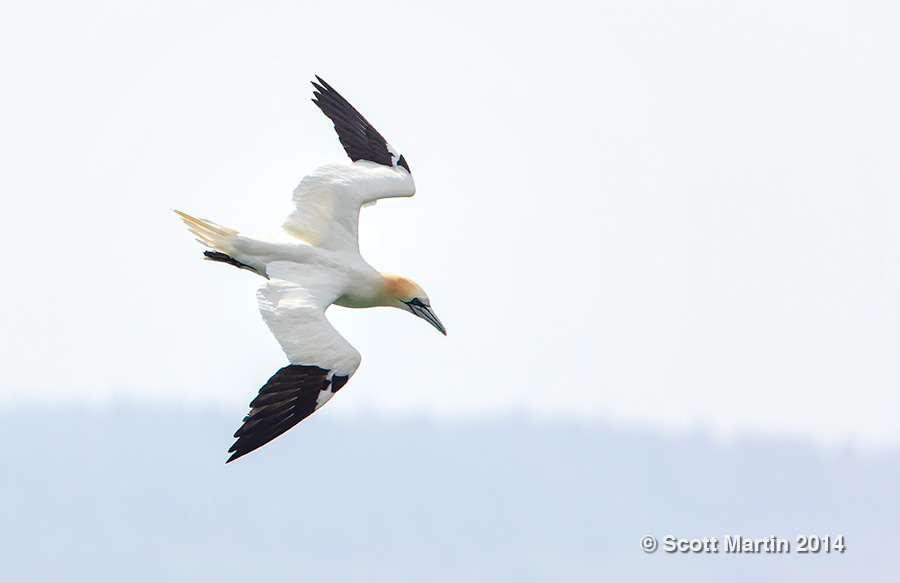
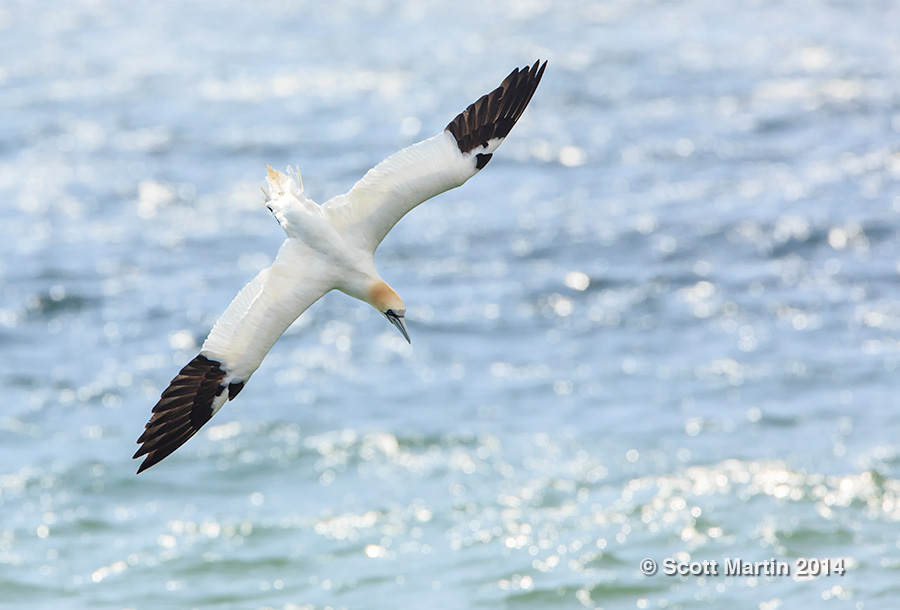
The Gannet has many unique and interesting design features that allow it function on the sea with maximum efficiency. Its wings are proportionally long and slender, and it fact weaker than most birds. As a general rule a bird’s wing muscles comprise at least 20% of their muscle mass, while the Northern Gannet is only 13%. Even still they are capable of cruising at speeds of up to 50 mph and can dive much faster than that. The next image highlights the long slender wings.
There are many other amazing design features of the Gannet that allow it to dive efficiently and also protect it from the water impact pressure when it strikes the surface at high speeds. They have no external nostrils and the secondary internal nostrils can be closed when under the water. Also their external auditory canals are small, covered by feathers and can be closed by a mechanism similar to the one used to close the nostrils. Perhaps the most remarkable diving protection enjoyed by the Gannet is its longer than usual sternum which guards the internal organs from direct impact pressure. Equally impressive are a series of inflatable air sacs, connected to the lungs which line the sides and back of the Gannet as well as between the sternum and pectoral muscles, further cushioning the impact pressure as the bird enters the water.
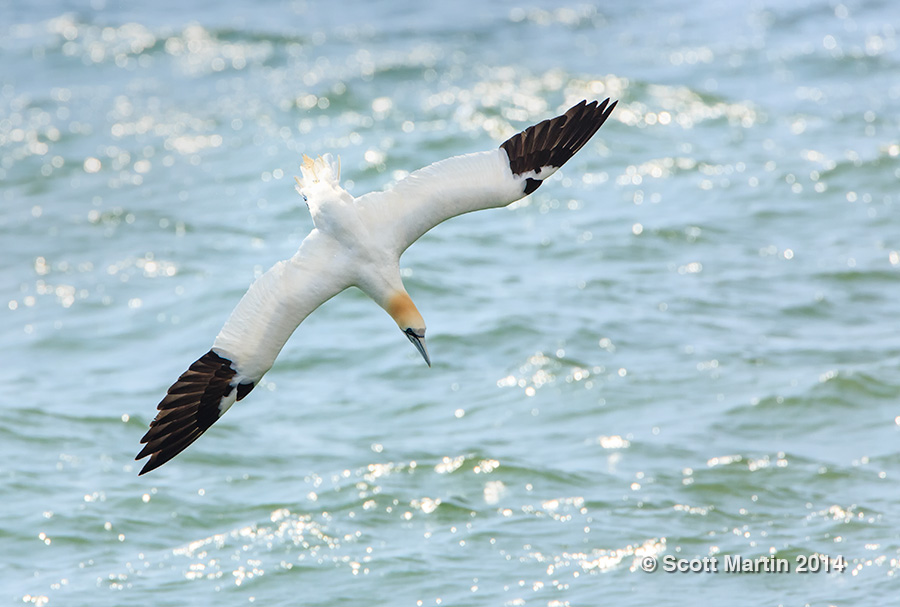
Gannets fly in fairly large groups about fifty to sixty feet above the water looking for schools of fish to feed on. You can see in this next image a few of the Gannets have spotted some fish below and are initiating their dive.
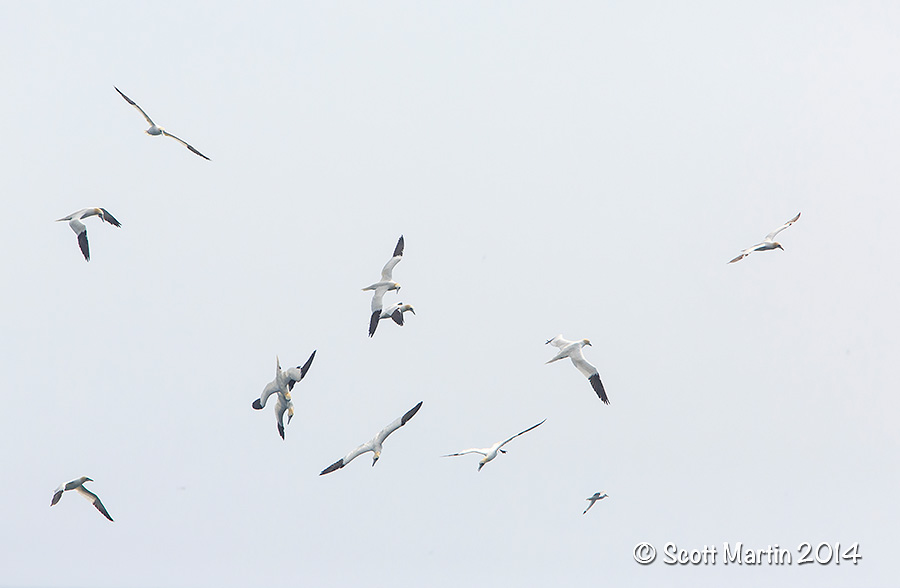
Gannets Fishing
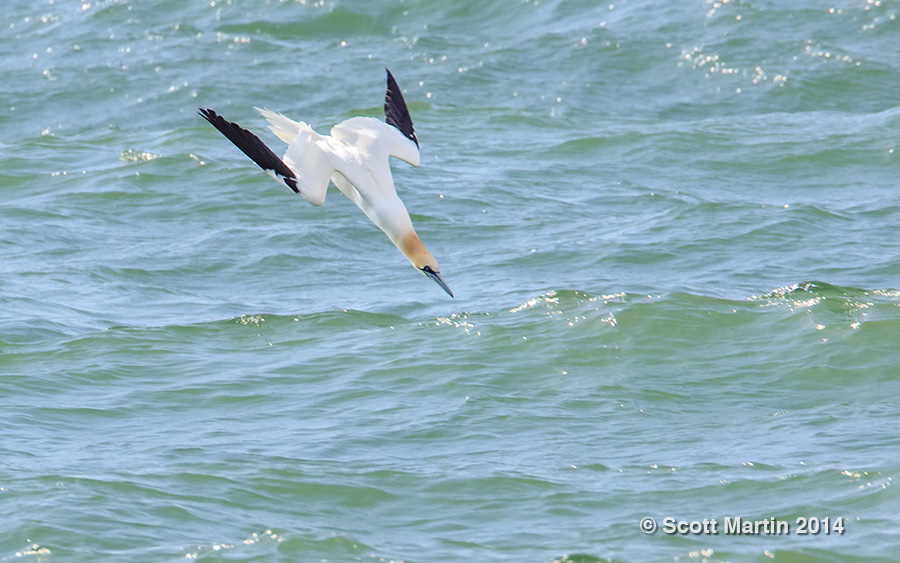
When a Gannet spots a target fish it quickly applies its air brakes and locks on to its acquired target, which is seen in this next shot.
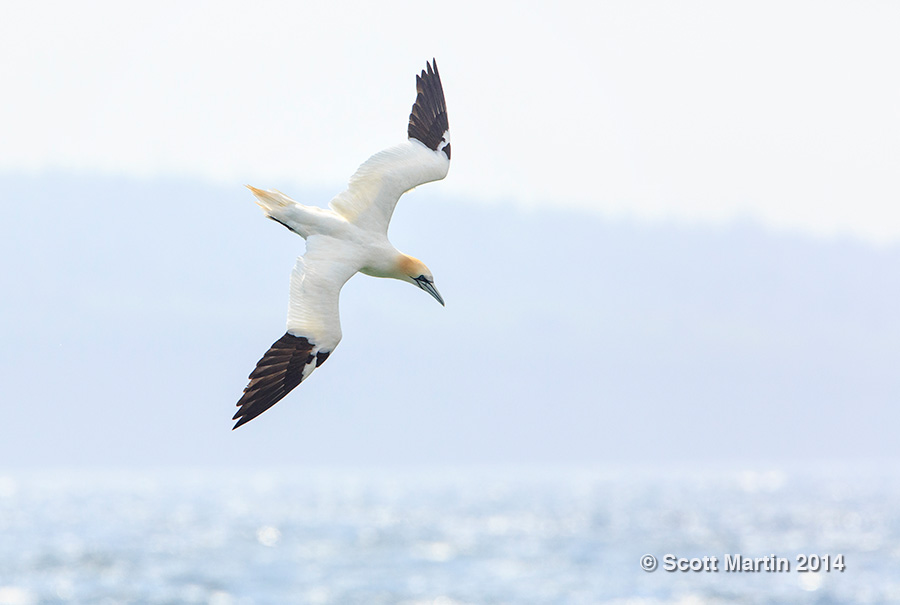
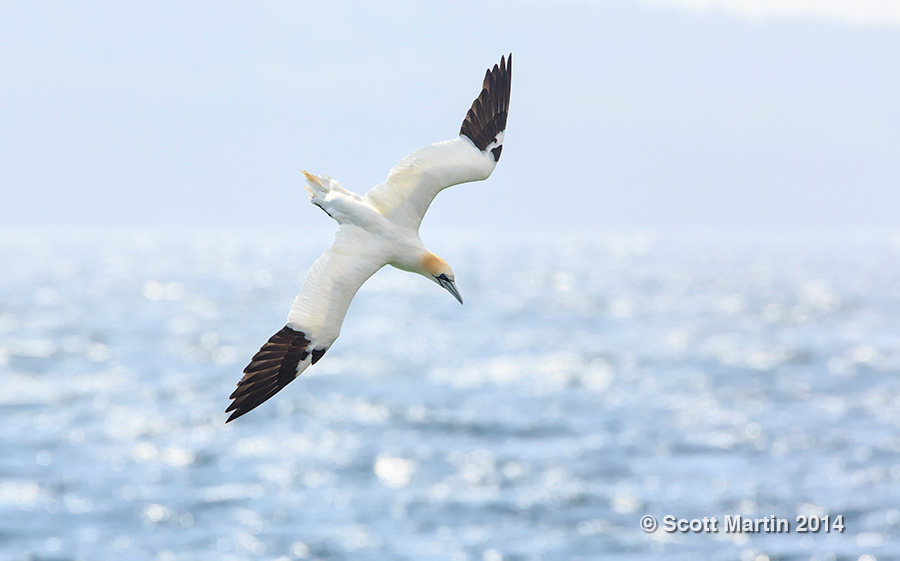
The next series of images shows the Northern Gannet in various stages of its dive (taken from the same dive sequence).
.
.
.
.
.
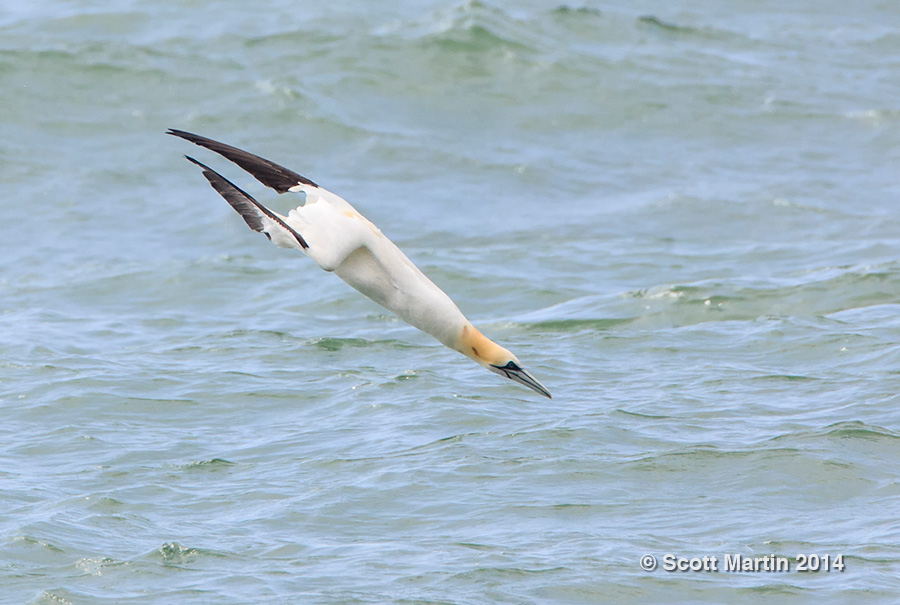
And a dive shot from another sequence showing the classic Gannet torpedo posture immediately pre-impact.
The diet of the Gannet is virtually 100% fish although they have known to eat squid opportunistically. They are no respecter of fish and will eat any variety available between the lengths of 1-12″. Interestingly they always swallow the fish while still underwater and will never carry a fish in their bill while inflight. When feeding the young before they fledge, the adults provide regurgitated fish.
When Gannets hit the water at up to sixty miles per hour momentum allows them to penetrate to depths of up to 15′ however they are also able to swim even deeper and have been recorded at depths of up to 45′.
Although we didn’t get to photograph the nesting sites on Bonaventure Island, there are lots of nest there. In fact it is estimated that there are more than 40,000 nests on the island accommodating over 100,000 birds.
All of the images in today’s post were taken with the Canon 5D Mk III with the EF500mm f/4 L IS lens.
I trust you have enjoyed this brief photo exposé of the Northern Gannet of the Gaspé Coast. The Gaspé region is an absolutely fabulous place to visit and if you’ve never been, its one of those destinations that should be on everyone’s bucket list.
by Scott Martin Photography | Oct 4, 2014 | Blog, Educational, Landscapes, Naturescapes
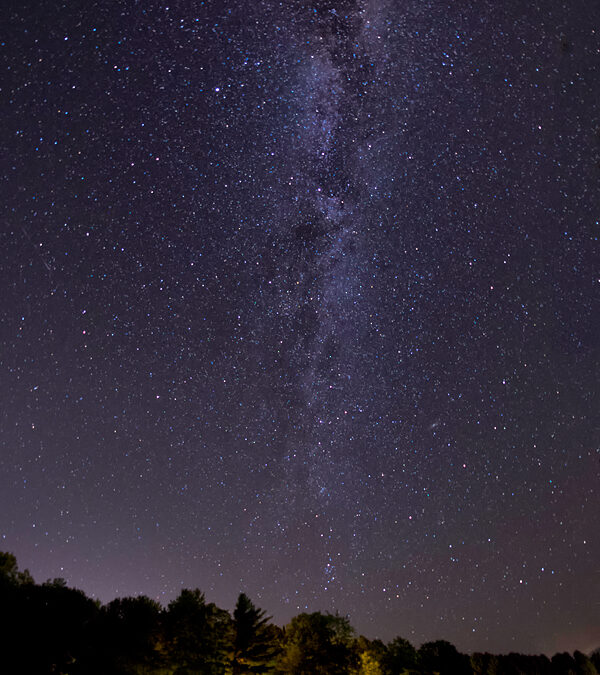
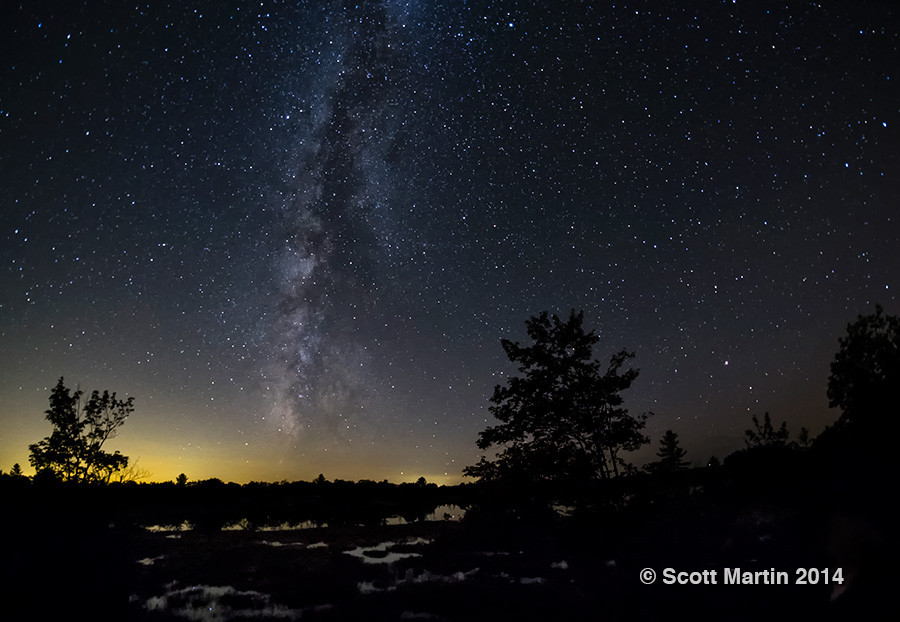
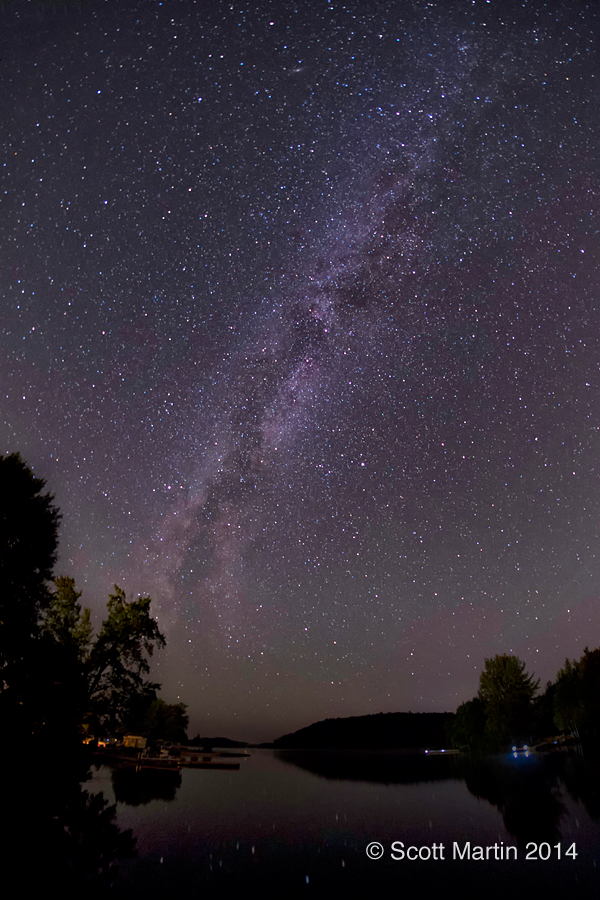
Since a young boy growing up in the Ottawa Valley, I’ve always had a fascination for stargazing and never tire of looking into the dark sky and with a sense of awe take in God’s handiwork as it stretches out across the heavens. As you take in the majesty of the Milky Way making its way across the night sky you are reminded of Psalm 19:1 which says “The heavens declare the Glory of God. The skies proclaim the work of His hands”. Although there have been years of looking upwards, it has not been until this past month or so that I’ve made any serious attempts to photograph the night sky. Today’s post will show case some of the images taken of the Milky Way and hopefully encourage you to get your camera out and experiment with astrophotography. Besides your camera, you really only need three other things to be successful; a tripod, a flashlight and coffee! This is my first attempt, taken with the tripod set up on the dock at the cottage.

The best Milky Way images have a wide field of view so you need to use your lens with the shortest focal length (a wide angle lens). As the light levels are low you also want the ‘fastest’ lens possible, meaning a lens with the largest aperture, allowing the most amount of light to reach the sensor in the least amount of time to effect a good exposure. So in terms of gear, the two most important considerations are focal length and aperture. Most of the images in this post were taken with an 8mm f/2.8 fisheye lens which has 180° field of view.
Astrophotography is also the perfect avenue to encourage you to shoot manually…. you really do need to have individual manual control of aperture, shutter speed and ISO. To top it off, you also need to focus manually!
In terms of exposure, long time exposures are required as there is so little light available. This is why a tripod is an absolute must for night time photography. Long exposures are not a problem with a tripod, however time is not always your friend with dark sky photography. As the earth rotates it effectively makes the stars appear to move across the sky and this motion is recorded in long time exposures. The stars cease to look light single spots of light but rather form star trails that get longer as the exposure time increases. So the ‘trick’ with Milky Way photography is to find an exposure time that is long enough to properly expose the image but not so long that distracting star trails form which detract from the image. To find the right exposure, photographers use the ‘500 Rule’ which states that the maximum allowable exposure time to prevent start trail formation is 500 divided by the effective focal length of the lens being used. I use the term ‘effective’ focal length as you must consider any crop factor that exists based on the sensor size of the camera you are using. So we can define the 500 Rule mathematically as Tmax = 500/(focal length x crop factor). For example, the Fuji X-E2 camera I was using has a crop factor of 1.5 rendering the 8mm focal length to function as a 12mm lens (8 x 1.5). Applying the 500 Rule we find that the maximum exposure to prevent motion blur of the stars is ~42 seconds (500/12). If I was able to use the same lens on the Canon 5D MkIII which is a full frame camera, the maximum exposure time would be ~63 seconds (500/8). If you don’t have an ultra wide angle lens, the standard zoom that comes bundled with most DSLR’s is usually in the 18-55mm range, which when used in portrait mode will still do a good job photographing the Milky Way. The maximum exposure to ensure no star trails will be 500/(18×1.5) or ~20 seconds.
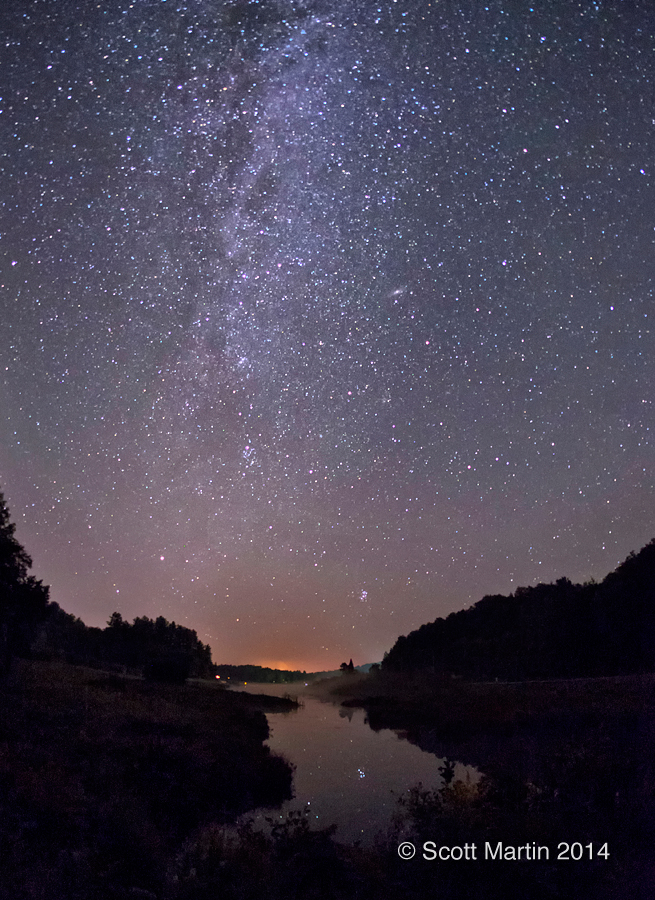
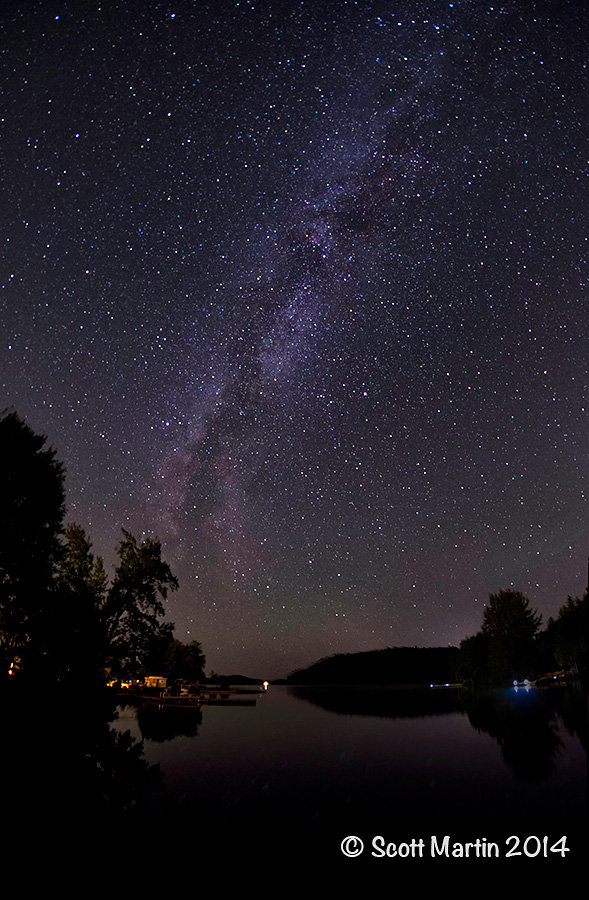
Milky Way looking down Long Lake just north of Utterson Ontario.
Once you have determined the required exposure duration using the 500 Rule, set your camera shutter speed accordingly. If the exposure is thirty seconds or less, simply set that shutter speed. If the exposure is longer than thirty seconds (the maximum pre-programmed shutter speed on most cameras) you will need to set the camera on the Bulb setting, which allows for unlimited exposure times, however you are responsible for timing the exposure. This is most easily done by purchasing a remote shutter release (inexpensive and available for most consumer cameras) or an intervalometer which also includes a timer that can be programmed for any shutter speed. The advantage of an intervalometer is that it can also be used to do Time Lapse photography and other things not possible with a remote shutter release.
We’ve talked a lot about shutter speeds for night sky photography as of the three exposure components, it is by far the most important. The next two things we have to determine are aperture and ISO and happily they are pretty simple. We set the aperture to the largest setting possible for the lens (the smallest f-stop number). For most lenses this will be between f/2.8 and f/4. This ensures the lens is capturing as much light as optically possible. ISO is the last parameter to set and we simply increase the ISO high enough to arrive at the correct exposure. The ISO effectively becomes the determining factor for the correct exposure (we’ve determined the shutter speed that can’t be exceeded and we’ve opened the lens as much as possible so we are left with the ISO as only remaining variable). The problem is that, although high ISO technology in cameras has improved dramatically over the past few years, as the ISO increases the amount of digital noise increases, especially in the shadow or dark areas, of which there are many in astrophotography. Noise is the bane of night photography and we will talk more about that in a moment.
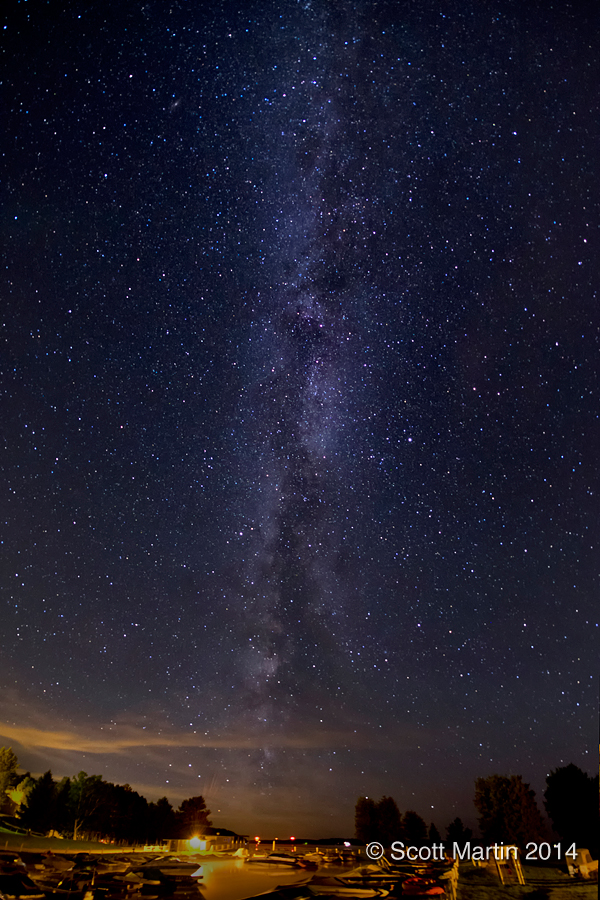
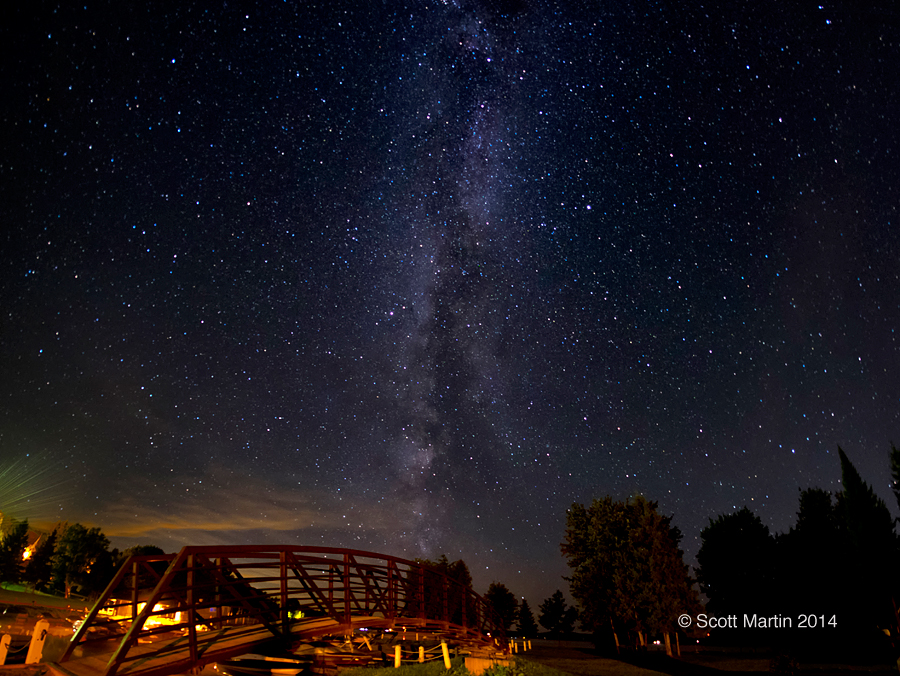
In terms of ISO, I have found that anything in the range of 2500 – 4000 will produce an acceptable result with 30 second exposures at f/2.8 on the two set ups I use for night sky photography (Canon 5D Mk III & 16-35mm f/2.8 lens and a Fuji X-E2 & 8mm f/2.8 fisheye lens). The following image was taken at a marina near our cottage with a 30 second exposure, f/2.8 and ISO 2500.
The last technical item needed to be discussed to help produce great astrophotography images is focusing. The extremely low light levels experienced during night sky photography render the electronic automatic focusing (AF) systems useless. Most electronic AF systems work by looking for adjacent areas of high contrast and then focus the lens to make the demarcation between adjacent areas of differing contrast as sharp as possible. To solve the low light focussing problem, most modern digital cameras fire an AF assist beam before the exposure which is usually in the form of a red beam of vertical lines, which project on to the object being photographed. This creates a series of adjacent high contrast lines which are recognized by the AF system and allows for accurate focusing in low light. The AF assist beam may work well indoors in low light, however is of no use at all when the object being photographed is light years away! Even the objects we place in the foreground of night sky images are usually hundreds of feet away. So our only option is to turn the electronic AF system off and focus manually with the focussing ring on the barrel of the lens. We need to turn off the AF system for two reasons; it won’t work in the dark and two, we don’t want the AF system to ‘hunt’ during the exposure. (Hunting is when the AF system moves the lens back and forth through the entire focusing range trying (unsuccessfully) to focus the lens). Although the simple solution for focussing is to focus manually, we still have the problem that we can’t really see anything through the viewfinder in the dark, so we often need a few test shots to get the focus of the lens just perfect. So remember when you are zeroing in on the proper ISO to get the right exposure, always check your test shots for focus as well. Fortunately focussing in the dark is not too hard as the depth of field (DOF) at small focal lengths is very large, even when using wide open apertures. To find the right focus I typically set the focusing ring to the infinity mark on the distance scale on the lens barrel and them back off that position slightly to make sure any foreground objects are properly focused. This technique generally works very well.
Landscape orientation over Torrance Barren Dark Sky Preserve (25 seconds, f/2.8, ISO 4000)
One final topic to cover that will help improve your results is to always think about composition when photographing the stars. This may seem counterintuitive, especially when shooting in the dark and thinking about the stars, but interesting foreground elements, whether they appear in silhouette or are illuminated must be considered if you desire great photographs. This means moving around a lot in the area where you are photographing, finding the spot where the foreground elements can frame the stars to effect the most pleasing result. In the image above the tripod location was selected so the two tall trees framed the Milky Way (and the Milky Way was positioned off centre in the frame according to the rule of thirds).
When playing with composition, it is wise to take a number of different perspectives in order to arrive at the best result and that is one of the great things of digital photography, the cost is the same whether you take one or one hundred frames. Ironically that is also one of the downsides of the digital age….in the old film days, when each trip of the shutter cost $1.00, you thought a lot about composition (and all the other exposure details before taking the shot) and this cost driven pressure help keep the image quality high!
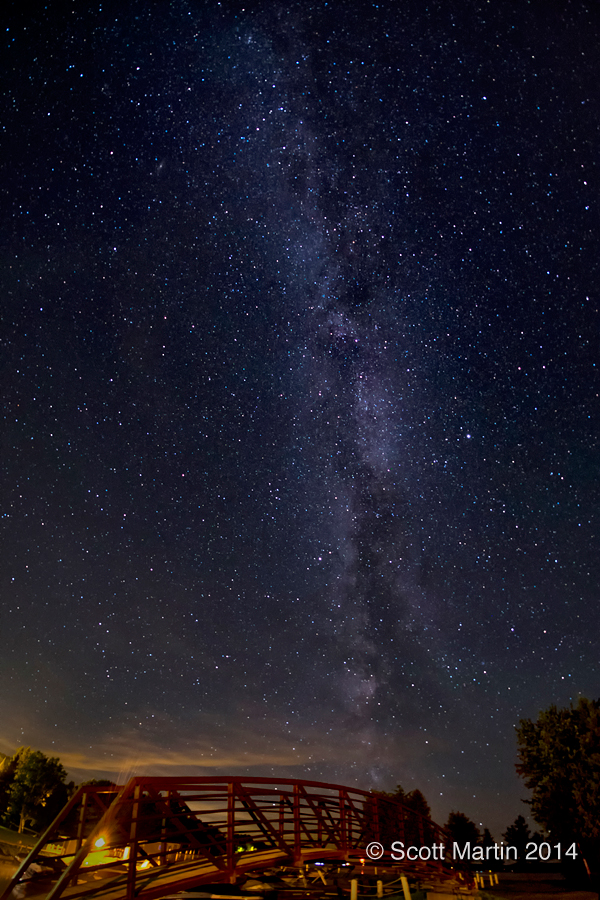
There is an interesting bridge that crosses the entrance to a marina near our cottage that provides and interesting foreground object for dark sky photography. The next three images show slightly different compositions trying to create the most pleasing result.
The first shows the bridge in three quarter perspective in landscape orientation with the Milky Way at the end of the bridge. It is probably the least pleasing image as the Milky Way is in the centre and the frame orientation reduces the amount of Milky Way in the frame.
Here is the same image taken in portrait orientation. A much better result.
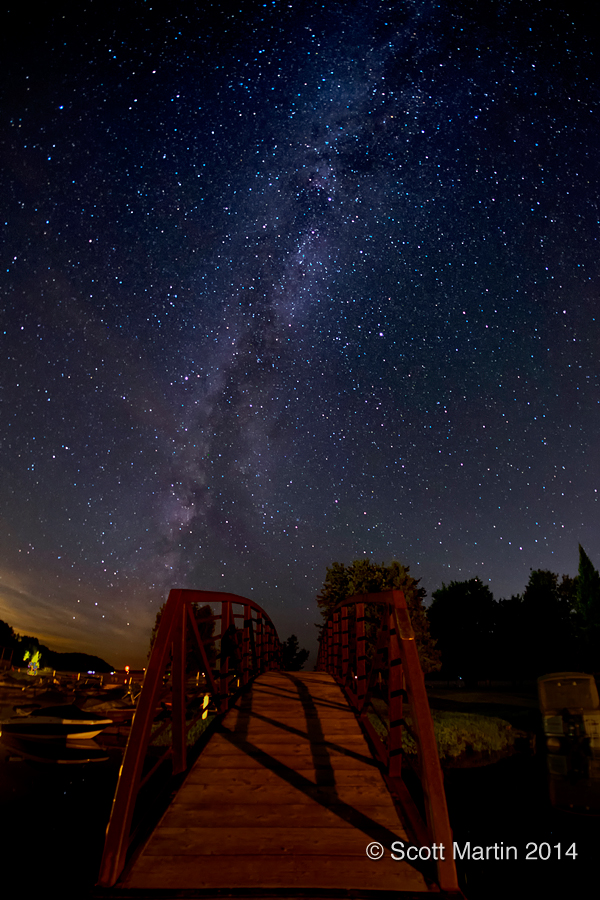
The next image is taken looking directly down the bridge and giving the appearance that the bridge is leading you to the Milky Way that awaits at the other end. This is the best image of the group (IMO) and hopefully a good example of always thinking about the foreground elements when composing images of the Milky Way. However photography is subjective and you may disagree….please feel free to comment!
Earlier we referred to digital noise being one of the problems that must be dealt with when doing long exposure night time photography. As a general statement, digital noise is most apparent in the shadow or dark areas of an image and noise increases as ISO increases. Photographing the Milky Way always requires high ISO’s as the exposure time is limited by the 500 Rule (otherwise we would simply use a low ISO and longer exposure time to reduce noise). A more detailed discussion on noise is beyond the scope of this post however I do want to show two examples of noise reduction and make some general comments on how noise reduction is achieved in most cases.
First, most good camera bodies have settings that allow for in camera noise reduction on long exposures. My experience has been that in-camera noise reduction is not as effective as the many methods offered in post processing. Also when in-camera noise reduction is employed the processing time required greatly increases the time needed to write the file to the memory card (often approaching the exposure time). For these reasons I always turn off in-camera noise reduction.
This next image is a single frame taken from the dock at our cottage. Noise reduction by Define 2, a Nik software plug-in for Photoshop. This is a one click automated function that works very well.
Another way to achieve great, perhaps the best, noise reduction is to stack multiple images and combine them afterwards in Photoshop. This is a time consuming and rather complicated process however the results speak for themselves. The following a stack of eight images (including the above image).
Compare the darkness of the sky in the stacked image as opposed to the single image. The single image is acceptable but the stacked image is much better. The one problem with the stacked image is that in the post processing I neglected to include the reflected stars in the water and I haven’t found the time to reprocess the stack to include the reflections. In any event it is good practice to take four to six of the same image when shooting at night which allows the possibility to stack them afterwards if you have a really great image.
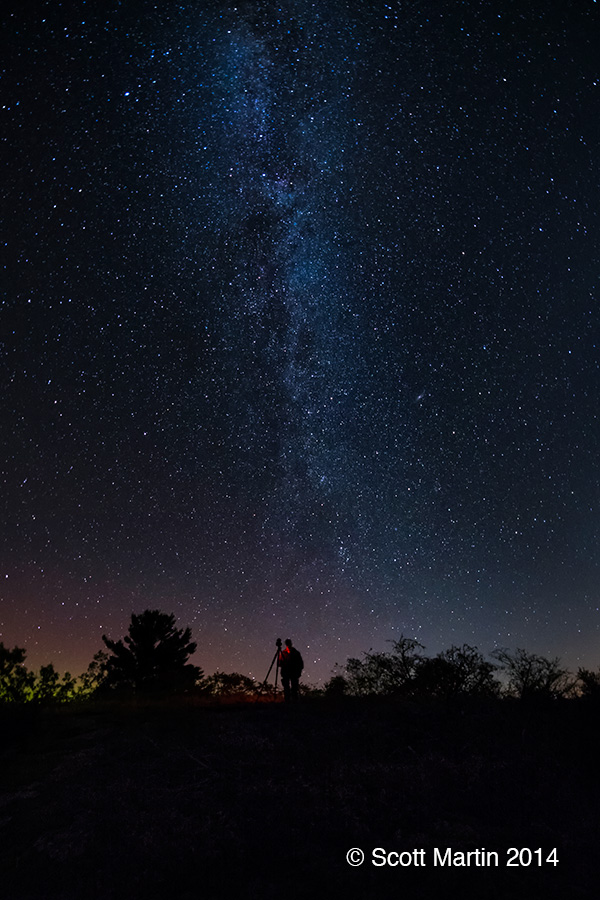
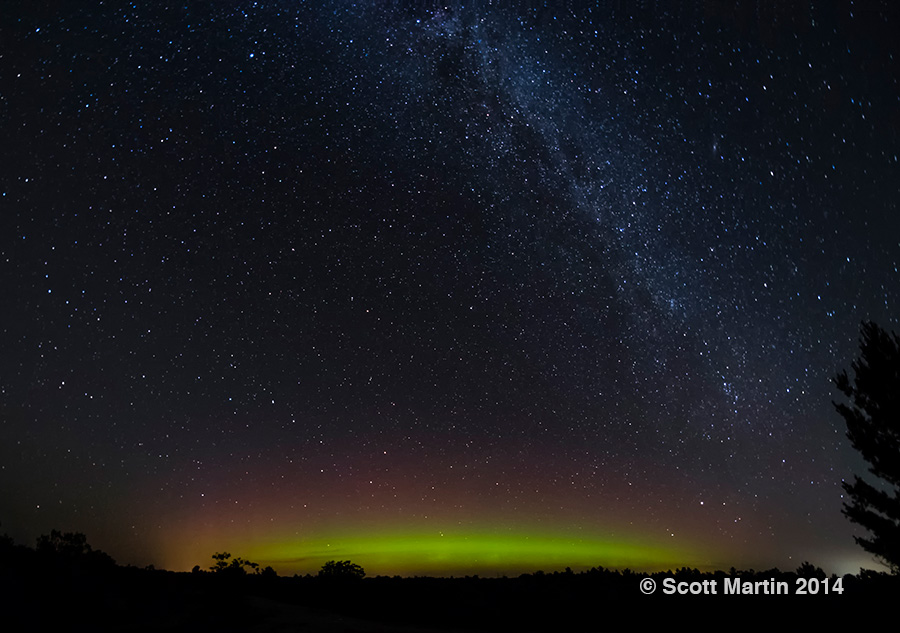
The following images were taken at the Torrance Barren Dark Sky Preserve in Muskoka Lakes Township about two hours north of Toronto by car. I met there with my good friend Arni, of ArniWorks Photography, for a few hours of night sky photography and it was a beautiful night with above zero temperatures and perfect stars. As an unexpected surprise we were also treated a beautiful display of the Aurora Borealis or Northern Lights. You can see Arni’s blog post from the evening by following this link.
Here is a shot including Arni and you can also see a hint of the developing aurora just above the horizon.
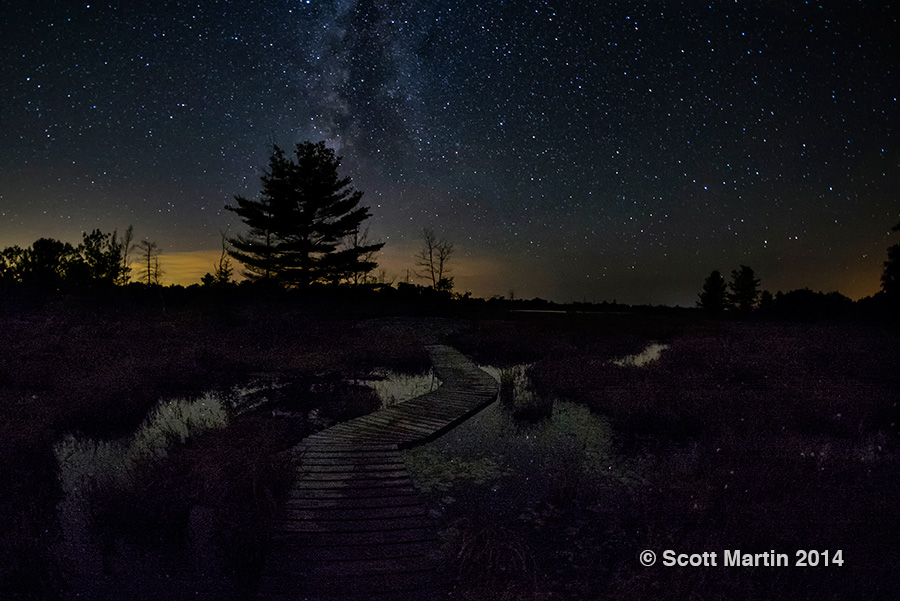
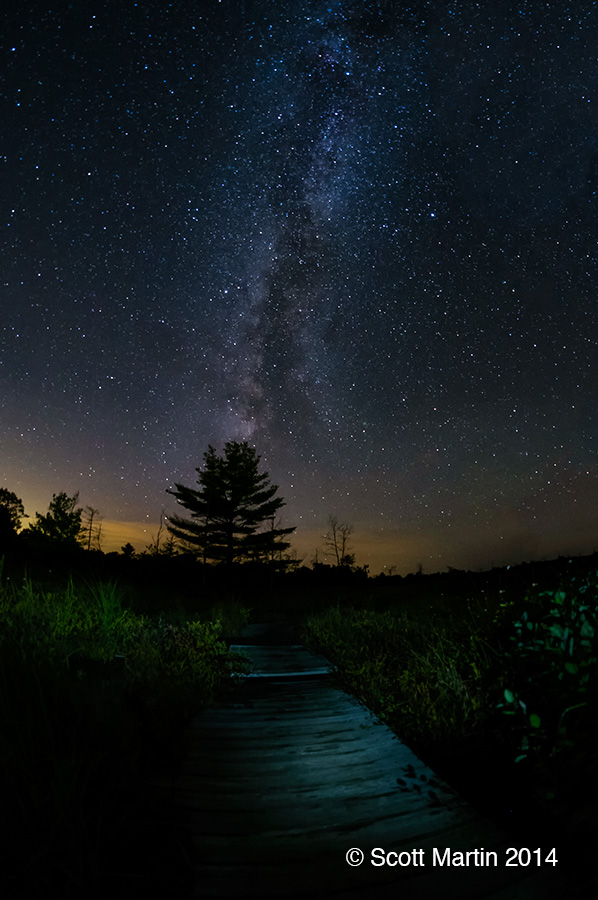
A meandering boardwalk.
Light painting is a technique that involves using a flash light or camera flash to ‘paint’ the foreground during the exposure. With a little practice it can produce interesting results, especially when you remember to be selective with your painting, using the technique to highlight certain objects in the foreground that will augment the image but never to uniformly illuminate the whole area. This next image was painted with a small LED flashlight.
As already mentioned Arni & I were able to see and photograph a display of the Northern Lights which added a wonderful dimension to our evening and the images we were blessed to capture. This next image shows the extent of the display and you should be able to easily distinguish the Big Dipper and Polaris (North Star).
It looks good in portrait orientation as well.

I trust you have found this post helpful and if you have never taken your camera out at night, you will feel ready now to give it a try! Night photography is not as difficult as it sounds and the results can be spectacular.
There are a number of other Milky Way images (25) that can be found in the Naturescapes Gallery of the SMP website.
Follow Scott Martin Photography