Time Lapse Photography – A New Challenge
Time Lapse Photography is an area of photography that has intrigued me for many years however I hadn’t seriously attempted any until recently. Time lapse photography is a method of compressing a long period of time into a short video of 10-15 seconds. The concept is quite easy; take a few hundred still images over a predetermined time period and then place them sequentially into a video format. That said the technical challenges required to record the images are often difficult and the post processing and video formatting can be quite complex. An impressive final result is only obtained after much practice and lots of time, both to obtain the photographs and to edit and assemble them afterwards.
The purpose of this post is not to get too technical in describing the details however to show a few of my early attempts at producing time lapses and hopefully encourage you to attempt some of your own. Basic time lapse photography does require an investment in gear however it certainly is not cost prohibitive. Besides the camera, you must have a tripod to ensure the camera is completely stationary throughout the recording period and an intervalometer to control the operation of the camera while it takes the photographs from which the time lapse will be compiled (some cameras have internal intervalometers in which case you won’t have to buy one). Advanced time lapse photography allows the camera to move in up to three axes during the recording of the images and although the gear required to accomplish this is expensive the results are impressive.
The easiest time lapses to create are those in which the exposure remains the same throughout the recording period. This first time lapse is of the Muskoka Bible Centre Marina near our cottage. There were 330 images taken at three second intervals over approximately thirty minutes with exposure settings of 1/500 sec, f/2.8 and ISO 50.
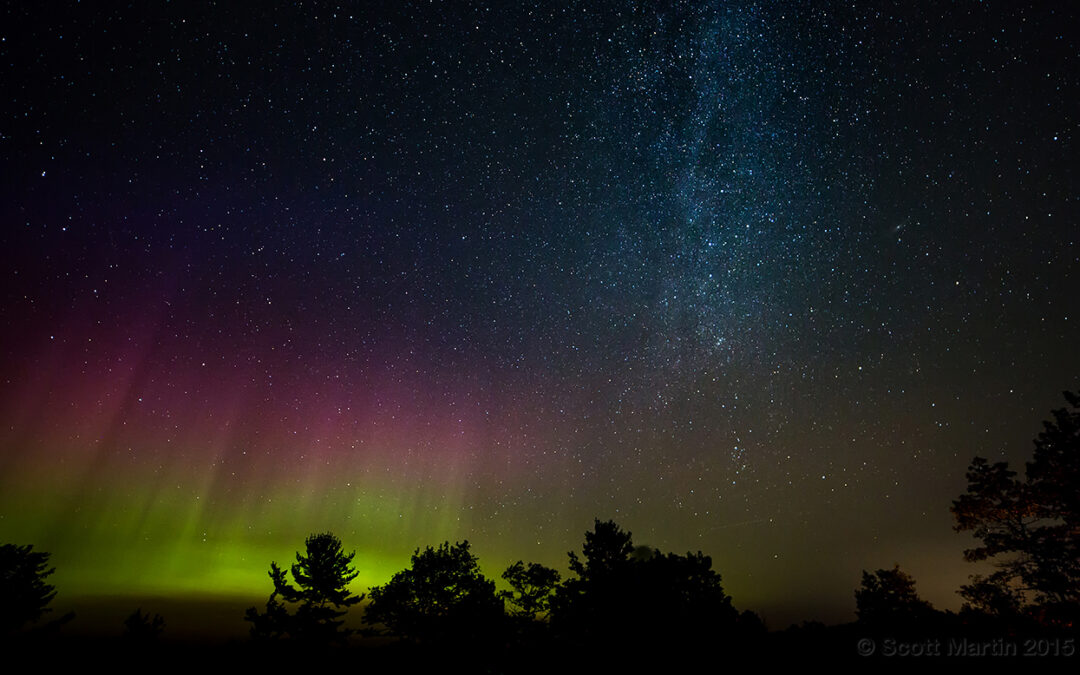
Taking a time lapse at night employs the same technique as during the day however the length of exposure required and the ambient temperature changes create some interesting challenges that must be addressed in order to be successful. This next time lapse of the Aurora Borealis (Northern Lights) and Milky Way is a series of approximately 450 images taken over a four hour period at thirty second intervals at Torrance Barrens Dark Sky Preserve in Muskoka. The exposure data was 25 seconds at f/2.8 and ISO 3200 using a Canon 5D Mk III and 14mm Rokinon ultra wide angle lens. The camera lens was wrapped with three winter hand warmers to keep the lens barrel temperature above the Dew Point in order to prevent condensation on the lens which immediately ruins the time lapse. This time lapse was also recorded at the end of the Perceid Meteor Showers season so if you look close you will see a number of meteor trails.
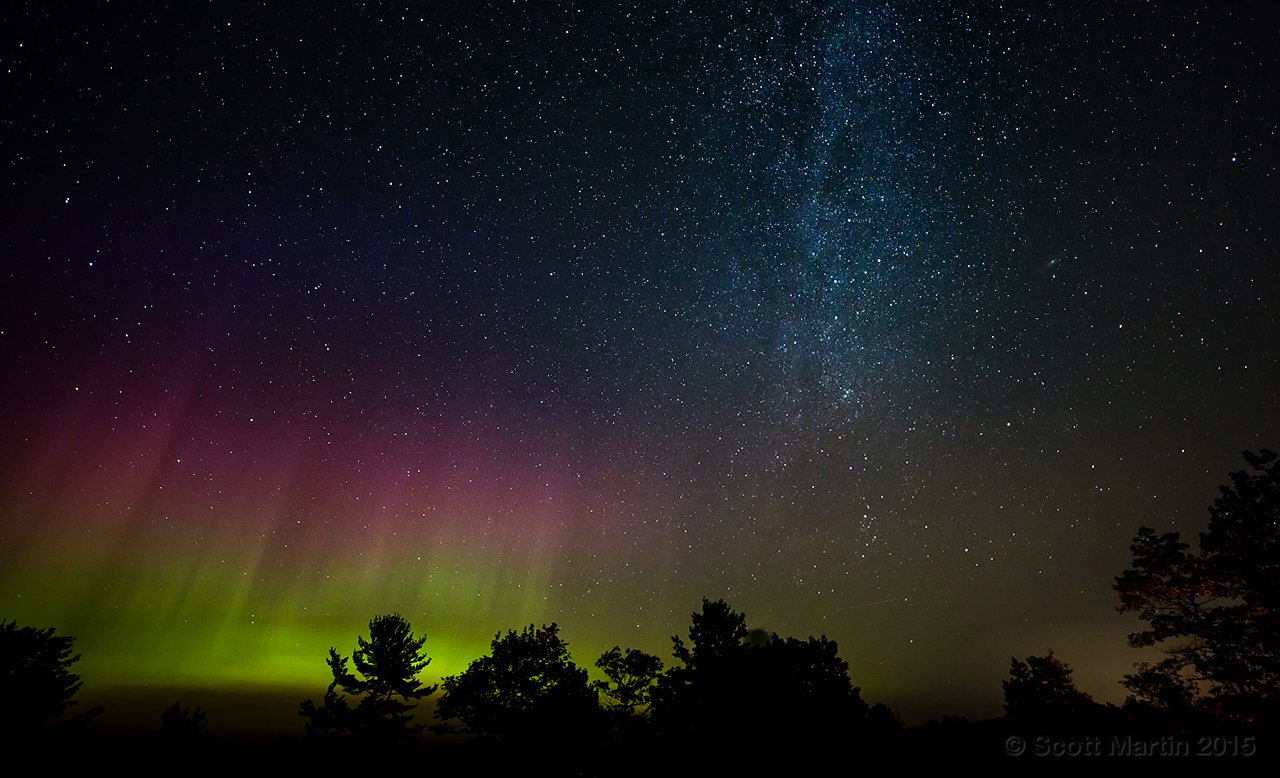
Most photographers have more than one camera body, so if you get interested in time lapse photography, I would highly recommend setting up two cameras every time out. It doubles your practice opportunity and helps pass the time babysitting two projects while you are trying to stay awake through the night :). This next time lapse was taken at the same time as the previous one, the only difference being the direction the camera was pointed. The first was pointed north to record the Northern Lights while the second was trained on the Milky Way. The exposure data for both time lapses was the same however the Milky Way was shot with a Fuji X-E2 and 8mm Samyang fish eye lens with a 180° field of view which creates the curved horizon. The lens was wrapped with a hand warmer to prevent condensation.
As mentioned earlier the easiest time lapses to create are those in which the exposure remains unchanged throughout the entire duration, as was the case with the first three time lapses in this post. The reason for this is that with any change in exposure from one image to the next, the different exposure causes a noticeable difference in the luminescence of adjacent frames in the time lapse sequence which appears as flickering in the final video. Flicker is the bane of every time lapse photographer and we go to great lengths to get rid of it. You may think that slight changes in exposure from frame to frame would not be noticed but I can assure you it is. We always take exposures manually and fix the aperture so that the diaphragm remains motionless at all times. The micro variability in exposure caused by the diaphragm stopping down to the same aperture for each frame (as it does if you use automated settings for your camera) is readily seen as flicker in the time lapse video.
So what do you do if your desired time lapse demands changing exposures, such as recording the sunset followed by the appearance of the stars? These types of time lapses are very impressive yet technically difficult to create, in fact amongst time lapse aficionados they are known as the holy grail of time lapses. There are a number of methods for creating flicker free changing exposure time lapses and they fall into two broad categories, one in which the exposures are highly controlled in the camera with special intervalometers that allow for bulb ramping and another that uses software solutions to smooth out the exposure changes evenly from frame to frame. To date I have experimented with a few of this type of time lapse, which is just enough practice to get an understanding of how difficult they are to do well (which I have yet to do). I have tried both methods and reluctantly will share a sample of each method.
The first is a sunset to starry night transition using a bulb ramping technique. Bulb ramping is when you connect a highly specialized intervalometer to the camera’s USB port which gives the intervalometer the ability to control the exposure, aperture and ISO of the camera in infinitesimal increments so that frame to frame luminescence variations are not noticeable. You set your camera to bulb mode (meaning the shutter remains open and is controlled by the intervalometer) and the intervalometer ramps up the exposure times and ISO over the course of the time lapse based on light readings from sensors in the intervalometer. Hence the term ‘bulb ramping’. I use a Timelapse+ intervalometer which is a terrific piece of equipment that can be used for any type of time lapses as well as for multi image HDR’s and rapid light sensing triggers for photographing lightning bolts. If you are looking for the ultimate intervalometer, look no further than the Timelapse+.
This was taken at the cottage and not an ideal location for a starry time lapse as there is quite a prominent light dome created by the town of Huntsville approximately ten kilometres away. The bright ‘star’ that dominates the dark sky is actually Venus, the brightest object visible in the sky that night.
The above time lapse was made from approximately 520 images over a 4.5 hour period during with the intervalometer modifying the exposure time, ISO and interval between exposures. The exposure times ranged from 1/20 sec to 30 seconds. The ISO varied between 50 and 4000 while the aperture was fixed at f/2.8 (Canon 5D Mk III & Rokinon 14mm lens).
The second sunset to night transition was taken from our hotel balcony in Percé, Quebec this past July. For this time lapse I manually changed the exposure time and the ISO during the recording of the images. The aperture was fixed at f/4. As a general technique I began the time lapse overexposing approximately one stop and would manually decrease the shutter speed or increase the ISO when the camera meter indicated the scene was one stop underexposed. This resulted in approximately six to eight ‘major’ exposure changes over the four hour period I was recording the time lapse. The images were captured with a Canon 5D Mk III and EF 24-105mm f/4 L IS lens and processed using Adobe Lightroom and a fabulous programme called LRTimelapse which is designed to process time lapse images and render high quality video files of the time lapse. There is a bit of a learning curve to the software but once you understand how it works the results are incredible. In fact I almost deleted all of the images from this project before processing them as I was so unhappy with the results, but decided to give them a try with LRTimelapse. I was more than impressed with the results as the original work product was very poor.
At this point, there is much learning and practice to be done to improve in the area of time lapse creation, however its a fascinating niche within photography that has attracted my intention and I hope to produce many more. Over the short term my intent is to utilize both the software and bulb ramping techniques for day to night transitions as well as hopefully adding one, two and then three axes of motion into the mix.
When you have finished recording the 300-500 images required to produce a time lapse video there are some added bonuses to be had from the individual frames. For one, there should be a few good frames amongst the many which stand alone as an acceptable image or print. Here is one frame from the Aurora Borealis time lapse above.
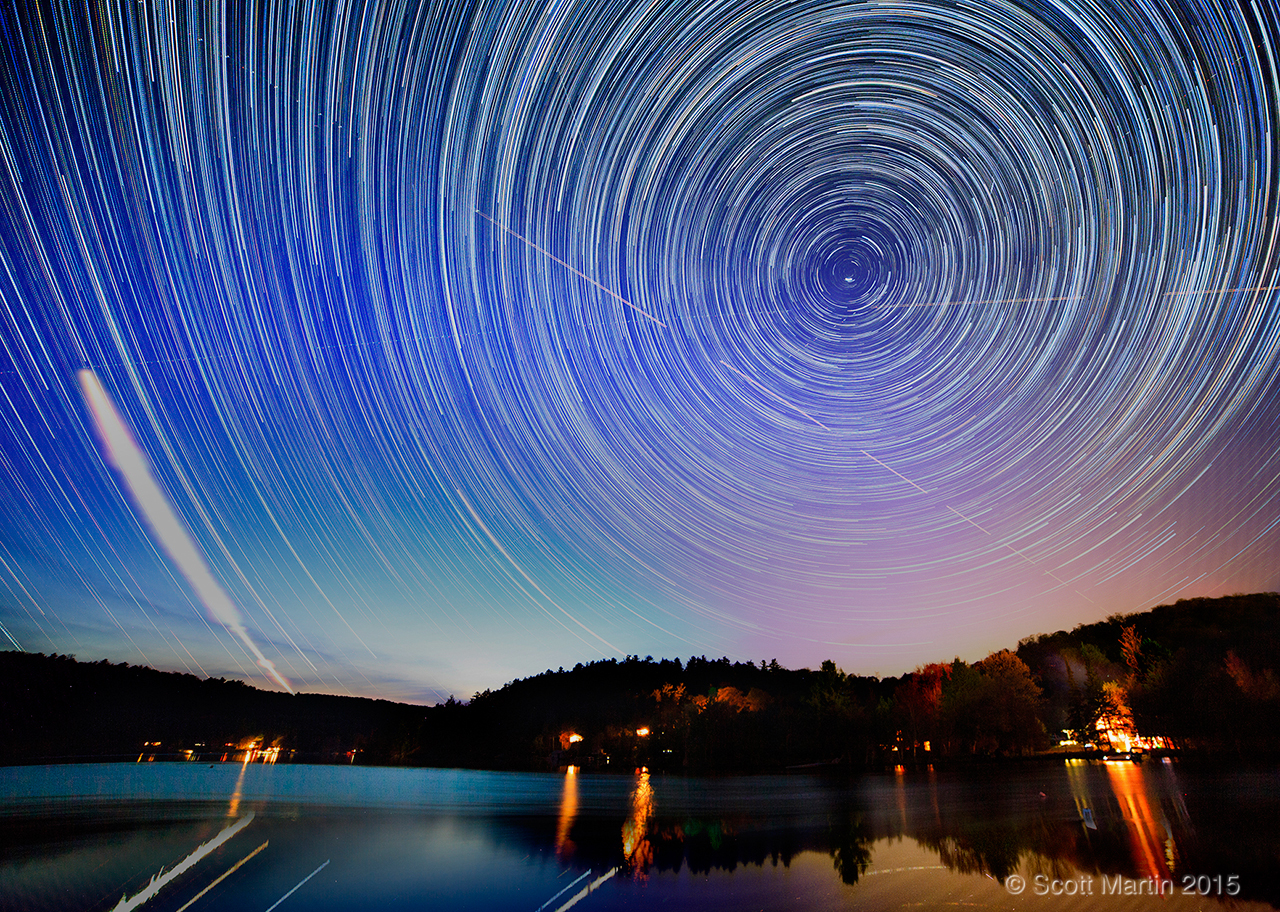
Another interesting possibility, made easy with Adobe Photoshop, is to ‘stack’ all of the images from the time lapse into one single image. Although this creates a gargantuan file, the movement of the stars over the recording period create star trails when stacked into the same image. As all the stars in the Northern Hemisphere revolve around the North Star it makes for a very interesting result as seen by this stacking of 530 images into a single image. These are the images from the Mary Lake Sunset to Night Sky Time Lapse.
I trust this brief introduction to the world of time lapse photography has piqued your interest enough to give it a try. Beside your camera all you need is a tripod, an intervalometer and a big memory card to record all those images….oh wait….and a pot of coffee to keep you warm and awake while you stay up all night photographing the stars!


Follow Scott Martin Photography