by Scott Martin Photography | Feb 24, 2012 | Blog, Landscapes, Naturescapes, Travel
Monument Valley is a vast area within the Colorado Plateau which is characterized by huge sandstone buttes and mittens, the largest of which are over one thousand feet high. Monument Valley is part of the Navajo lands and all of the images in this post were taken within the 92,000 acre Monument Valley Navajo Tribal Park. Monument Valley is entered off Hwy 163 just south of the Utah, Arizona border and a few miles west of the Four Corners. For the trivia buffs, the Four Corners is the only place in America where the borders of four states meet….Arizona, Utah, Colorado and New Mexico.
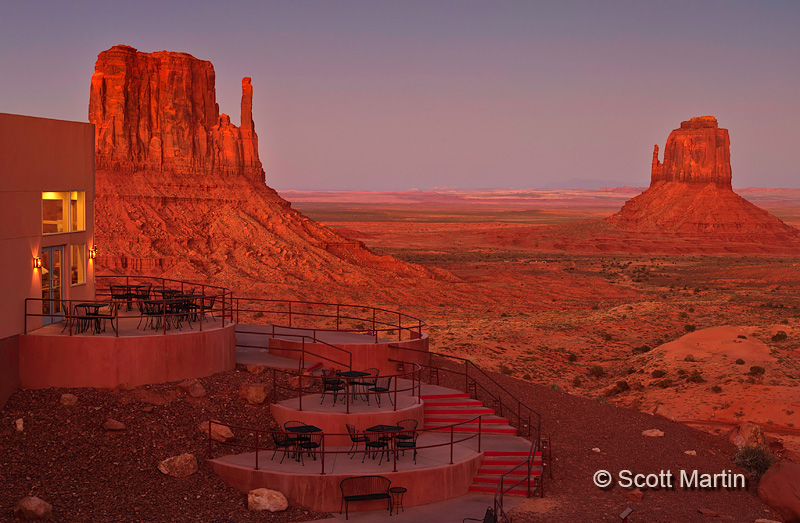
While in Monument Valley, Deb & I stayed in the The View Hotel which was a terrific spot and every room has a view like no other hotel you have ever stayed at. When in the area, this is the only place to stay if you want to capture incredible sunrises and sunsets without leaving your room. Here is a twilight image of the West and East Mittens (and hotel dining room entrance) taken from our balcony.

.
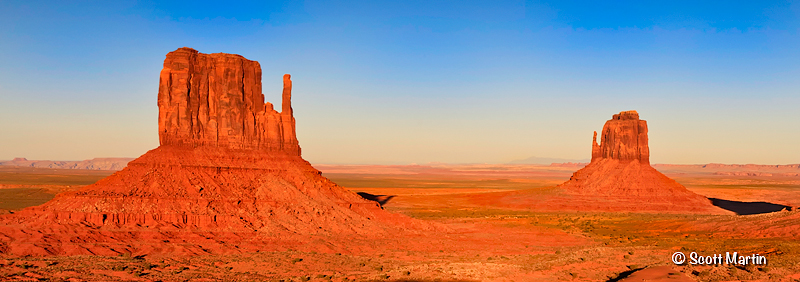
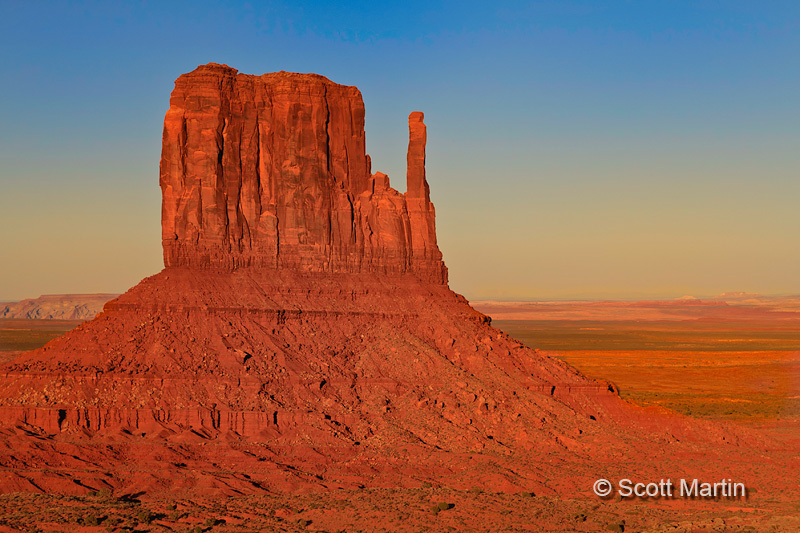
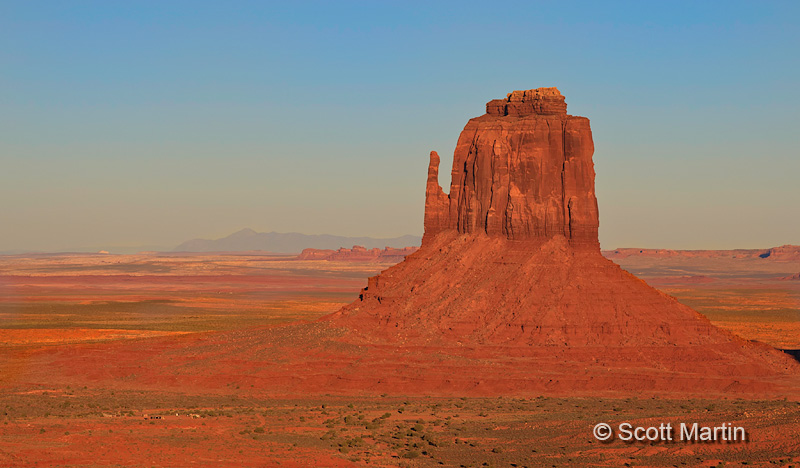
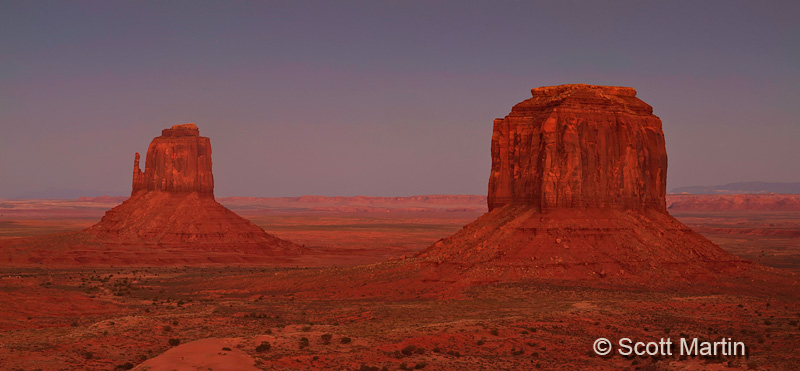
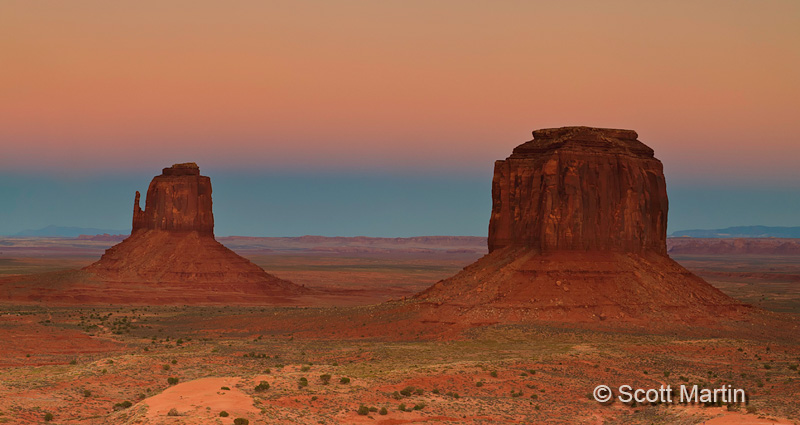
Monument Valley is a wonderful place to photograph; the awe-inspiring beauty of the landscape, the sheer size of the buttes & mittens and the dynamic light creates ever-changing colour hues within both rock and sky so each image is different from the other even though the object remains the same. The following images are an attempt to show case the three sandstone formations that comprise the famous Monument Valley Panorama; the West Mitten, East Mitten and Merrick Butte.
The first five images are sunsets.
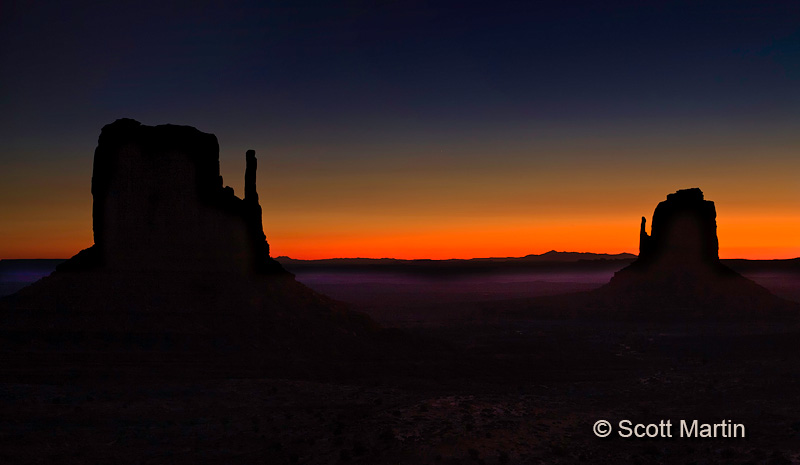
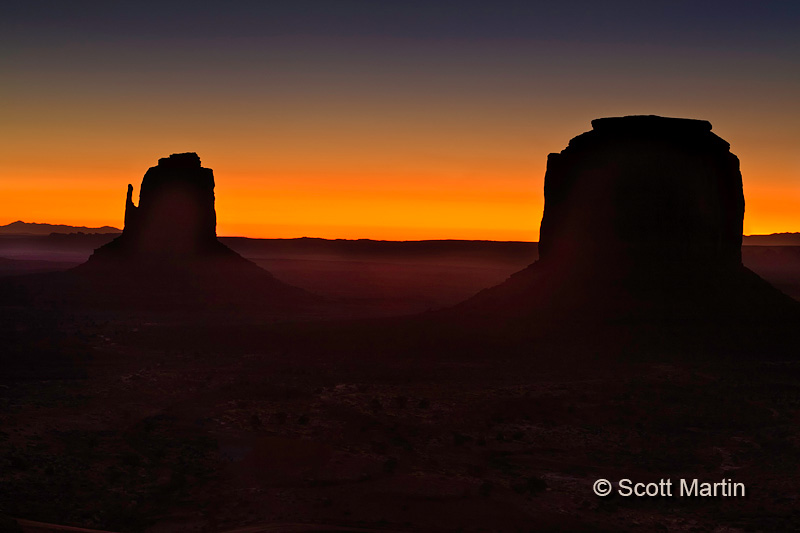
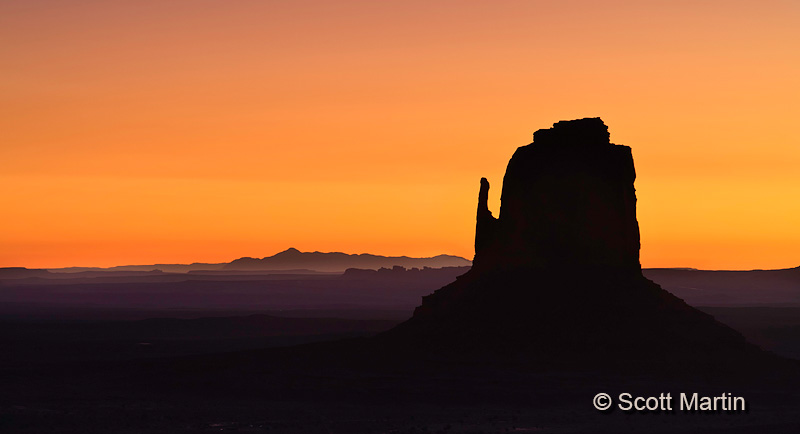
The Mitten Buttes (West & East)
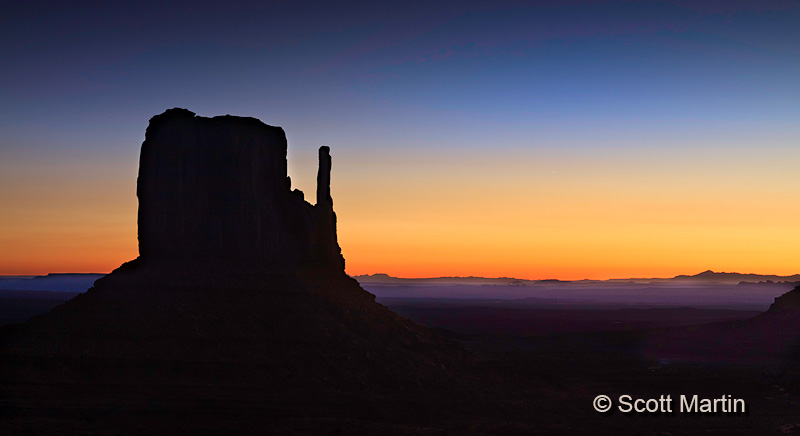
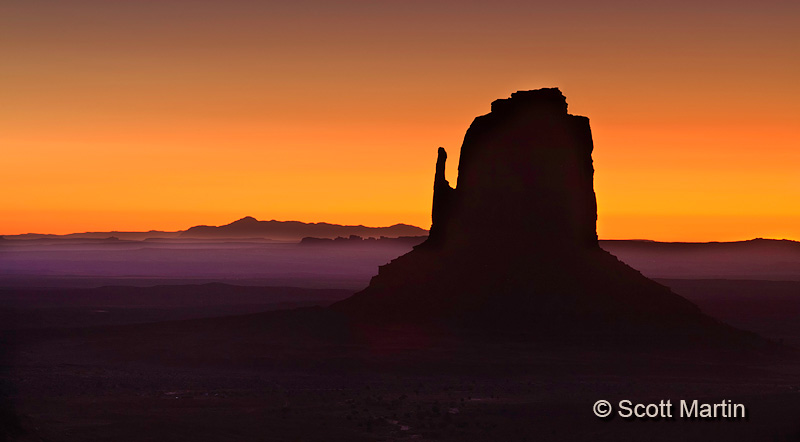
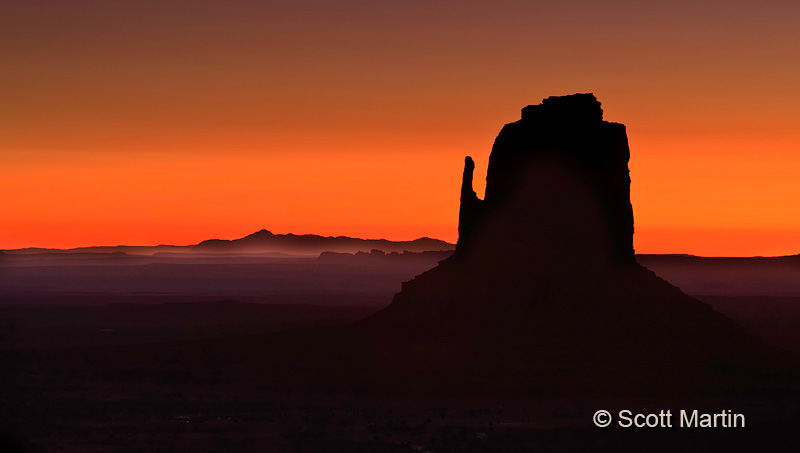
The West Mitten
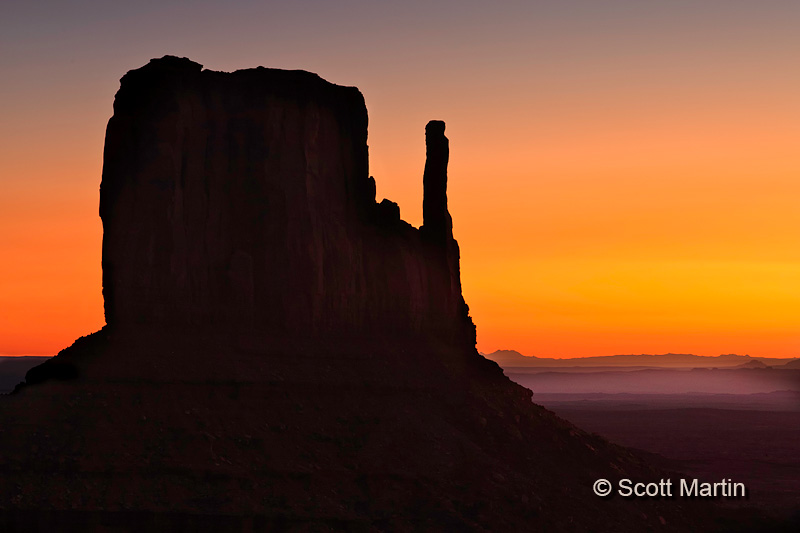
The East Mitten
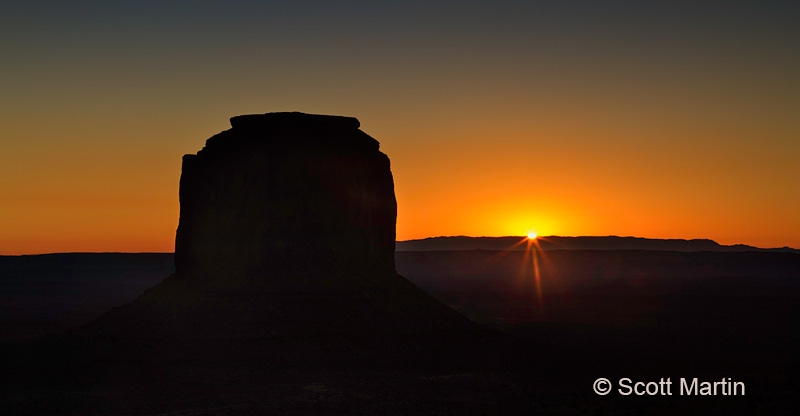
The East Mitten and Merrick Butte
The same shot, different time, different sky….amazing!
The following images are sunrise shots and as is often the case the photographs taken before sunrise are the ones that catch your eye.
.
.
.
.
.
.
.
.
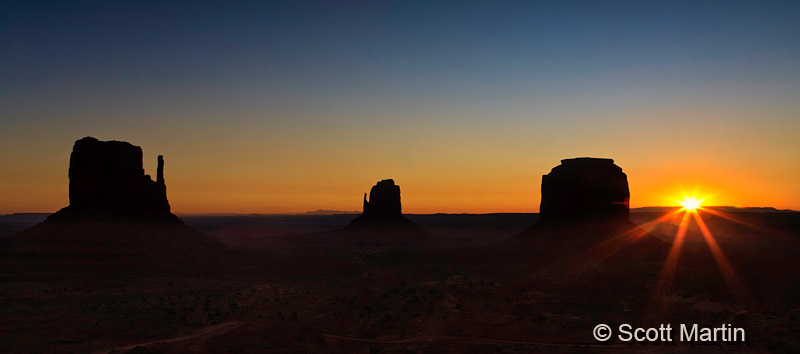
If memory serves me correctly these images were taken using three different lenses; 16-35/2.8; 24-105/4 and 70-200/2.8 Most of this series was also taken using 4×6 Lee ND Grad filters.
After watching the sunrise we headed out into the valley where there is a forty mile dirt road that winds its way around countless buttes, each one a great photographic opportunity, the result of which I’ll post another time. From Monument Valley we headed North along Highway 163 to Moab Utah and two more incredible National Parks; Canyonlands and Arches.
by Scott Martin Photography | Feb 21, 2012 | Blog
Photographers in general and landscape photographers specifically take most of their images in the early morning or late afternoon light. These times, for an hour or two after sunrise and the same before sunset are often referred to as the “Golden Hours”. When the sun is close to the horizon, the incident light travels farther through the atmosphere and more of it is refracted or scattered, losing some of the higher wavelengths (blues) leaving the lower wavelengths (reds) creating the typical pinkish sunrises and red/orange sunsets we enjoy so much. Also during the golden hours, the shadows are longer, the light is more even and the lighting ratios are reduced all of which combine for the great light which makes every image better than when shot in the harsher direct light of the mid-day.
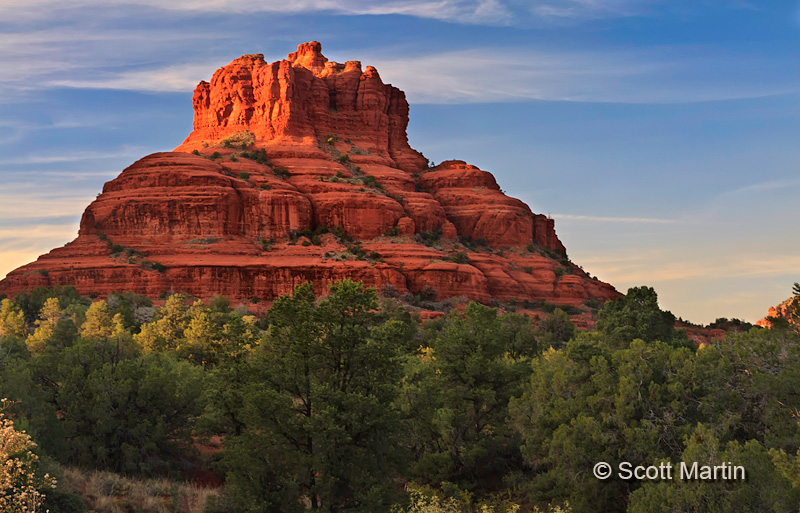
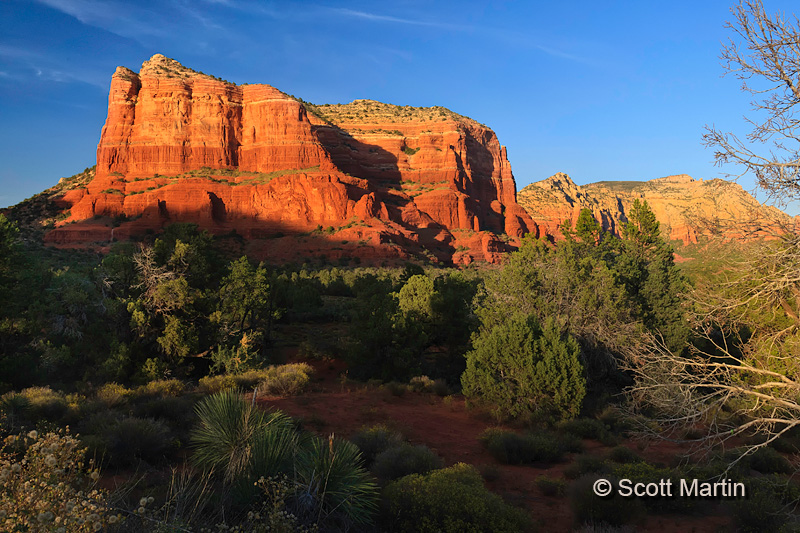
The images in this post are taken in Sedona Arizona, which is located about two hours north of Phoenix Arizona and it’s where Deb & spent the first night of our five-day photo tour of the Grand Canyon area. Sedona is an absolutely beautiful town and the scenery is spectacular in all directions.
The five images are shown in chronological order, the first two being snap shots taken at the side of the road (Route 179) as we entered Sedona.

.
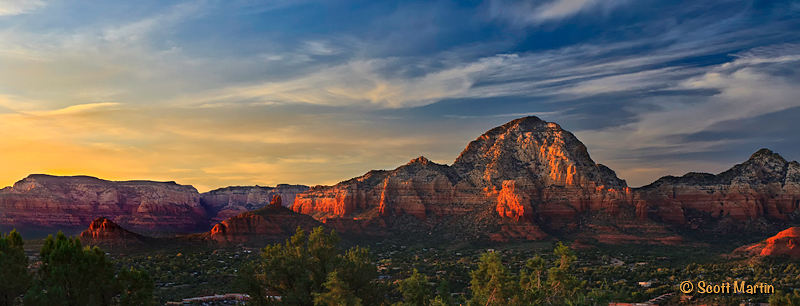
The next three sunset shots mark the transition from the golden hour to twilight. Twilight being the time between sunset and dusk when although the sun is below the horizon the sky retains its blue colour to the eye before transitioning to the blackness of night. “Night” photography should always be done during twilight while the sky retains some colour which serves to preserve the distinction between the objects and the sky. Once the sky is dark the boundary between the object and the background is lost resulting in a poor image.
The following images were taken from the top of Airport Road which climbs to a vantage point high above Sedona and is a popular place for people to gather and watch the spectacular sunsets. There were probably a hundred people there the evening we were including a number of serious photographers jostling for the best spot to set up a tripod. They were taken with a 16-35/2.8 zoom lens using Lee & Singh-Ray 4×6 ND gradient filters.
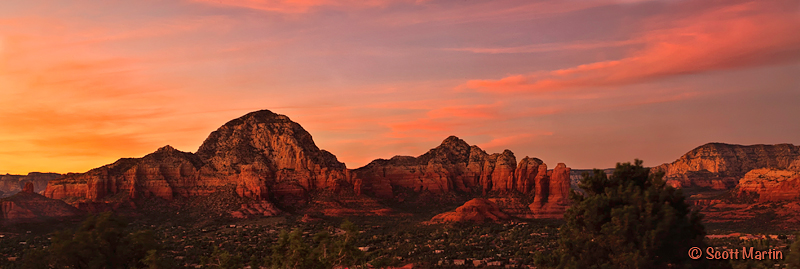
This next image is a favourite, taken just before sunset, and I wish you could see it full size. Our first night in Arizona was the only day we saw clouds in the sky.
The next image was taken after sunset and by using a longer exposure captured more colour (reds/pinks) than would be seen while watching the sunset.
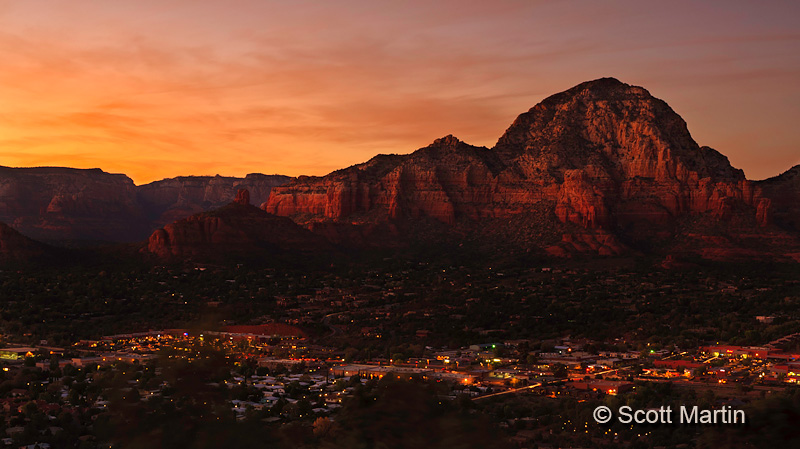
This last image was taken long after sunset when it was almost dark as you can tell by the lights in the Sedona Streets in the foreground. As in the previous image, an overly long exposure was used to get some light in the sky, which would have appeared almost dark when taking the photograph.
by Scott Martin Photography | Feb 17, 2012 | Blog, Landscapes, Naturescapes, Travel
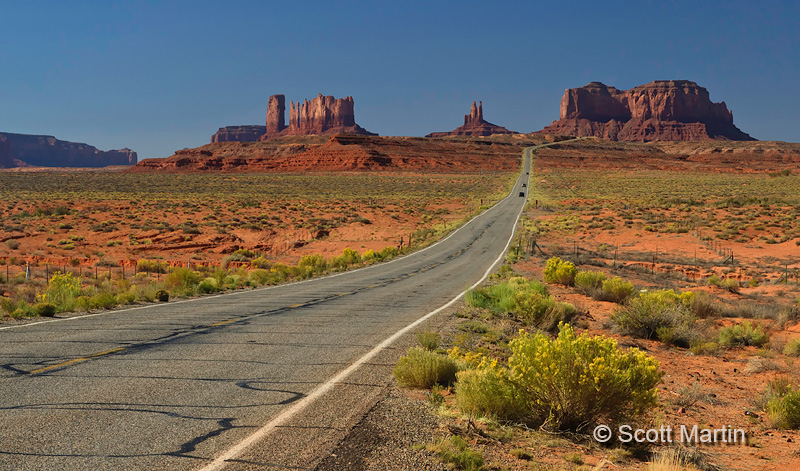
Heading southwest towards Monument Valley on Route 163 near the Utah Arizona border you are greeted by one of the most iconic open road views in the country. Our first glimpse of this amazing vista was in the rear view mirror as we were heading North towards Moab at the time! No doubt you have seen pictures similar to the ones posted today, however I trust you also enjoy these. Please feel free to comment on them and let me know which perspectives you enjoy the best.
The five images to follow were all taken hand-held at focal lengths ranging from 16-105 mm, with the perception of the depth of the image being progressively compressed at the focal length increases. One of the ‘rules’ of wide-angle landscape photography is to have something of interest in both the foreground and background , however this creates a problem for shots like these where the topography is pretty nondescript save for the incredible buttes and mittens that are at least five miles away. To try to follow the rules of composition, I found the largest bush along the road side and positioned it in the foreground of the image, making sure to have the camera high enough that separation was maintained between the bush and the background rock formation.

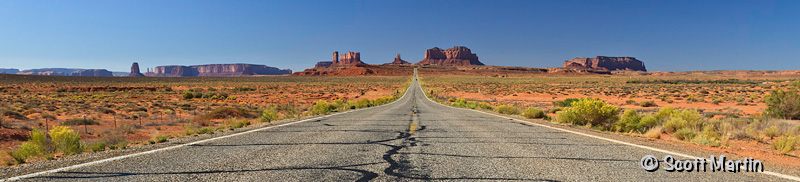
This next shot was taken from the same general spot as the first image (you can see the bush used as foreground object in the last shot on the right side of this image as well). The only differences being focal length (24mm) and lower camera height to change the perspective making the road more prominant. For this shot I was lying down so the camera was only about six inches above the road. This image is a single frame, cropped to create the panoramic look.
The last three images attempt to find a pleasing balance of perspective and composition resulting in a great photograph, or moving the image from a snapshot to a photograph.
The next image is just a snapshot, taken with the camera at standing height from relatively close to the rock formation. Being too close to the background stops the road from disappearing into a long thin ribbon which takes a way the feeling of great distances and also reduces the ability to sense just how big the rock formations actually are. Both of these problems are compounded by the longer focal length chosen to take the image (105 mm).
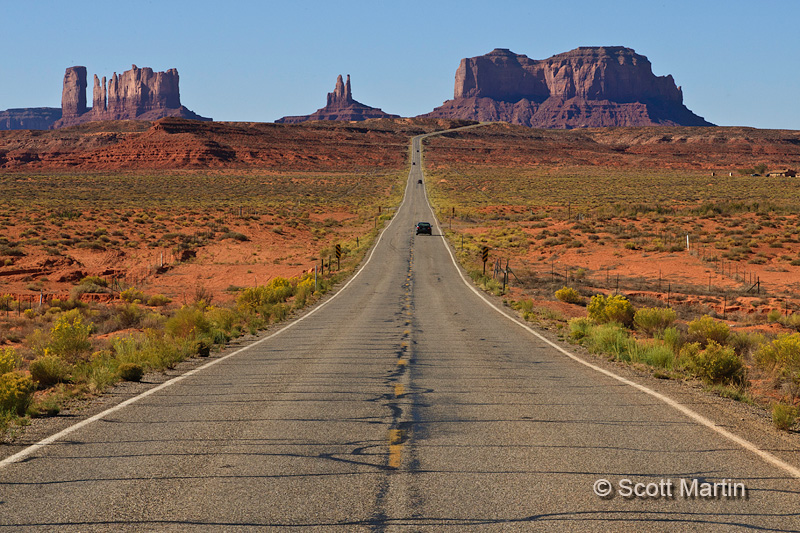
The last two shots come the closest to working well at conveying the feeling of what it was like to actually be there. The next image was taken from the farthest point away from the buttes which were about four or five kilometres away. It was taken standing to reduce the relative size of the road in the foreground and including a bend in the road to change the way your eyes are led towards the buttes and mittens in the background.

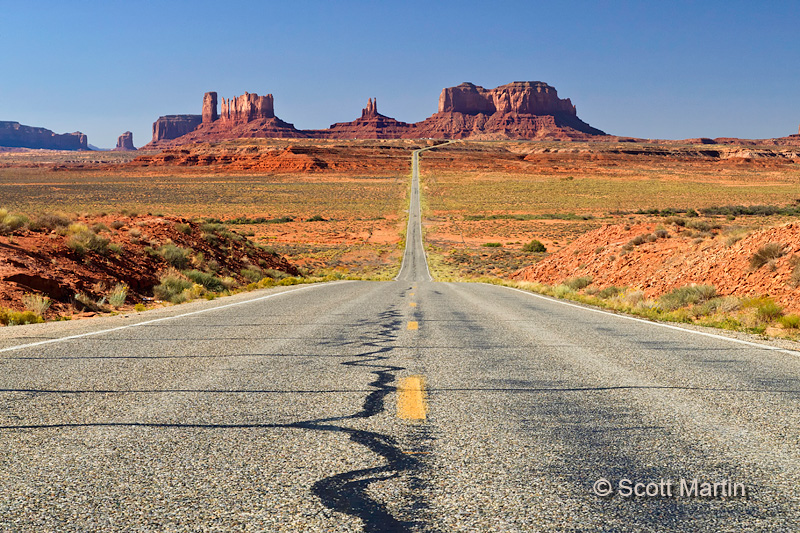
The last image is my favourite of this group. It was taken from a sitting position in the middle of the road to enlarge the presence of the road slightly as well as allowing the small berms on the roadside to provide some foreground interest. Plus the straight road into Monument Valley takes you immediately to the object of the image. The shot was taken at 65mm at f/16 at 1/100 sec.
The enjoyment of an image is a purely subjective thing, we either like it, don’t like it or are ambivalent towards it. The trick with good photography is to deliver images that someone other than yourself actually likes! To do that we need to learn to always be thinking about the pictures we are taking, and then experimenting with different variations of the same scene like I’ve tried to demonstrate with these images of Monument Valley. The more thought one puts into the exercise before pressing the shutter really helps deliver consistently better images. It is so much easier to improve your skills in the digital age as CF cards are inexpensive and we can take lots of images in order to arrive at a couple of good ones. For this series Deb & I probably spent an hour or so stopping at four or five different spots along the highway and taking about seventy-five images.
If you haven’t already been there, plan a trip to Monument Valley. You will be glad you did!
by Scott Martin Photography | Feb 11, 2012 | Blog, Landscapes, Naturescapes, Travel
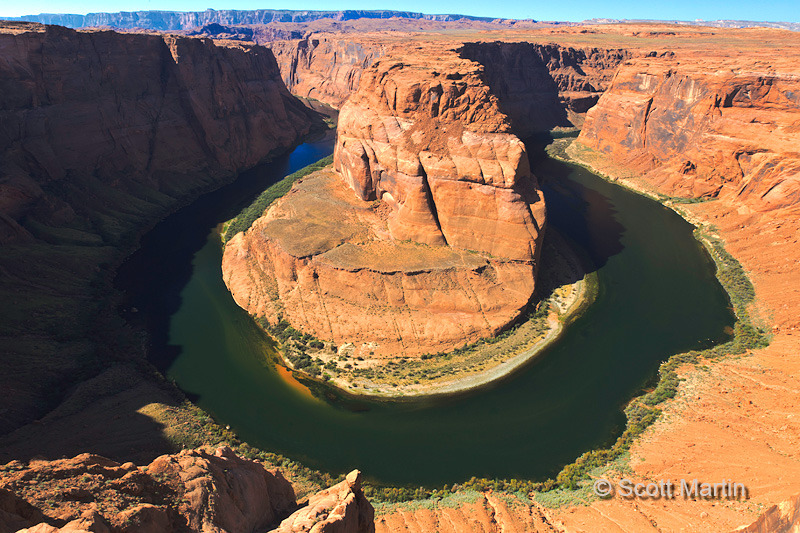
The Horseshoe bend in the Colorado River is located just outside of Page Arizona just west of Highway 89. It is one of the most impressive vistas along the river and has become an iconic image of the Grand Canyon area. The Bend is reached by a rather short trail of three quarters of a mile, however the soft sand over most of the trail makes for a rather arduous trek and there is absolutely no shelter from the sun, so remember to take lots of water with you.

Taking a good picture of the bend is not done without a little fear and trepidation as the rim is over 1000 feet above the river and in order to keep the entire river in the frame the camera needs to be right on the brink. I set my tripod up as low as possible and crawled the last few feet to the brink on all fours. Once you peak your head over the edge its an awe-inspiring sight; Gods great handiwork right before for eyes! The image above was taken at a focal length of 16mm and is a single image. I have a number of panoramic images of the area which I may post later.
A couple of miles upstream from the Horseshoe bend is the Glen Canyon Dam, which is bigger than its more famous down stream cousin, the Hoover Dam, located just outside Las Vegas, Nevada. The Glen Canyon Dam is 710′ high and 1560′ wide and over 300′ thick at the base. The reservoir it created is Lake Powell, the second largest artificial lake in the States.

The Glen Canyon Dam was constructed between 1956-1966 while the Hoover Dam was built from 1931-1936.
We were visiting the dam mid-morning after hiking to the Horseshoe bend for sunrise. This created strong shadows across the face of the dam which results in poor images, however here is an attempt to make an artistic shot of a hydroelectric dam.

Page AZ is also known for the Antelope Slot Canyons, which are a must see when in the area.
Follow Scott Martin Photography