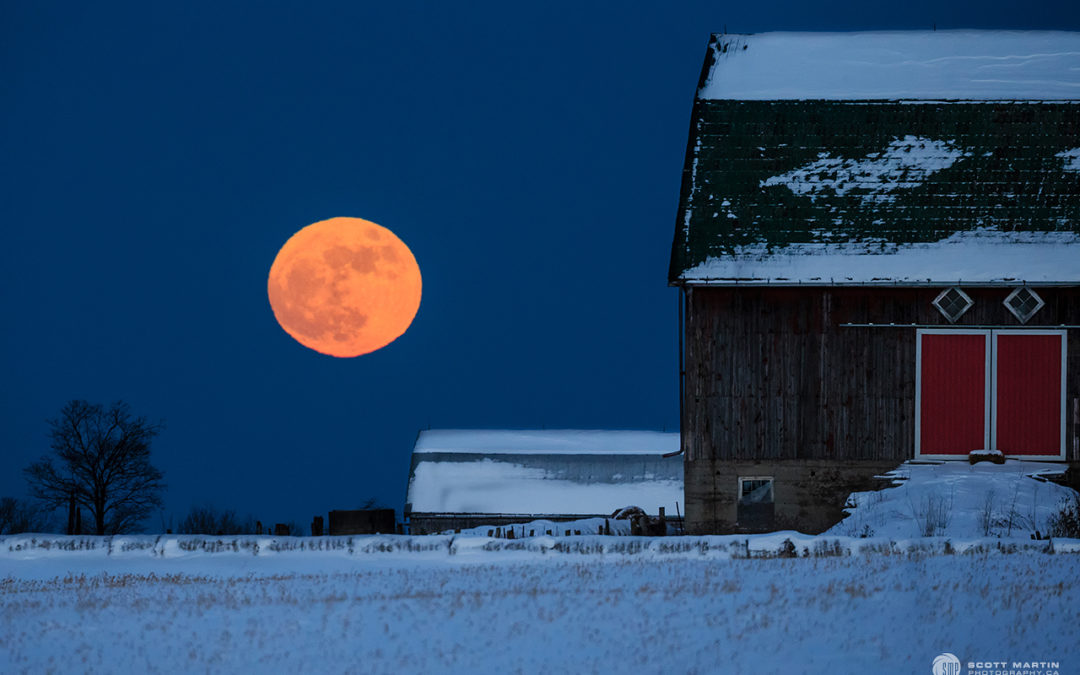
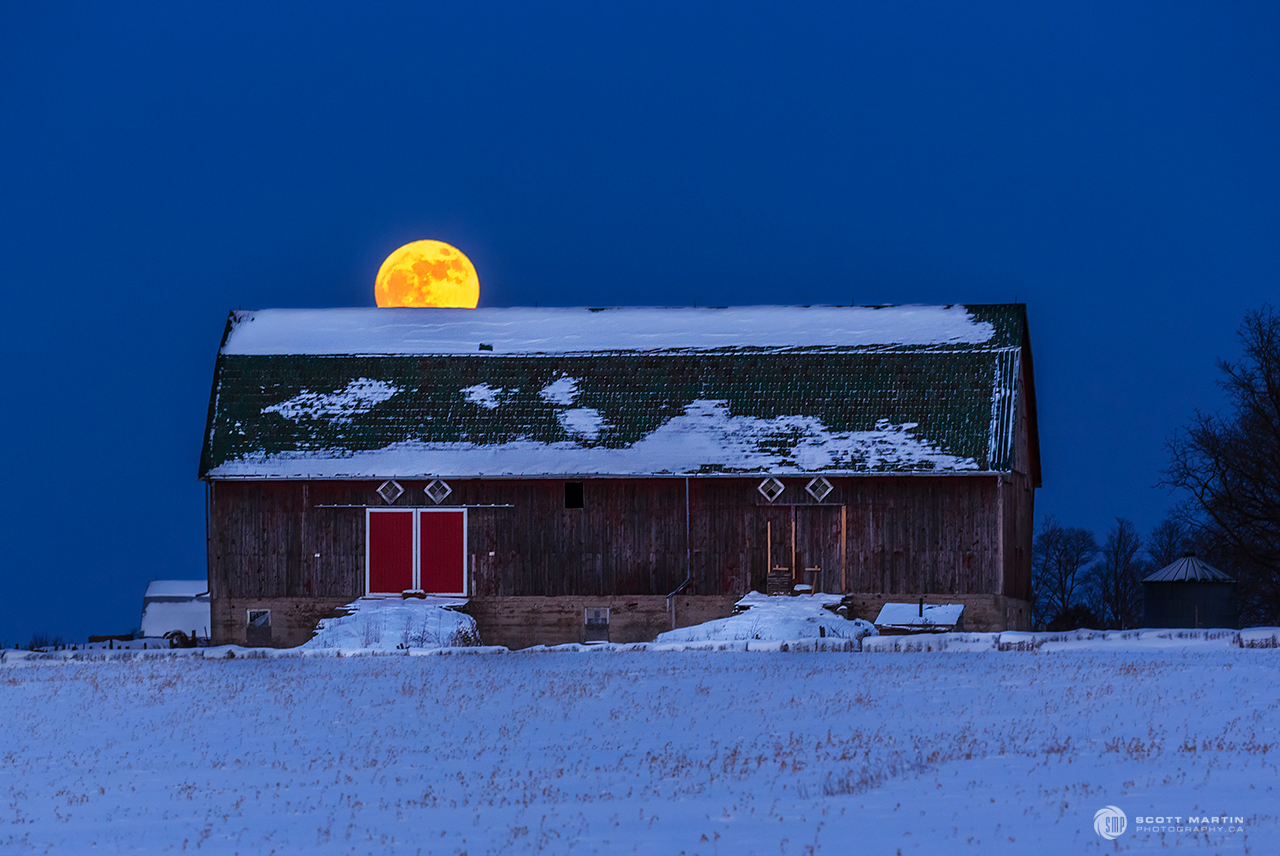
New Year’s Day 2018 was also a day the moon was featured prominently in the late afternoon sky. It was a ‘Wolf Moon’ (the first full moon in January) and a Supermoon (when a full moon occurs at perigee) making it appear about 7% larger than a typical full moon. The full moon on New Year’s Day meant that a rare second full moon occurred in the same month (on the 31st) which is known as a Blue Moon (hence the term “once in a blue moon”). To make this story even more interesting, the Blue Moon on January 31st was also a total lunar eclipse in the southern America’s (we saw a partial eclipse in Ontario). With all that build up, here is a picture of the full moon on New Year’s Day taken at a farm near Brechin, Ontario shortly after it rose. It was well worth the drive and standing out in the snow in -20°C temperatures to take these few shots.
The closest I could park the car was more than 100 yards away so I chose to take just one camera, lens & tripod with me. The lens I selected had a 500mm focal length, which was the wrong lens for the job! After taking just one picture with it (above), I ran back to the car along a snowmobile trail and replaced the big telephoto lens with a more versatile 100-400mm zoom lens which allowed lots of different compositional possibilities!
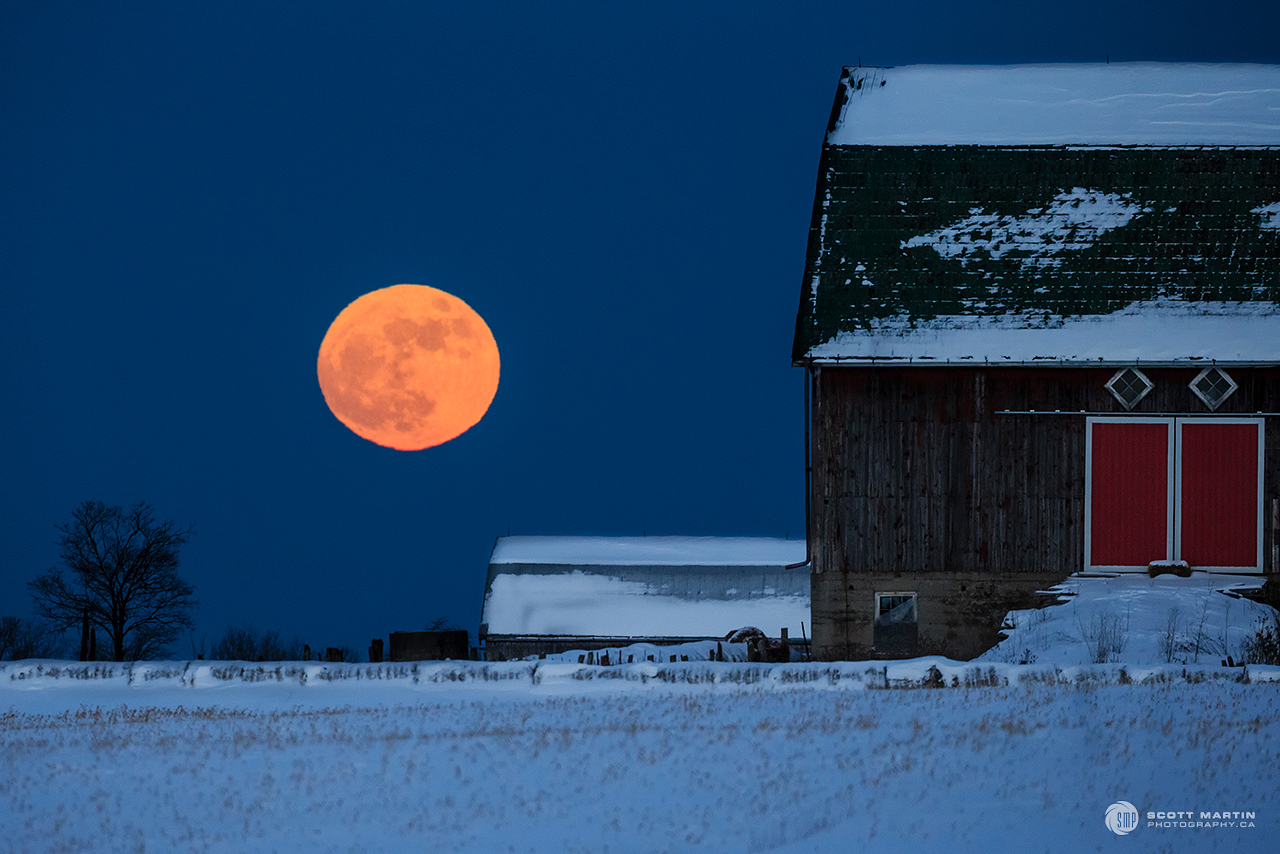
The above image was taken at a focal length of 300mm.
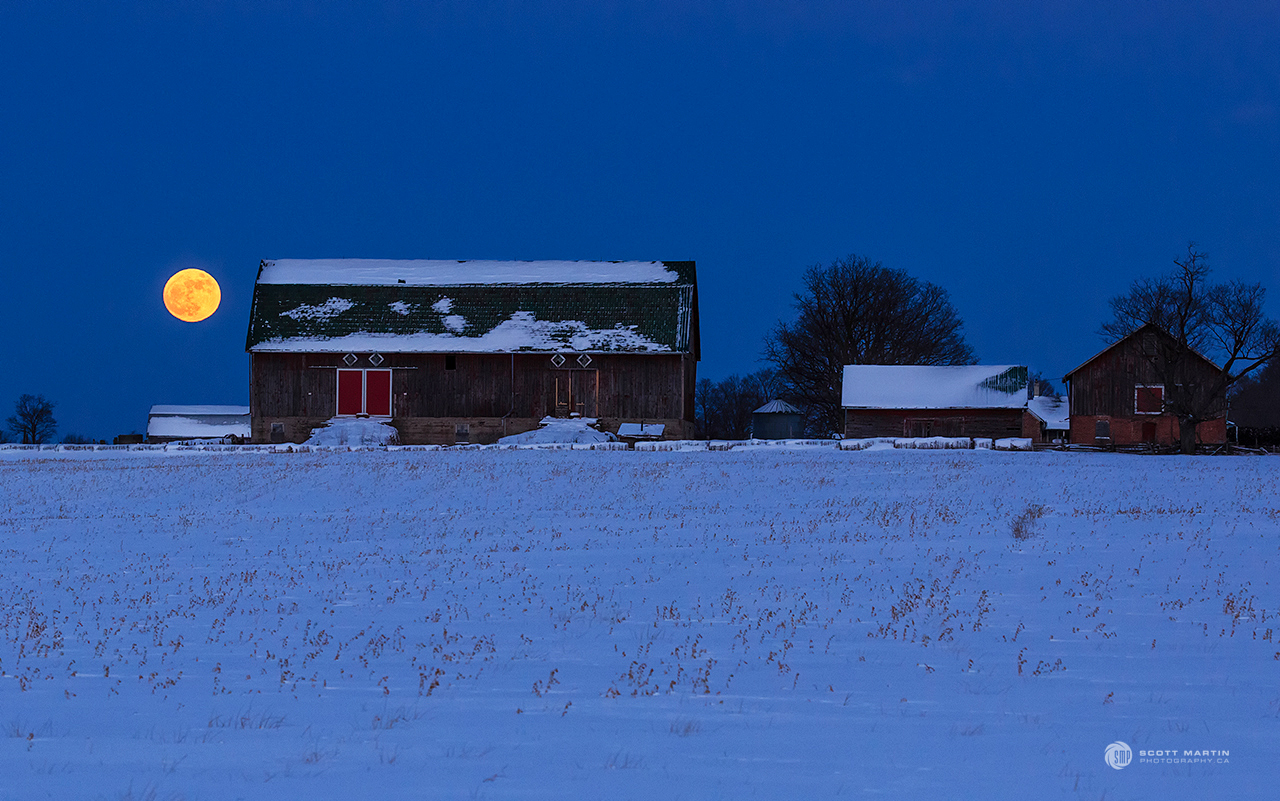
A focal length of 135mm allowed inclusion of all the farm buildings, however as the focal length decreases, so does the contribution of the moon to the image. It is often difficult in the field to determine exactly what the best composition will be, especially as composition is a very subjective thing. For that reason it is wise to experiment with as many different compositional combinations as possible.
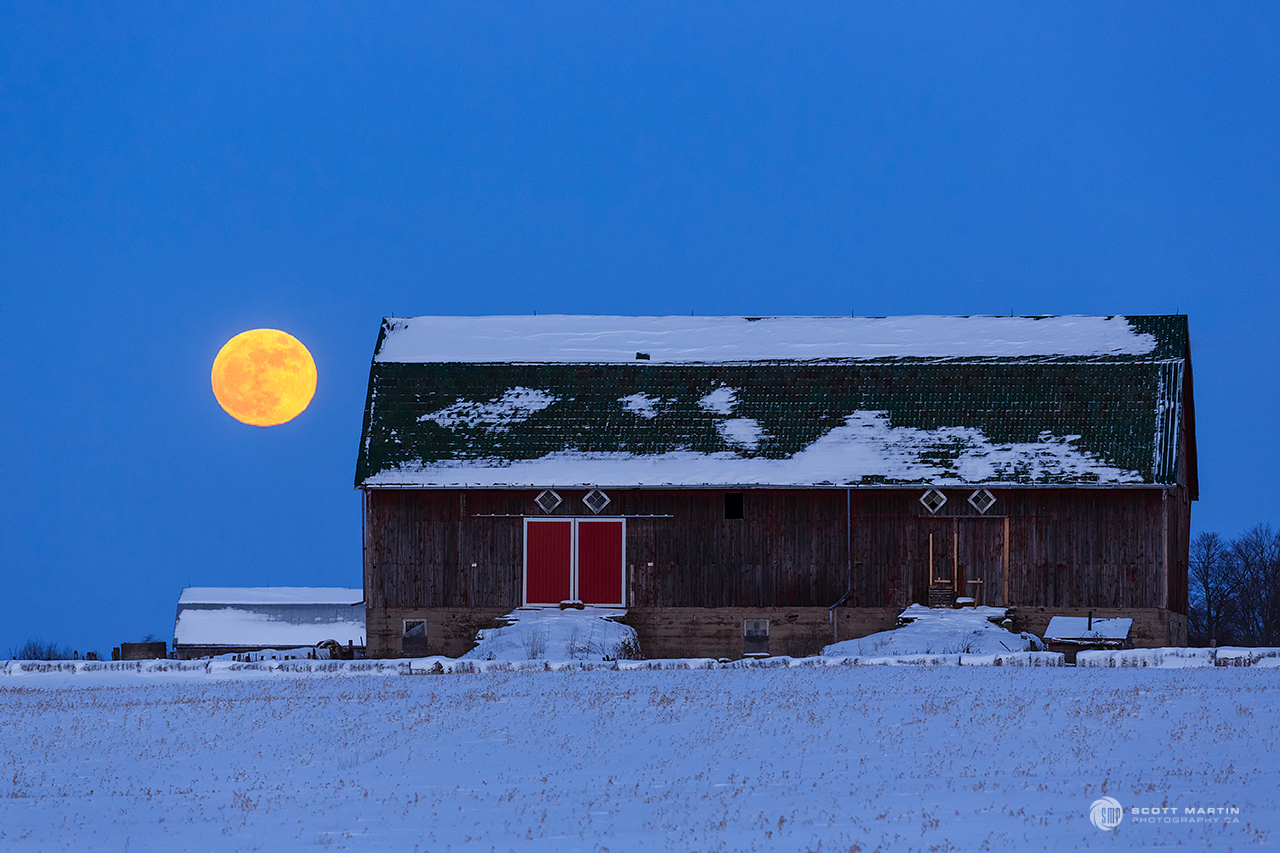
I had to move to the right in order to position the peek-a-boo moon directly over the red barn doors (note the reduced relative size of the outbuilding to the left of the barn), however it makes for a more pleasing composition. The better you can train yourself to think about even the smallest of details while you are out taking pictures is extremely beneficial. It is paying attention to the little things that make would be snapshots become great photographic images.
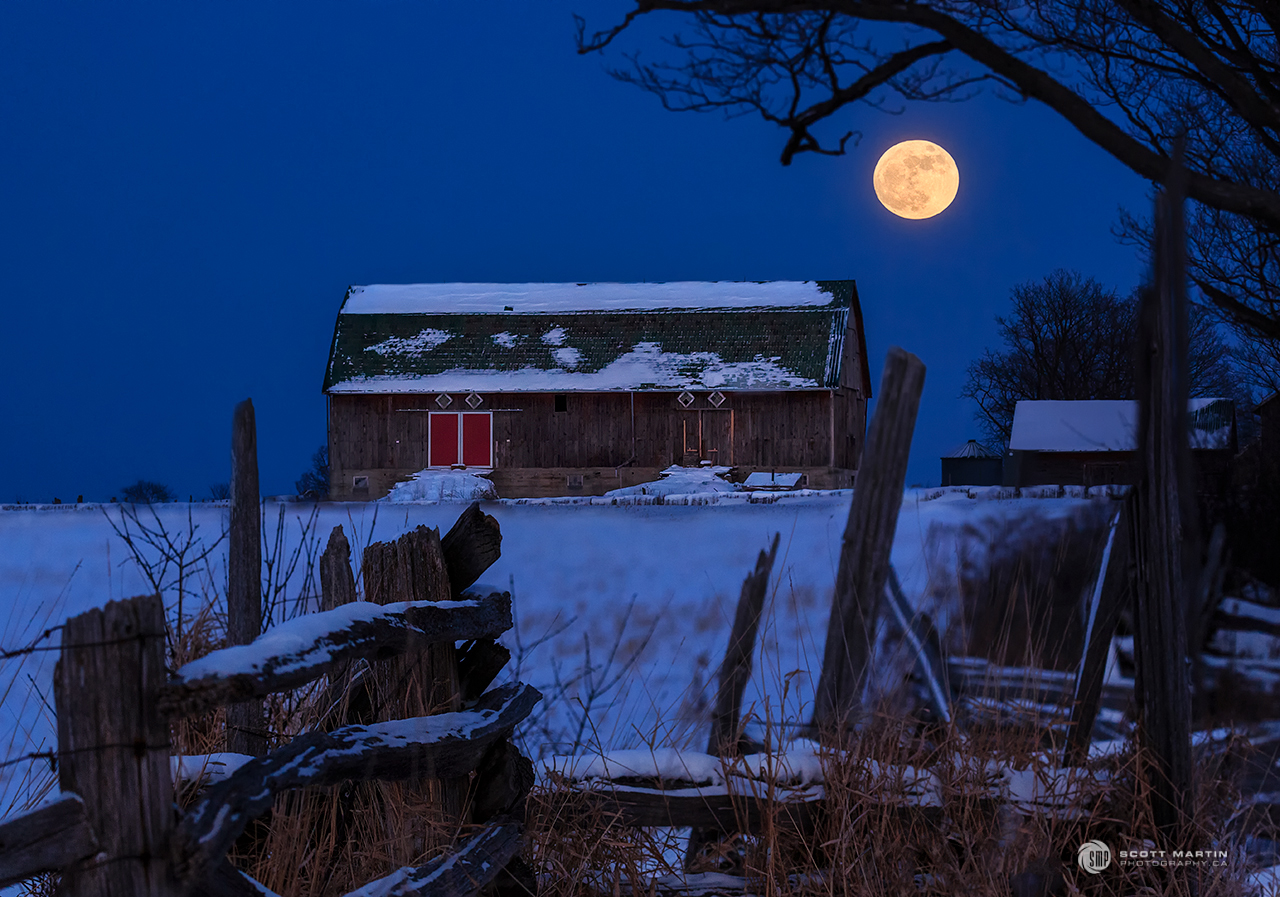
While walking back to the car with hands and feet far too cold to be taking more pictures, the rustic fence and full moon under the tree branches made me stop for ‘just one more’!
It’s interesting to see how the colour of the moon changes so dramatically as it quickly rises into the sky, beginning a burnt orange as it rises to almost white after about twenty minutes. The influence of the earth’s atmosphere on the sun’s rays when the moon is low in the horizon causes the colour changes. In none of these images was the moon’s colour manipulated during processing. They all appear as they were exposed in the camera.
Sorry there are no Blue Moon or lunar eclipse photographs to post as it was a snowy overcast day with total cloud cover on the last day of January!
Enjoy the winter months and don’t be afraid to take your gear out in the cold to capture some winter landscapes.
As always, if you have any questions, please ask and we will be glad to answer them. Also, I’ve recently opened a new Instagram account just for landscape shots, @smp_landscapes so please follow me there if you are on Instagram. The Instagram account for bird photography is @scottmartinphotography
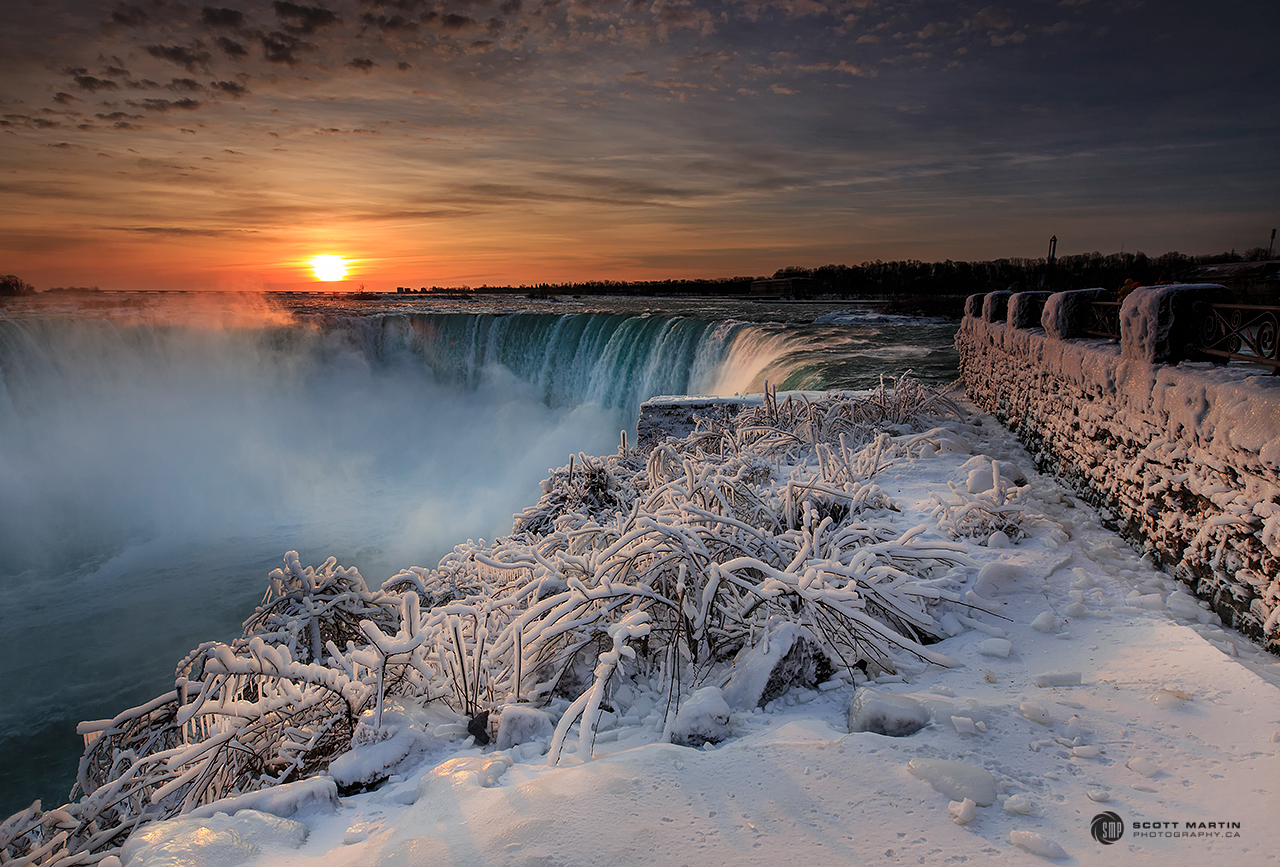
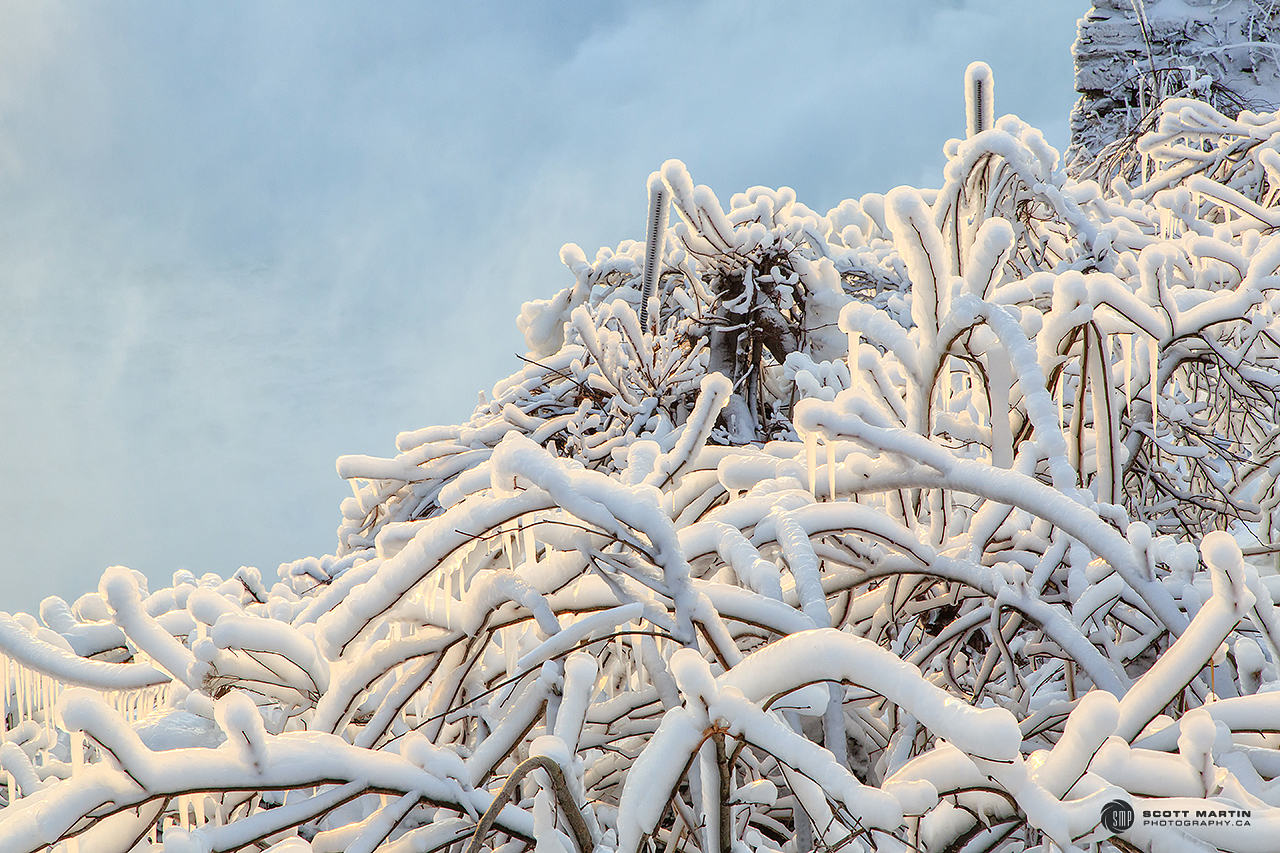
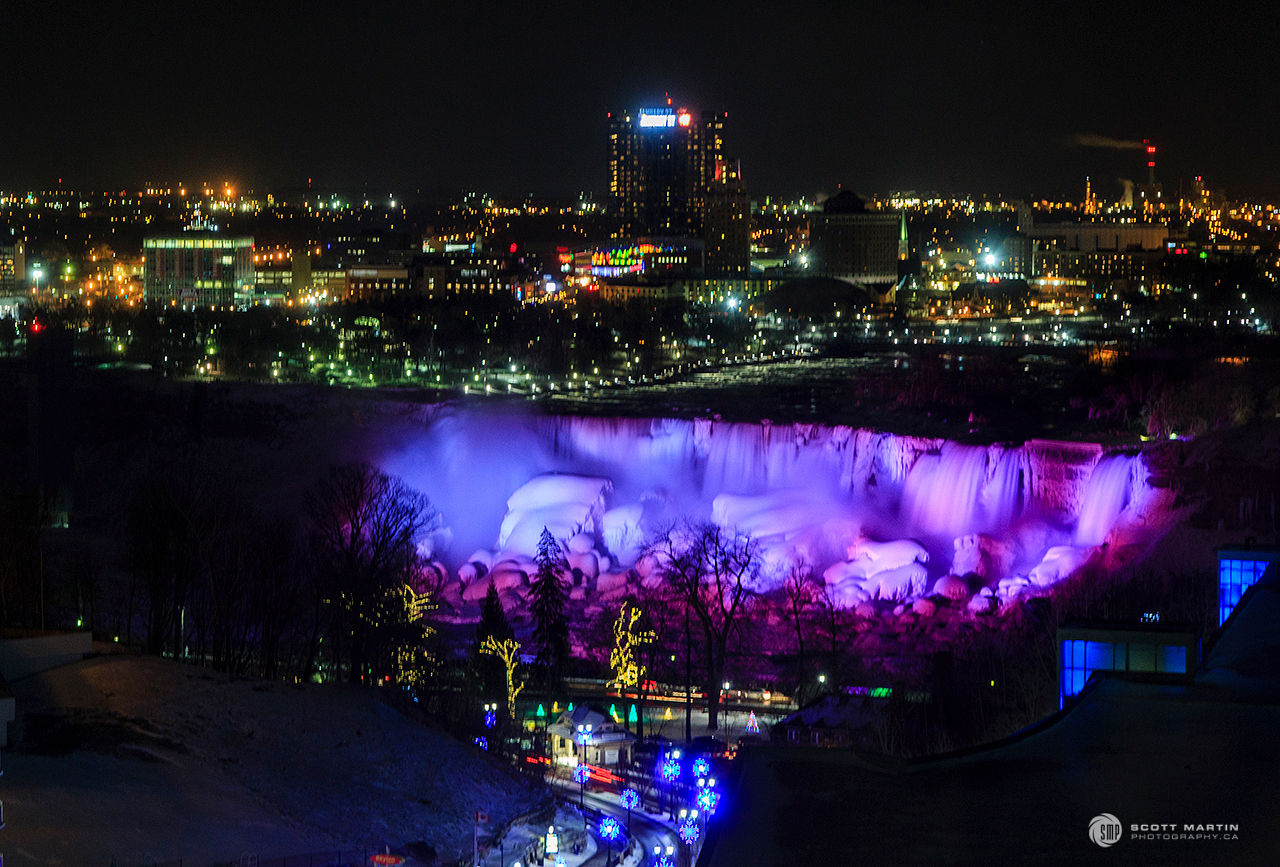
For the past number of years we have enjoyed an extended family weekend in Niagara Falls in January. It is a great time of the year to see the falls dressed in her winter splendour with snow and ice abounding and the ever-present mist laminating layer after layer of ice on everything it touches. Also during winter the sun rises over the Horseshoe Falls creating the opportunity for that ‘perfect’ Niagara Falls sunrise photograph.
So on a very cold Saturday morning Deb & I made the short walk from our hotel to the brink of the falls arriving in the dark about twenty minutes before sunrise. It’s wise to arrive early for three reasons; you will likely be first on scene and thus the prime spot to take the image is available (the early bird…), you have time to scout out and determine the best vantage point, and you have time to set up your gear and take test images to determine the correct, perspective, composition and exposure details to successfully record the image you have in mind.
With your smartphone it is possible to do much of the advance planning long before you arrive on the scene. There are many apps that help in this process and after testing many of them my two favourites are LightTrac and PhotoPills. LightTrac is a great little app that allows you to see rise and set times for the sun and moon on any date anywhere in the world. PhotoPills is a very robust app that is essential for every landscape photographer. It allows you to determine where and when the sun or moon will be positioned where you desire and how to position yourself to photograph it. PhotoPills also provides a wealth of information to help calculate complex photographic challenges including time lapse, long exposure and HDR (High Dynamic Range) photography.
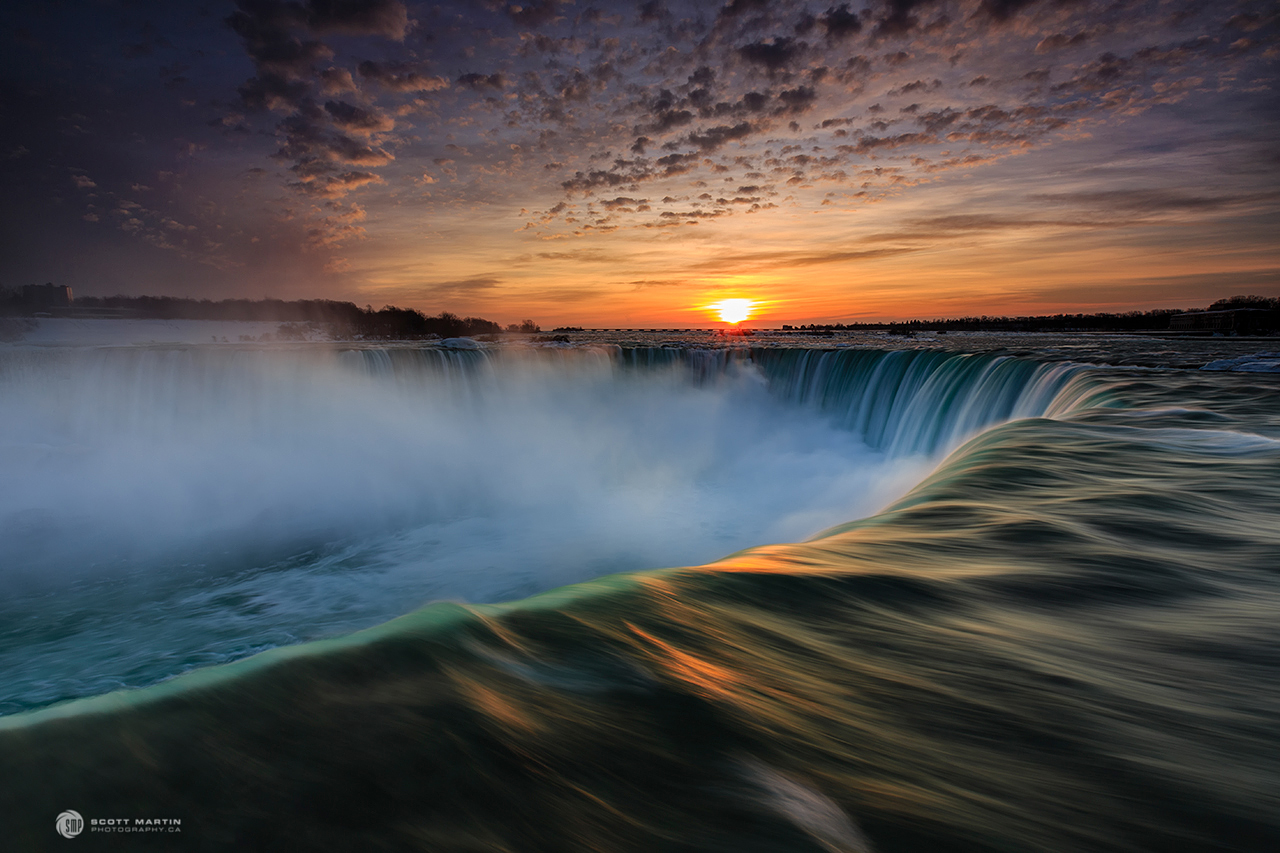
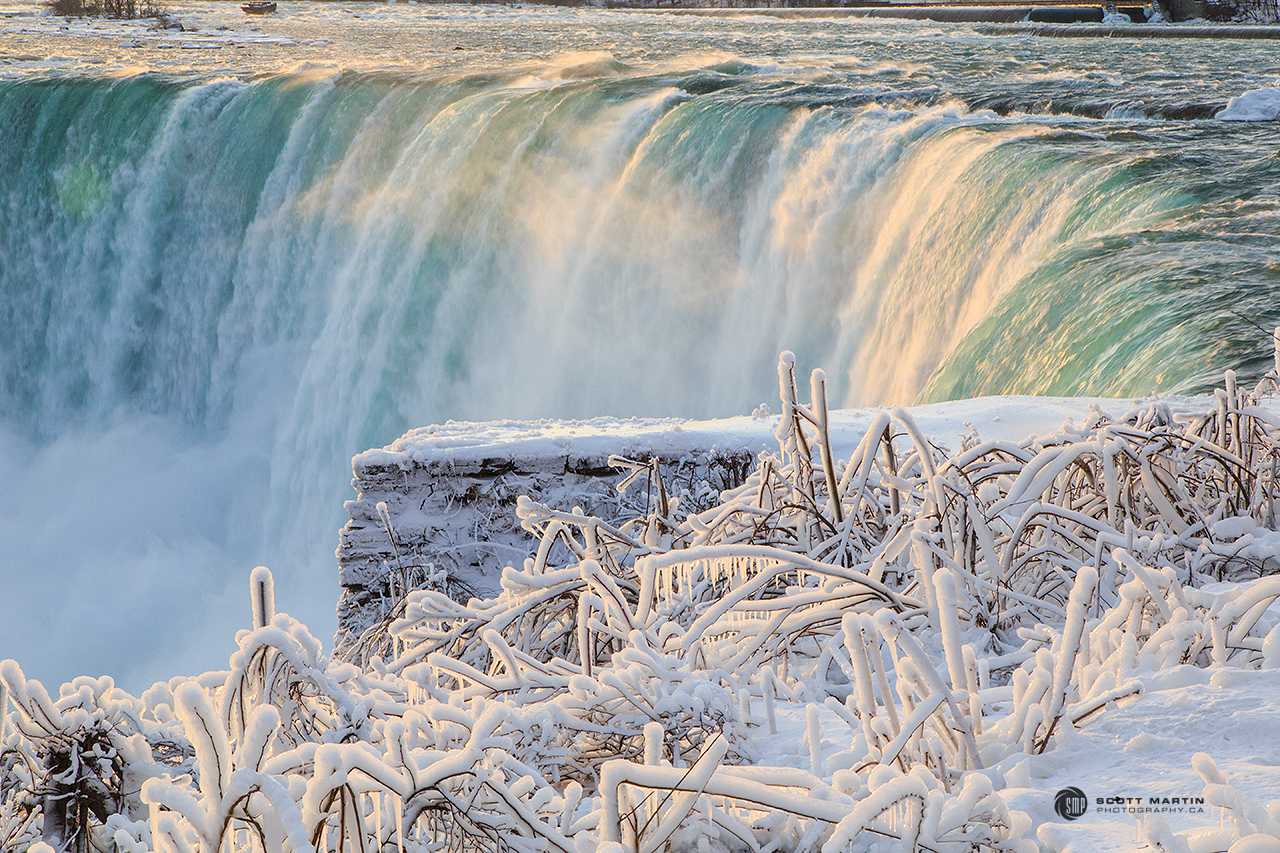
Once we pinpointed our location and set up the tripod, we waited patiently for the sun to rise, very happy that there were some clouds in the sky and the wind was sufficient to be blowing the mist from the falls away from the spot where the sun was going to rise.
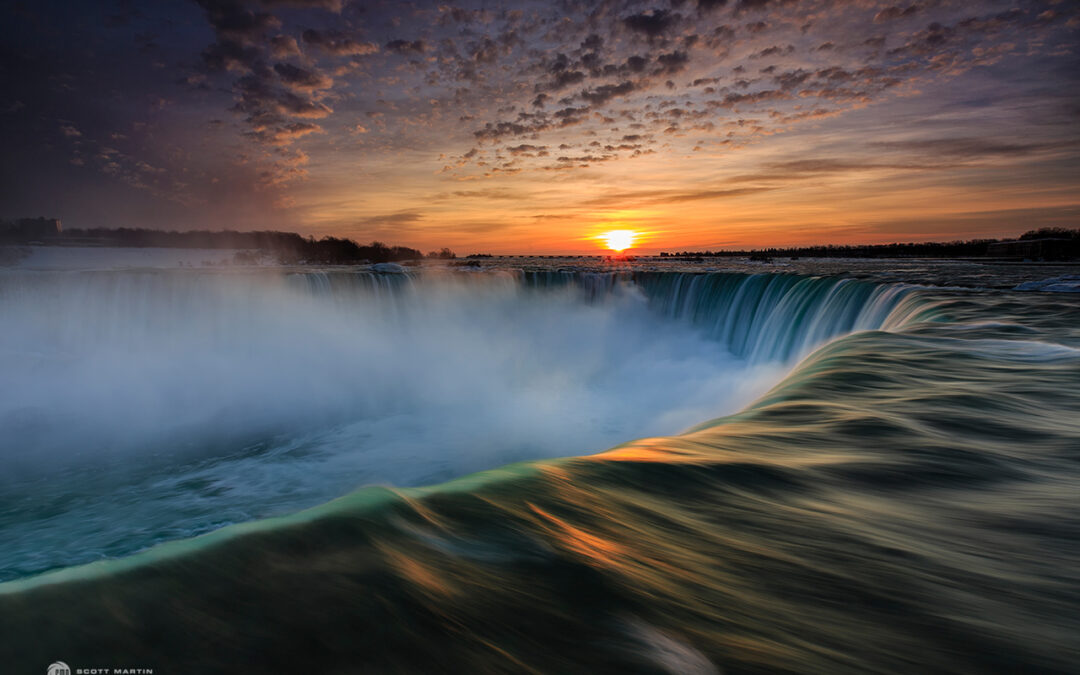
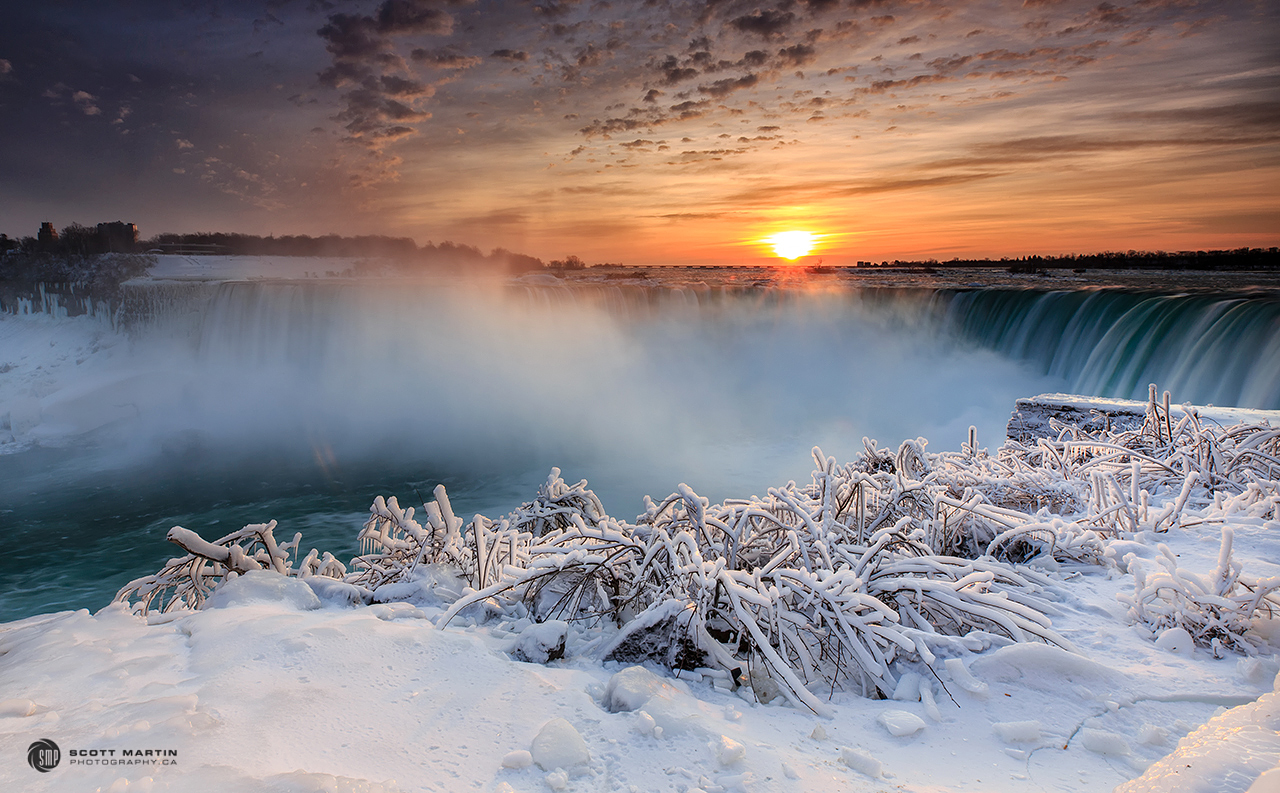
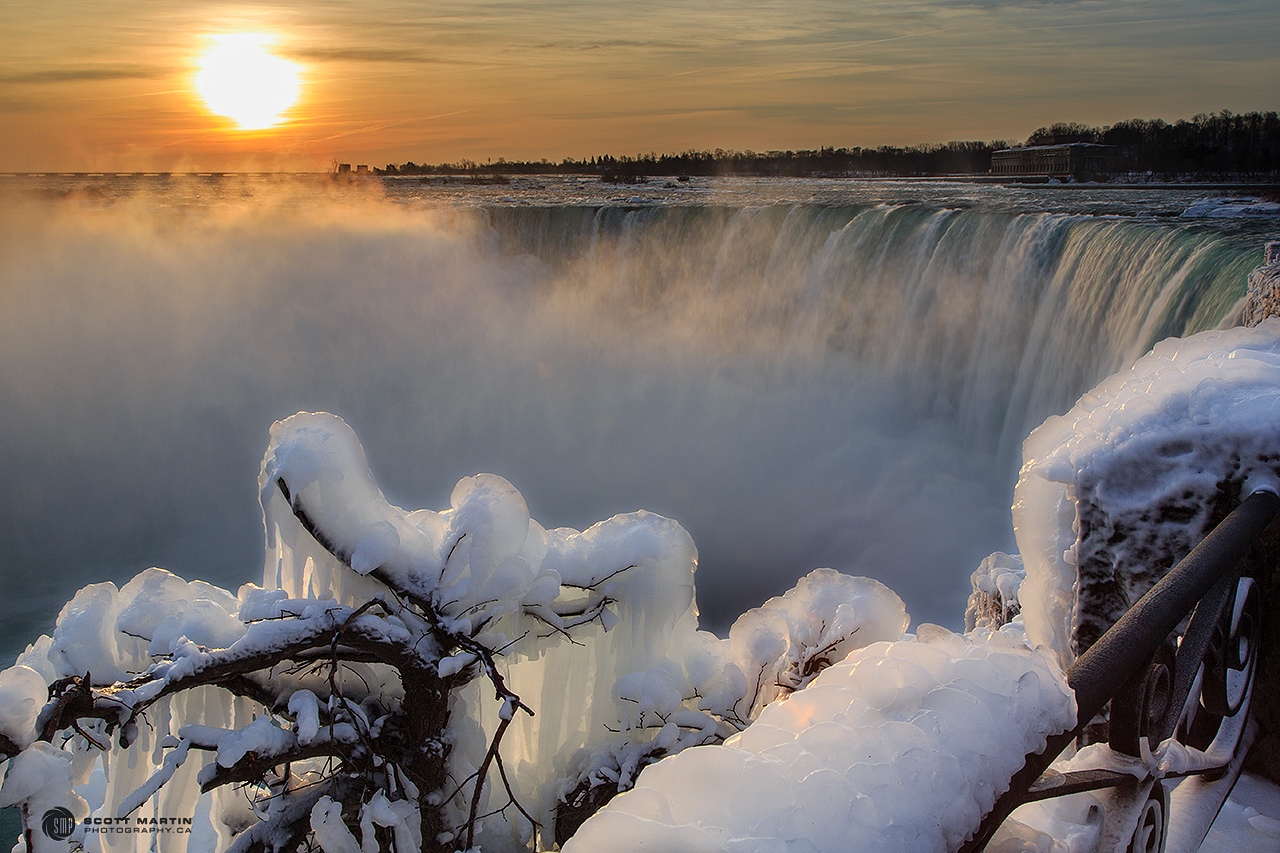
Sunrise, January 20, 2018
This image was taken using a Canon 5D Mk III with an EF 16-35mm f/2.8L III lens; ISO 50, f/22, 1/2 sec at 16mm focal length. I was able to take this image with a single frame by using a Singh Ray reverse three stop ND grad filter to darken the sun by three f-stops which evens the light intensity at the camera sensor. Without the filter, in order to get a well exposed image you would require at least two images, one exposed for the bright sky and the other for the darker falls and combining them later on the computer. It’s always easier and less time consuming to take one image and filters help make that possible.
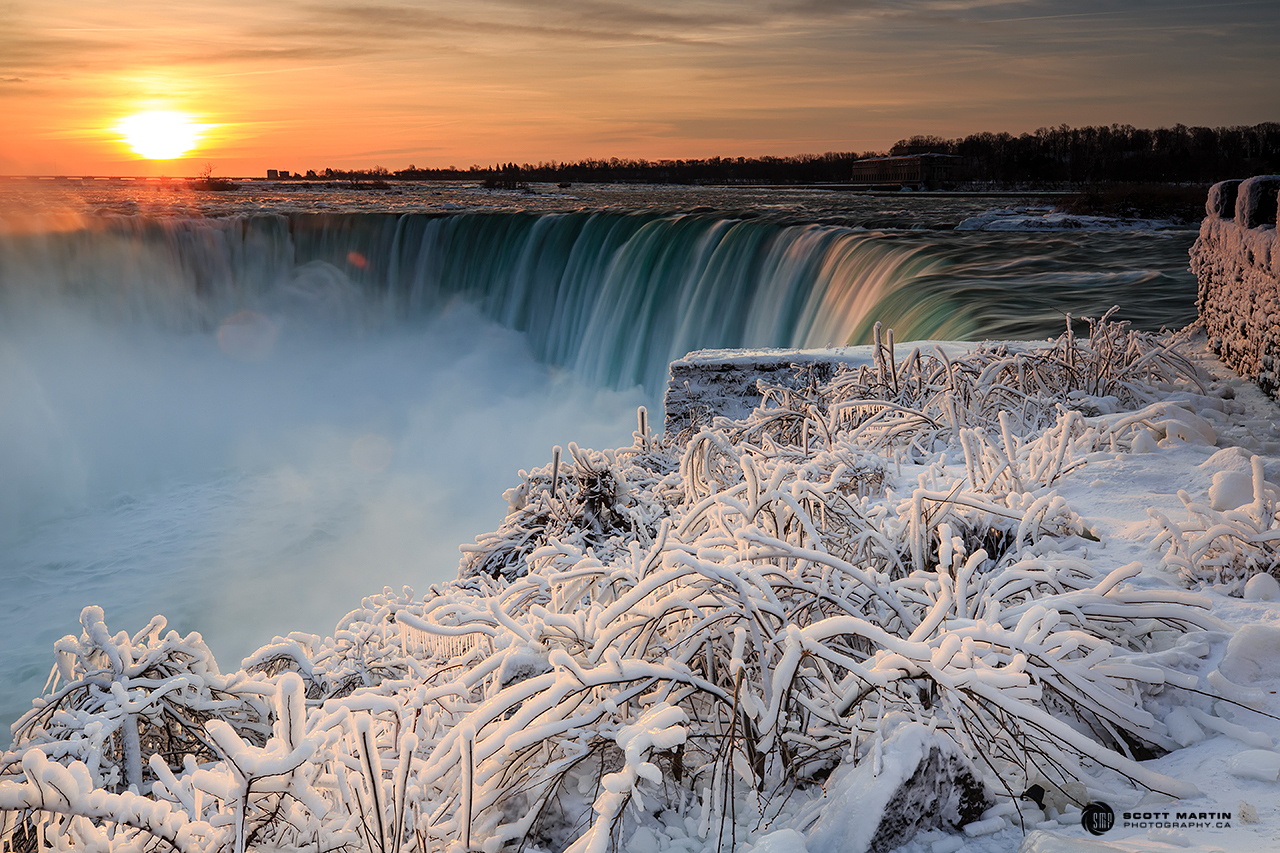
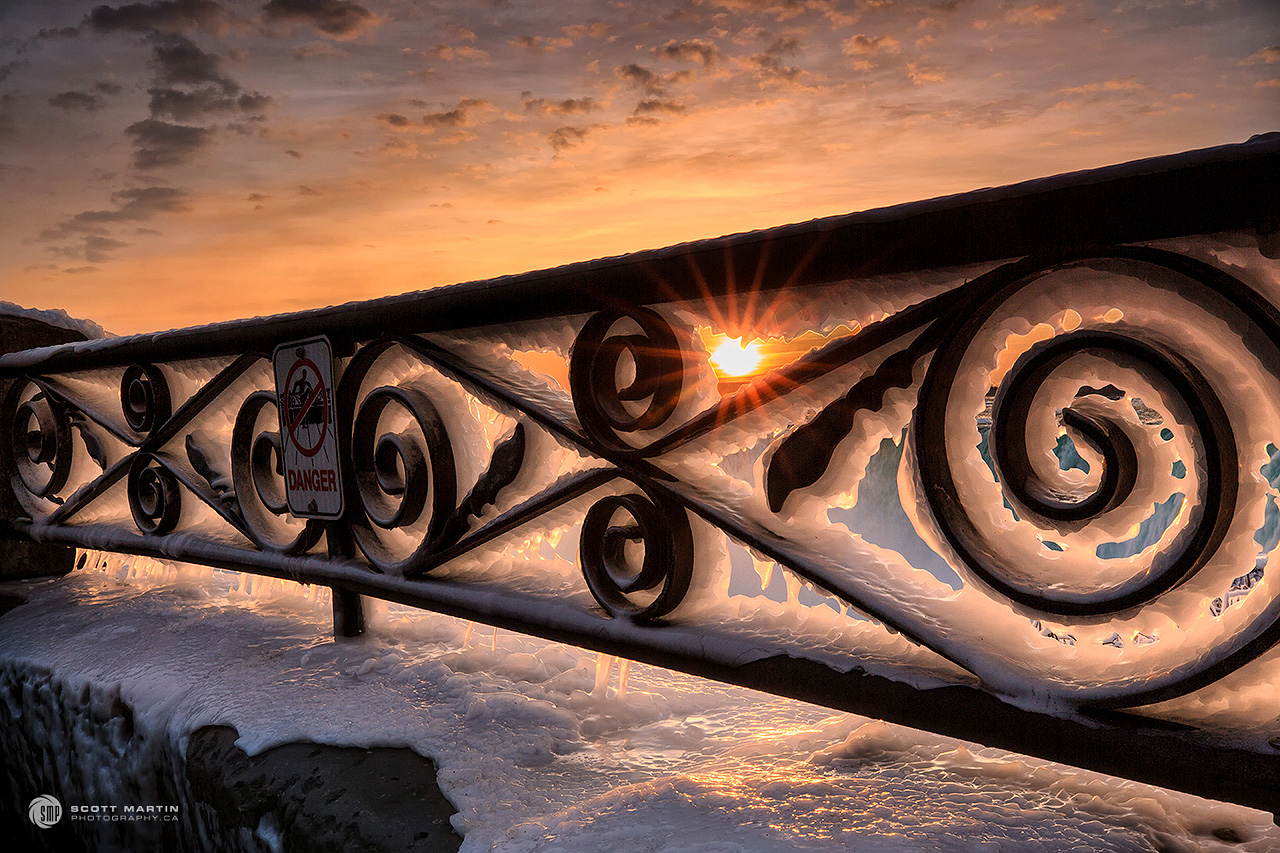
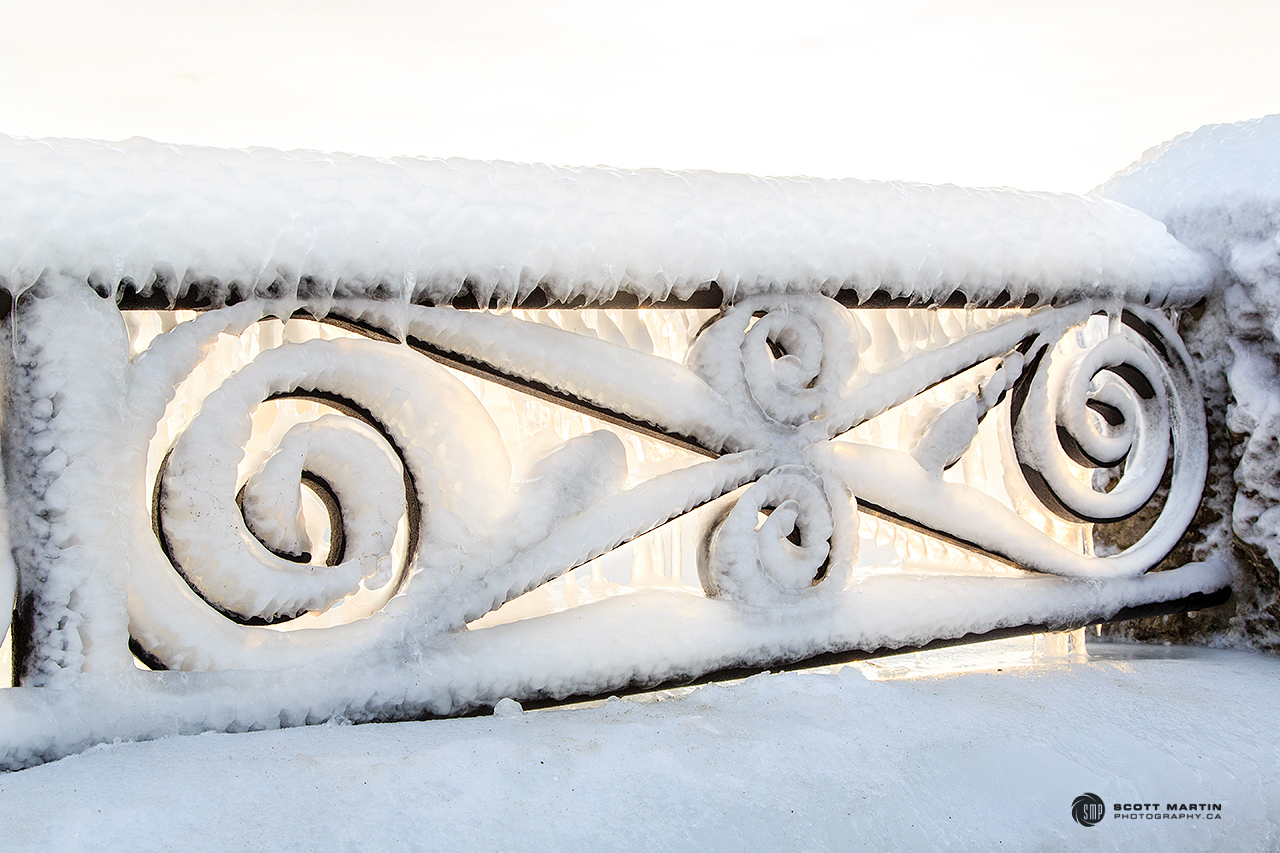
After capturing a ‘few’ sunrise images we wandered around the falls enjoying a great start to new day. Making more memories of Niagara Falls on a cool winter’s morning before heading back to the hotel for breakfast. I hope you enjoy these images.
As always, your comments and questions are welcomed and I trust that you will grab a tripod and camera and head out early one morning soon to photograph the sunrise. You will be glad you did.
Although this is a little late, Happy New Year and all the best in 2018 to you and yours!
This past summer Deb & I visited Newfoundland for the first time. It was a magical place to explore and happily we were able to see and photograph the wonderful geography, historic lighthouses and quaint villages as well as three unpredictable things we had hoped to see, namely icebergs, Puffins and whales.
This year was one of the best in recent memory to see icebergs in Newfoundland due to the large numbers present and how late into the summer the pack ice remained before breaking up and freeing the mighty icebergs to drift out to sea. This allowed Deb & I to see a few icebergs at the end of July, more than a month later than usual. We had planned the timing of our visit to see Puffins and whales which made the likelihood of seeing icebergs slim, however as we daily monitored IcebergFinder in the weeks prior to our trip we were excited to find that we just might see some. (Bookmark the IcebergFinder link if you ever plan to visit Newfoundland and want to know where the icebergs are).
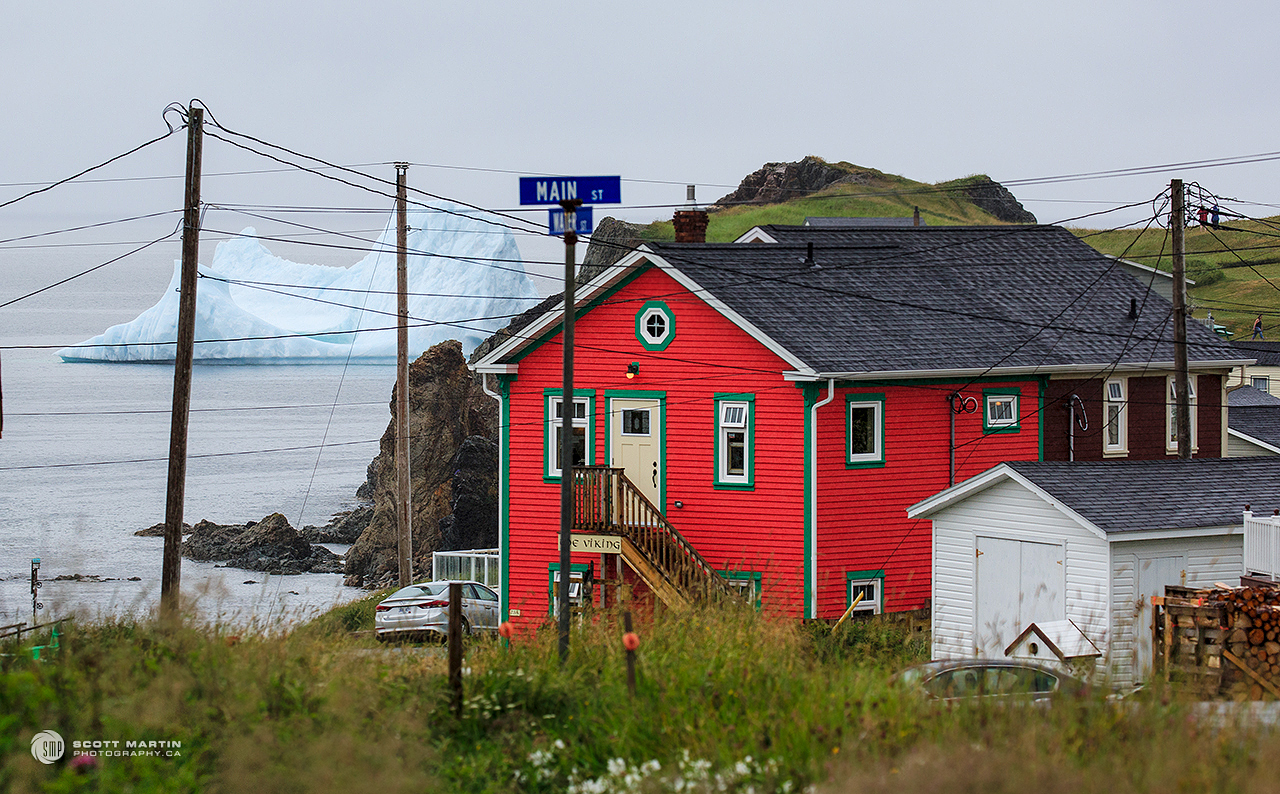
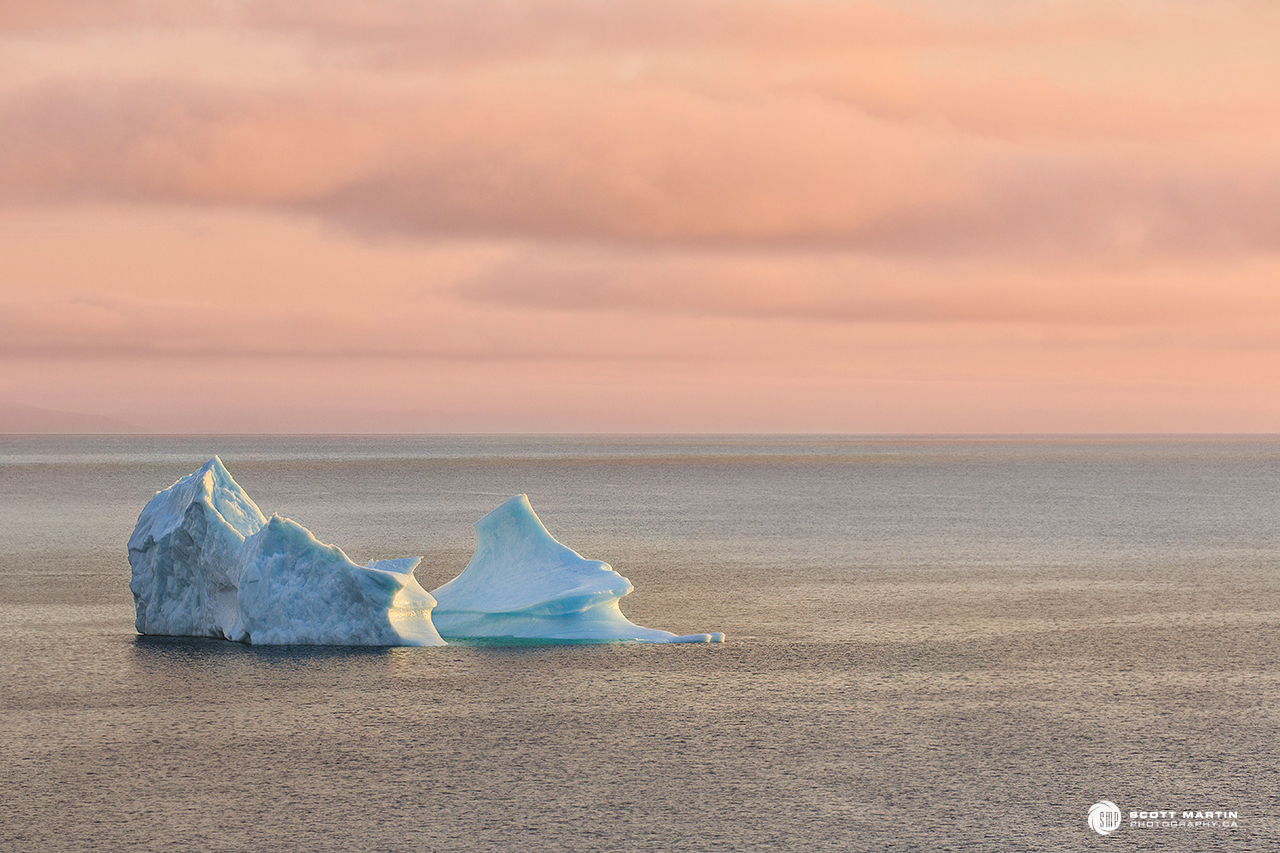
While staying in Twillingate, part of the region known as Iceberg Alley along the North Coast of the island, we heard a large iceberg was just a few kilometres away in Crow Head. Neither Deb nor I had ever seen an iceberg and will never forget the feeling of cresting a hill heading into the village and seeing a huge iceberg sitting majestically just off shore. I had to stop the car and take a pic 🙂
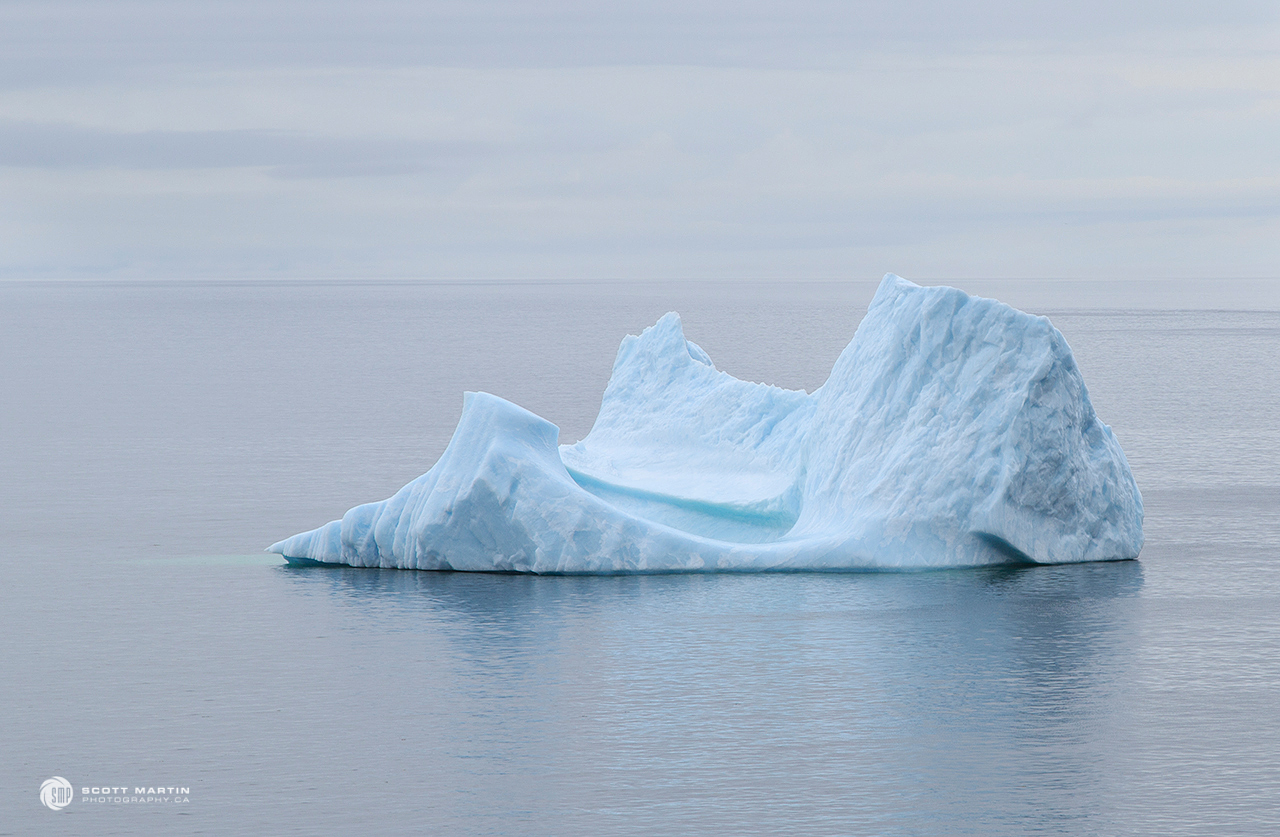
We quickly made our way to a great vantage point to see and photography the iceberg.
Icebergs are formed when they calve off a glacier and typically survive for three to six years before passing out of existence. Most icebergs in Newfoundland are formed when they break off glaciers in Greenland and currents take them southwest where they encounter the Labrador Current which they follow until they physically break apart due to the erosive action of the wind and waves or simply melt as they stray into warmer waters.
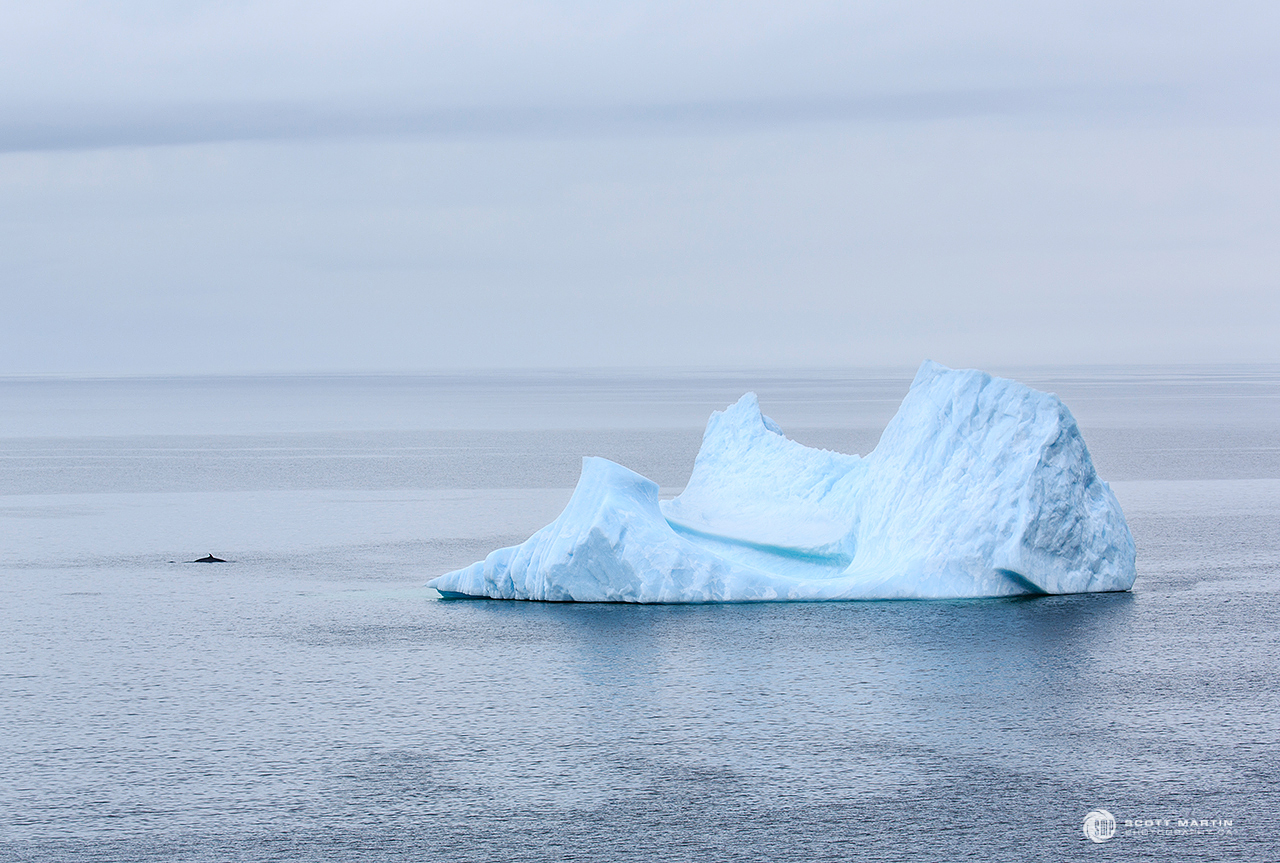
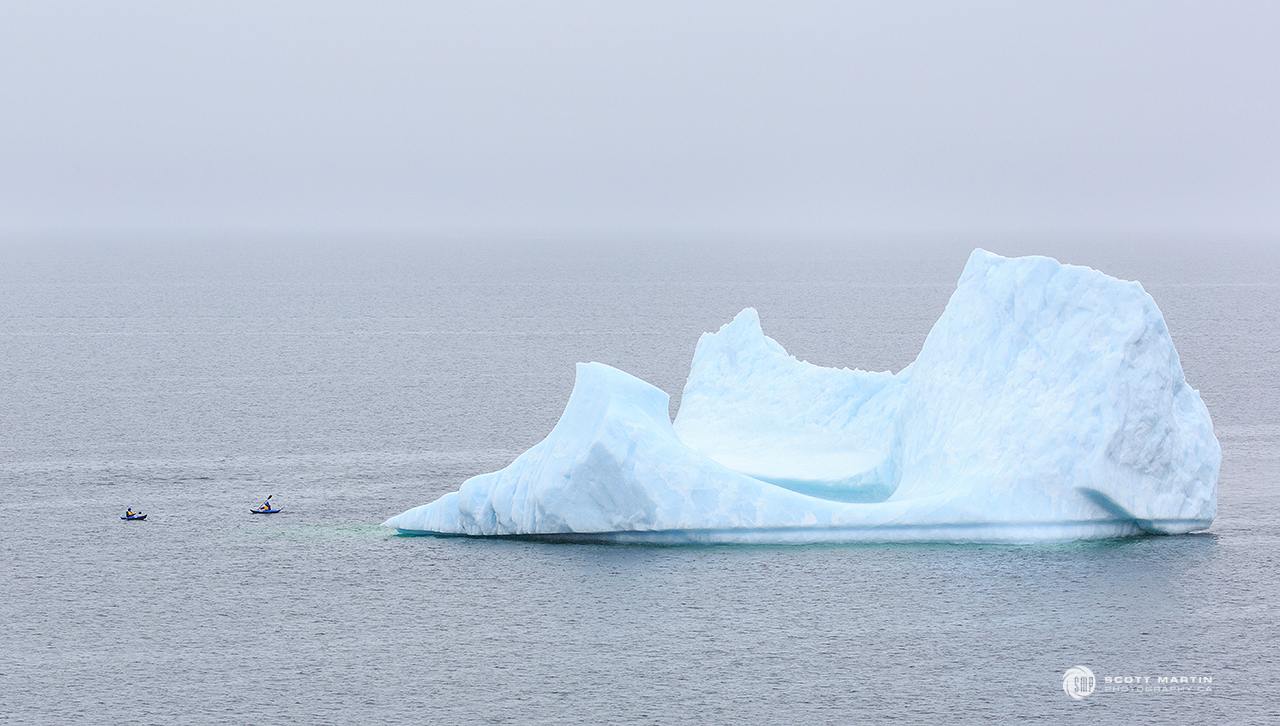
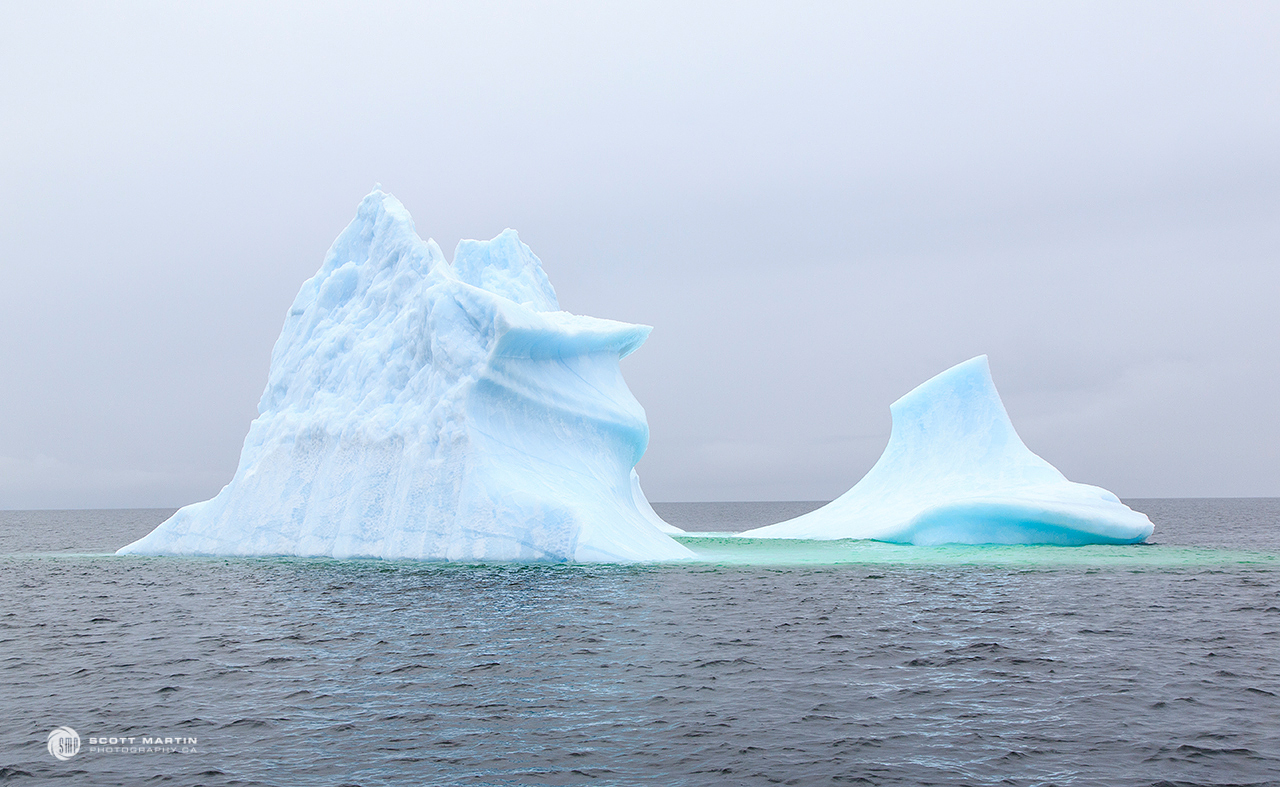
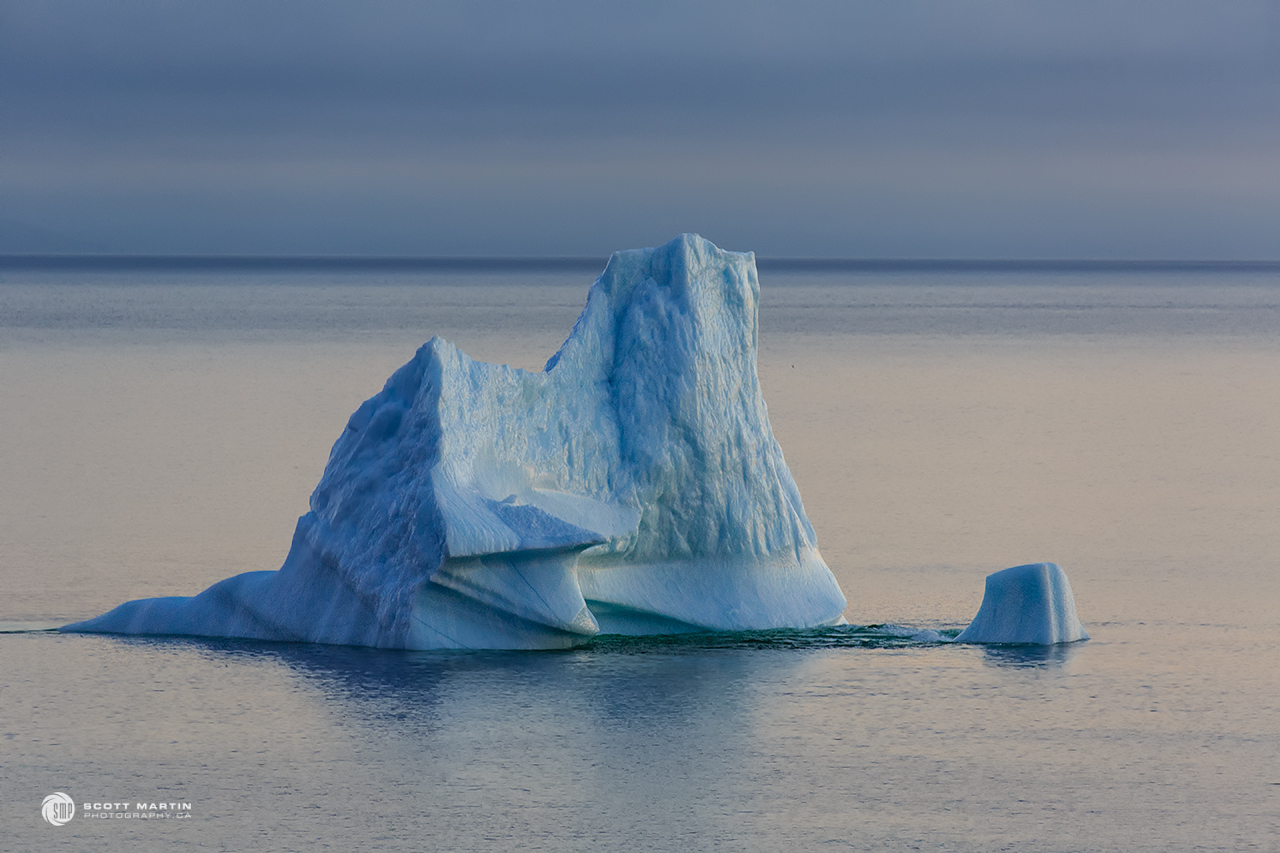
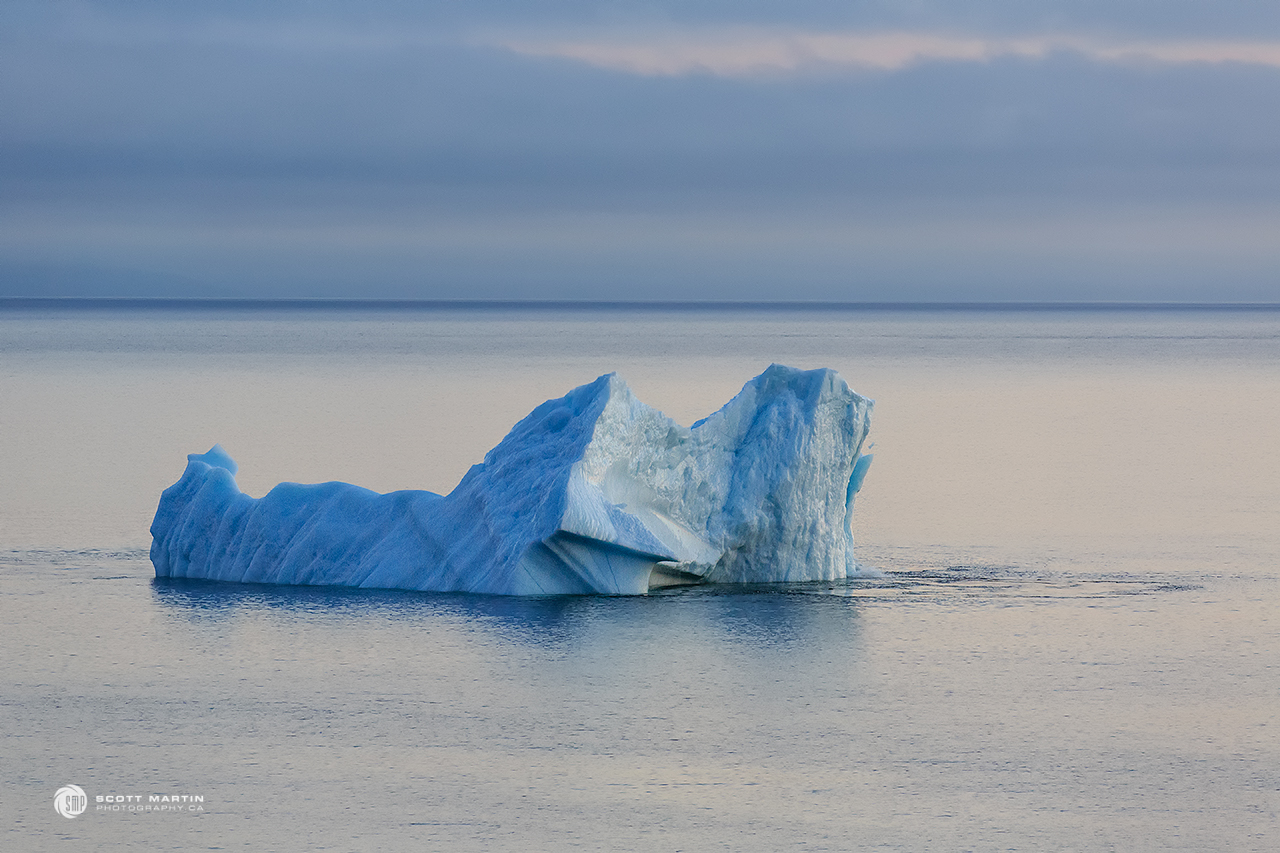
We were thrilled to see a Minke whale slowly swim behind the iceberg and give a bit of context to the size of the iceberg. Minke Whales are up to 30′ long and the locals were saying the iceberg was 200′ wide and 75′ high. It was grounded in 580′ of water! Take note of the iceberg water level in this picture and compare it with the images to follow.
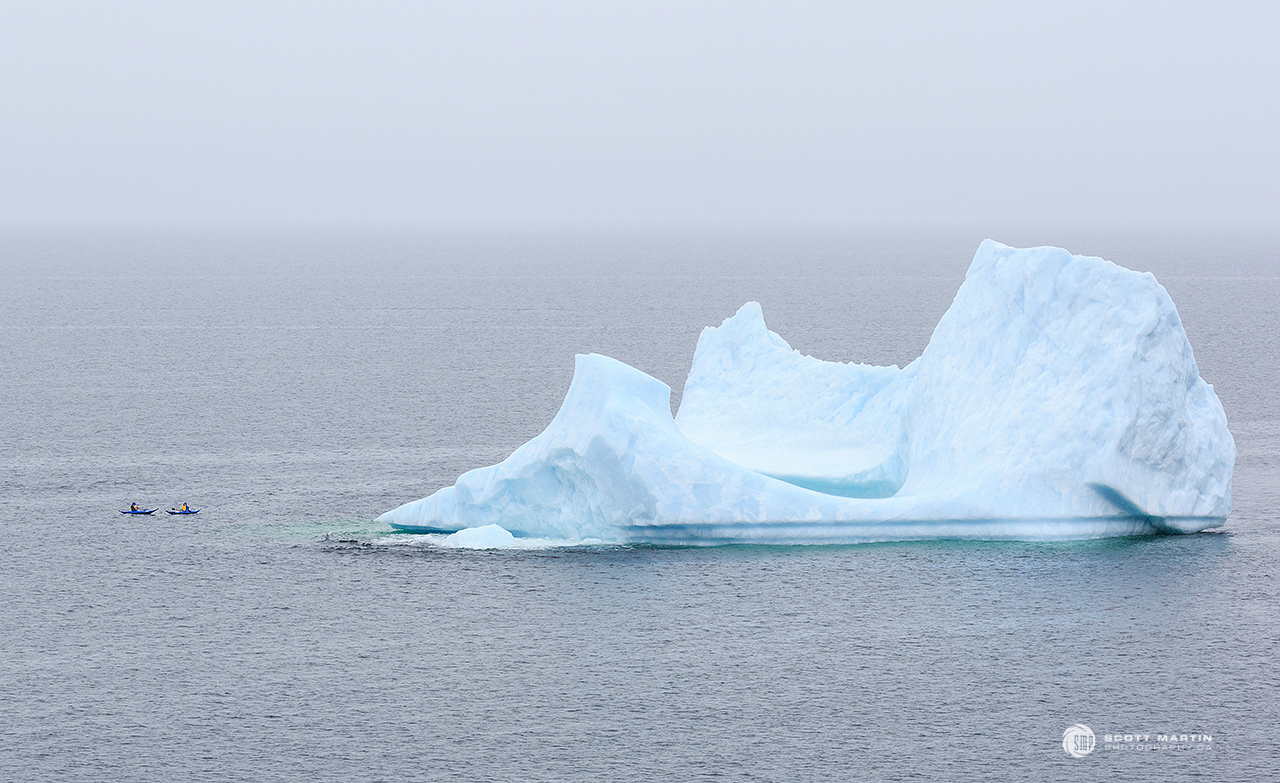
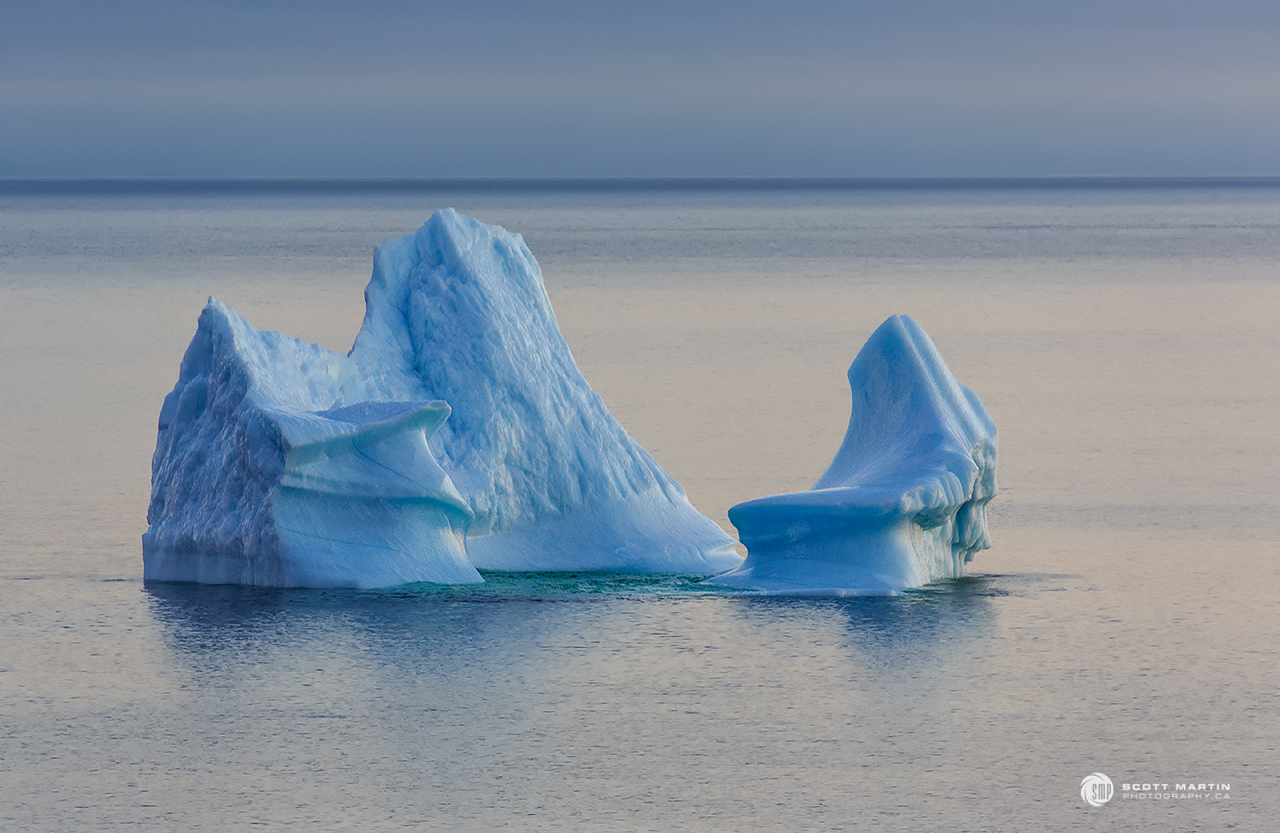
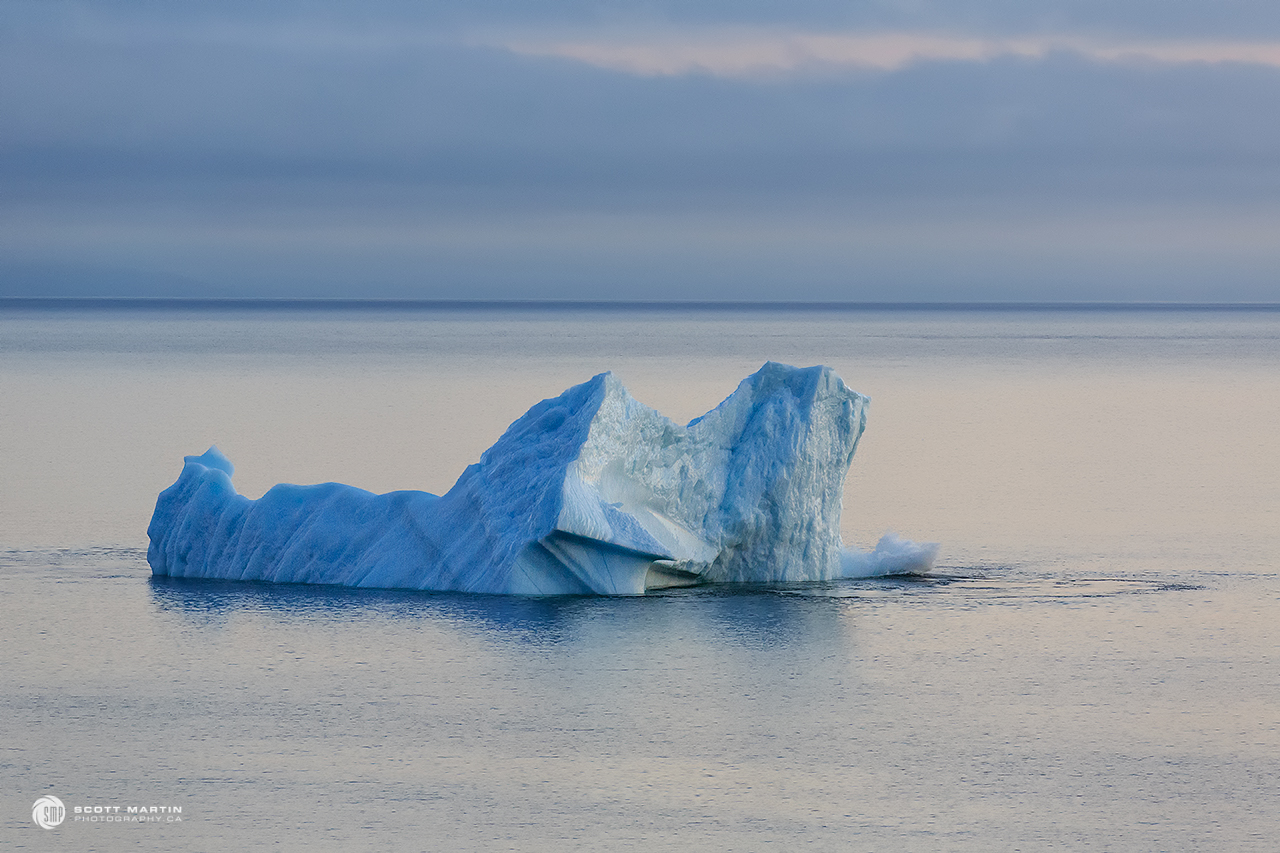
These two kayakers, much braver than Deb or I, also provide some context, but have you noticed the changing water levels….the iceberg was destabilizing and starting to roll!
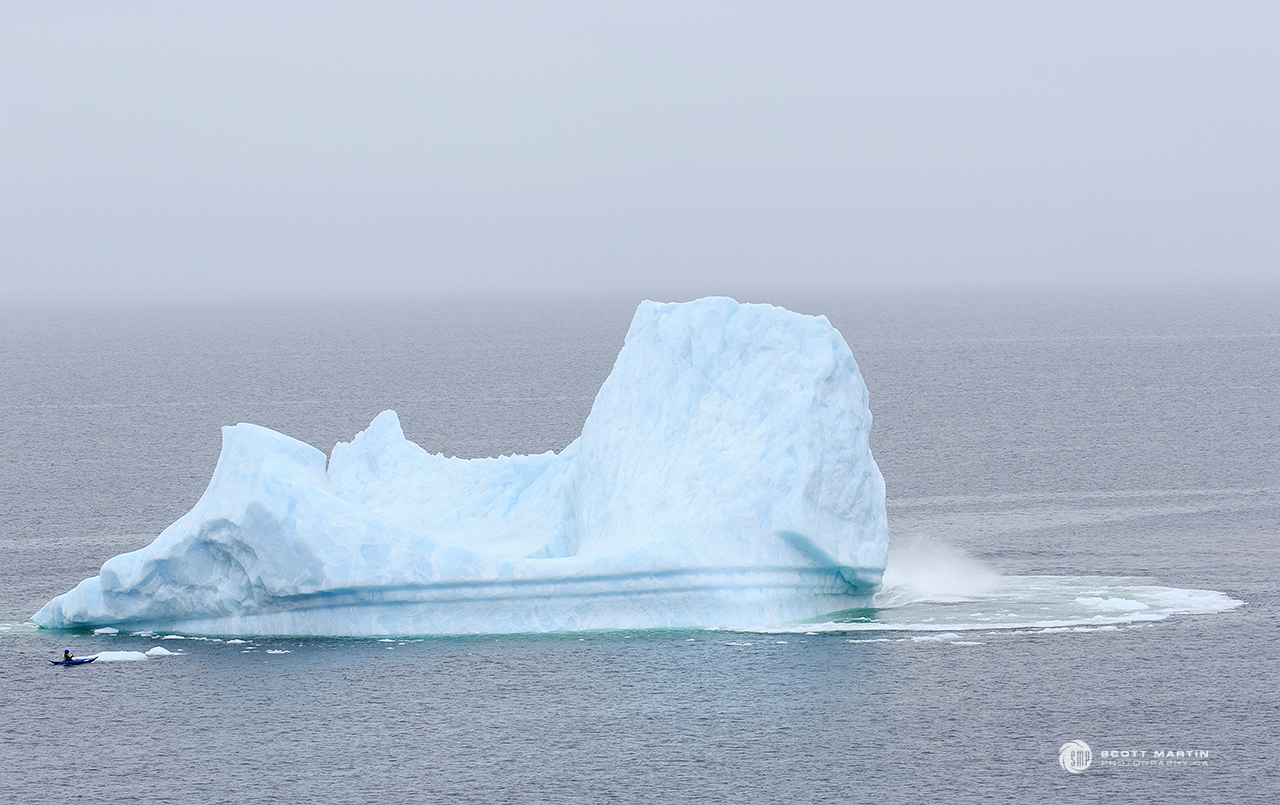
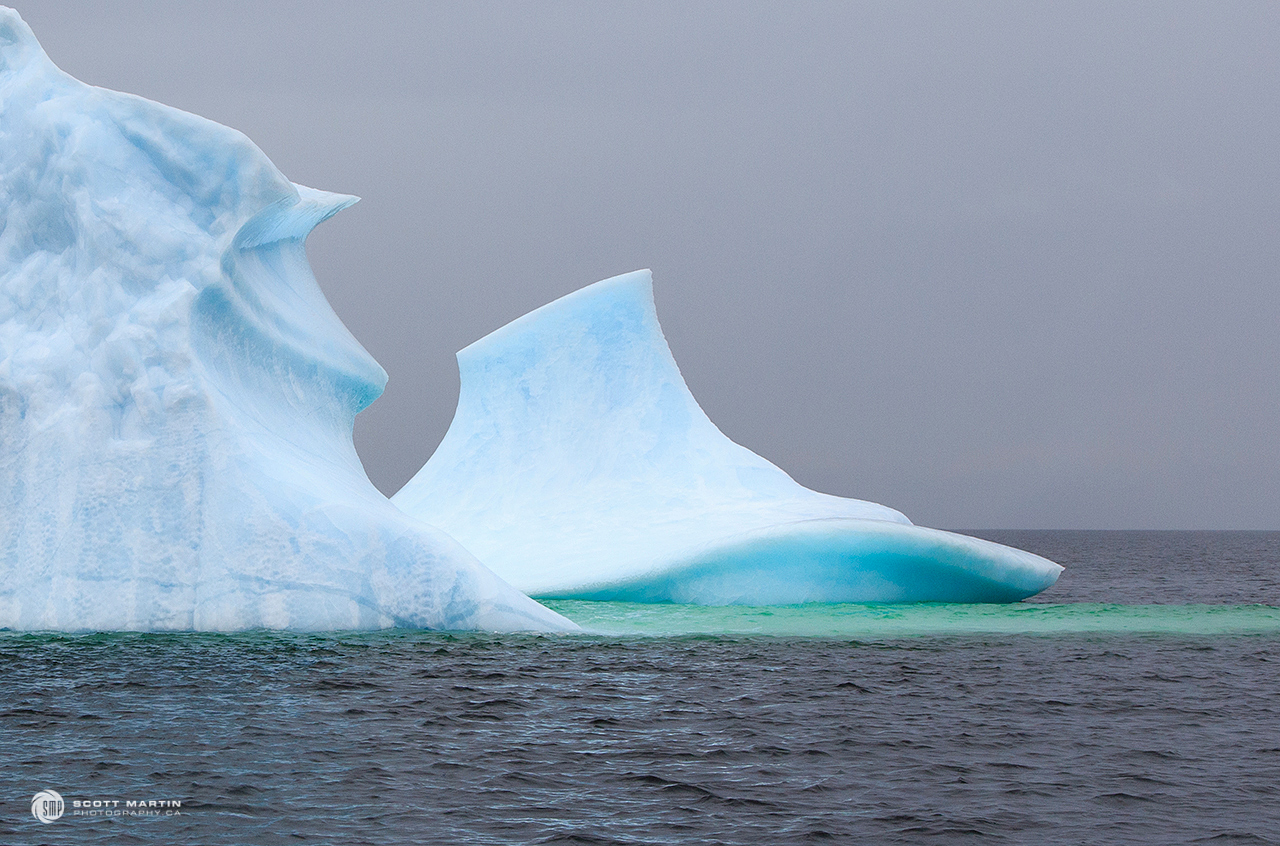
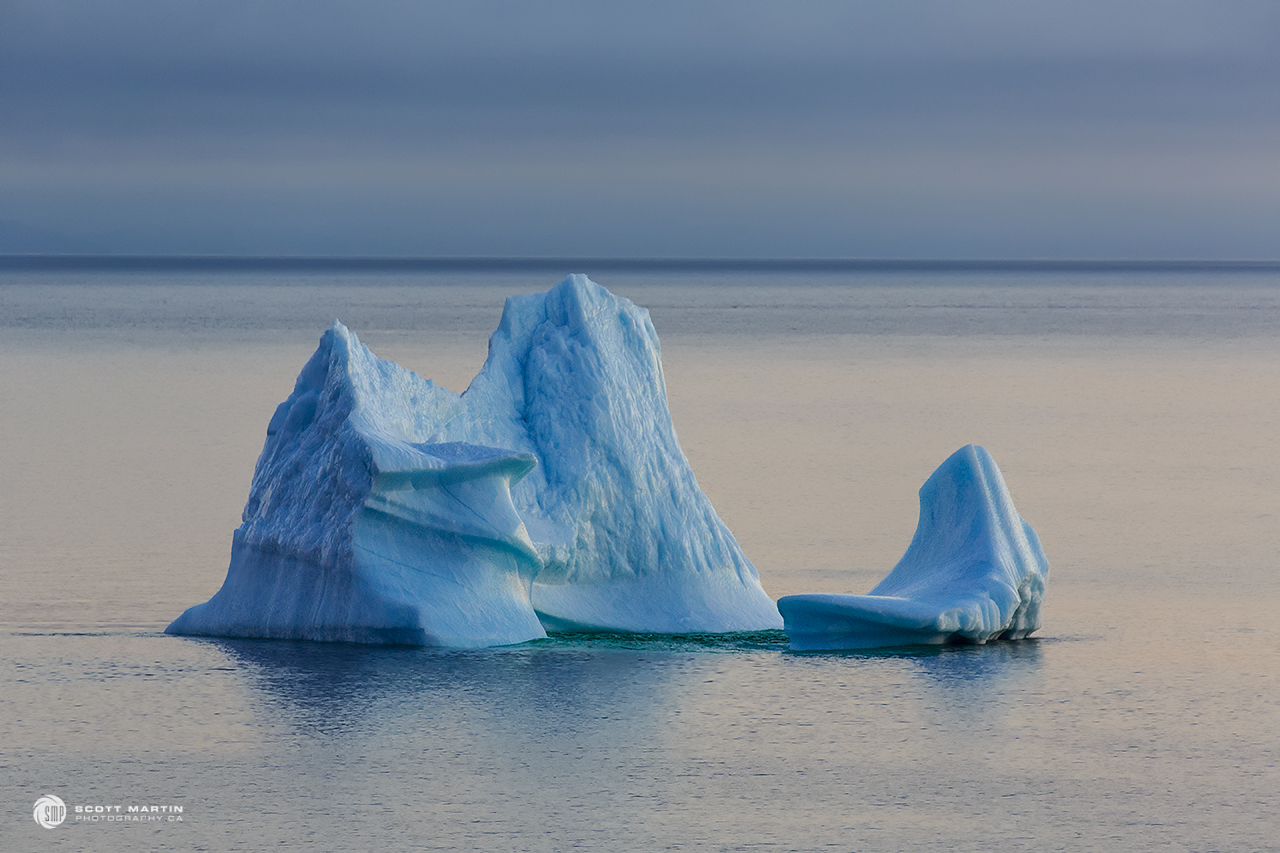
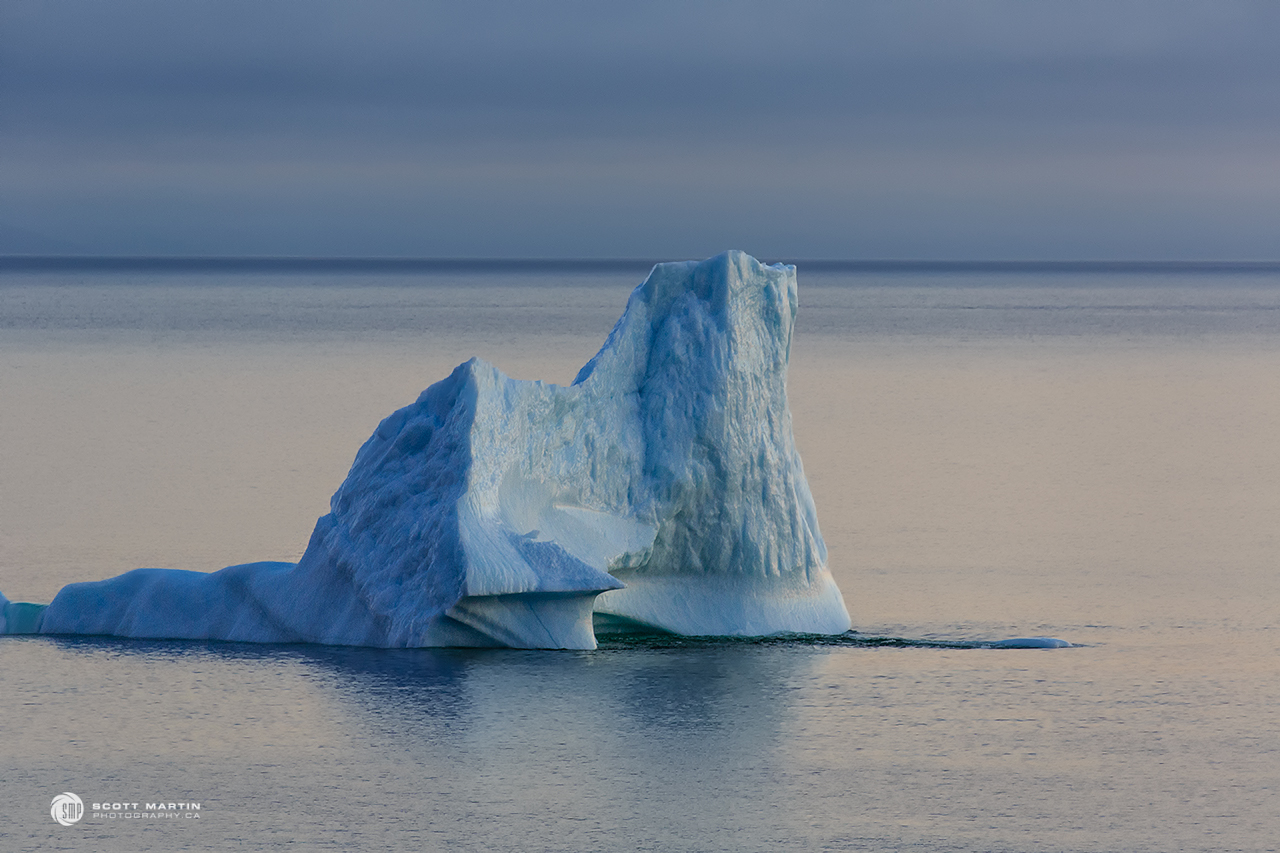
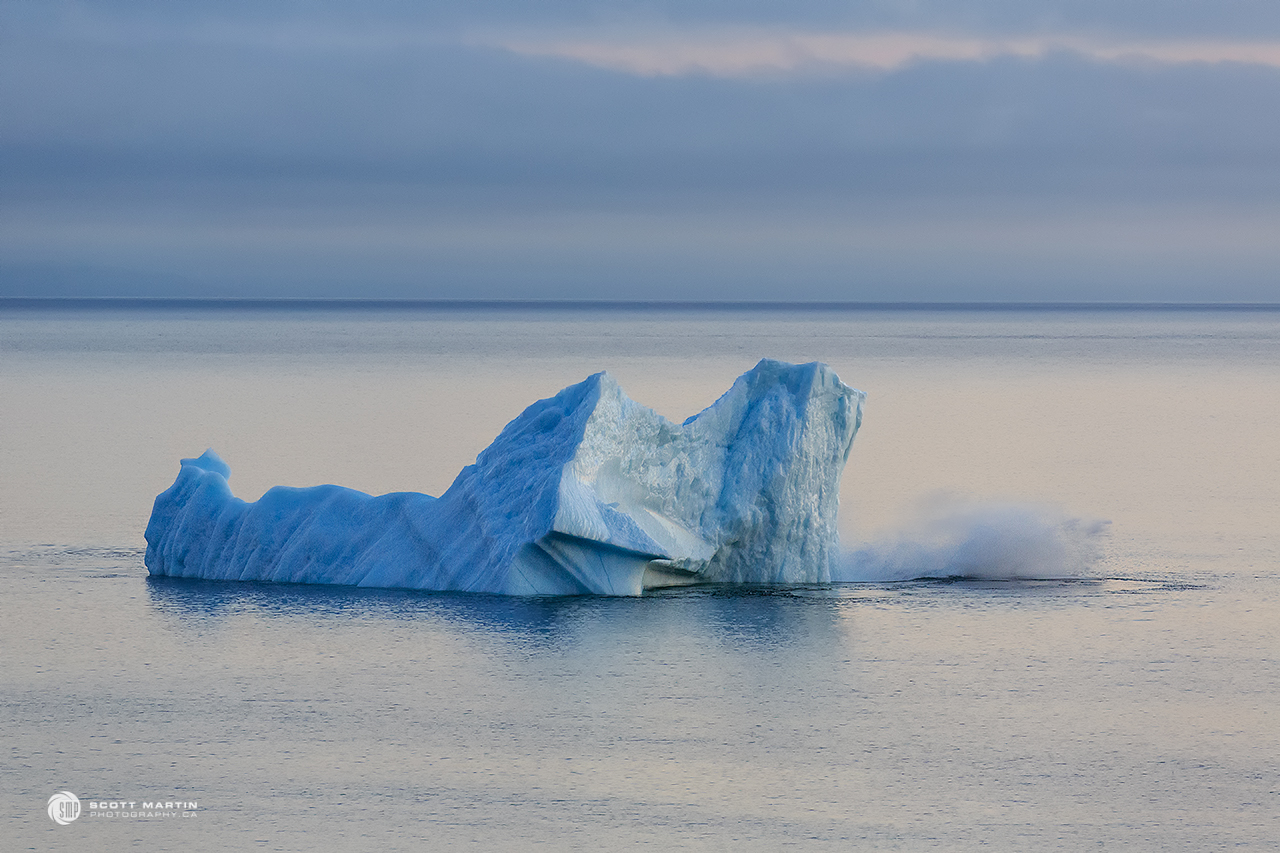
As the iceberg moves, the weight distribution is altered which can cause the iceberg to fragment as seen in this next image. The sound of ice breaking away from the iceberg and splashing into the water is like nothing we had ever heard; like the combination of a rifle shot with thunder.
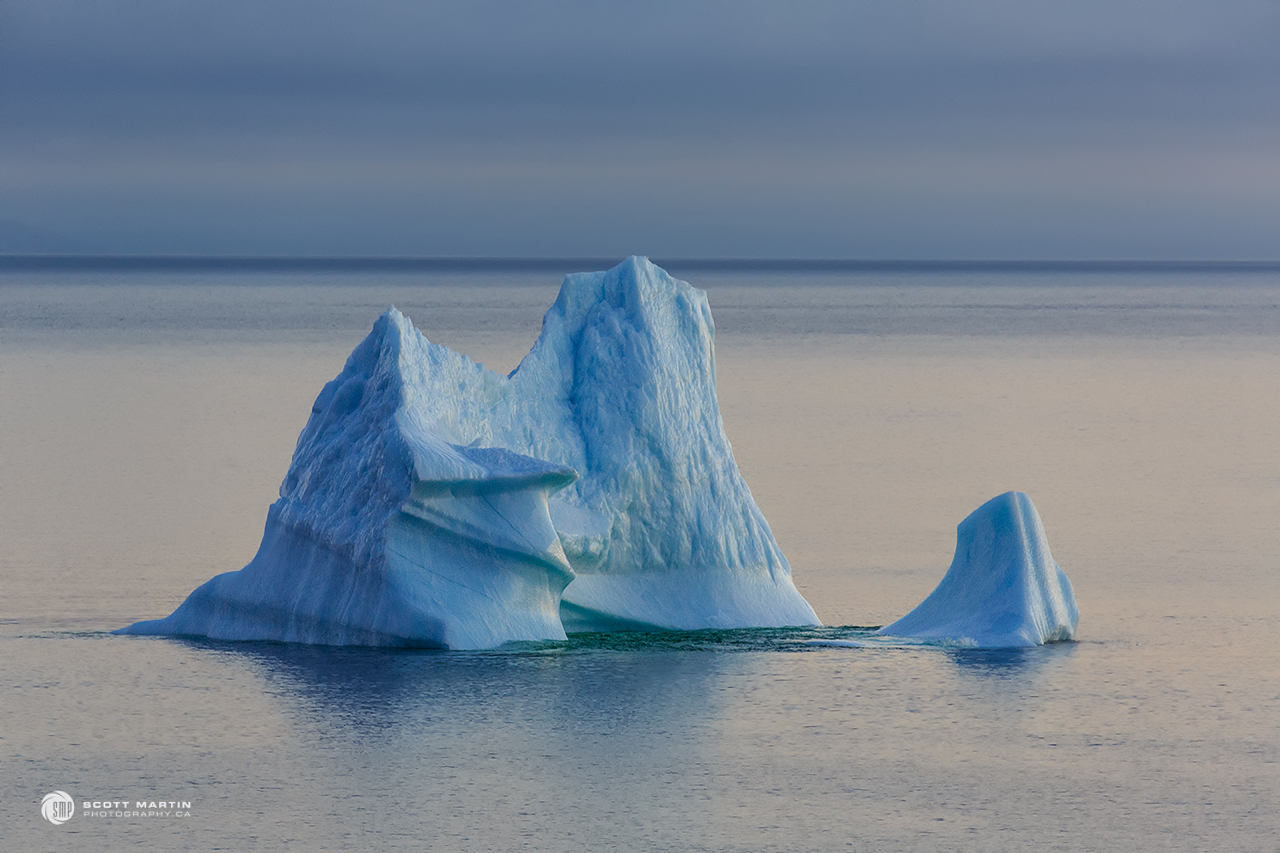
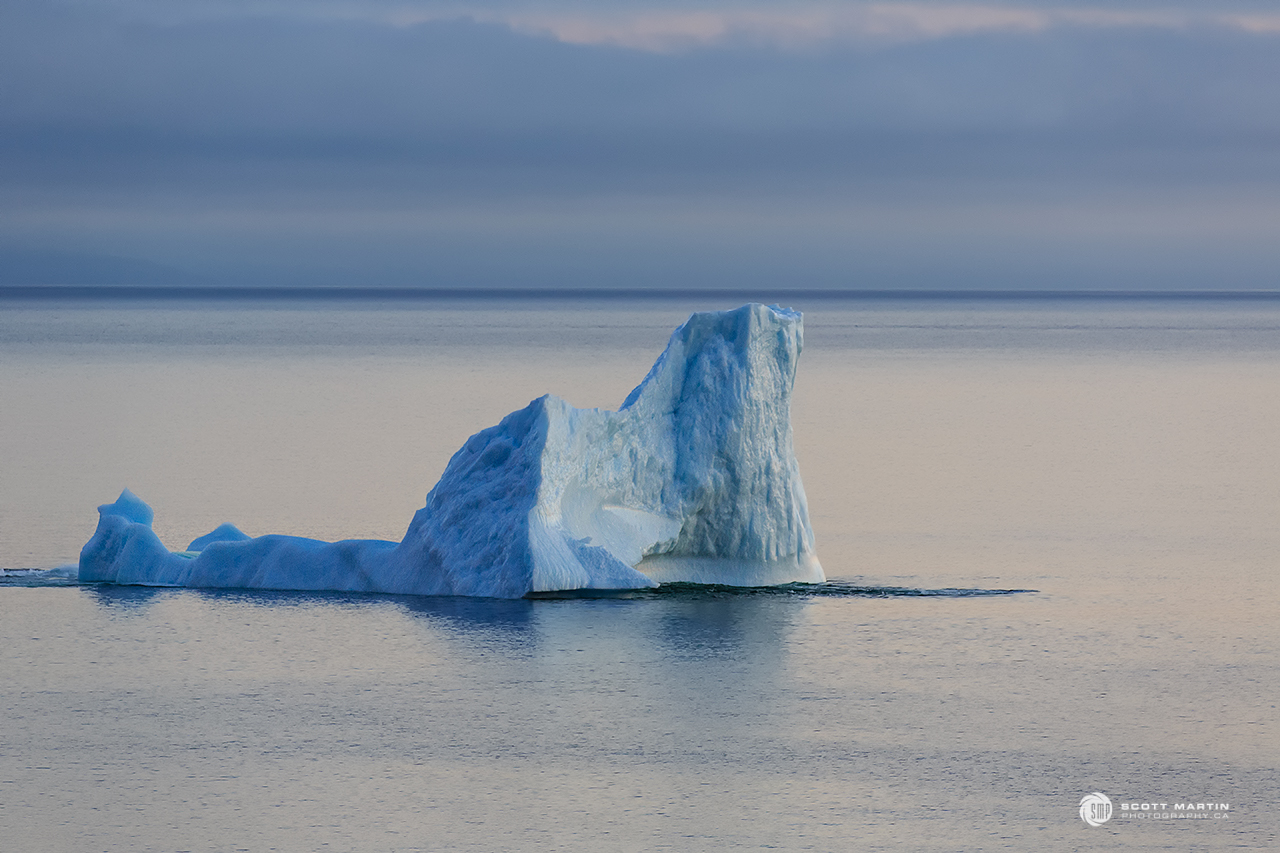
Once the iceberg began to fragment, the process continued and less than five minutes after the first piece of ice fractured and even larger segment fell off the back of the iceberg. Check the water level marks and note how much the ice mass was moving.
I can only imagine what it would have been like to be in a kayak while an iceberg was breaking up around me!
Although we didn’t try a kayak, we connected with Iceberg Man Tours in Twillingate for a two hour cruise highlighted with a visit to the iceberg. Captain Cecil was terrific and we learned so much about Newfoundland, the culture, the whales and the icebergs during our cruise. Captain Cecil is a retired teacher, who grew up in Twillingate, served as mayor of Twillingate and started Iceberg Man Boat tours in 1985. Cecil knows Newfoundland!
The little village of Crow Head, NL as seen from amongst ice fragments around the iceberg.
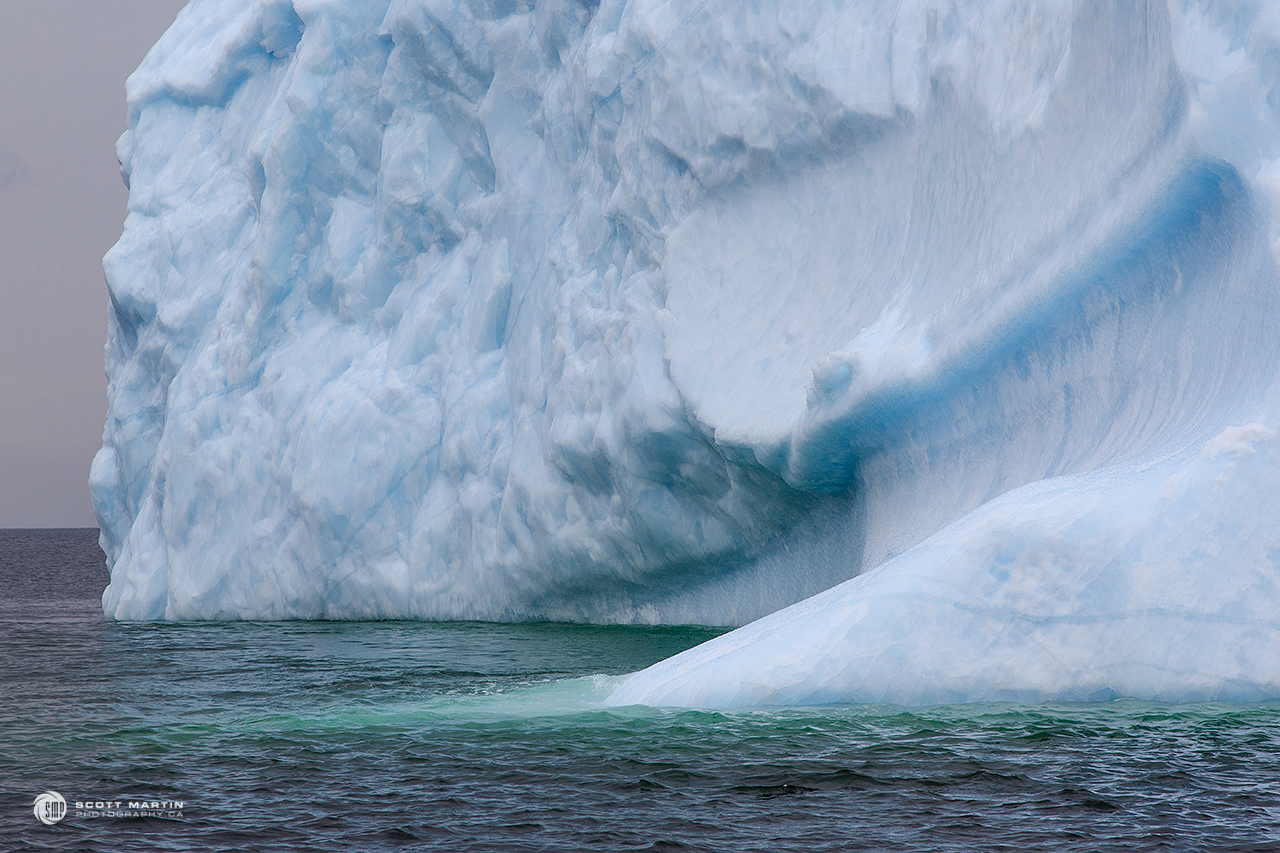
We circled around the iceberg a number of times, taking more than 500 images of it from every conceivable angle. It was hard to put the camera down!
.
Like modern pieces of art.
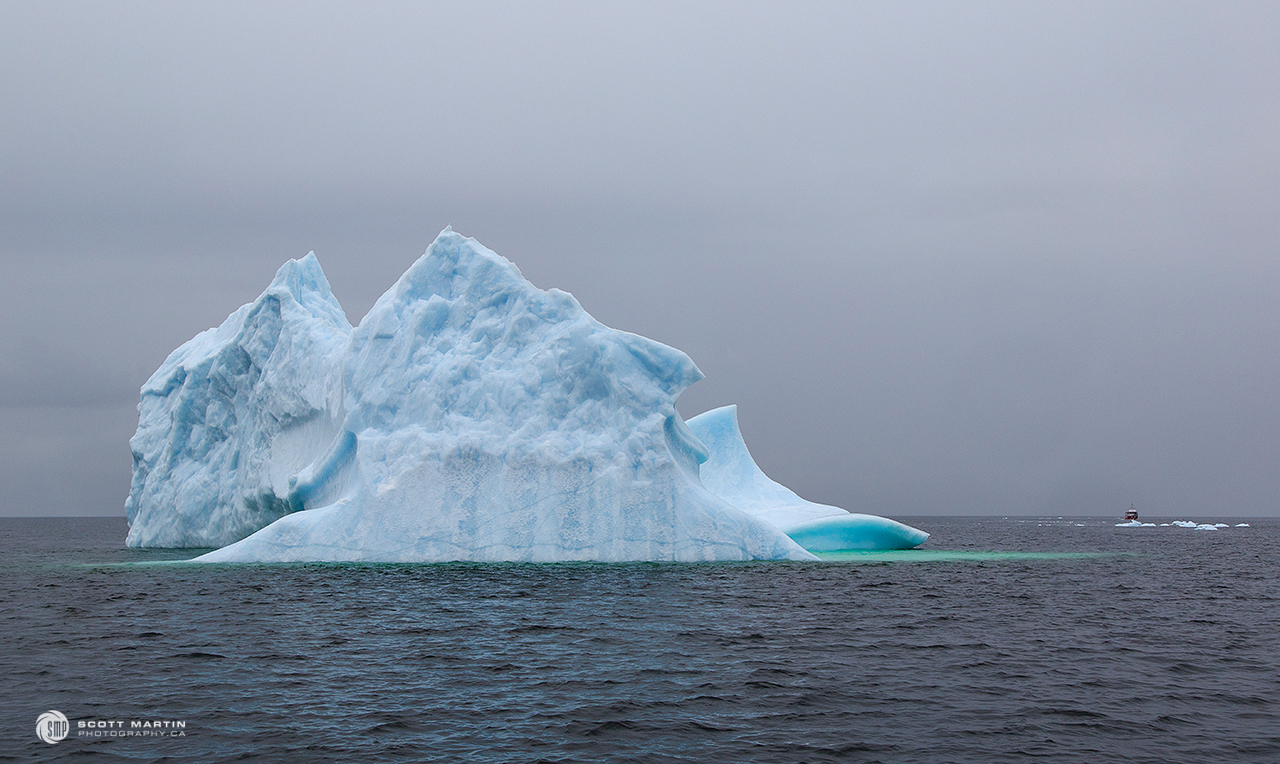
The approaching ship provides an interesting size perspective for the next image.
.
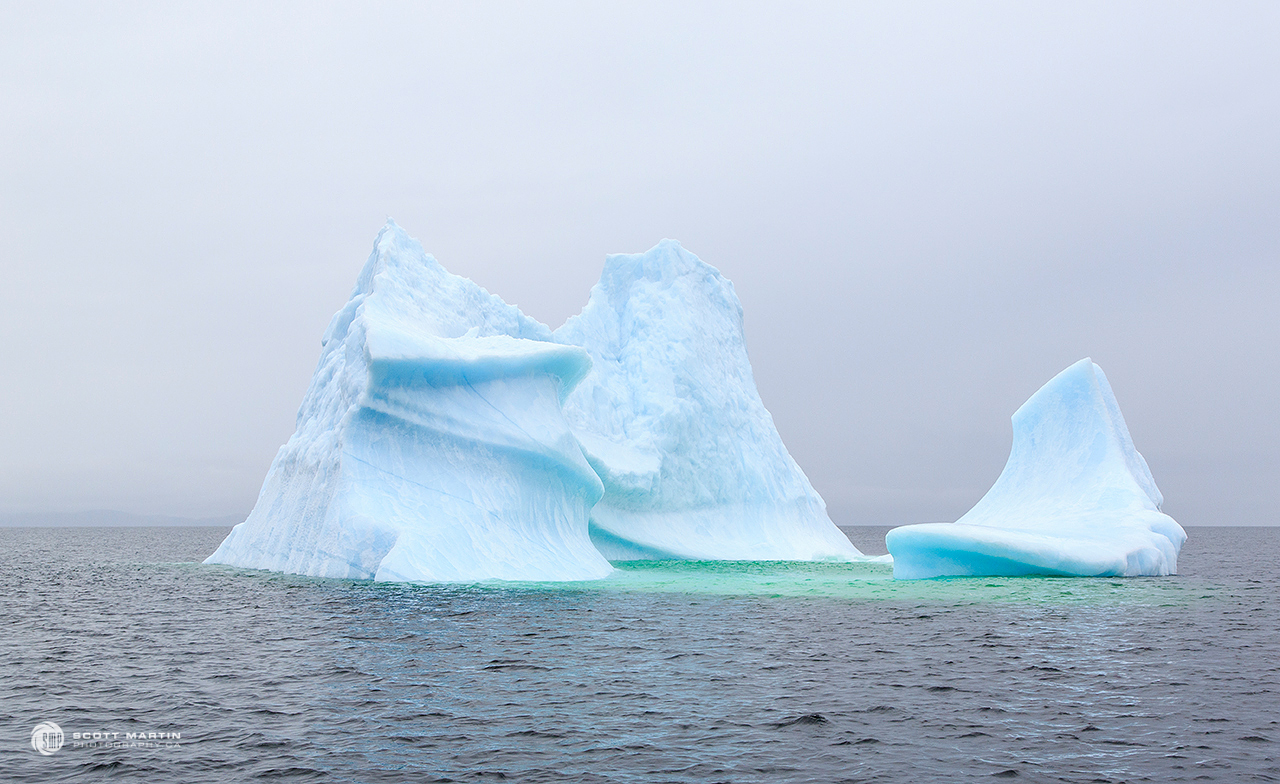
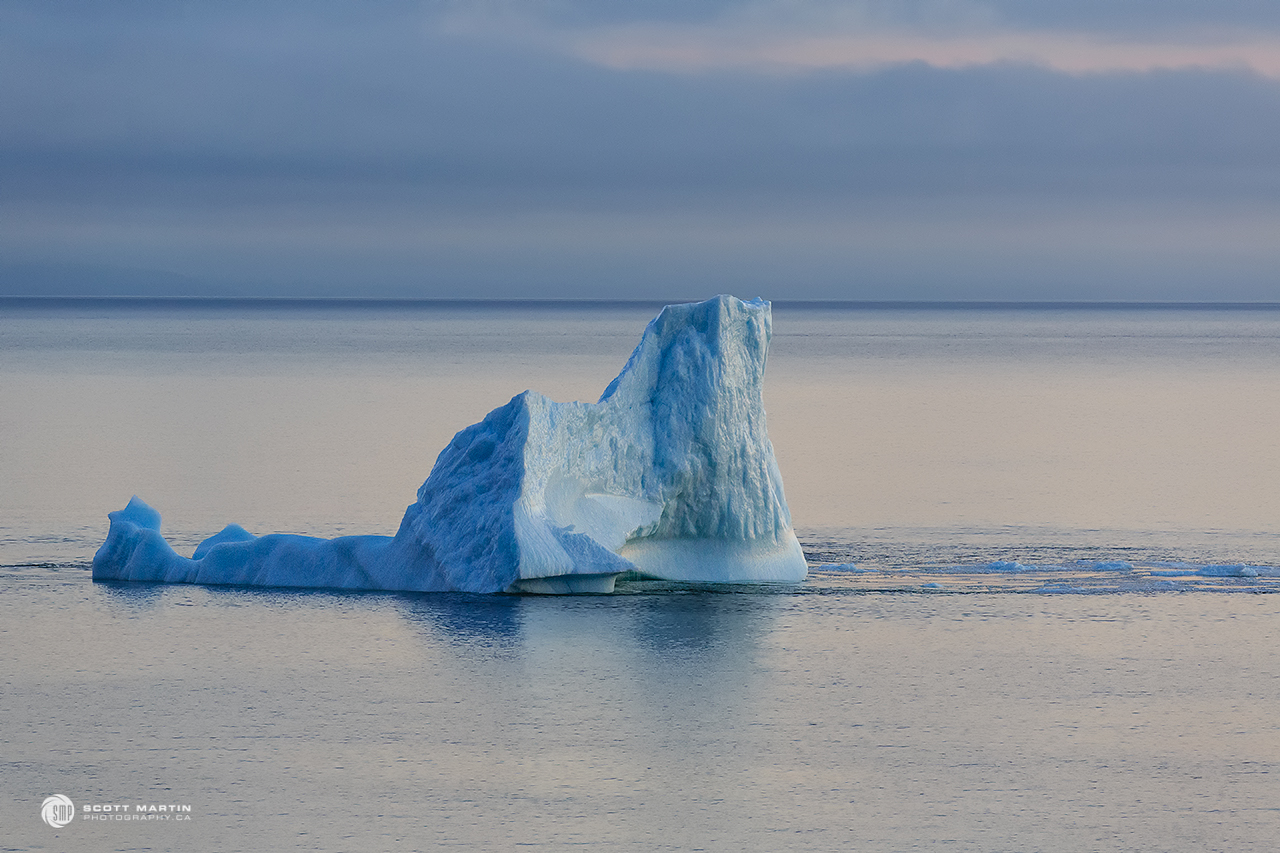
After returning to Captain Cecil’s dock in Twillingate and enjoying dinner in a little restaurant on the edge of the harbour we headed back to Crow Head to watch the sunset and see the iceberg one last time. Although we couldn’t frame the sun setting over the iceberg from the mainland, we did enjoy the colours and the new look they gave the iceberg. It was remarkable how much the iceberg had changed in ten hours.
As the sun went down we were chatting with another couple and their daughter and it turned out the father & daughter were the two kayakers from earlier in the day! Ironically, as they were saying they felt more awe than fear as the large chuck of ice fell from the iceberg close to their kayaks, a loud rife sounding noise came from the iceberg and the entire iceberg began to pitch and roll quite drastically. By this time it was about thirty minutes after sunset and it was quite dark, however I just had to take some images, even though an ISO of 8000 was required.
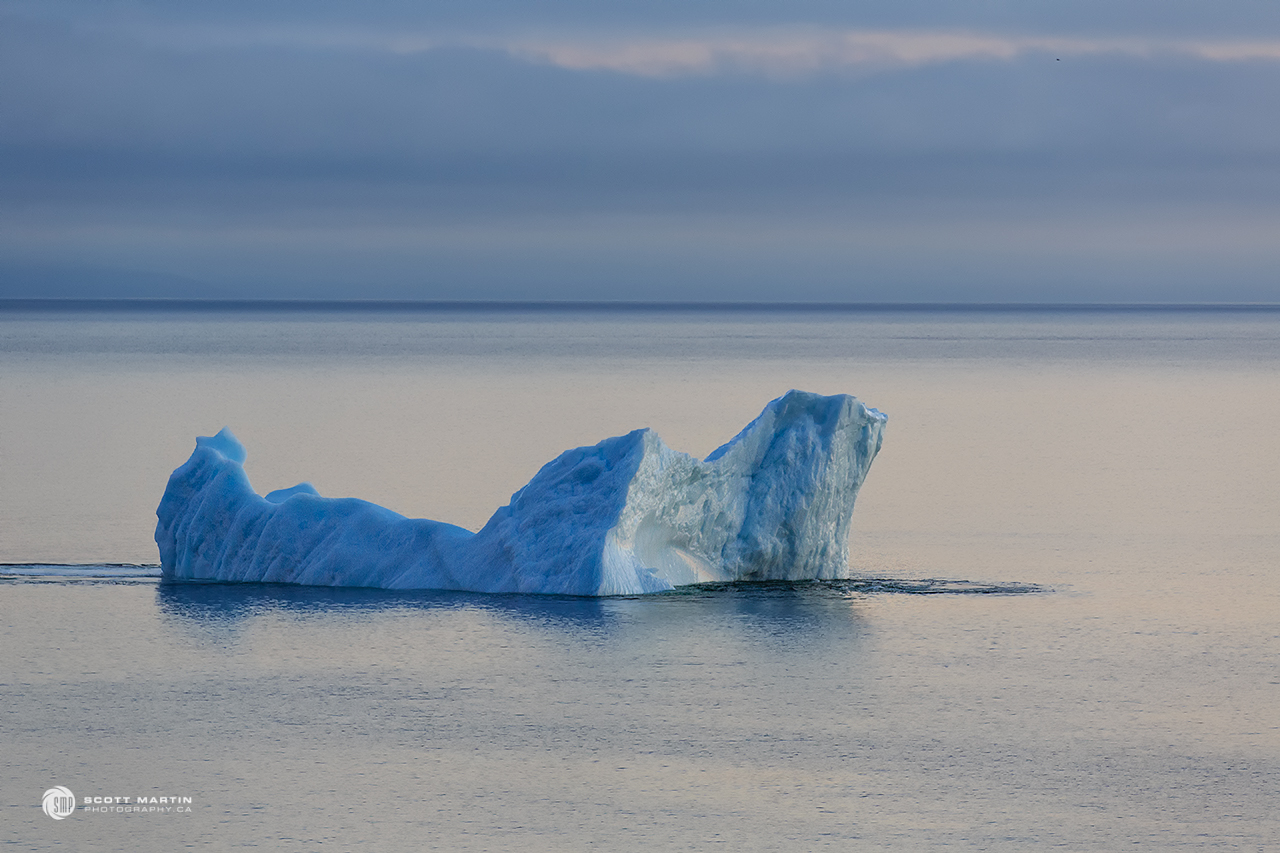
The iceberg slowly begins rotating in a clockwise direction.
.
.
The beautiful modern art looking section of the iceberg is about to disappear forever.
As the iceberg rotates a whole new mass of ice appears on the left side. This section was about 100′ in length.
.
The image above shows the iceberg at its maximum rotation and now it slowly reversed its rotation and began to roll away from us. The unsettling of the iceberg caused another large pice of ice to flake off, as seen on the right side of the following image.
This was a huge pice of ice, at least thirty feet in height. The sound of the fragmentation and ensuing splash was a unique and unforgettable sound.
.
After the enormous splash, the iceberg silenced and the surrounding waters calmed.
The previous images were taken over approximately ten minutes and by the end of that time the iceberg had loosed itself from the ocean floor 580′ below and slowly started drifting out into the North Atlantic. All of the images in the previous sequence were taken with the camera on a tripod so you can get a sense of how much the iceberg was moving by comparing its profile against the horizon.
When we left our hotel early in the morning, Deb & I had no idea we would be spending the entire day watching an iceberg, but what a day it was. Never having seen an iceberg before and then watching it break apart over the day and move out to sea was a highlight of the trip. We highly recommend when travelling to ‘The Rock’ that you schedule a time of the year you are likely to see some icebergs. They will never disappoint.
If you haven’t already done so, please subscribe to the blog and receive notification of future blog posts. The next two or three will be centred on Newfoundland; its rugged geography, old light houses, Puffins and Humpback Whales!
As we come to the end of another year, I’d like to thank all of you who have followed the blog. Your comments, support and encouragement are much appreciated. From our family to yours, a very Merry Christmas and Happy New Year.
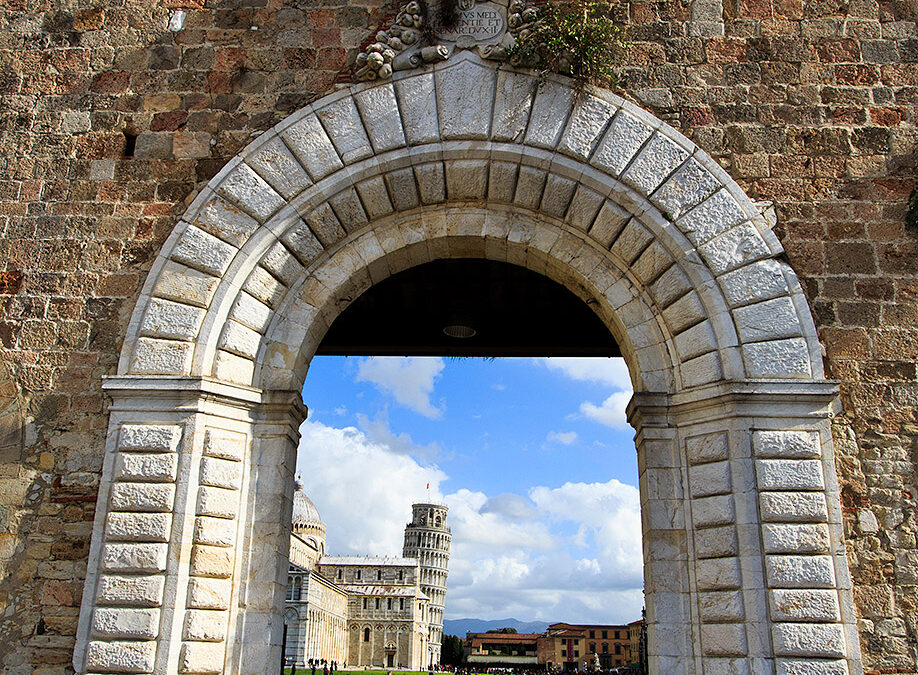
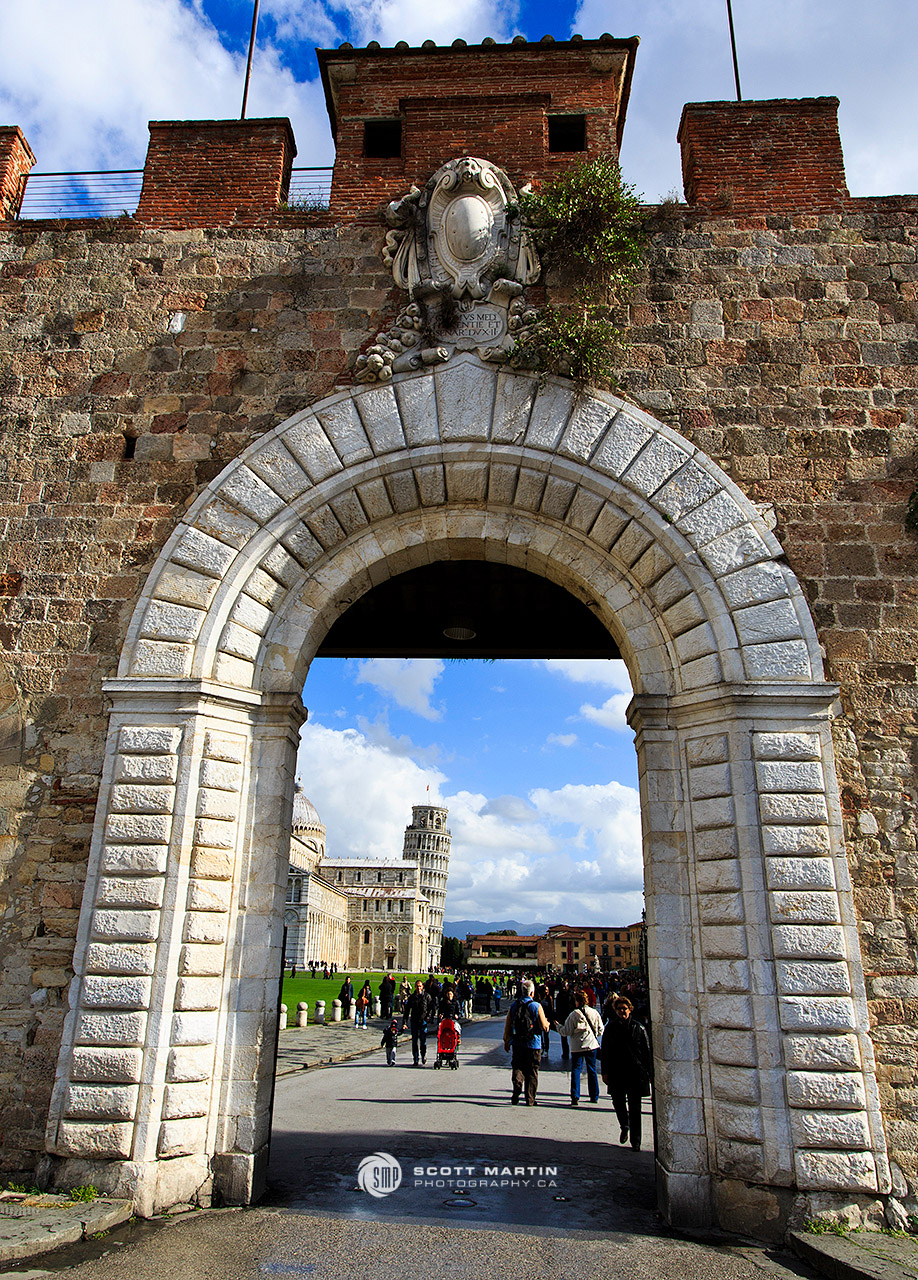
The beautiful country of Italy is home to many unique and well known buildings with the Leaning Tower of Pisa being among the most iconic. As Deb & I left Cinque Terre and headed to the Amalfi coast for a few days in Positano we made it a point to stop and visit the Leaning Tower.
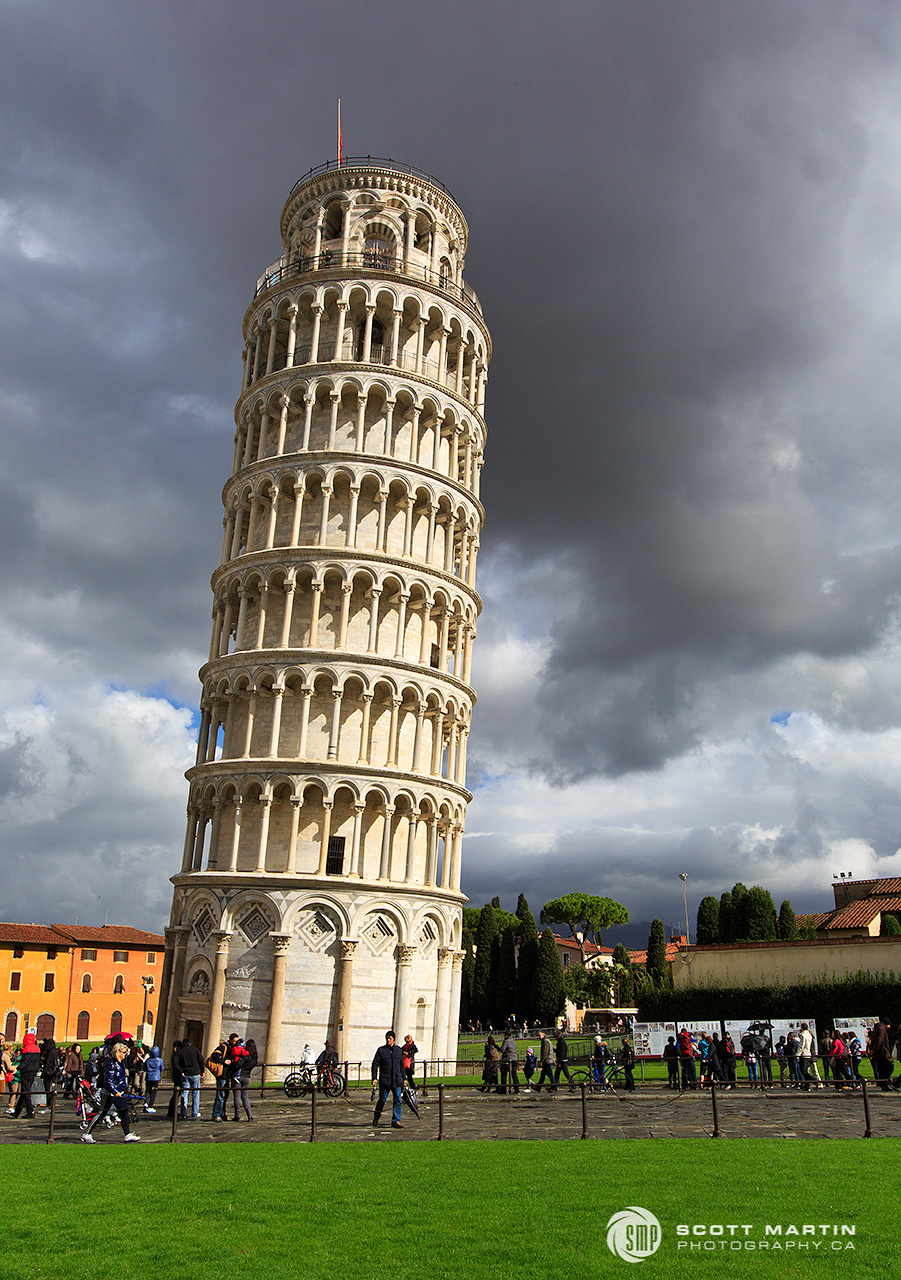
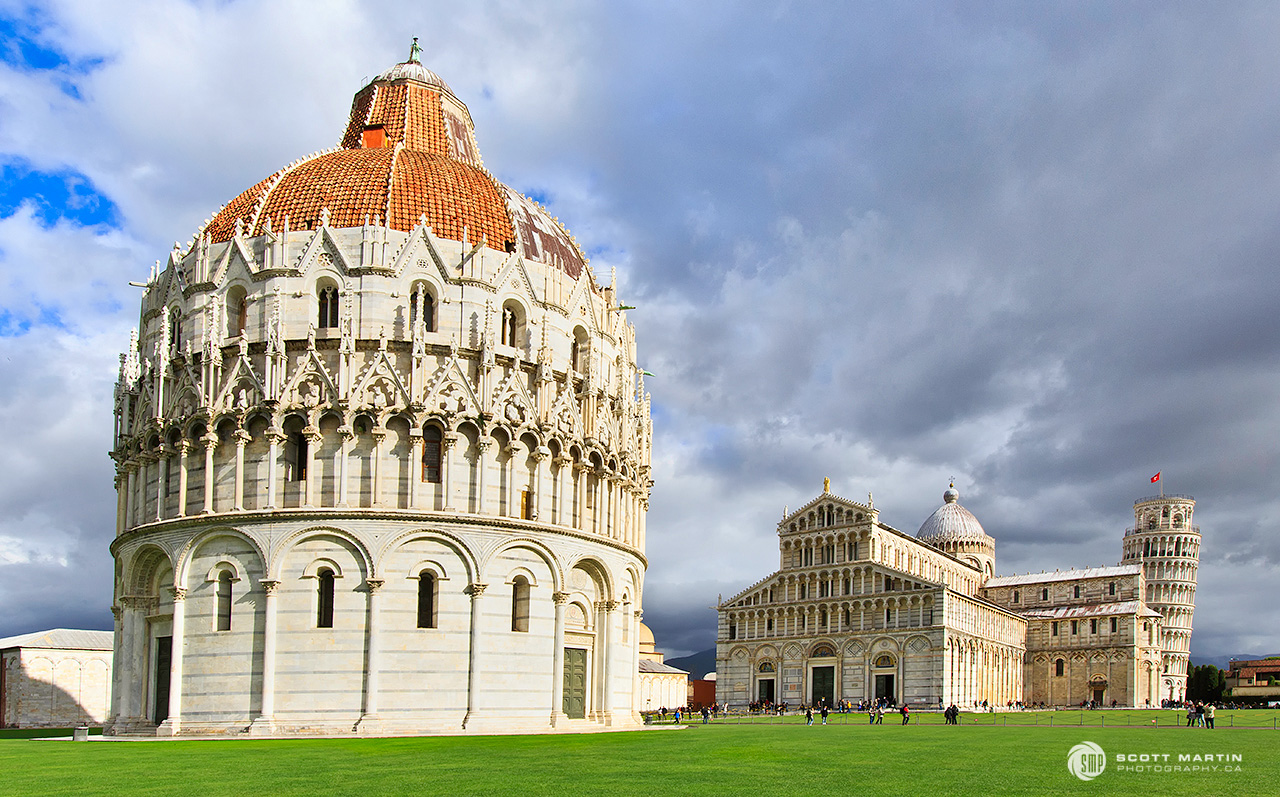
Pisa is a coastal city of over 90,000 people in the famous Italian region of Tuscany. The Leaning Tower of Pisa is a free standing bell tower, or campanile, of the Pisa Cathedral. The partially walled grounds of the cathedral have three primary buildings; the cathedral, the baptistery and the campanile. As we approached one of the gateways to the campus we experienced our first glimpse the Leaning Tower. One of the many joys of travel is the feeling engendered when seeing an iconic landscape or building in person for the first time and this image captures that moment with the famous bell tower.
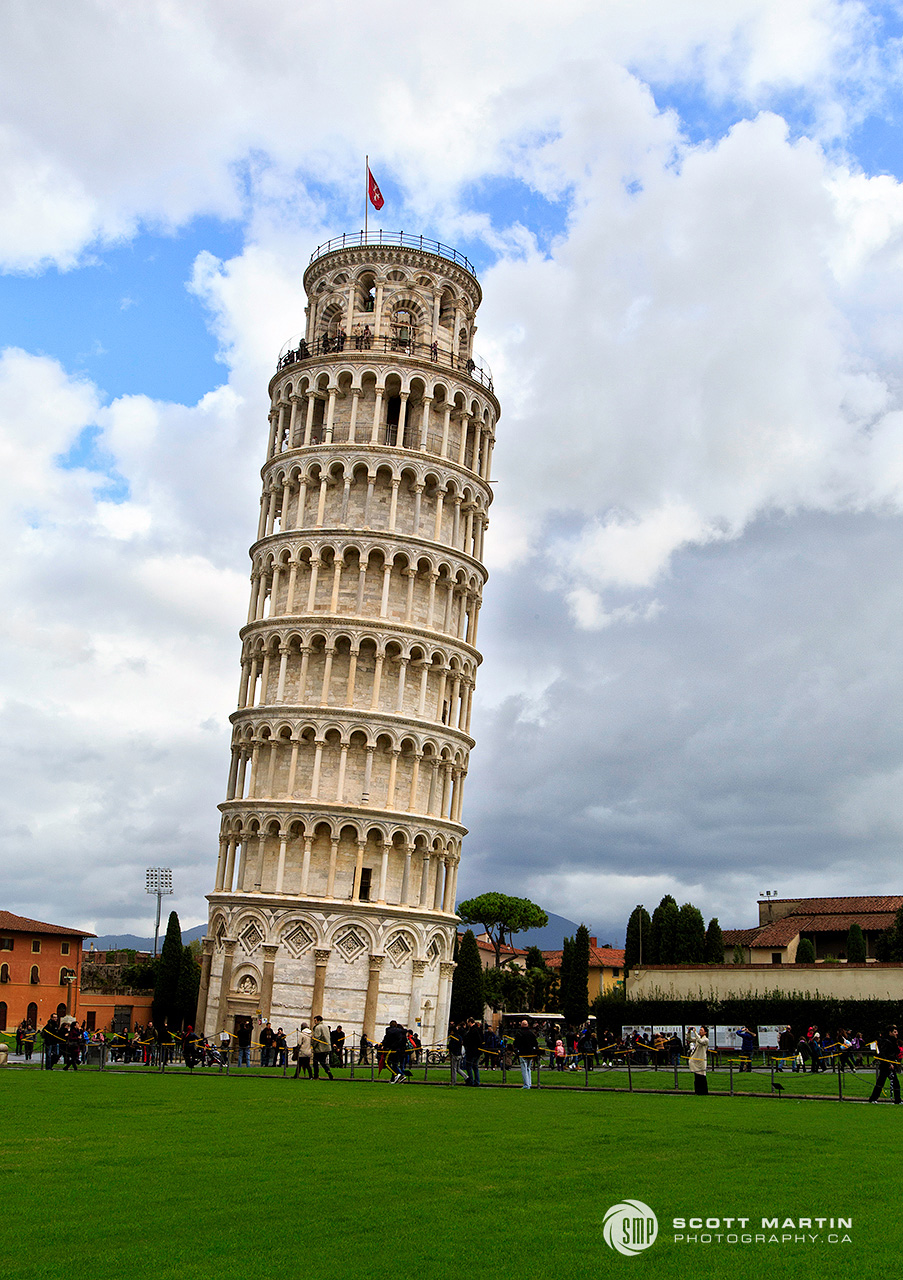
The tower is ~185 feet high and took many many years to complete. The tilting of the tower began to occur during its initial construction primarily due the sandy ground on one side of the tower being too soft to support the extreme weight of the structure (14,500 metric tons).
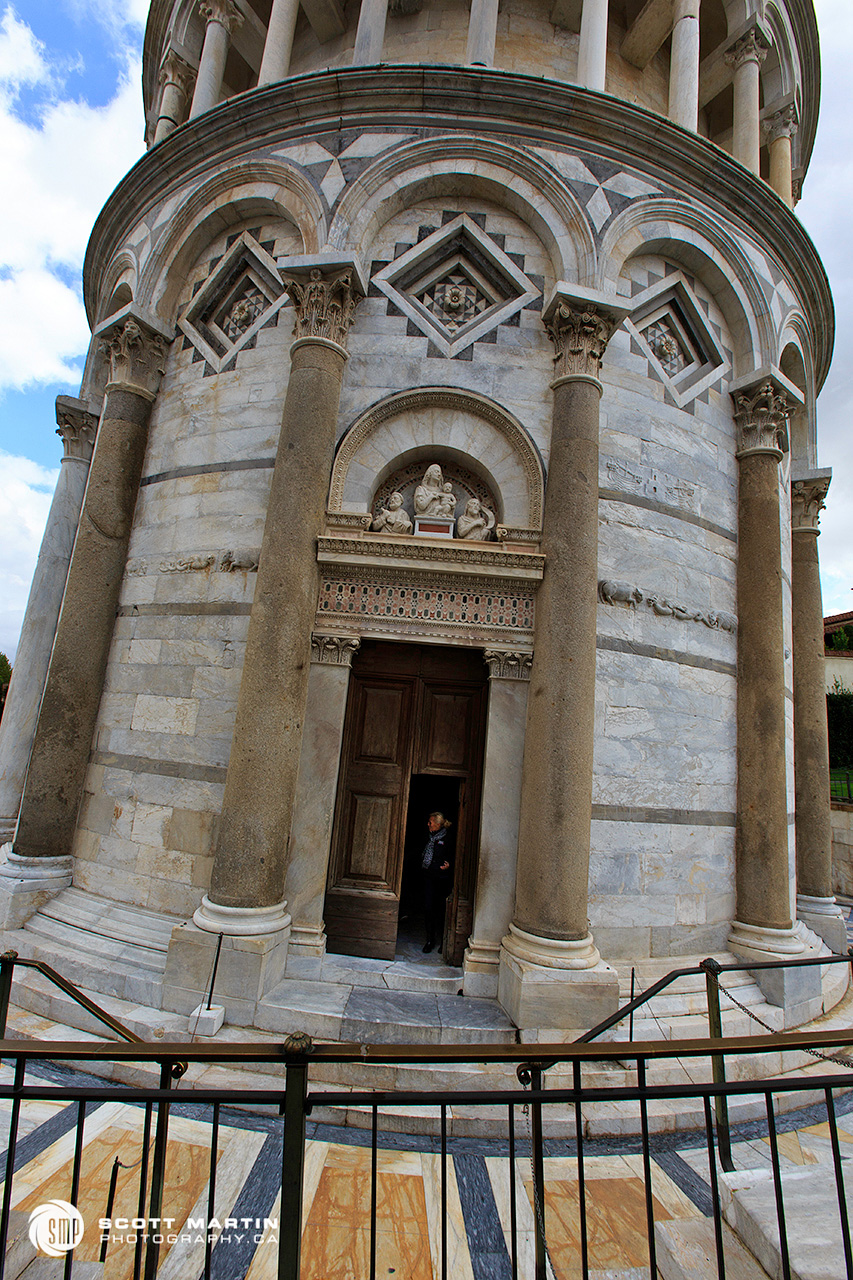
The walls at the base of the tower are made of solid white marble and are an incredible eight feet thick in order to create a sufficient support on which to build the seven stories above. Unfortunately, the ground below didn’t do as well! It’s hard to believe that the below grade foundation is only ten feet deep for a structure that is almost 200′ high. Certainly the design of the tower was flawed from the outset.
Construction of the tower began on August 14, 1173 and wasn’t completed until 1372 when the bell chamber was finished atop the tower 199 years after the ground breaking. Recent cleaning and surface restoration of the tower removed centuries of dirt & grime from the industrial revolution which had darkened the tower to a dirty grey colour. This next image shows the beautiful white sunlit marble against a stormy dark back ground. It really is a beautiful structure.
By 1990 the tower’s lean reached 5.5° and the campanile was closed to the public. Steel guy wires were attached to the third level, the seven bells were removed from the bell chamber and nearby apartment buildings were evacuated due to fear of spontaneous toppling of the tower. Between 1990-2001 the tower was straightened and stabilized. This was accomplished by removing 1350 cubic feet (77 tons) of earth from below the high side of the foundation. This restored the lean of the tower to about 3.9° which it was in the late nineteenth century. The decision was made not to place the tower in a vertical orientation largely due to tourism considerations. Its present lean means that the centre point at the top of the tower is 12’10” from the centre point at the base.
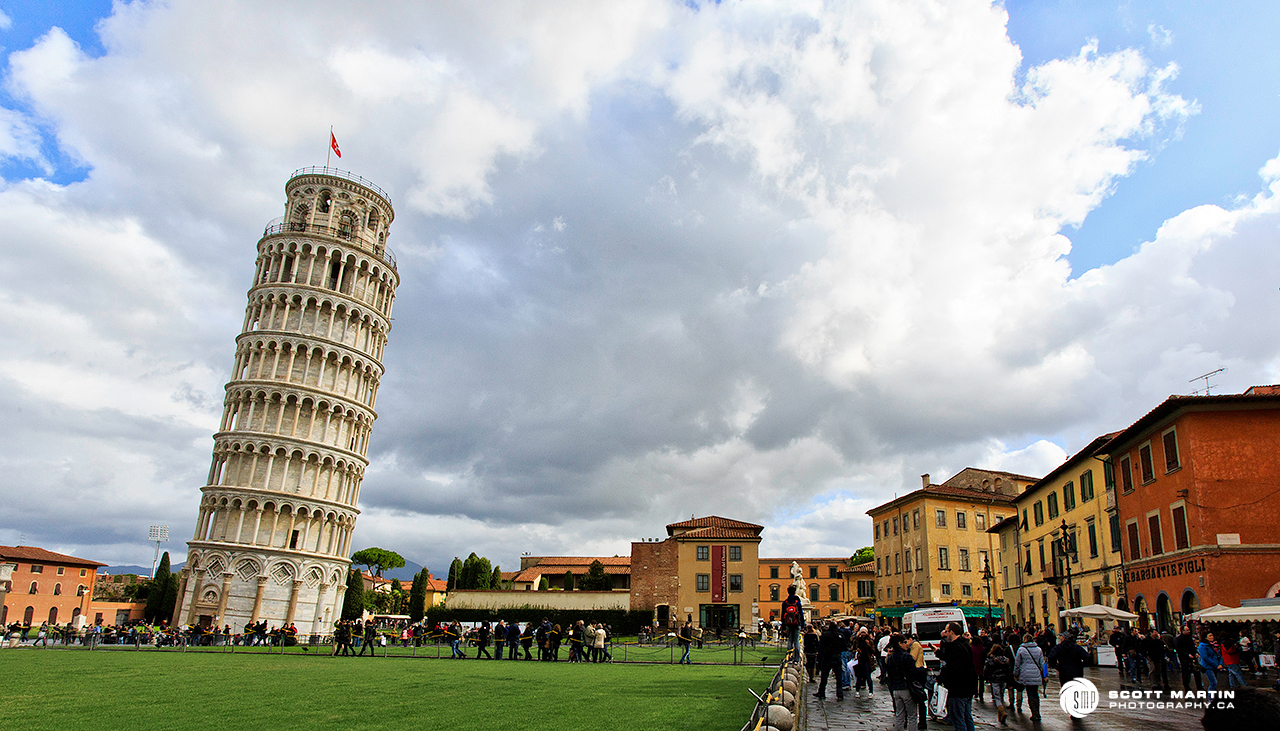
Although this next image has not been manipulated, it was taken at a focal length of 16mm on a full frame camera and the native optics of the lens creates an exaggerated perspective of the tower.
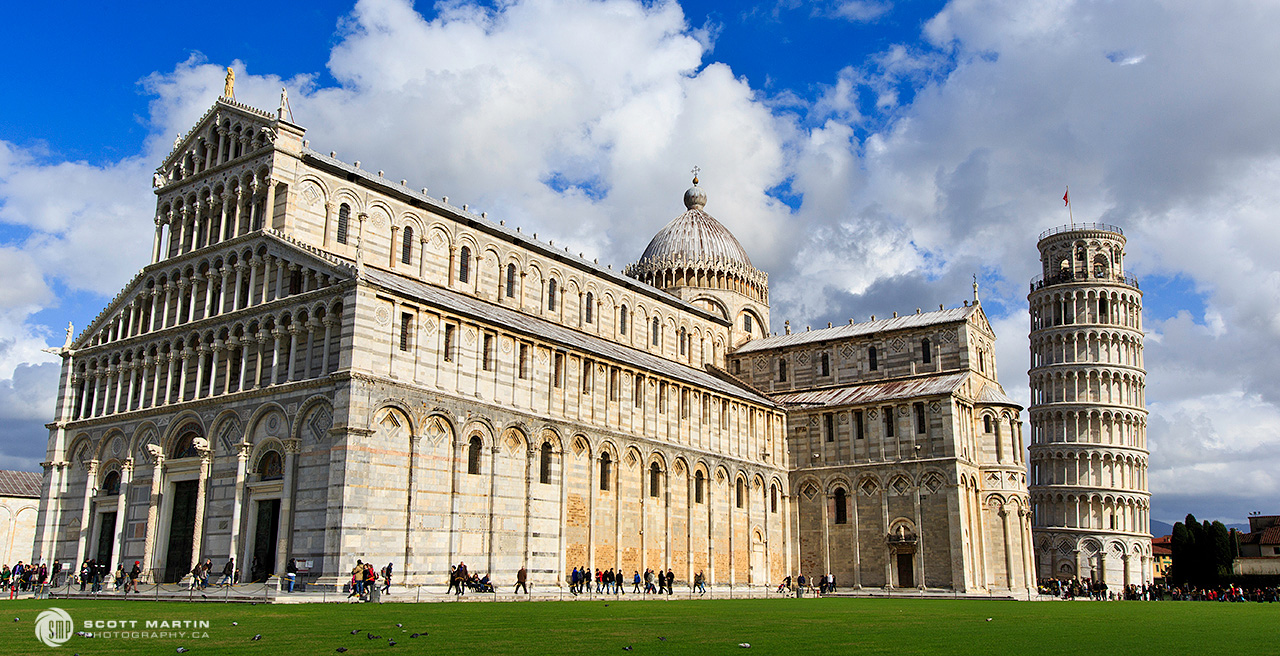
The Pisa Cathedral is an impressive structure in its own right, designed in the shape of a latin cross and constructed of white & grey marble. The cathedral began construction in 1063 and was completed in 1092.
It’s hard to believe when walking through the campus that these buildings are almost one thousand years old.
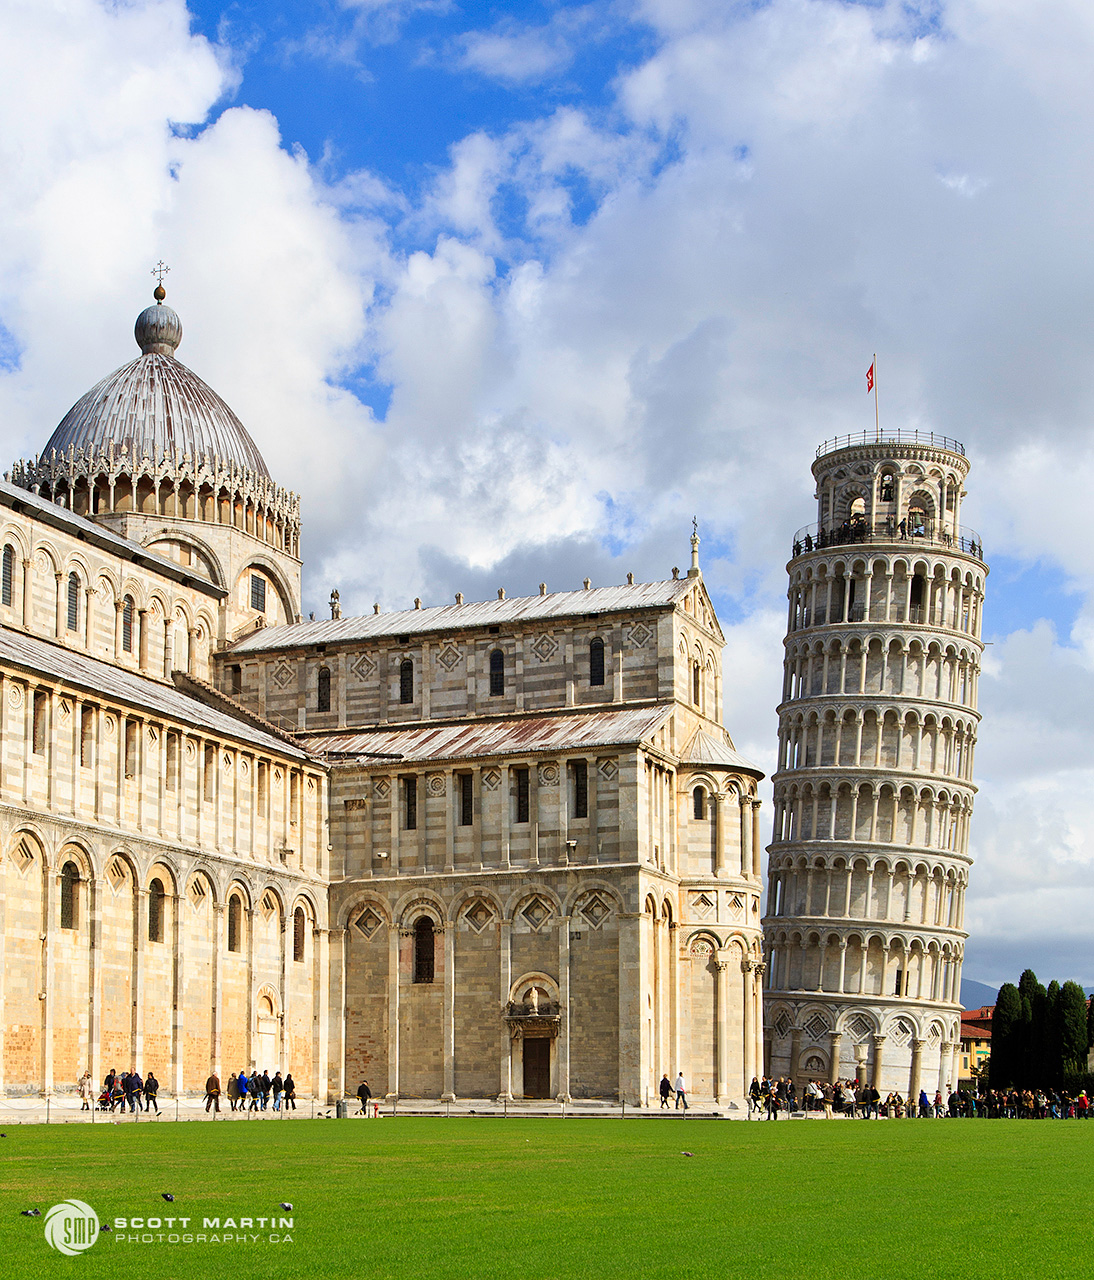
The third major building on the cathedral grounds is the baptistery. It was the second structure chronologically, with construction starting in 1152 and completed in 1363, two hundred and eleven years later. The Pisa Baptistery is the largest in Italy and like the adjacent structures is constructed of marble. The interesting thing to note when looking at the baptistery is the different architectural styles of the building, presumably a result of the 200+ years it took to build. The base of the building is in Roman styling with rounded arches above the columns while the upper sections of the building are of gothic styling with pointed arches atop the columns.
The baptistery also has a relatively small foundation and shares the sandy earth of the cathedral & bell tower so it also leans, however an almost imperceptible 0.6° towards the cathedral.
Although we only spent a few hours visiting Pisa, it was a great time and a pleasure to see and learn a little about its iconic landmark.
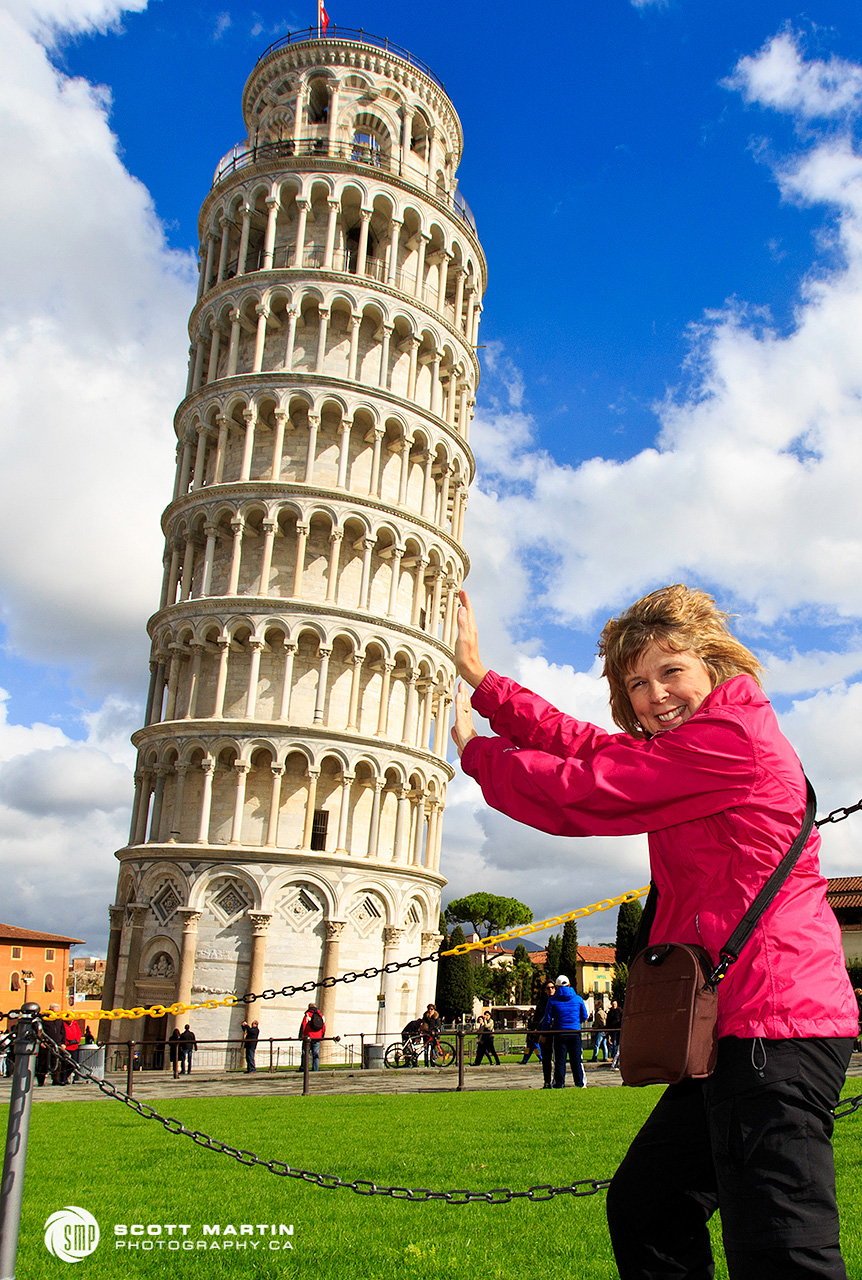
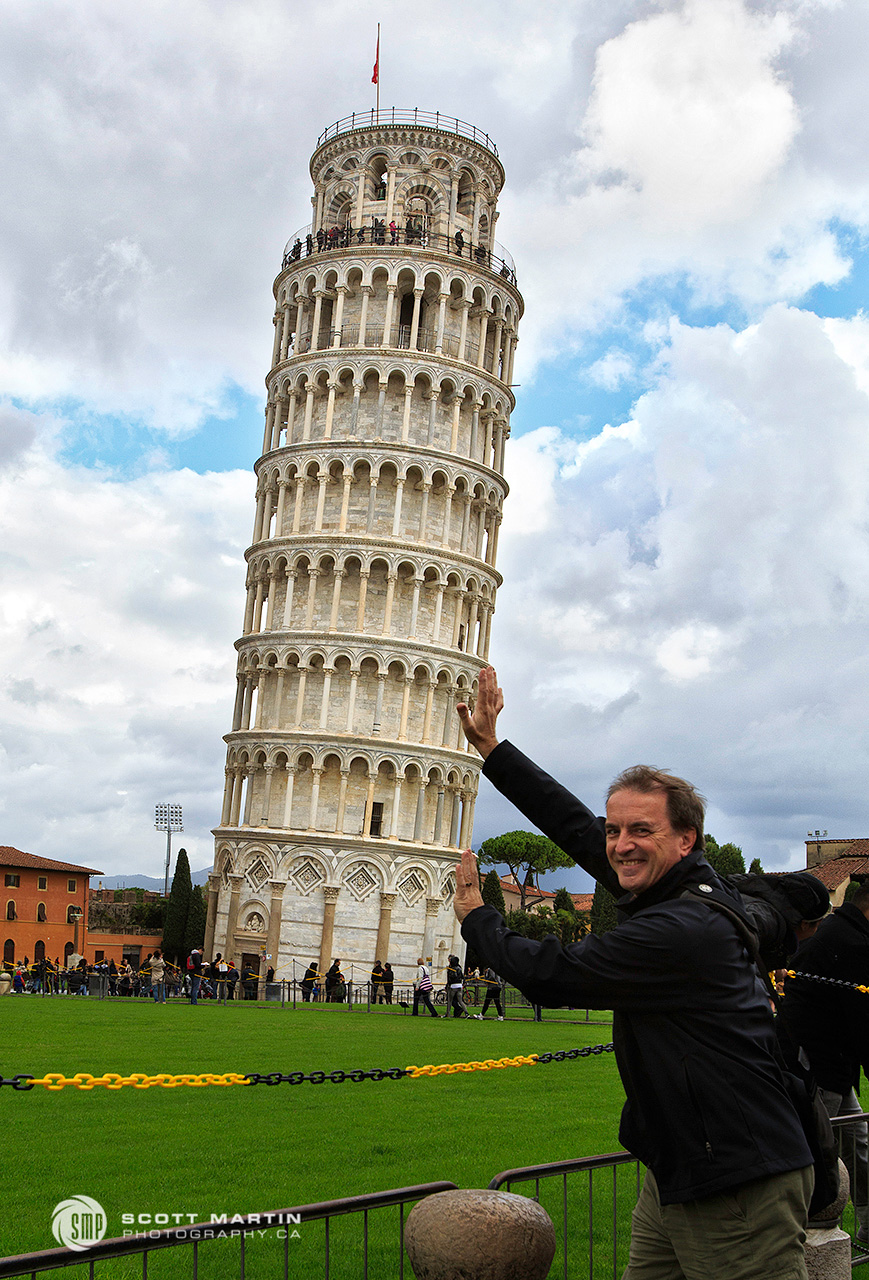
Deb & I couldn’t help taking some classic tourist shots of the tower while we were there. As a photographer, one always looks for that ‘original shot’, especially of the well known landmarks…..I’m quite certain these next two images don’t qualify 🙂
.
Other images from Pisa can be seen by clicking on this link plus there are a number of other galleries from various locations in Europe that are also posted on the website.
All of the images in this post were taken using a Canon 5D Mk III and EF 16-35 f2.8 wide angle zoom lens.
Thanks for taking the time to read through this post and I trust you’ve enjoyed the Leaning Tower of Pisa. As always you comments and questions are much appreciated.
During summer vacation we spent a day with our great friends, Tim & Cindy, touring around Renfrew county. Both Tim and I were born in Renfrew County so it was great to spend a day on the old stomping grounds. Renfrew County is Ontario’s largest county so there is much to see and plenty to do, certainly more than what can be packed into one day.
Food stops were a delight with ice cream at Brumm’s Dairy in Pembroke then off to Eganville for fries at the Jolly Fryer and latte’s and espresso at Engine House Coffee. How can you beat fries, ice cream and coffee?
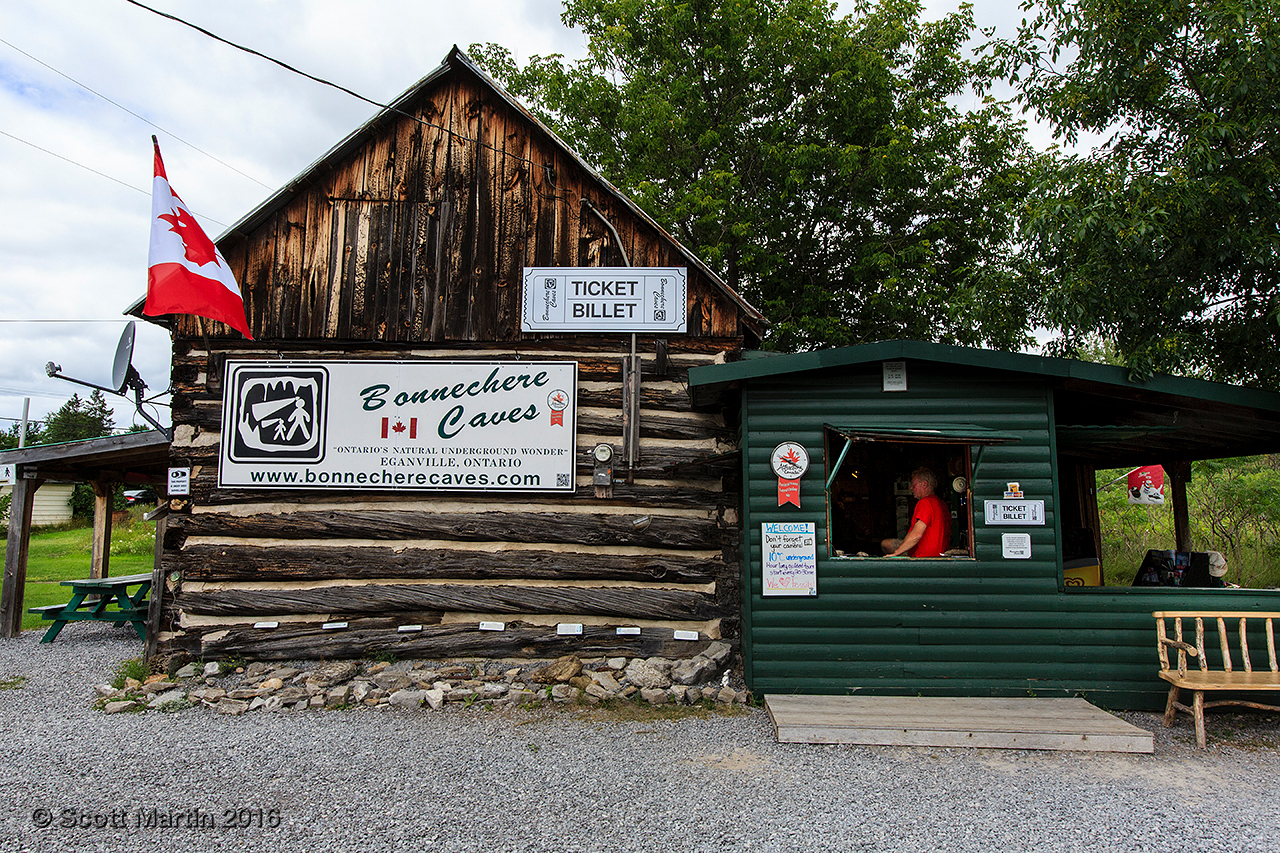
From a photographic perspective the highlight of the day was capturing the Bonnechere Caves and the Bonnechere River which rages through the area providing incredible rapids and waterfalls to photograph.
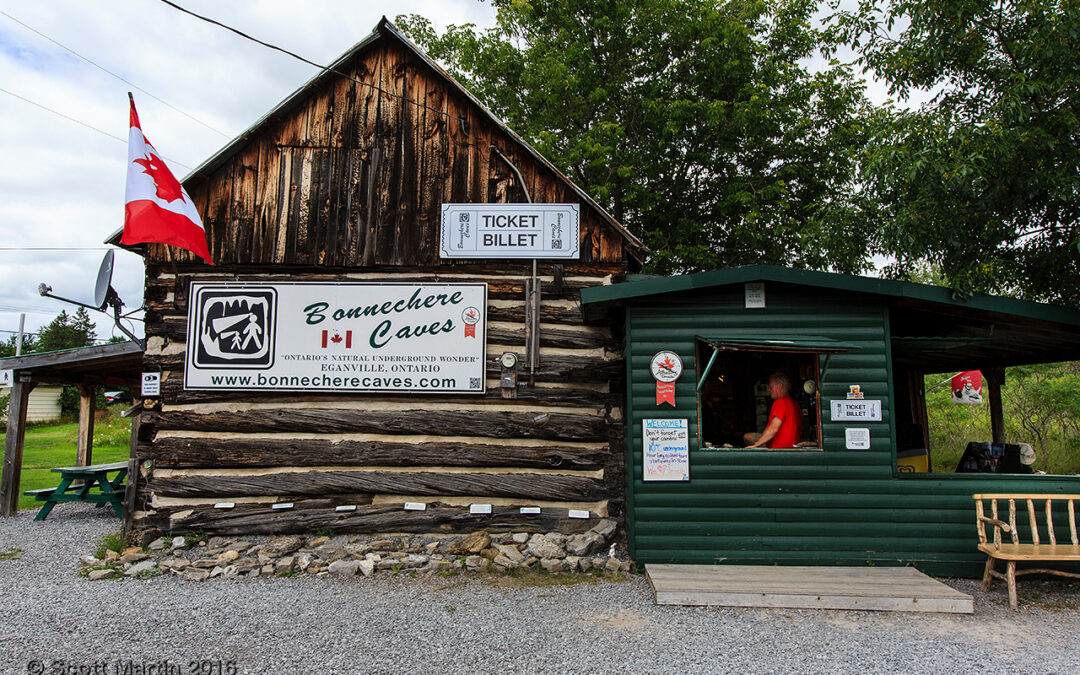
Although the Bonnechere Caves have been there a lot longer, they have been open to the public since 1955 when Tom and Ruth Woodward purchased the land and explored and developed them for public access. Check out their website via this link if you want to learn more about the caves and their history.
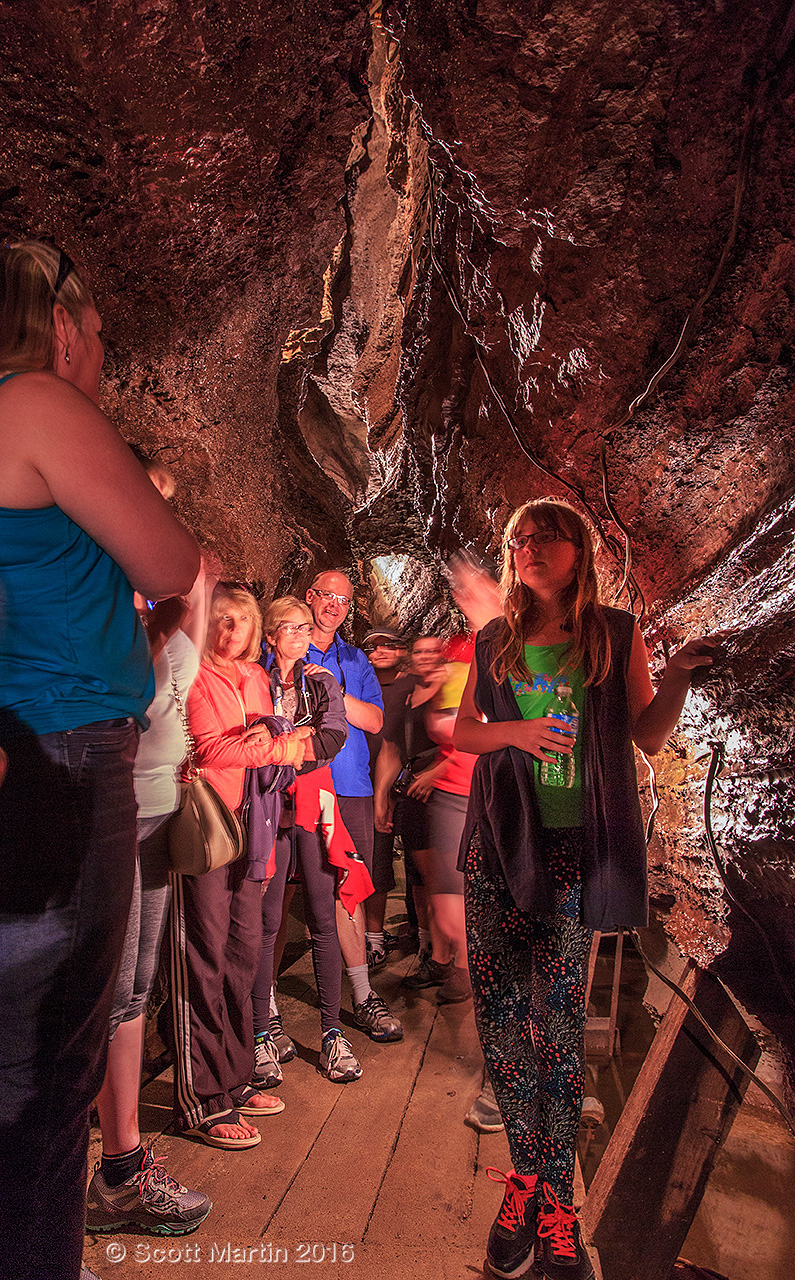
The atmosphere at the caves is laid back and welcoming. Tours leave from the parking lot every half hour and they operate daily from Victoria Day to Thanksgiving. Our tour guide was excellent with a perfect blend of history, education, story telling and lots of humour. It was excellent and brought back fond memories from when I last visited the caves 45 years ago.
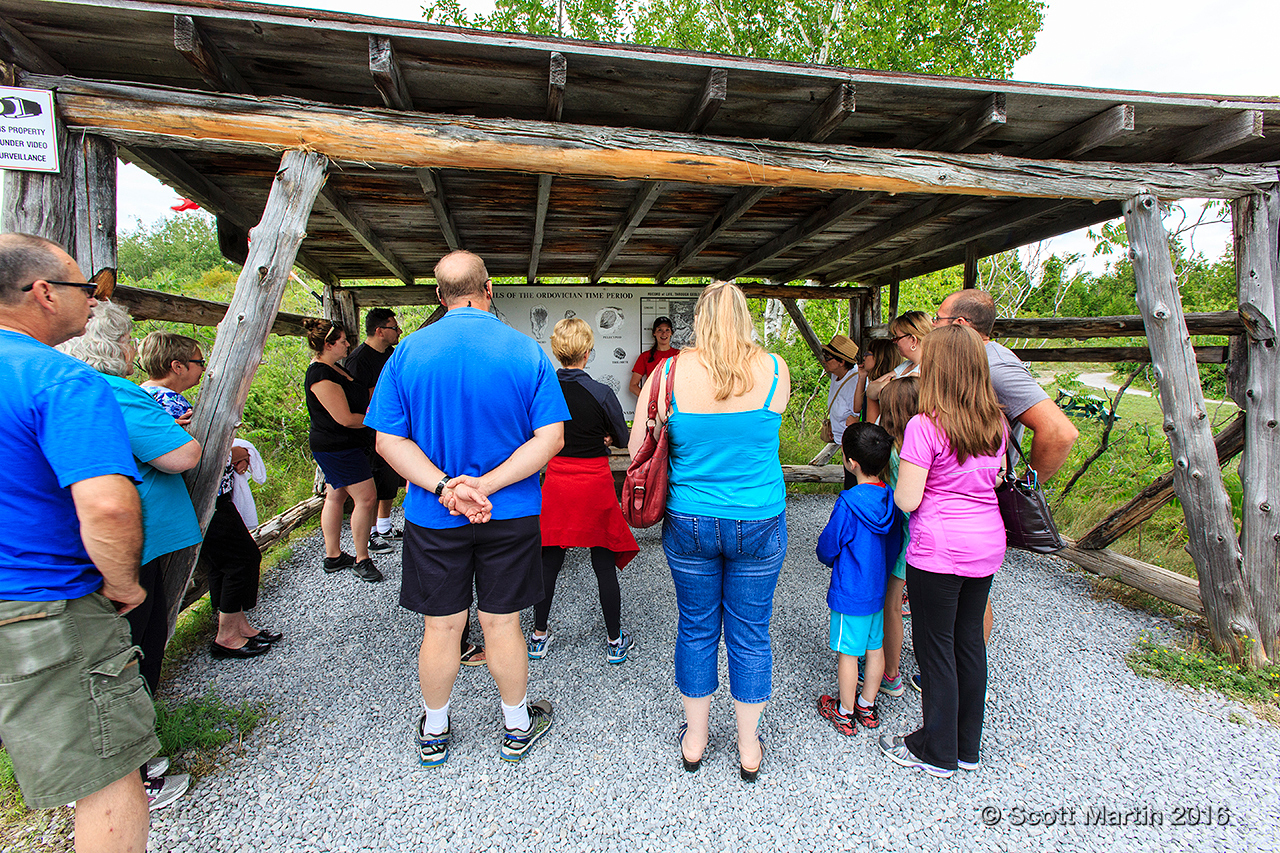
Our group being introduced to samples of the many fossils that are found in the area.
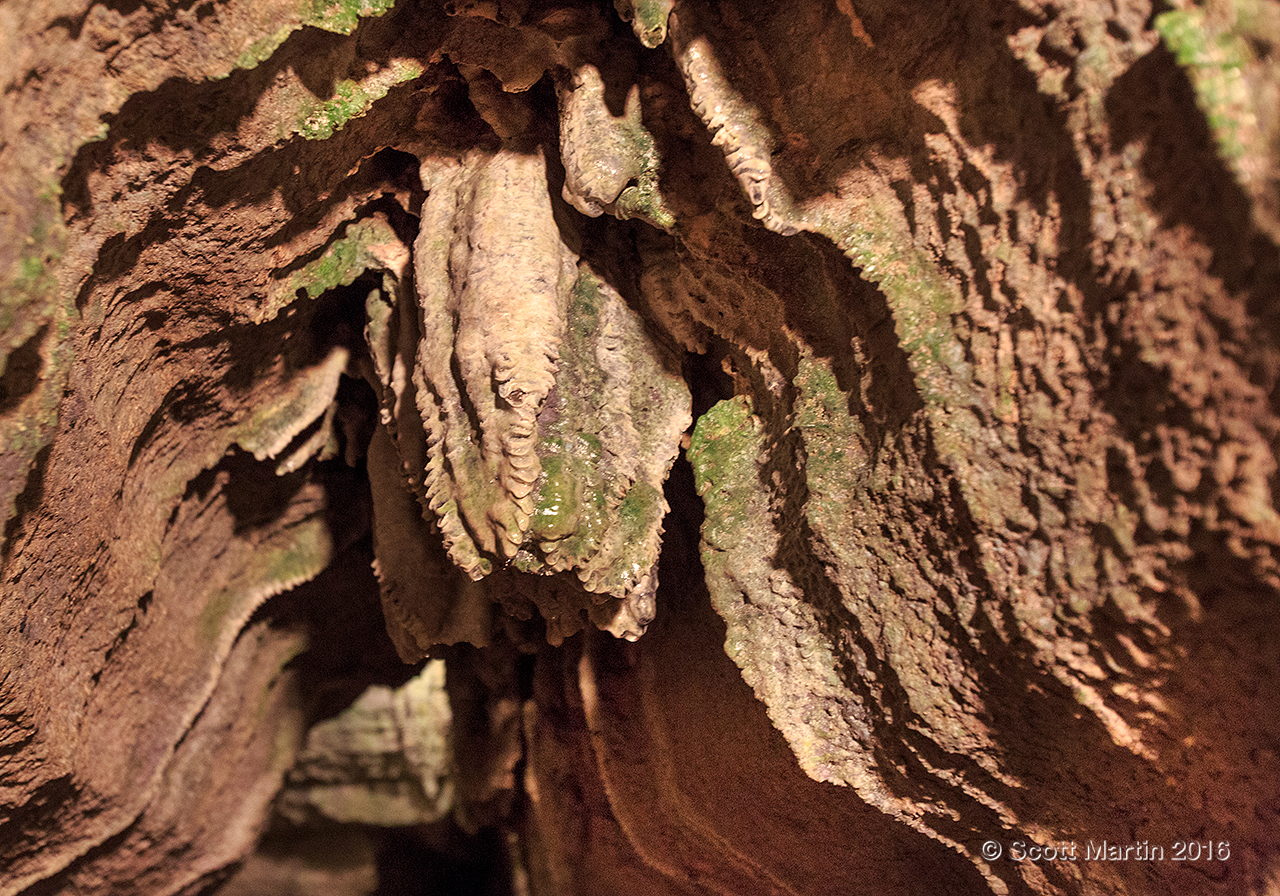
This is the stalactite formation known as the beehive, for obvious reasons!
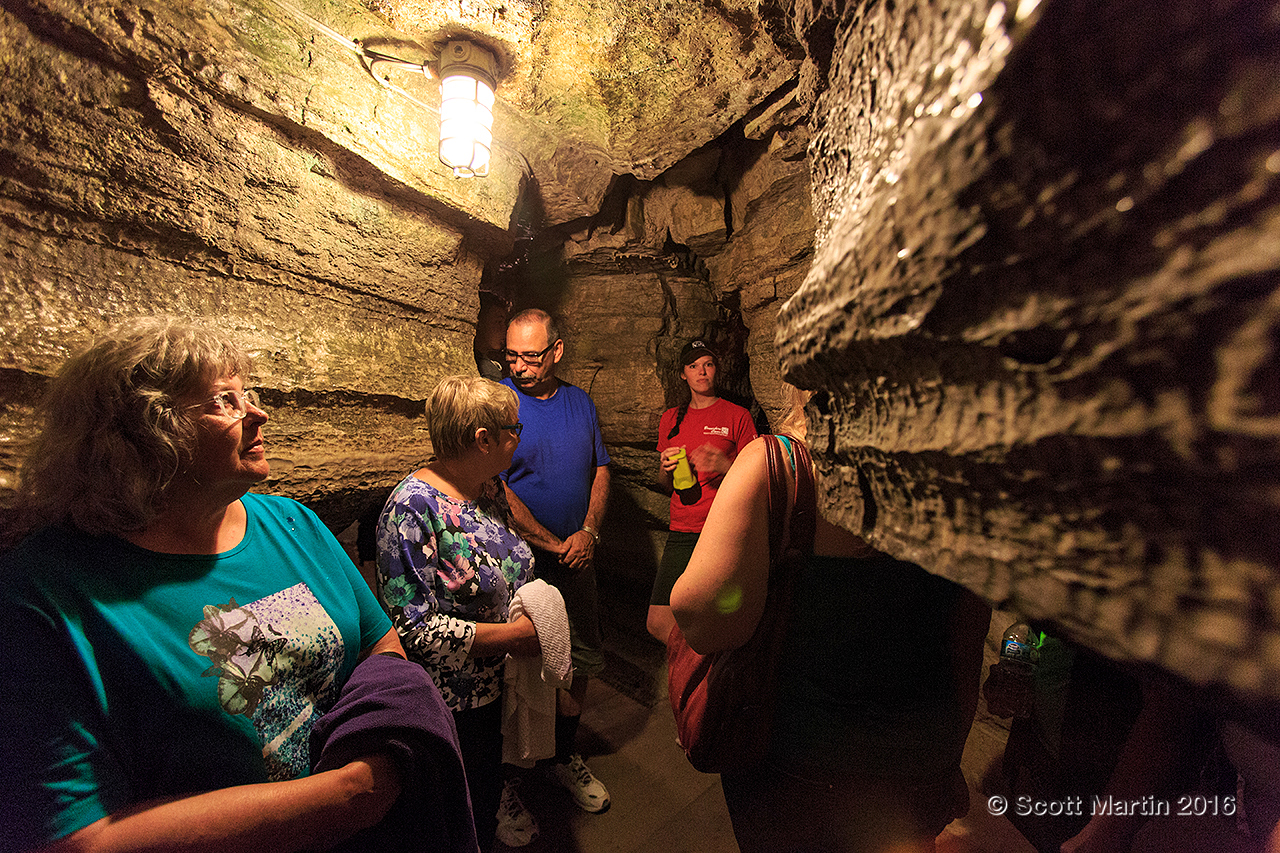
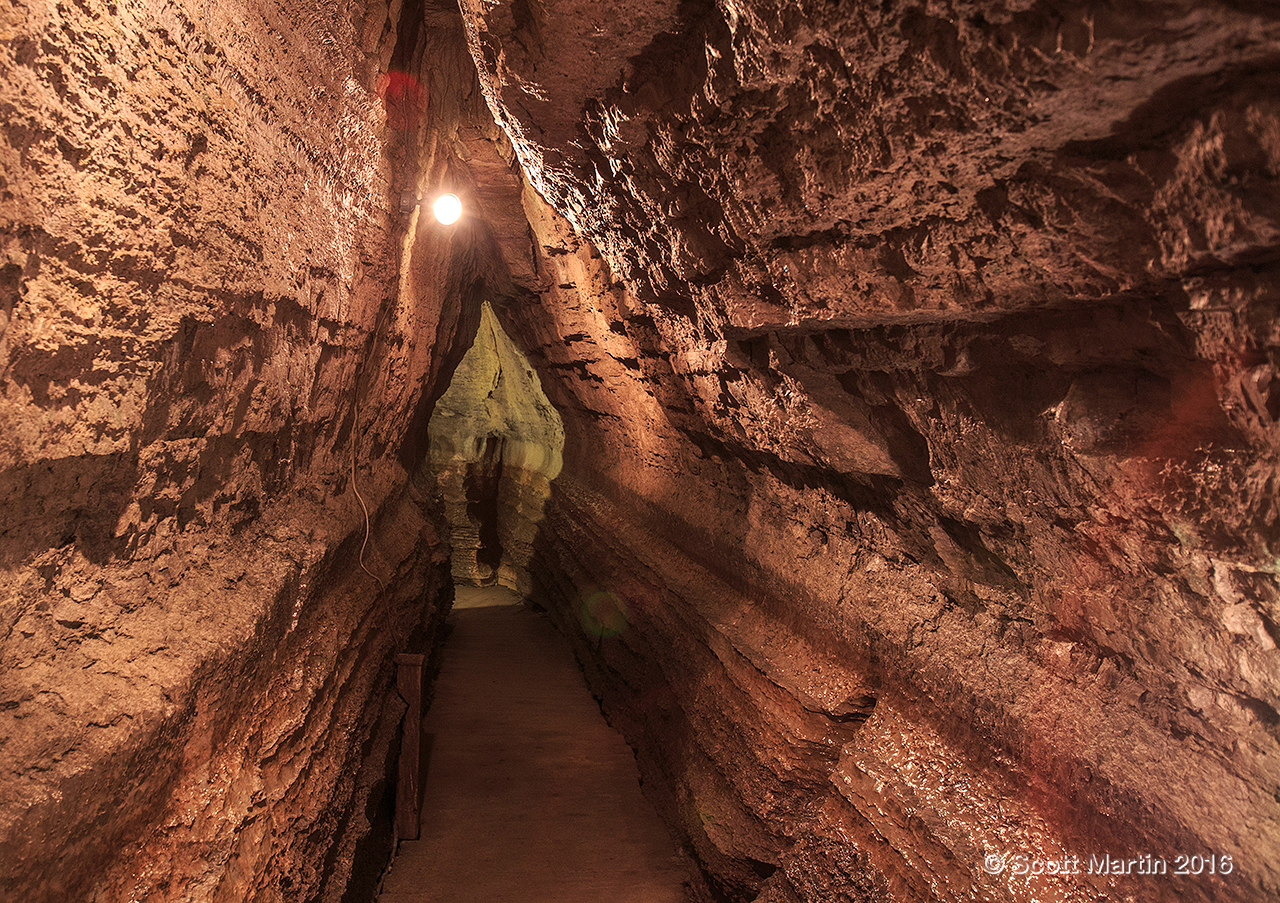
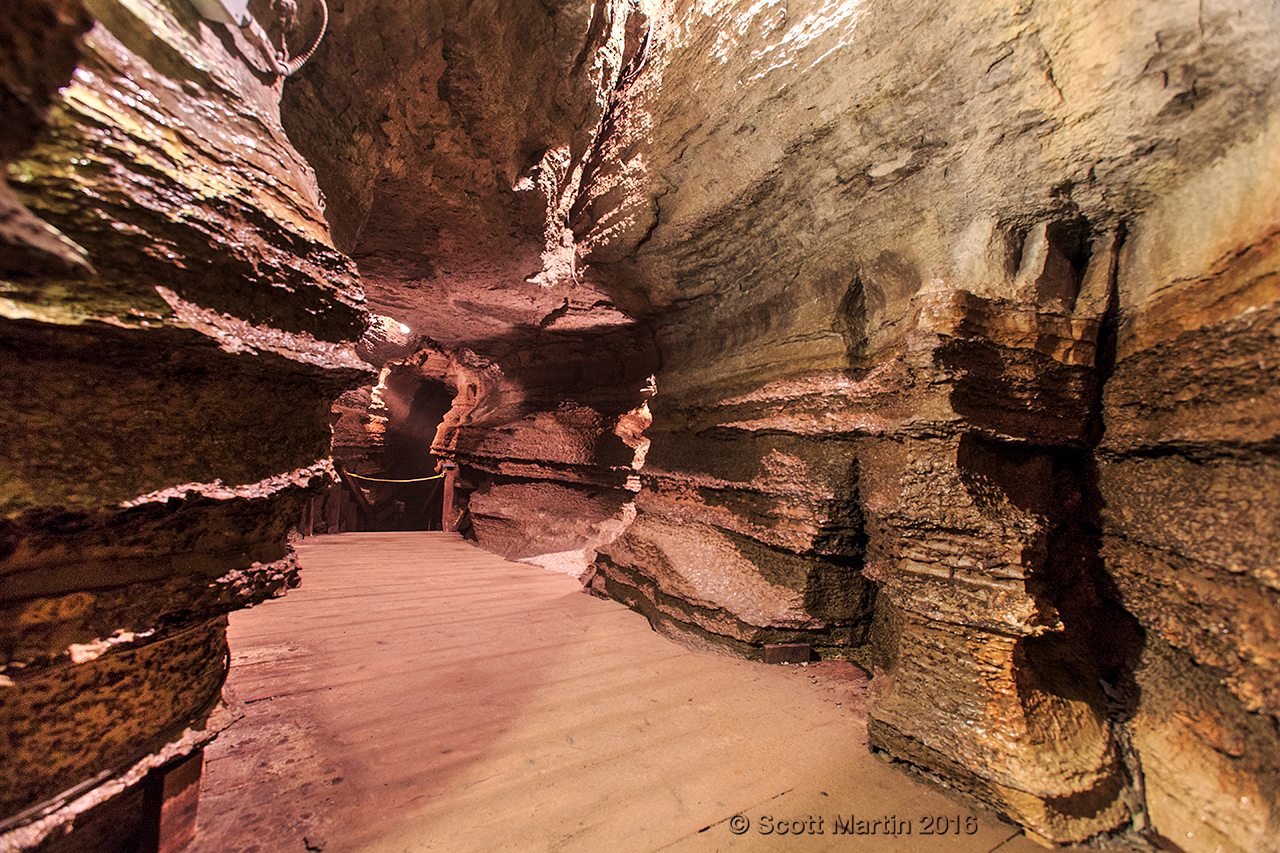
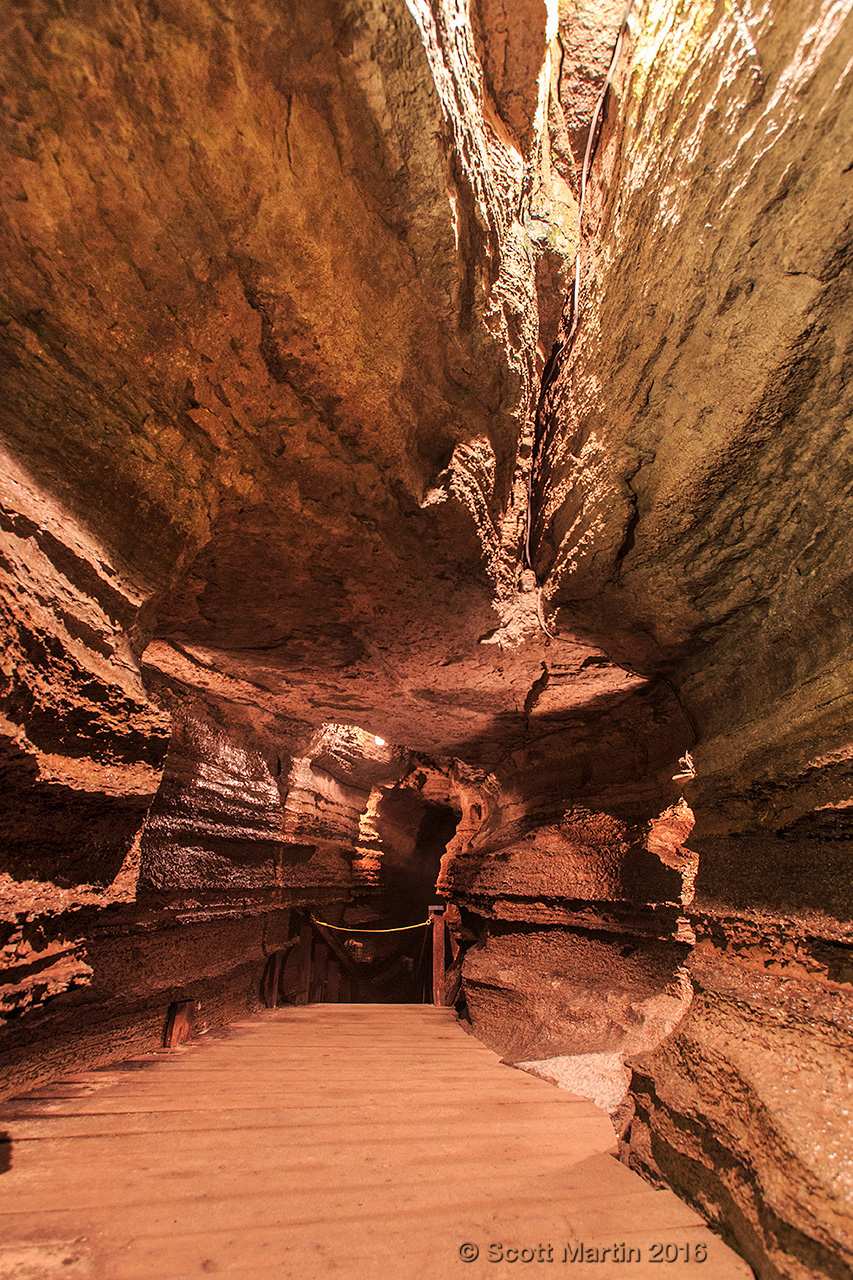
These next images show various views of the caves as we proceeded through on our tour. I was thankful they allowed me to take a tripod and take as many images as desired. Most of the pictures in the caves were taken at a fairly high ISO with shutter speeds ranging from three to five seconds.
.
.
.
.
.
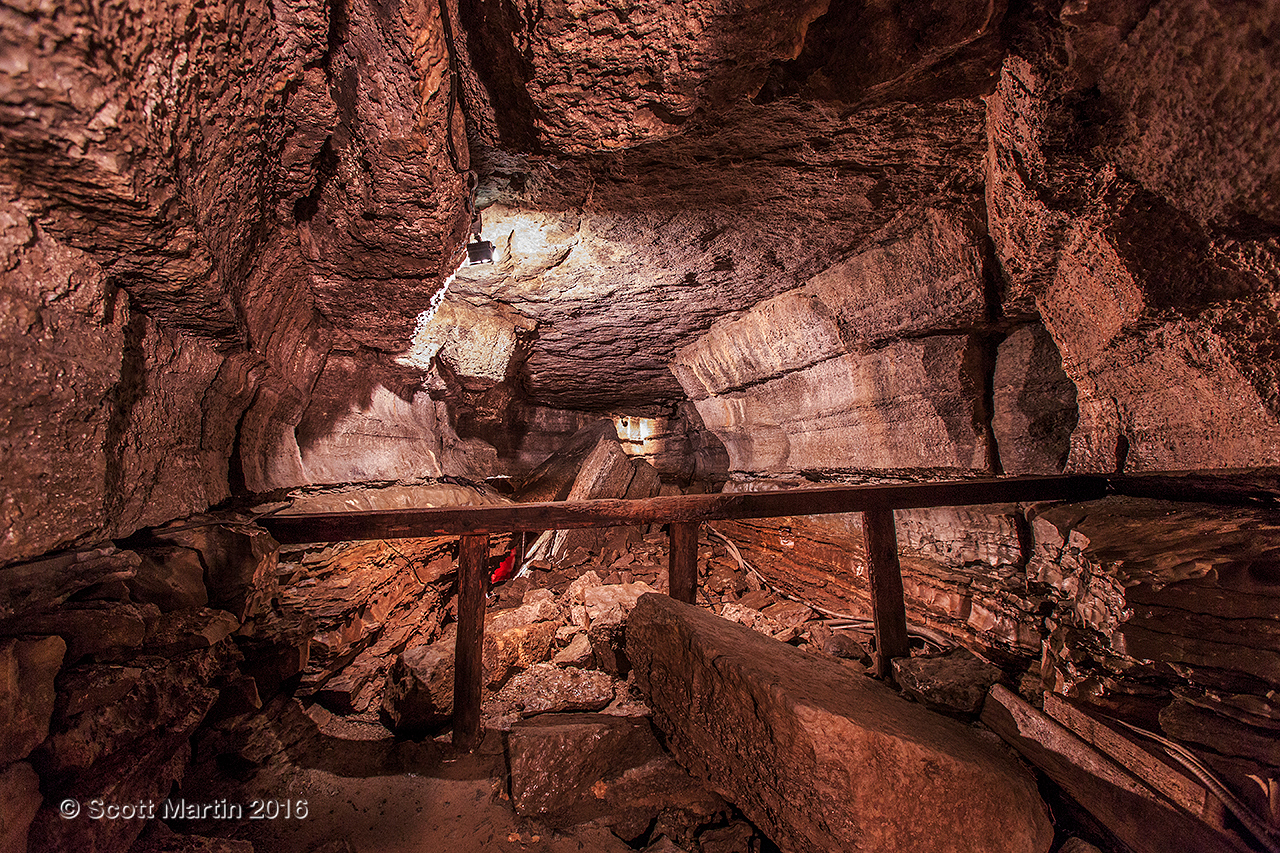
This last shot of the caves shows an area that suffered a collapse….fortunately this was at the end of the tour. As an introduction it would have been unnerving 🙂
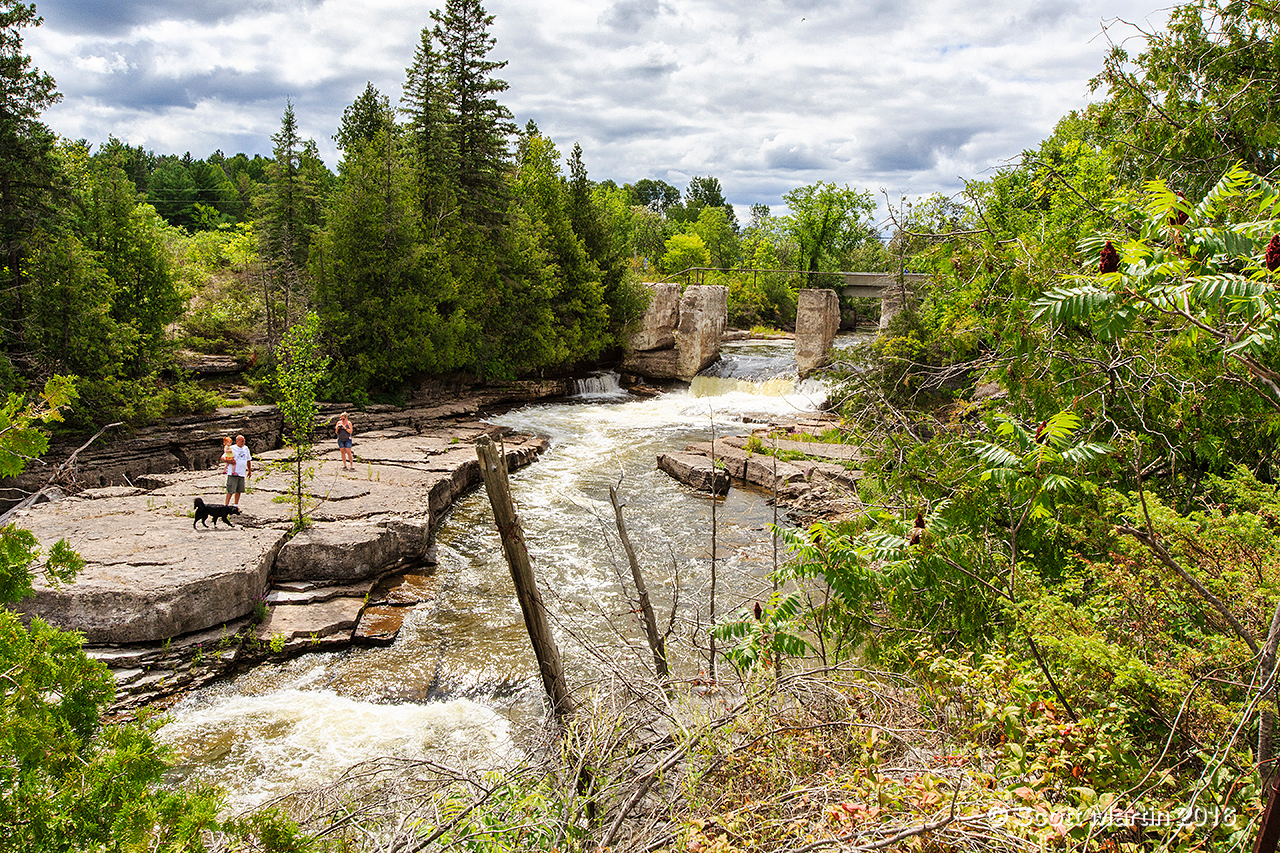
After touring the caves we crossed the bridge to the opposite side of the Bonnechere River and made the short hike to the river’s edge and rushing waters that awaited.
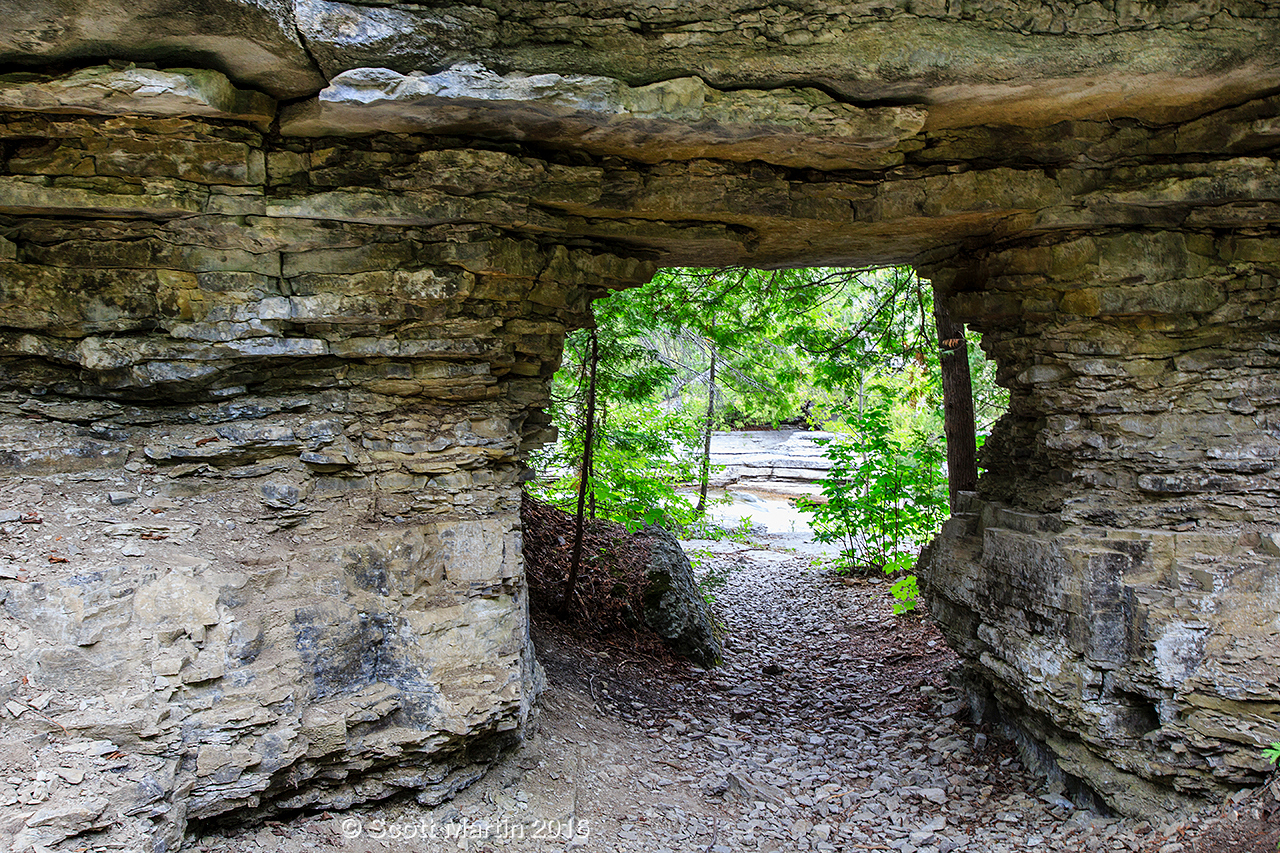
Even the hike to the river was enjoyable with many interesting formations in the relatively soft limestone formed by the Bonnechere River when water levels were much higher.
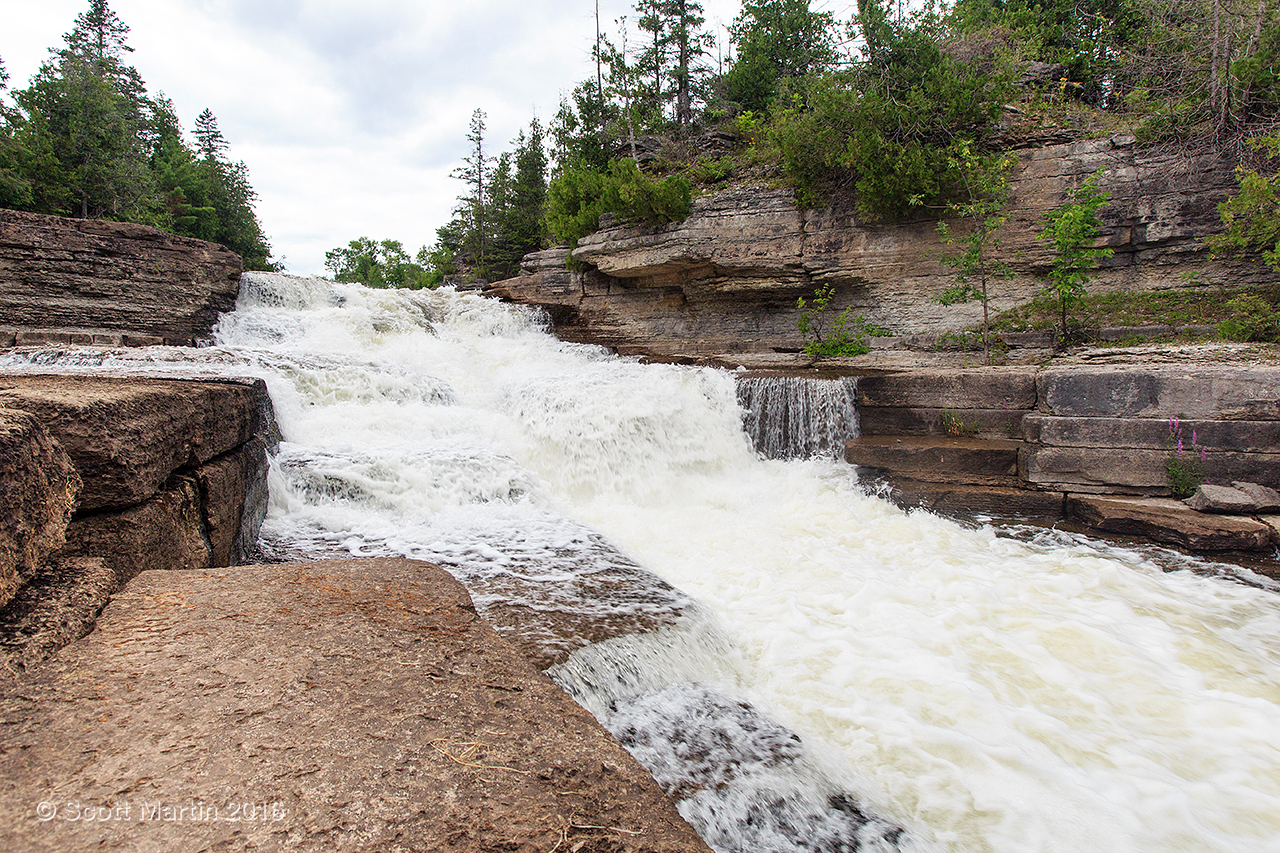
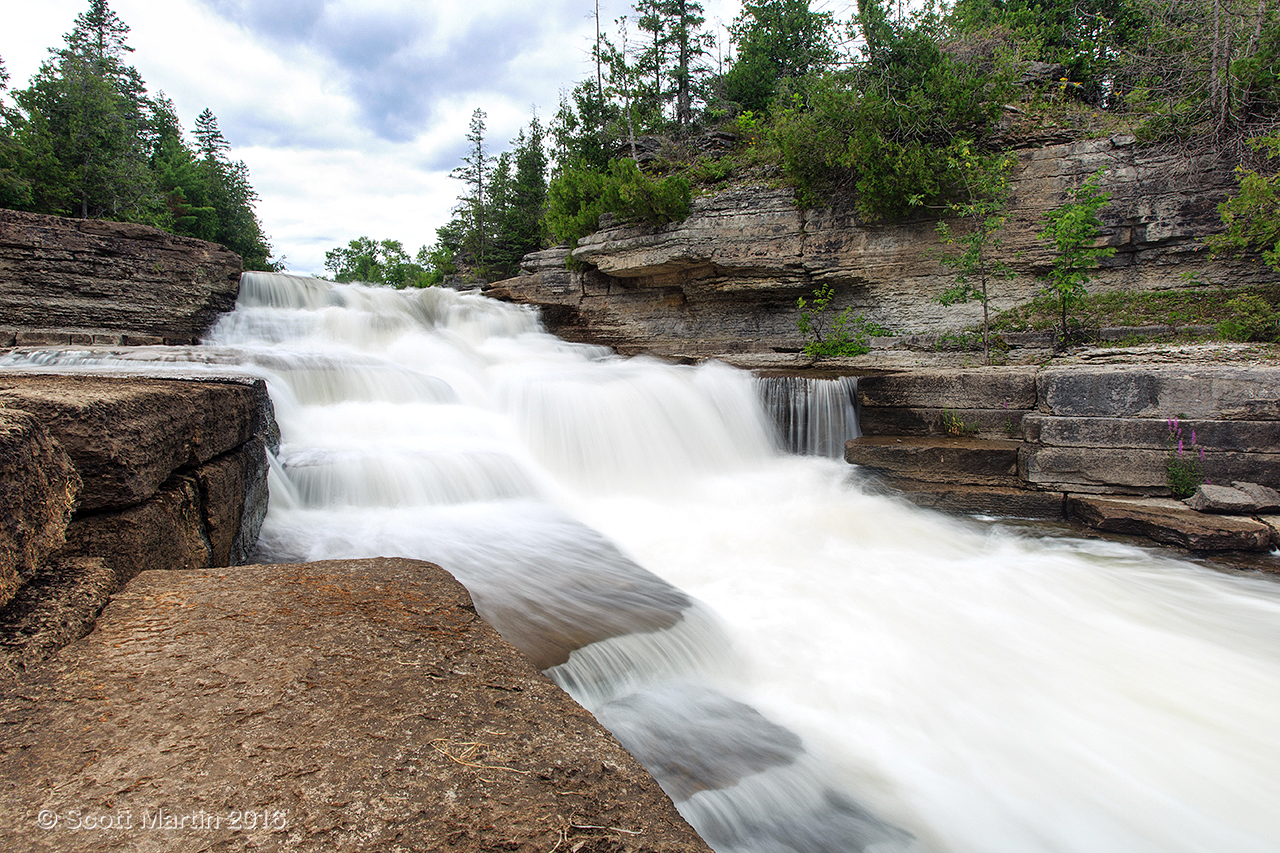
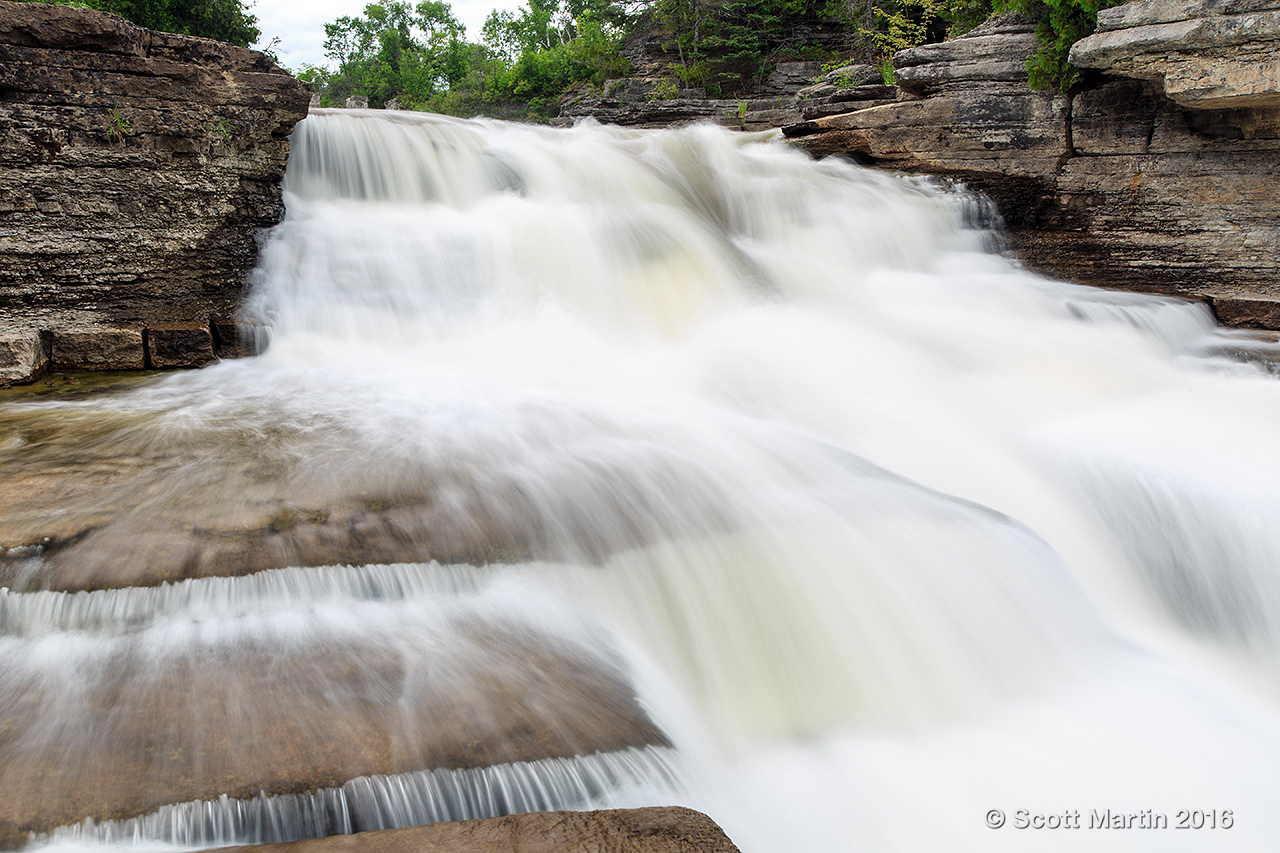
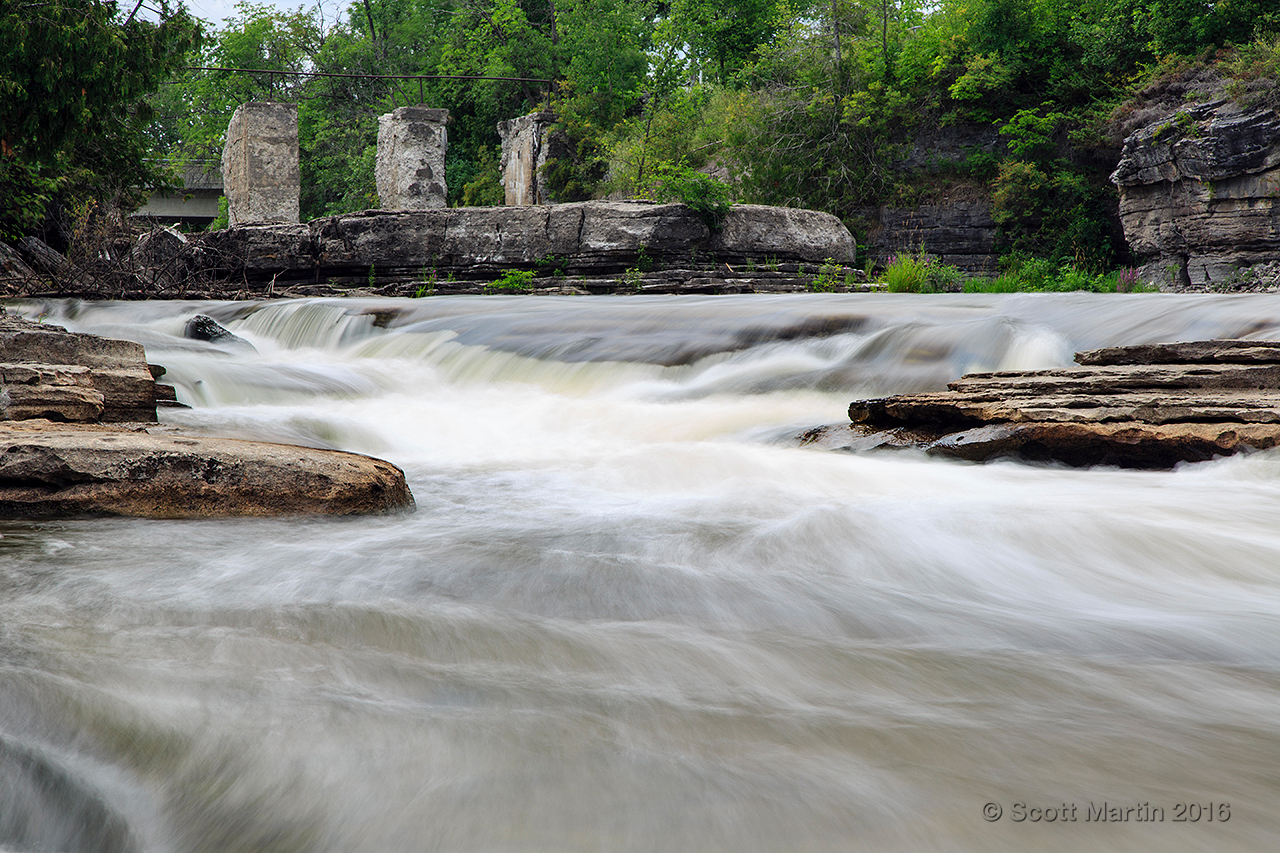
When photographing rivers, rapids and waterfalls, shutter speed is the factor that has the most influence on the image. It is shutter speed that will determine whether the water movement is stopped with perfect focus, freezing the action of the water perfectly, or creates an image in which the water appears etherial with smooth white waters flowing over the rocks beneath conveying the motion and power of the flowing water.
As a matter of practice, first determine the composition you desire and position the tripod accordingly; secondly determine the aperture required to create the necessary depth of field (generally a smaller aperture is preferred in order to keep all elements in focus – anywhere from f/11 to f/22 is usually fine, especially when using wide angle lenses). Finally choose a shutter speed that creates the amount of motion you wish in the water. This is often a matter of trial and error until the proper exposure time to create the desired effect is achieved.
In this next series of images we will look at the effect shutter speed has on the moving water. Everyone’s favourite image will be different based on their subjective preferences and I’d be interested in knowing your choice. Leave a comment with your preference and we will see if there is a clear winner or whether the variety of choice is large. Remember the shutter speed of your favourite and use that speed as a starting point the next time you are photographing rushing waters.
A. 1/100 second
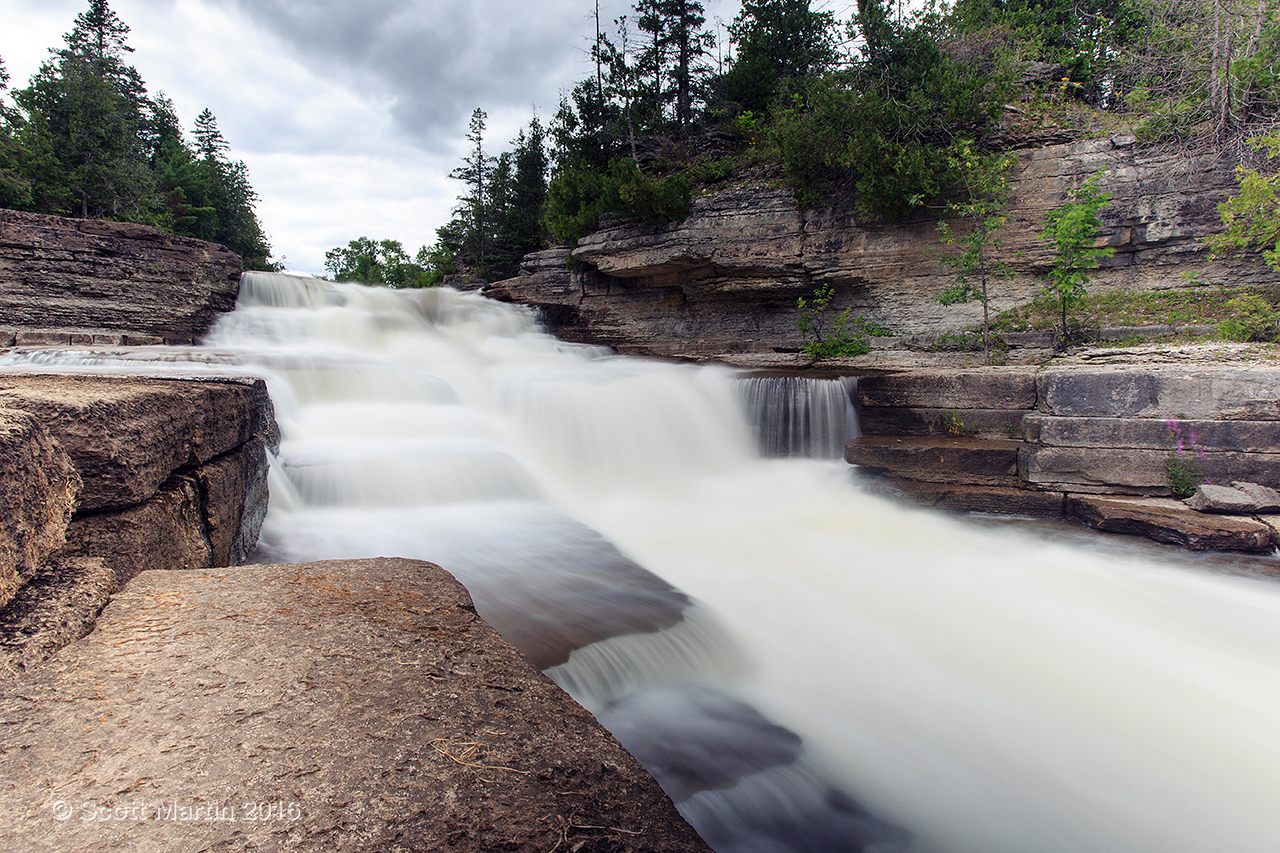
B. 1/2 second
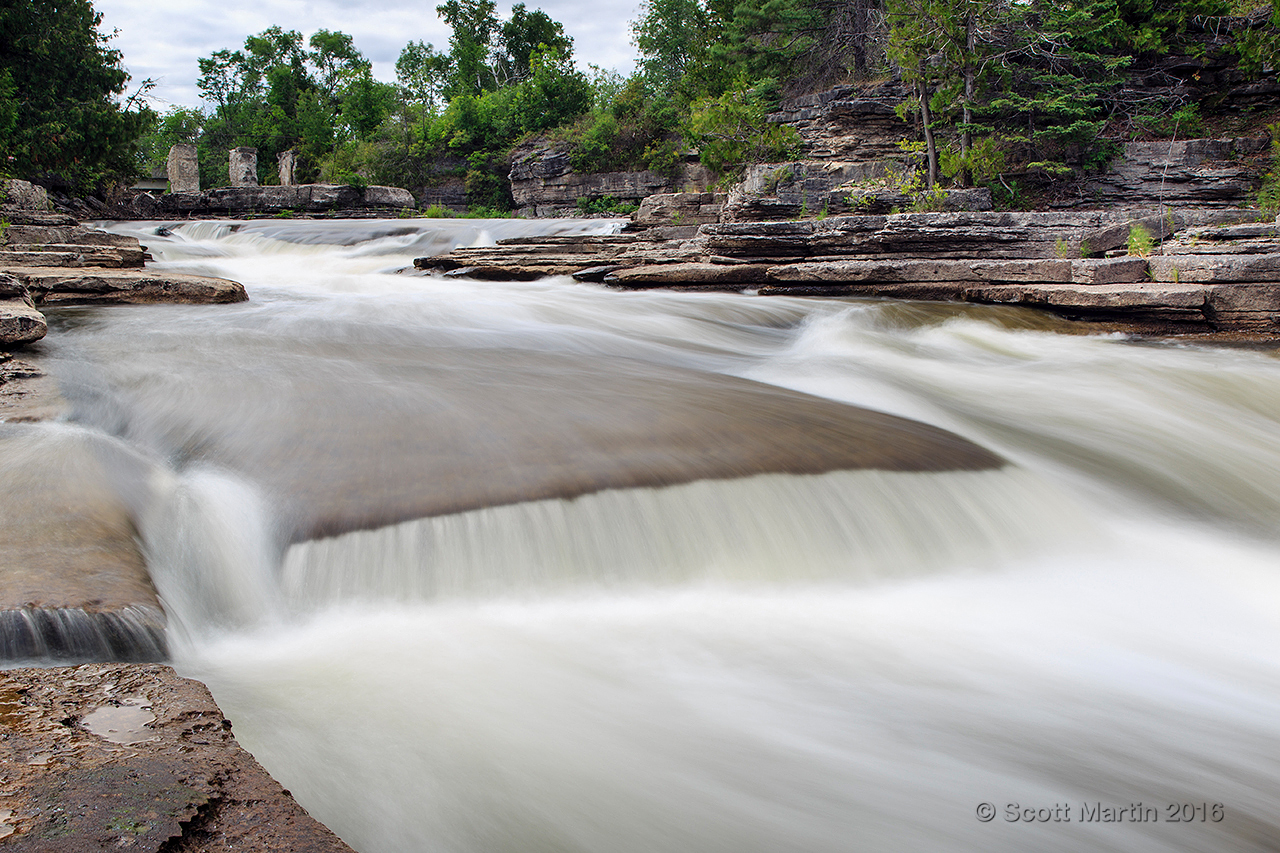
C. 2 seconds
D. 4 seconds
Although there was a cloudy sky when these images were taken, you may be wondering how we were able to achieve such slow shutter speeds. During the daylight even with an aperture of f/22 and an ISO of 50 you can not typically get to exposures of much more than 1/4 to 1/2 second. To achieve slower shutter speeds you require filters for the lens that reduce the light entering the lens. If you have a polarizing filter, you can use that to gain about 1.5 more stops. Otherwise you require Neutral Density filters to further reduce the light reaching the sensor. Neutral density filters come in many forms and are found in every landscape photographer’s tool box. For the pictures in this post I used a Singh-Ray Vari ND filter which is a great filter that allows you to vary the amount of light reduction from 2 to 8 stops which is extremely helpful.
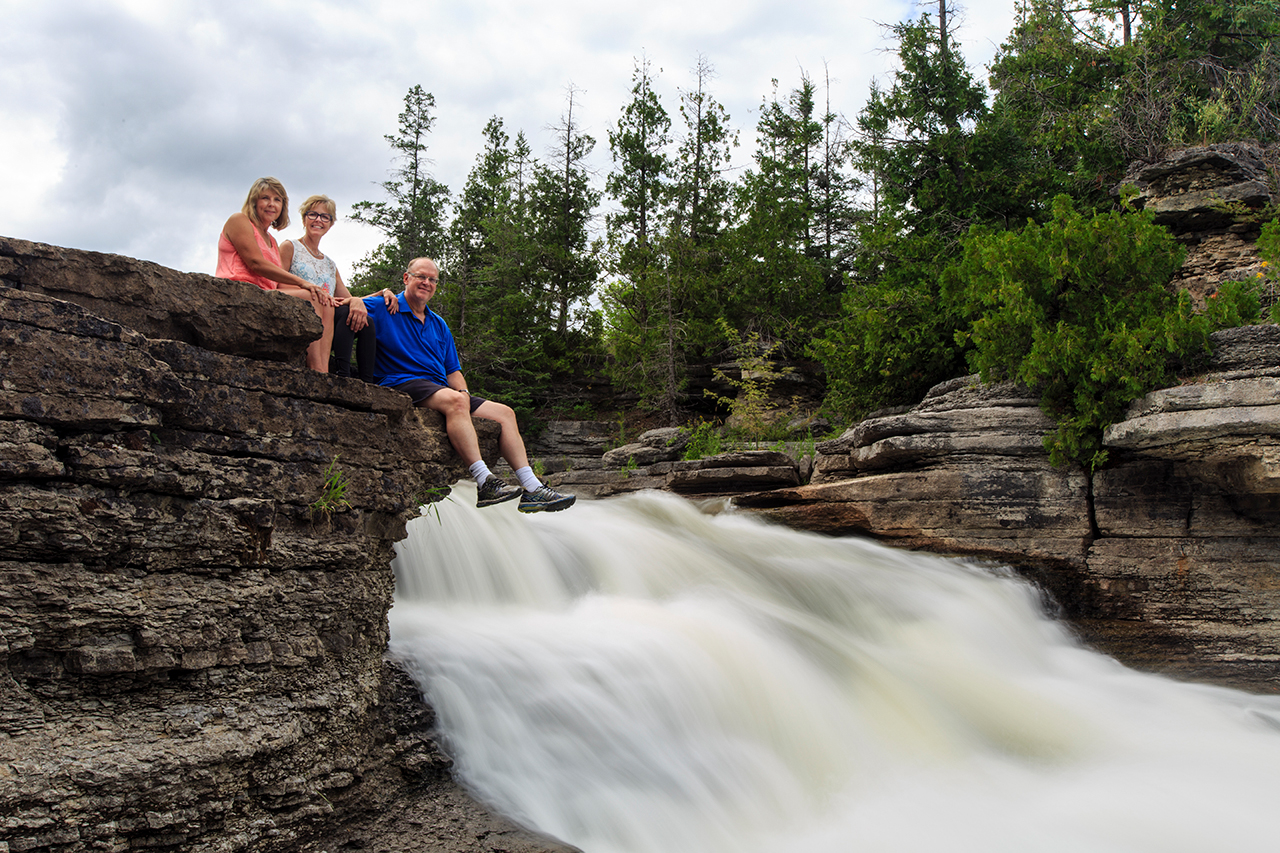
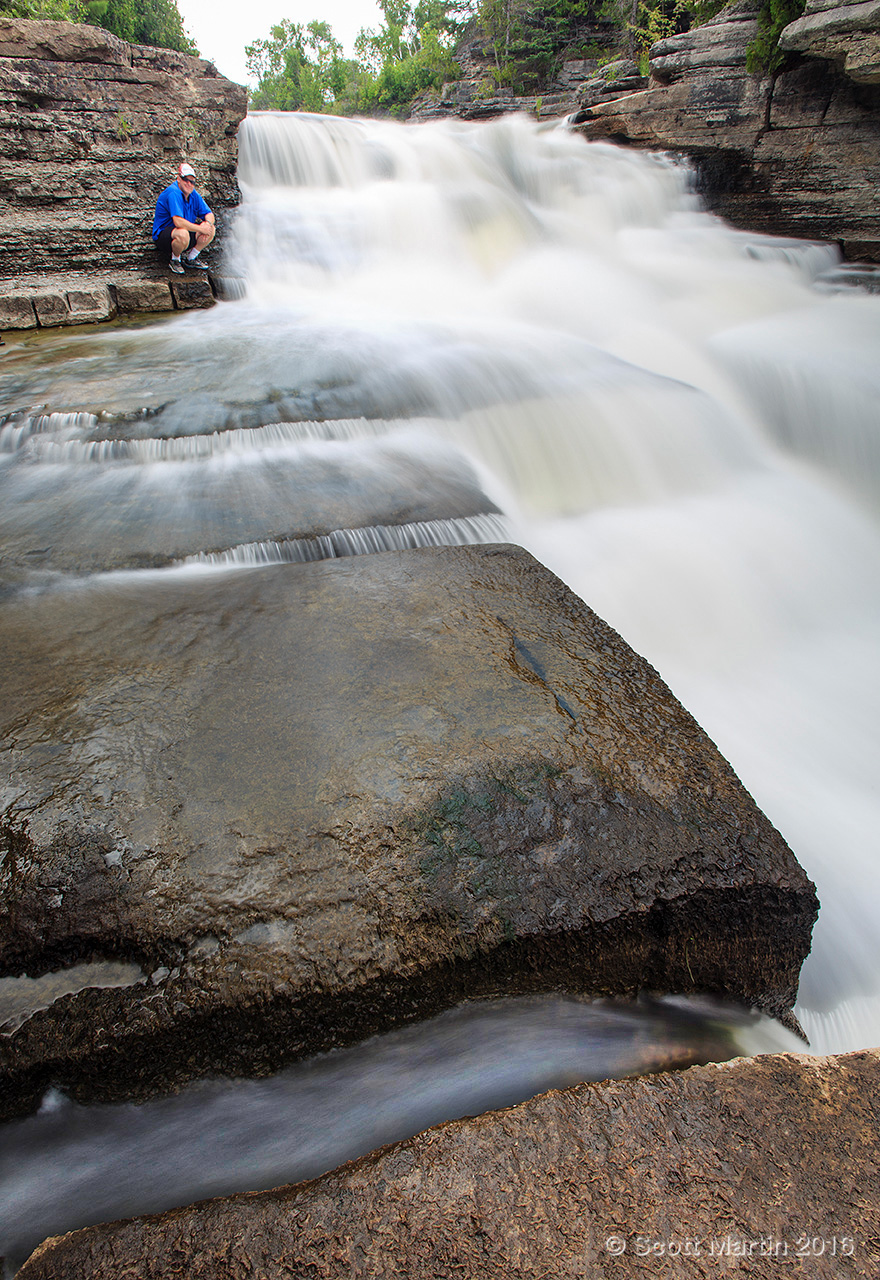
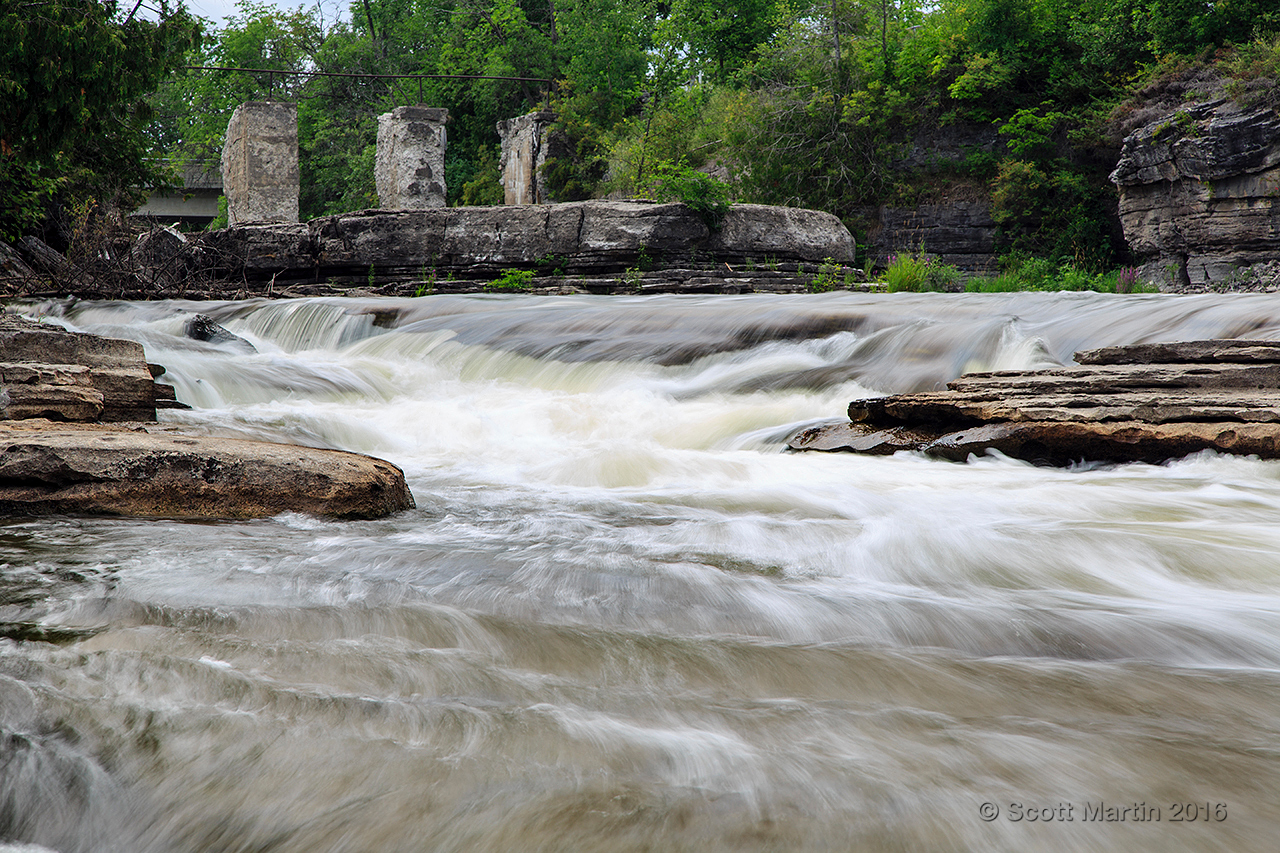
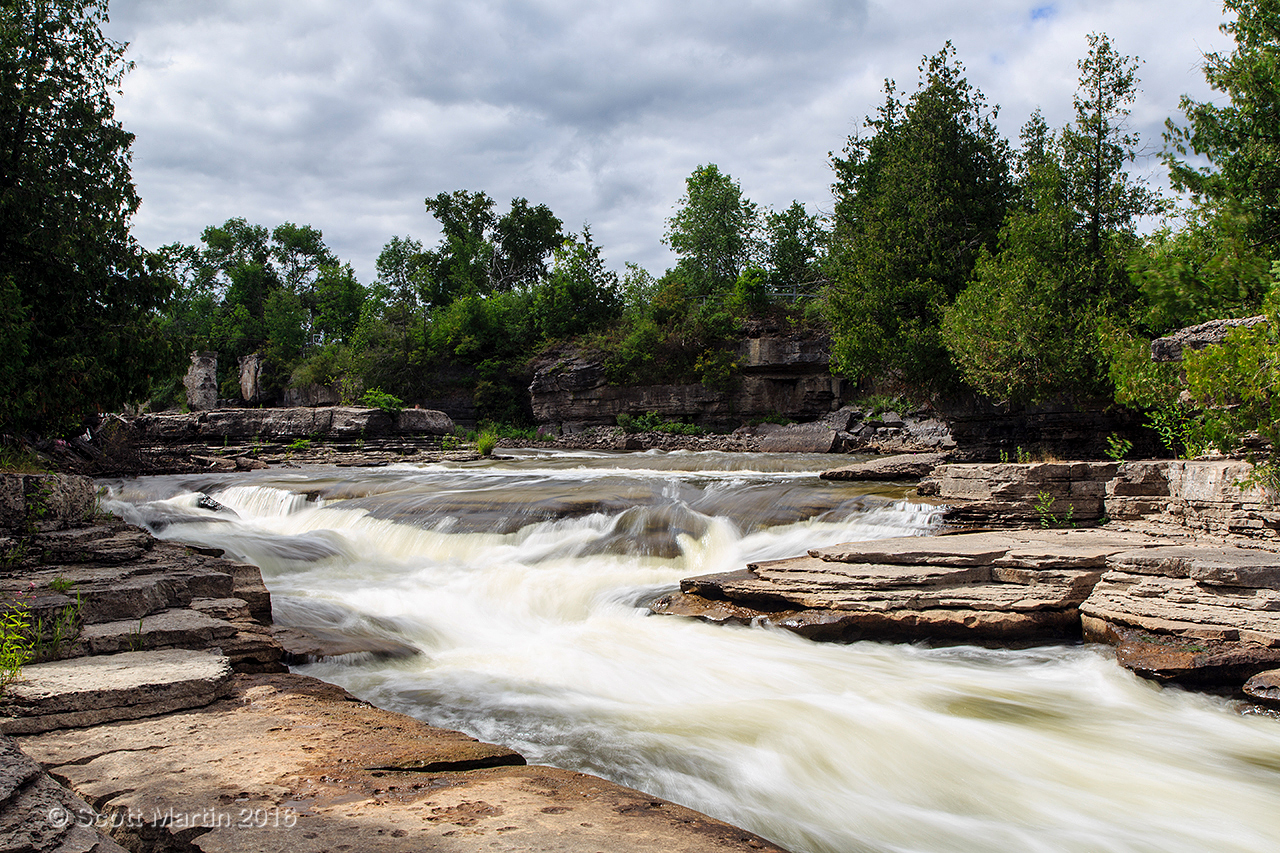
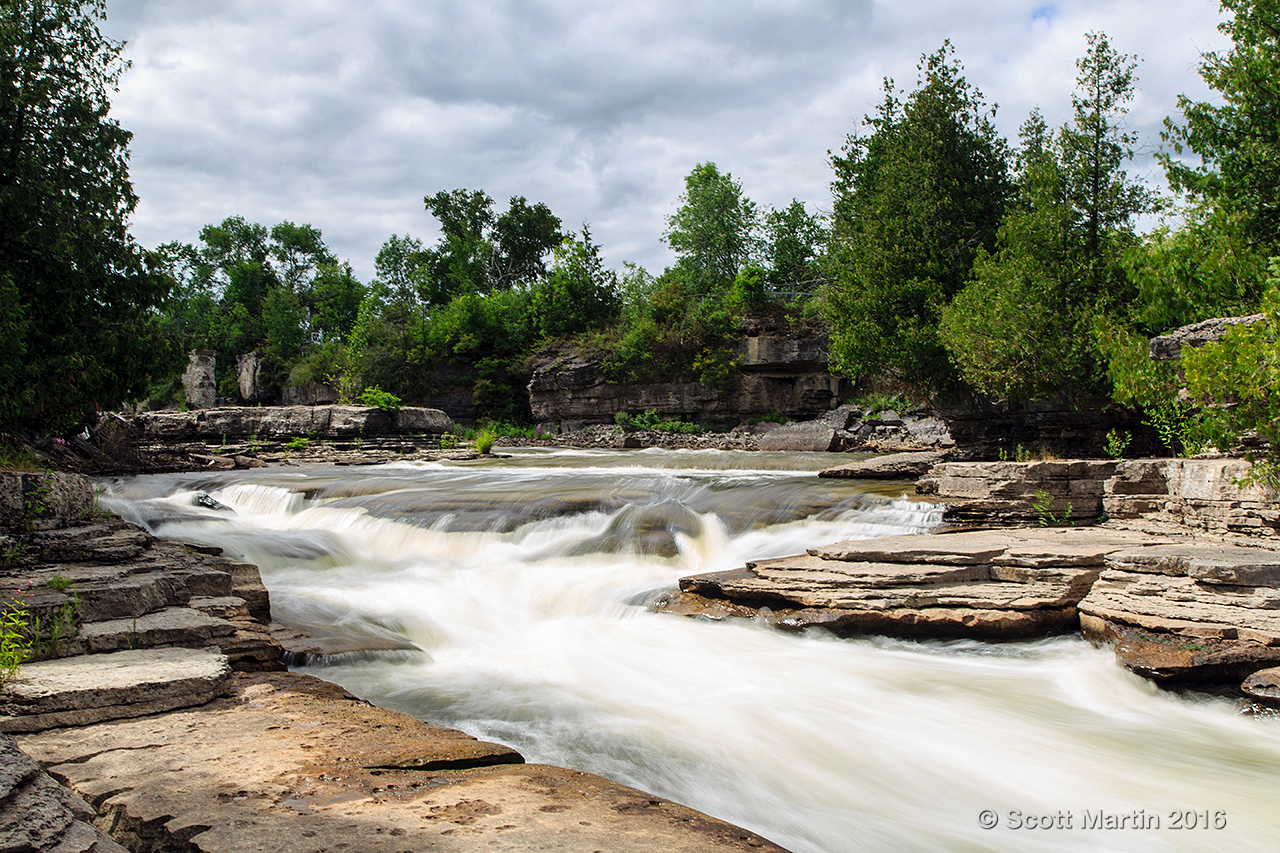
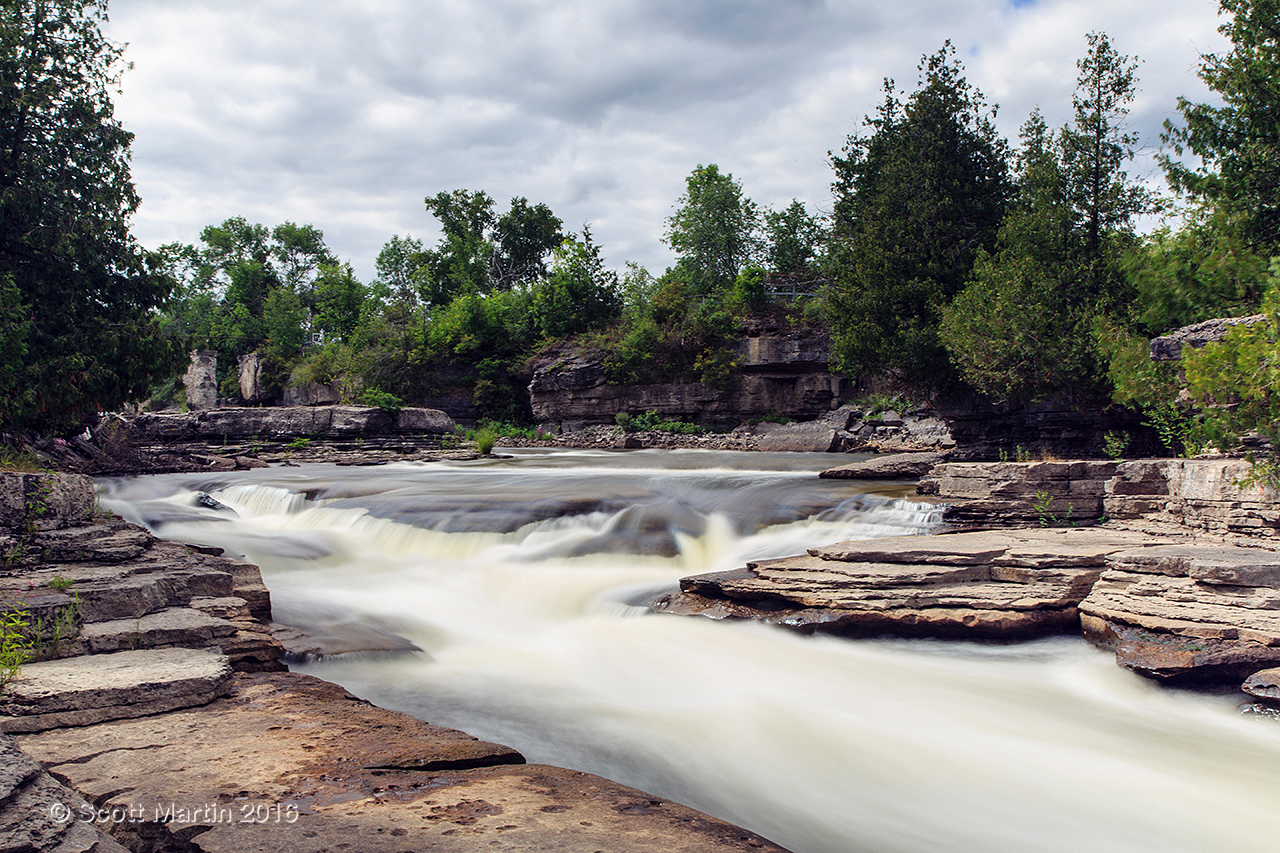
We will close today’s blog with a few more shots of the Bonnechere River. I will include some similar scenes at different shutter speeds for your critique which I always appreciate.
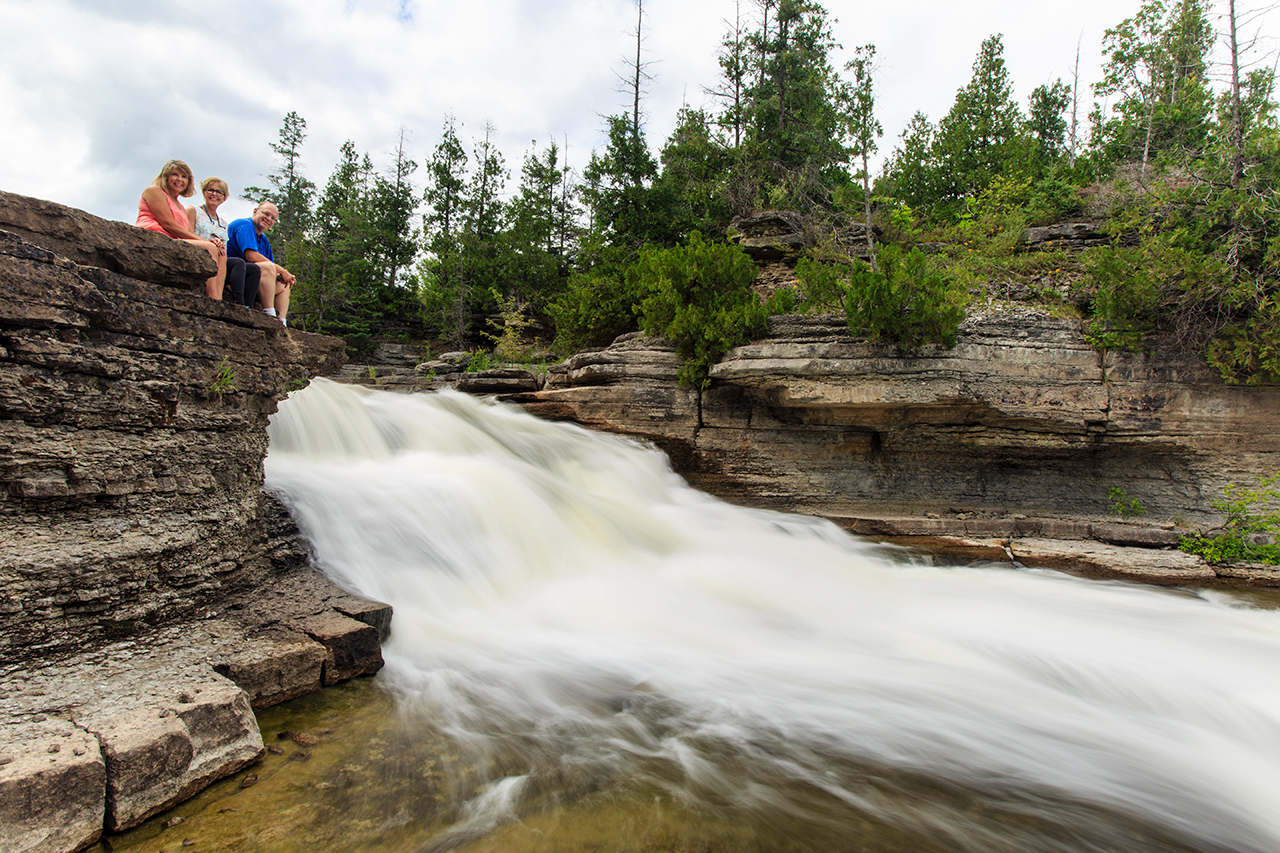
For long exposure shots including people, ask them to hold as still as possible and always use a flash to help freeze any motion (I used a +3 flash exposure compensation for this pic).
.
.
.
.
.
1/3 second
1 second
5 seconds
10 seconds
I trust the pictures from this post will encourage you to plan a trip to the Ottawa Valley and include the Bonnechere Caves and the Bonnechere River on your itinerary. It will take about half a day to see them both but if the light is nice you could certainly spend another half day exploring the river in search of that perfect shot.
All of the images in today’s blog were taken with a Canon 5D Mk III and either a 16-35mm or 24-105mm lens using a Gitzo GT1545T traveler tripod and Markins Ball head. More images of our day can be seen in the Bonnechere Caves, Eganville ON gallery.
As always, thanks for taking time to visit the blog. It is much appreciated.
Time Lapse Photography is an area of photography that has intrigued me for many years however I hadn’t seriously attempted any until recently. Time lapse photography is a method of compressing a long period of time into a short video of 10-15 seconds. The concept is quite easy; take a few hundred still images over a predetermined time period and then place them sequentially into a video format. That said the technical challenges required to record the images are often difficult and the post processing and video formatting can be quite complex. An impressive final result is only obtained after much practice and lots of time, both to obtain the photographs and to edit and assemble them afterwards.
The purpose of this post is not to get too technical in describing the details however to show a few of my early attempts at producing time lapses and hopefully encourage you to attempt some of your own. Basic time lapse photography does require an investment in gear however it certainly is not cost prohibitive. Besides the camera, you must have a tripod to ensure the camera is completely stationary throughout the recording period and an intervalometer to control the operation of the camera while it takes the photographs from which the time lapse will be compiled (some cameras have internal intervalometers in which case you won’t have to buy one). Advanced time lapse photography allows the camera to move in up to three axes during the recording of the images and although the gear required to accomplish this is expensive the results are impressive.
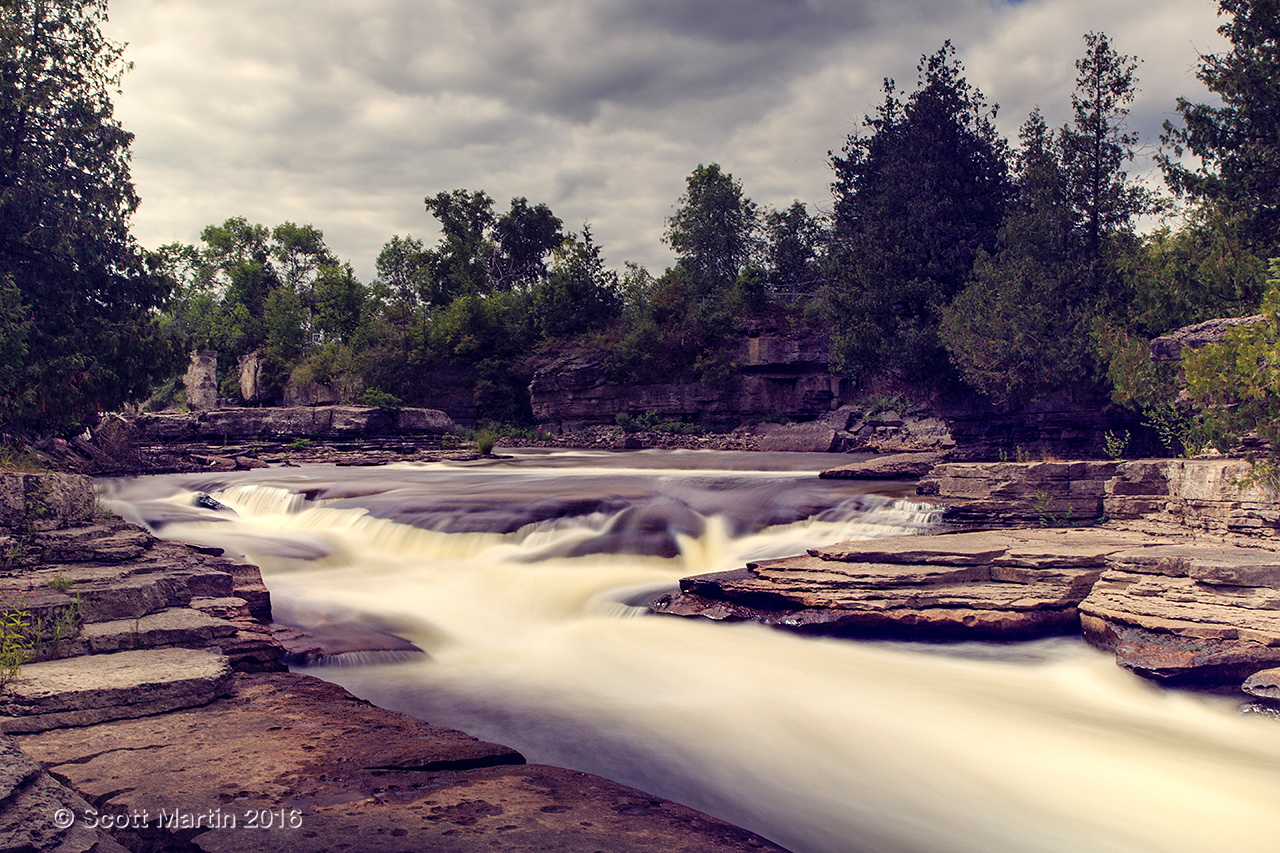
The easiest time lapses to create are those in which the exposure remains the same throughout the recording period. This first time lapse is of the Muskoka Bible Centre Marina near our cottage. There were 330 images taken at three second intervals over approximately thirty minutes with exposure settings of 1/500 sec, f/2.8 and ISO 50.
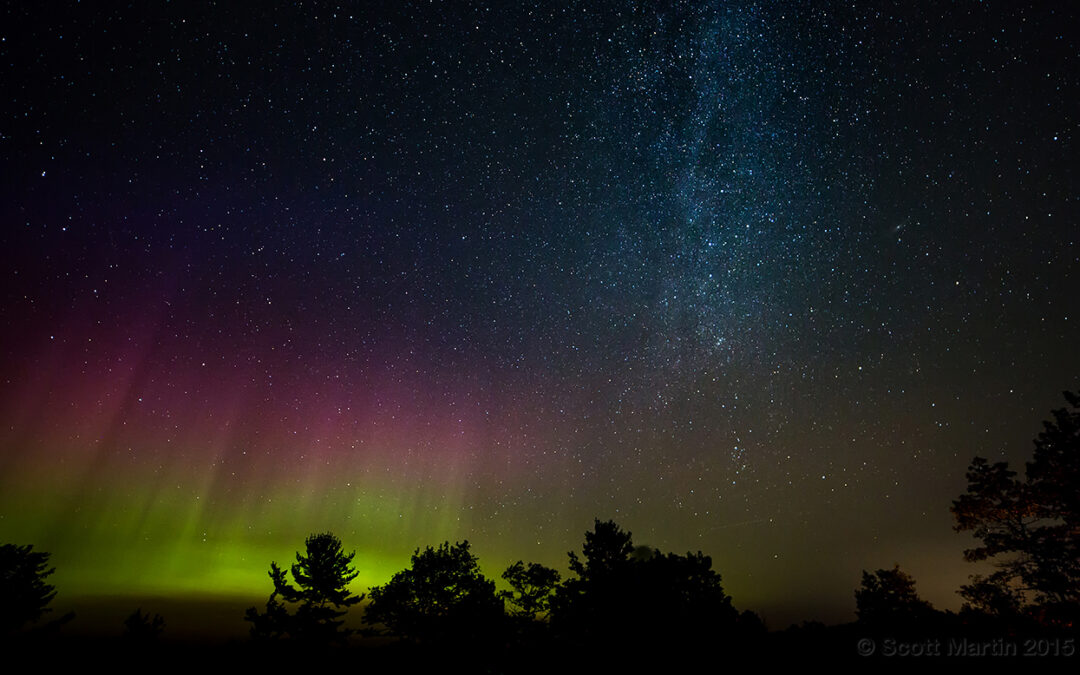
Taking a time lapse at night employs the same technique as during the day however the length of exposure required and the ambient temperature changes create some interesting challenges that must be addressed in order to be successful. This next time lapse of the Aurora Borealis (Northern Lights) and Milky Way is a series of approximately 450 images taken over a four hour period at thirty second intervals at Torrance Barrens Dark Sky Preserve in Muskoka. The exposure data was 25 seconds at f/2.8 and ISO 3200 using a Canon 5D Mk III and 14mm Rokinon ultra wide angle lens. The camera lens was wrapped with three winter hand warmers to keep the lens barrel temperature above the Dew Point in order to prevent condensation on the lens which immediately ruins the time lapse. This time lapse was also recorded at the end of the Perceid Meteor Showers season so if you look close you will see a number of meteor trails.
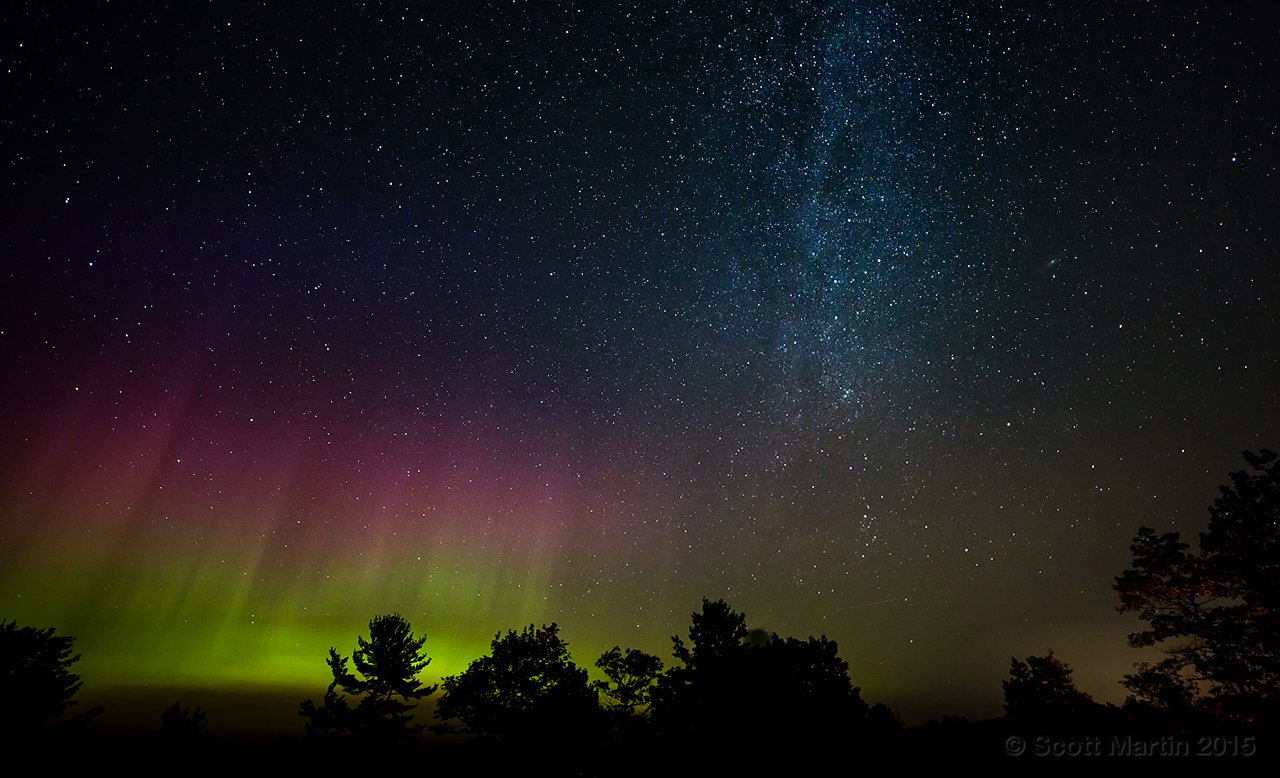
Most photographers have more than one camera body, so if you get interested in time lapse photography, I would highly recommend setting up two cameras every time out. It doubles your practice opportunity and helps pass the time babysitting two projects while you are trying to stay awake through the night :). This next time lapse was taken at the same time as the previous one, the only difference being the direction the camera was pointed. The first was pointed north to record the Northern Lights while the second was trained on the Milky Way. The exposure data for both time lapses was the same however the Milky Way was shot with a Fuji X-E2 and 8mm Samyang fish eye lens with a 180° field of view which creates the curved horizon. The lens was wrapped with a hand warmer to prevent condensation.
As mentioned earlier the easiest time lapses to create are those in which the exposure remains unchanged throughout the entire duration, as was the case with the first three time lapses in this post. The reason for this is that with any change in exposure from one image to the next, the different exposure causes a noticeable difference in the luminescence of adjacent frames in the time lapse sequence which appears as flickering in the final video. Flicker is the bane of every time lapse photographer and we go to great lengths to get rid of it. You may think that slight changes in exposure from frame to frame would not be noticed but I can assure you it is. We always take exposures manually and fix the aperture so that the diaphragm remains motionless at all times. The micro variability in exposure caused by the diaphragm stopping down to the same aperture for each frame (as it does if you use automated settings for your camera) is readily seen as flicker in the time lapse video.
So what do you do if your desired time lapse demands changing exposures, such as recording the sunset followed by the appearance of the stars? These types of time lapses are very impressive yet technically difficult to create, in fact amongst time lapse aficionados they are known as the holy grail of time lapses. There are a number of methods for creating flicker free changing exposure time lapses and they fall into two broad categories, one in which the exposures are highly controlled in the camera with special intervalometers that allow for bulb ramping and another that uses software solutions to smooth out the exposure changes evenly from frame to frame. To date I have experimented with a few of this type of time lapse, which is just enough practice to get an understanding of how difficult they are to do well (which I have yet to do). I have tried both methods and reluctantly will share a sample of each method.
The first is a sunset to starry night transition using a bulb ramping technique. Bulb ramping is when you connect a highly specialized intervalometer to the camera’s USB port which gives the intervalometer the ability to control the exposure, aperture and ISO of the camera in infinitesimal increments so that frame to frame luminescence variations are not noticeable. You set your camera to bulb mode (meaning the shutter remains open and is controlled by the intervalometer) and the intervalometer ramps up the exposure times and ISO over the course of the time lapse based on light readings from sensors in the intervalometer. Hence the term ‘bulb ramping’. I use a Timelapse+ intervalometer which is a terrific piece of equipment that can be used for any type of time lapses as well as for multi image HDR’s and rapid light sensing triggers for photographing lightning bolts. If you are looking for the ultimate intervalometer, look no further than the Timelapse+.
This was taken at the cottage and not an ideal location for a starry time lapse as there is quite a prominent light dome created by the town of Huntsville approximately ten kilometres away. The bright ‘star’ that dominates the dark sky is actually Venus, the brightest object visible in the sky that night.
The above time lapse was made from approximately 520 images over a 4.5 hour period during with the intervalometer modifying the exposure time, ISO and interval between exposures. The exposure times ranged from 1/20 sec to 30 seconds. The ISO varied between 50 and 4000 while the aperture was fixed at f/2.8 (Canon 5D Mk III & Rokinon 14mm lens).
The second sunset to night transition was taken from our hotel balcony in Percé, Quebec this past July. For this time lapse I manually changed the exposure time and the ISO during the recording of the images. The aperture was fixed at f/4. As a general technique I began the time lapse overexposing approximately one stop and would manually decrease the shutter speed or increase the ISO when the camera meter indicated the scene was one stop underexposed. This resulted in approximately six to eight ‘major’ exposure changes over the four hour period I was recording the time lapse. The images were captured with a Canon 5D Mk III and EF 24-105mm f/4 L IS lens and processed using Adobe Lightroom and a fabulous programme called LRTimelapse which is designed to process time lapse images and render high quality video files of the time lapse. There is a bit of a learning curve to the software but once you understand how it works the results are incredible. In fact I almost deleted all of the images from this project before processing them as I was so unhappy with the results, but decided to give them a try with LRTimelapse. I was more than impressed with the results as the original work product was very poor.
At this point, there is much learning and practice to be done to improve in the area of time lapse creation, however its a fascinating niche within photography that has attracted my intention and I hope to produce many more. Over the short term my intent is to utilize both the software and bulb ramping techniques for day to night transitions as well as hopefully adding one, two and then three axes of motion into the mix.
When you have finished recording the 300-500 images required to produce a time lapse video there are some added bonuses to be had from the individual frames. For one, there should be a few good frames amongst the many which stand alone as an acceptable image or print. Here is one frame from the Aurora Borealis time lapse above.
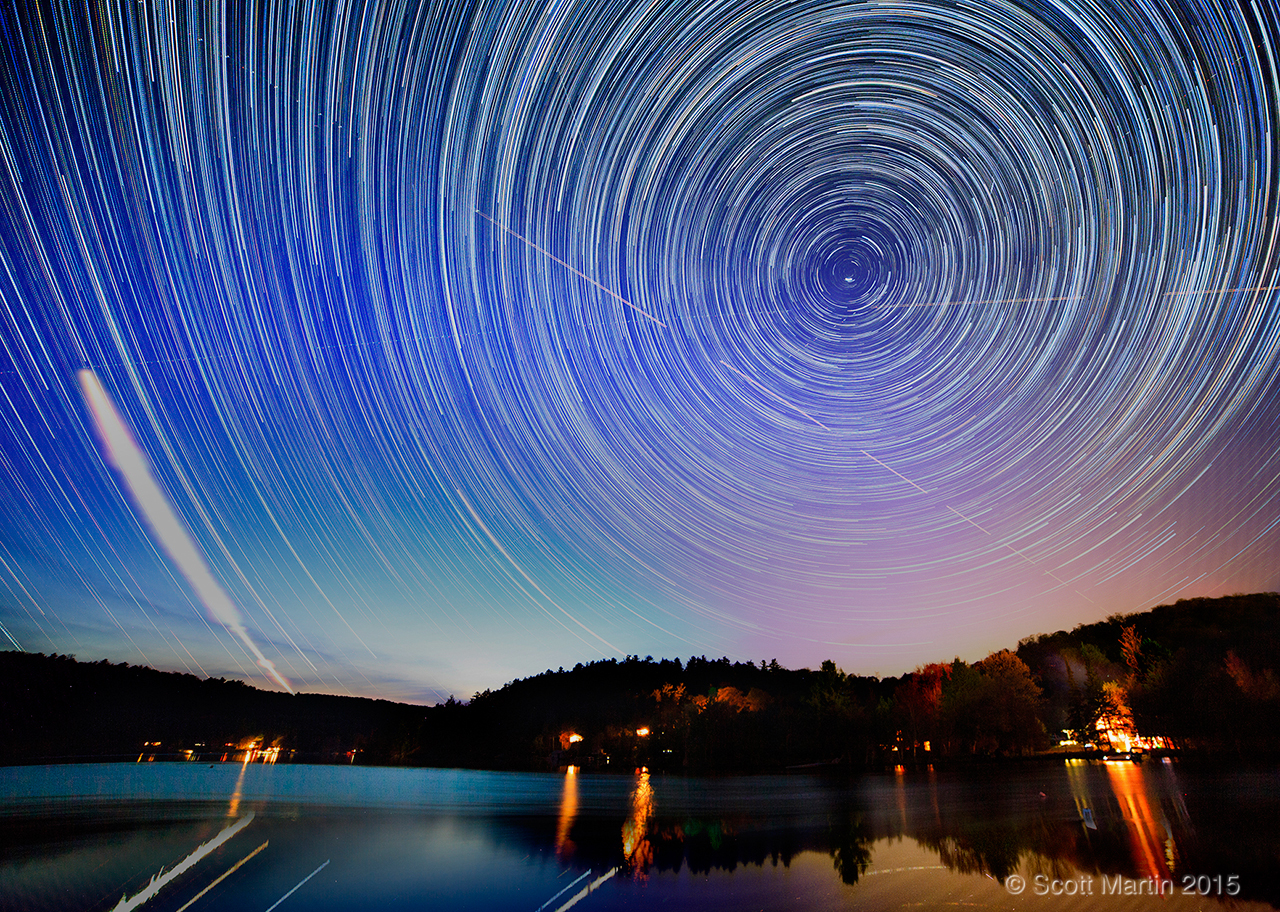
Another interesting possibility, made easy with Adobe Photoshop, is to ‘stack’ all of the images from the time lapse into one single image. Although this creates a gargantuan file, the movement of the stars over the recording period create star trails when stacked into the same image. As all the stars in the Northern Hemisphere revolve around the North Star it makes for a very interesting result as seen by this stacking of 530 images into a single image. These are the images from the Mary Lake Sunset to Night Sky Time Lapse.
I trust this brief introduction to the world of time lapse photography has piqued your interest enough to give it a try. Beside your camera all you need is a tripod, an intervalometer and a big memory card to record all those images….oh wait….and a pot of coffee to keep you warm and awake while you stay up all night photographing the stars!


Follow Scott Martin Photography