
Happy New Year to all of you who have followed this blog over the past year and I trust each and every one of you will enjoy a wonderful New Year in 2014, full of God’s blessings.
This will be a short post today and something completely different from the norm in that it will be a bit of a tutorial, so your feed back would be appreciated.
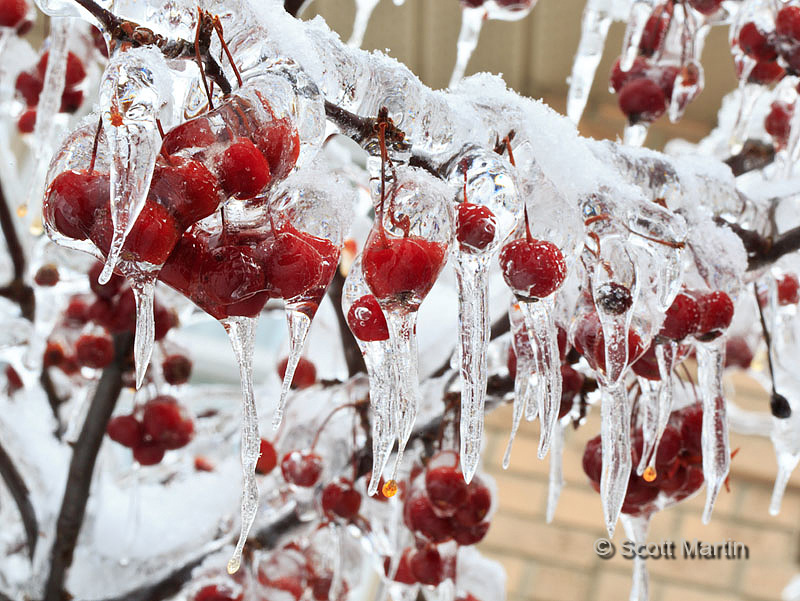
Christmas of 2013 in our area will forever be remembered for the ice storm that blanketed southern Ontario and caused power outages on a huge scale, affecting millions of people and leaving thousands of homes in the Greater Toronto Area without power for over a week. Our home in Oshawa was relatively unscathed, being without power for about half a day and an Ash tree in our front lawn suffering major damage (and perhaps may have to come down). Although the ice storm caused major destruction, it also allowed for some great photographs opportunities which actually lasted for three or four days before the sun came out and temperatures rose sufficiently to melt the ice. All of the images in today’s post are of a Flowering Crabapple tree located in the front yard of our home. Each image was taken using the Canon 5D MkIII and EF 100mm f/2.8L macro IS USM lens mounted on a tripod.
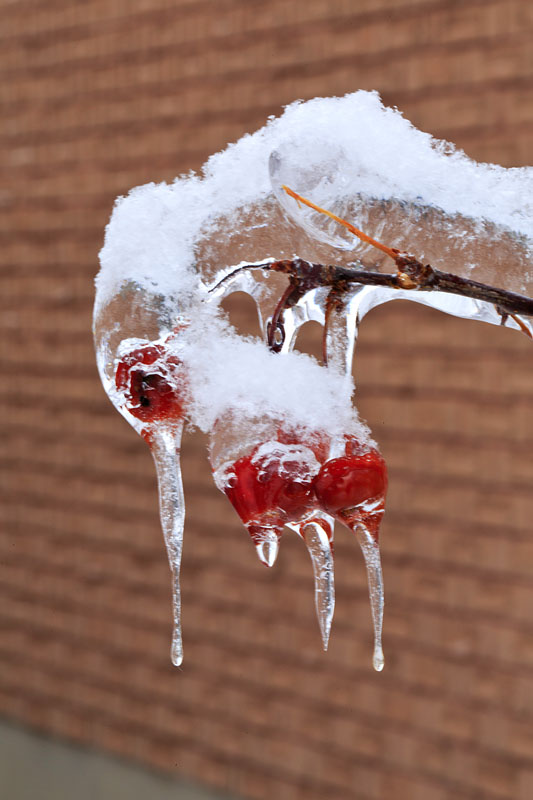
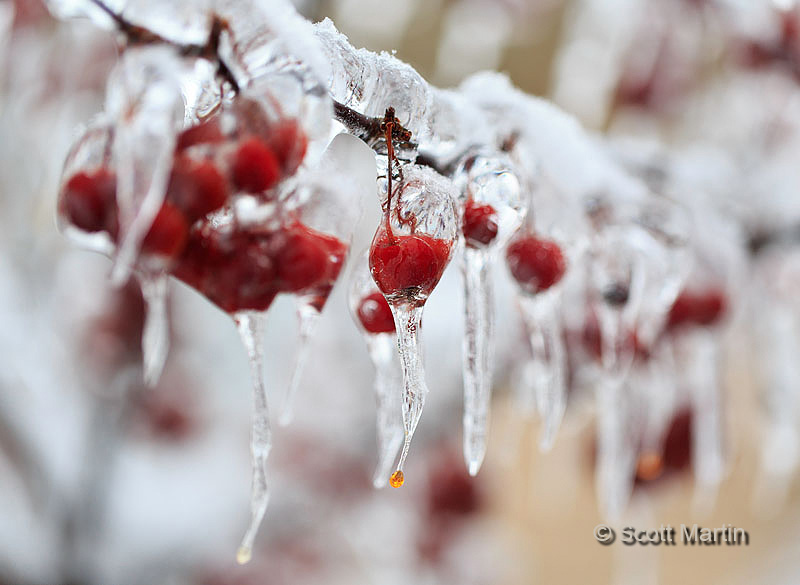
This first image is the final result after much experimentation to achieve the desired outcome; bright red Crabapples encased in ice with a snowy frosting and winter back ground.

Its important to consider the back ground (BG) of every image taken and if possible develop a BG that adds to the effectiveness of the image by isolating the object of the photograph from the BG. Classically, look for uncluttered BG’s that are out of focus, factors that help create separation between the object and its surroundings and therefore draws one’s attention to the object of the photograph. Technically this can be accomplished by two methods; when possible increasing the distance between the object and and BG, and increasing the aperture on your lens (lower f-stop) which reduces the depth of field (DOF; the distance range perpendicular to the lens that remains in focus).
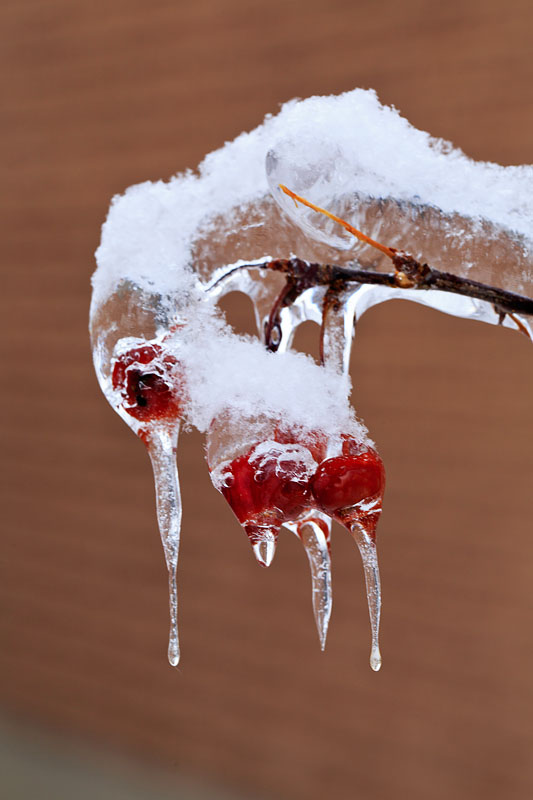
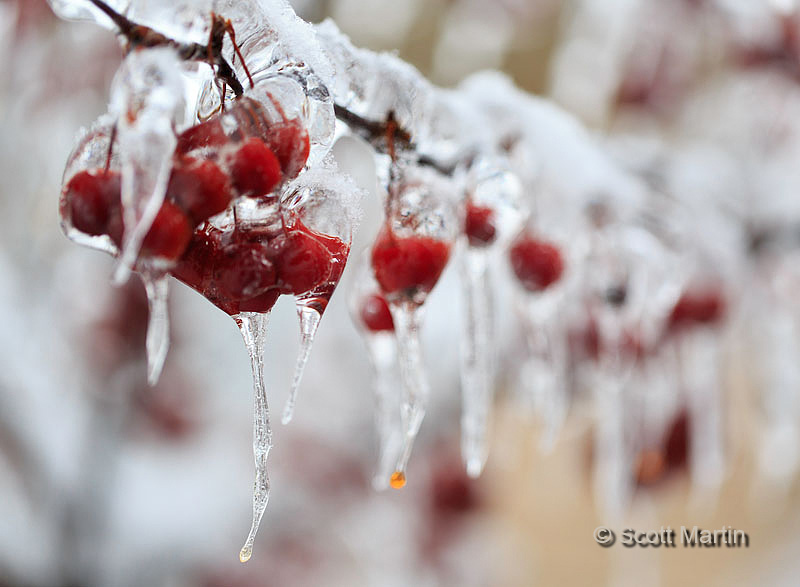
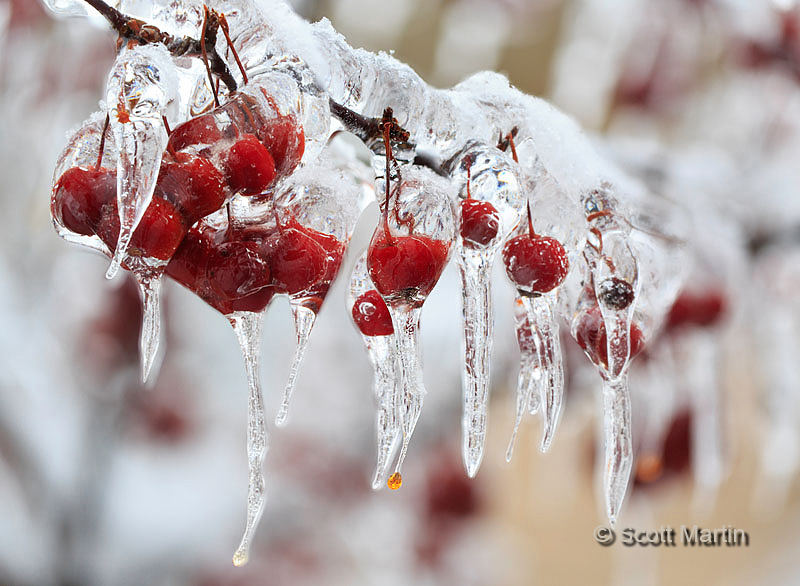
The next three images are all taken with the same camera position as the image above, however the BG is the brick siding of our next door neighbour’s house. They show the relationship between aperture and depth of field and that even when a BG is separated from the object and out of focus, colour has a huge impact on the final result!
f/32 ISO 100 1/2 sec (smallest lens aperture, maximum depth of field, bricks recognizable but out of focus due to distance from object).
f/10 ISO 100 1/20 sec (less depth of field, bricks almost unrecognizable and crabapples in reasonable focus throughout)
f/2.8 ISO 100 1/125 sec (minimum depth of field, bricks unrecognizable however crabapples not in focus due to extremely shallow depth of field)

Some may prefer the f/2.8 image while others may prefer the f/10 version as more of the object remains in good focus. A little bit of photoshop on the f/10 version improves the image about as much as can be accomplished given the colour of the brick BG.

Not being happy with the colour of the BG I decided to use a 48″ white/silver reflector (which is typically used to reflect light onto a person during portrait photography) to create the appearance of a snowy BG. Intuitively I selected the white reflecting surface which produced the following result.
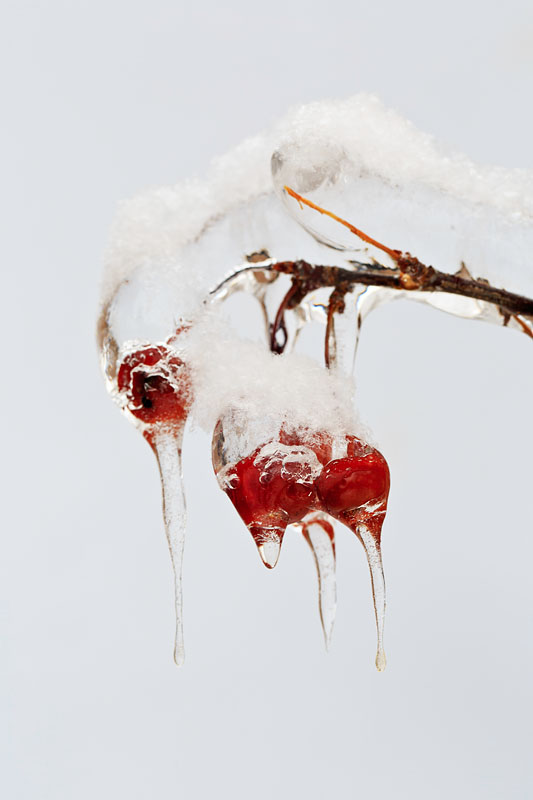
Although this is an improvement, all the detail in the ice covering the branches is lost and the structure within the icicles is greatly reduced using the white reflector. This led me to try something that was quite counter intuitive which was to use the highly reflective silver reflector and take the shot one more time which produced the results shown in the first image which has lots of detail in the ice, snow flakes and icicles that was absent using the white reflector. Here it is again with a little text in keeping with the date today.

The above image was relatively simple to take in that separating the subject from the BG was easy, the back ground was uncluttered and there was even room to place our own BG into the image. It may have taken some time and experimentation but the process was not a difficult one…..you just have to do it 🙂 But what about situations where you are faced with a cluttered BG that can not be separated from the object? In that case all we have to play around with is the depth of field which we do by changing the aperture of the lens. Remember: larger aperture (lower f-stop) has a shallow DOF while a smaller aperture (higher f-stop) has a deeper DOF. As an aside, focal length of the lens also affects DOF. A wide angle lens (shorter focal length) has a greater DOF than a telephoto lens (longer focal length) at the same aperture.
Here is a different branch of our Crabapple tree with a very cluttered and close BG in which I’ve purposely positioned the object branch at an angle to the lens which makes DOF considerations all the more challenging.
The first image f/32 ISO 100 1/2 sec. Things are in focus but there is no obvious object to be found. An all around poor image which even includes the windows and bricks on our house.
At f/2.8 ISO 100 1/320 sec things start to improve, an object is clearly identified but compositionally it is in the middle of the frame….a big mistake.
Focusing on the Crabapple cluster in the left of the frame at f/2.8 to improve the composition doesn’t work well as the DOF is so shallow you can not visually lock onto the object and therefore the image does not hold any interest.
So what can you do? Probably the best thing to do at this point is to agree that the ‘perfect shot’ is not coming from this set up and move on, however with todays digital files and photoshop we can quite easily blend multiple images into one final image. The most complicated form of this process is know as focus stacking where one will take tens (or even hundreds) of images of the same subject slowly moving the focus point from the front to the back of the object and then put all these images together to create an image where the entire object appears in perfect focus even though each individual image in the stack had a very shallow DOF. The simplest form of this process (and the least desirable in terms of results) is to put two images together. This last image is a blending of the f/32 and f/2.8 images above. If you look closely you will see the downside of the two image process but I trust this example shows the possibilities exist so that with patience and thinking things through you can often achieve results that will turn your snapshots into photographs!
I trust this was a helpful post and now its back to working on posts of our European trip.
Happy New Year!
These are amazing photos! If I didn’t know any better I would think they were straight out of a photography magazine!
Very helpful tutorial, I have learned so much from you!
Enjoy the new year!
Thanks Stace and Happy New Year. Keep leaving comments 🙂
Very interesting and informative Scott. The pictures are excellent! It’s really neat what can be accomplished with present day digital technology when combined with know-how. What I need is more know-how! Thanks for the excellent tutorial! Looking forward to more of these.
Thanks Dad and more know-how is what we all need 🙂
Wow. You are the epitome of an artist and educator. I learned about photography and I applied the concepts about focus and background to what we do with drs we coach. Thank you. And of course thank you for the beautiful photos. Are the European photos from a trip this year ?
Thanks Jen and thanks also for checking out the website. Its amazing how principles transcend the boxes we put them in so thanks for applying some photography truths to our coaching! The European photos are all from our thirtieth anniversary trip….its just taken some time to get to them onto the blog.
And here I thought that first image came straight out of the camera! Great tutorial Scott, you shared plenty of important tips and techniques. Like Rob, I like the merged result at the end. Maybe I should expand my digital knowledge beyond Lightroom 😉 A very Happy New Year to you, Deb and your family!
Thanks Arni and there is a whole new world called ‘layers’ out there waiting for you 🙂 Happy New Year to you, Dianne and your family. I also hope there are some winter owls in your very near future!!
i like this! you should definitely write more tutorials like this in the future.
Thanks Joan and Happy New Year to you and your great family. I’ll try to work on some more tutorials!
Hi Scott.
Excellent tutorial my friend. Go to admit that I often want to do this but so often get caught up with so little time. Love the first shot – really well done. Also like the last with two merged. Have not had a go at this (something to look forward to). As you say, so many options now with digital dark room, just need to spend more time. Happy new year to you and Deb. Trust that God will richly bless you in 2014. Take care!
Rob
Thanks Rob and all God’s best to you, Dianne and family in 2014…..especially Scarlett 🙂