by Scott Martin Photography | Jan 18, 2020 | Birds, Blog, Educational, Raptors, Wildlife
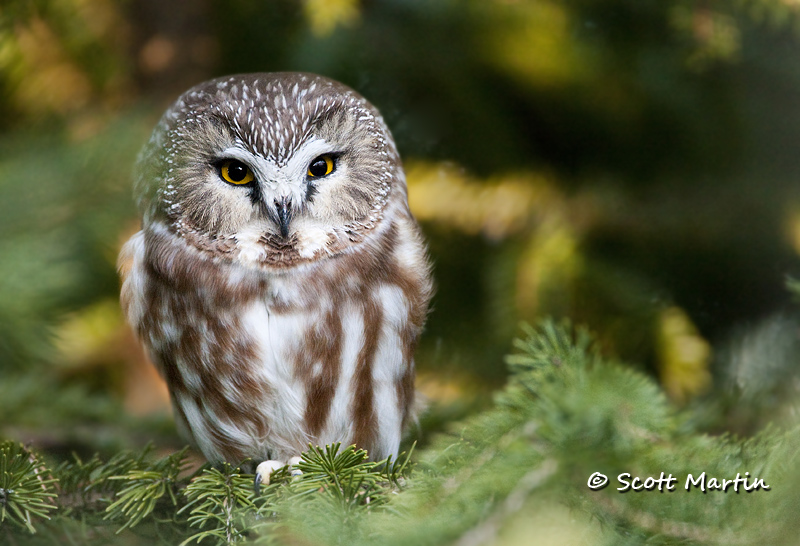
The Northern Hawk Owl is a medium sized owl that typically lives and breeds in the far north. They are rarely seen in south eastern Ontario unless factors such as a lack of food in their native habitat displaces them southward in search of a reliable food source. This winter a lone Northern Hawk Owl has shown up about an hours drive north west of us and it has become quite a celebrity with many birders and photographers making a point of seeing this locally rare bird.
I will prepare another blog post about the Northern Hawk Owl, however with this post I would like to highlight a behaviour that is fairly common amongst raptors; the practice of caching food for future consumption. Northern Hawk Owls are opportunistic diurnal raptors that take prey whenever it presents itself. Thus if the owl captures more food than its immediate nutritional requirements demand it will hide, or cache, that food in a safe place for later consumption. Typical spots for caching food are inside tree cavities or betweens forks of tree branches. It is a behaviour that I was aware of but had never observed until watching this Northern Hawk Owl. It was also a pleasure to be able to catch the caching process with the camera and I trust you enjoy the educational aspect of the images in this post.
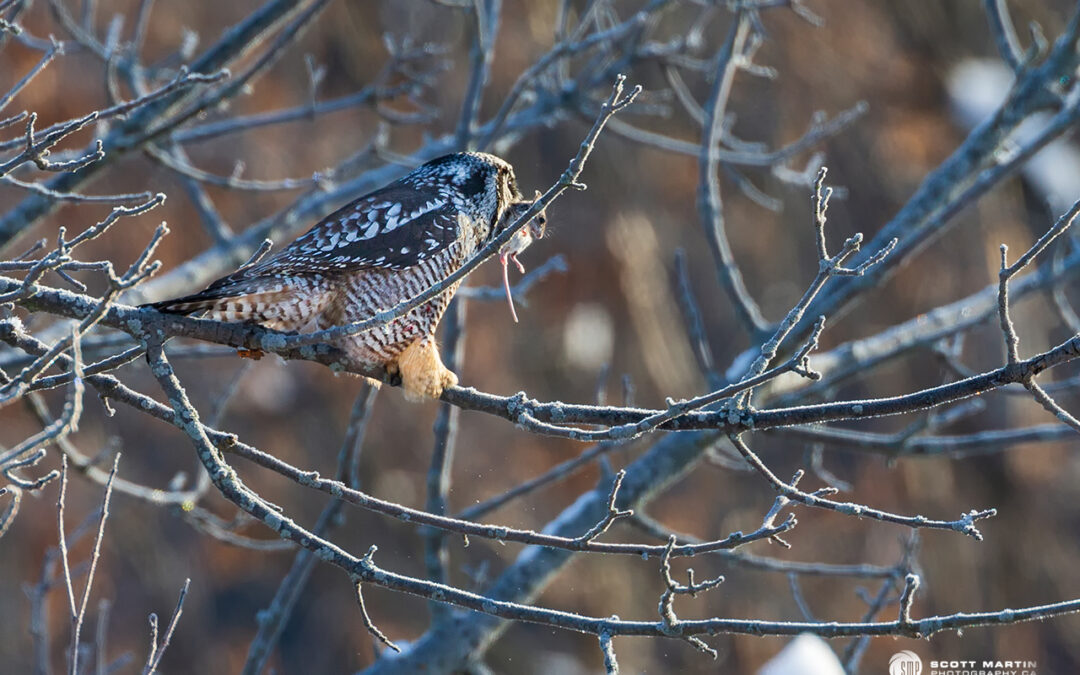
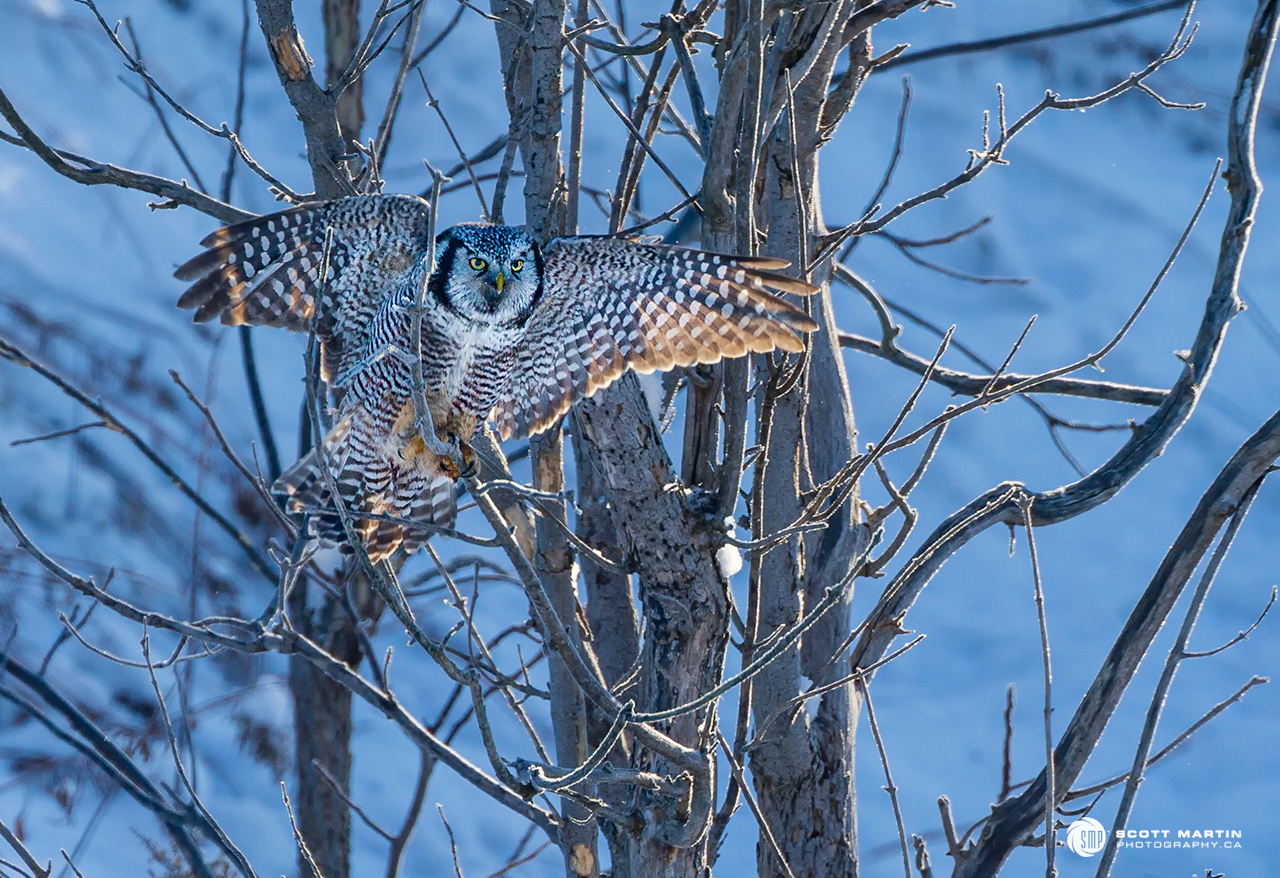
The first step for the owl is to catch the prey. Northern Hawk Owls typically hunt voles and small to medium sized birds. The owl caught this vole outside of my view however returned with it to a nearby perch.
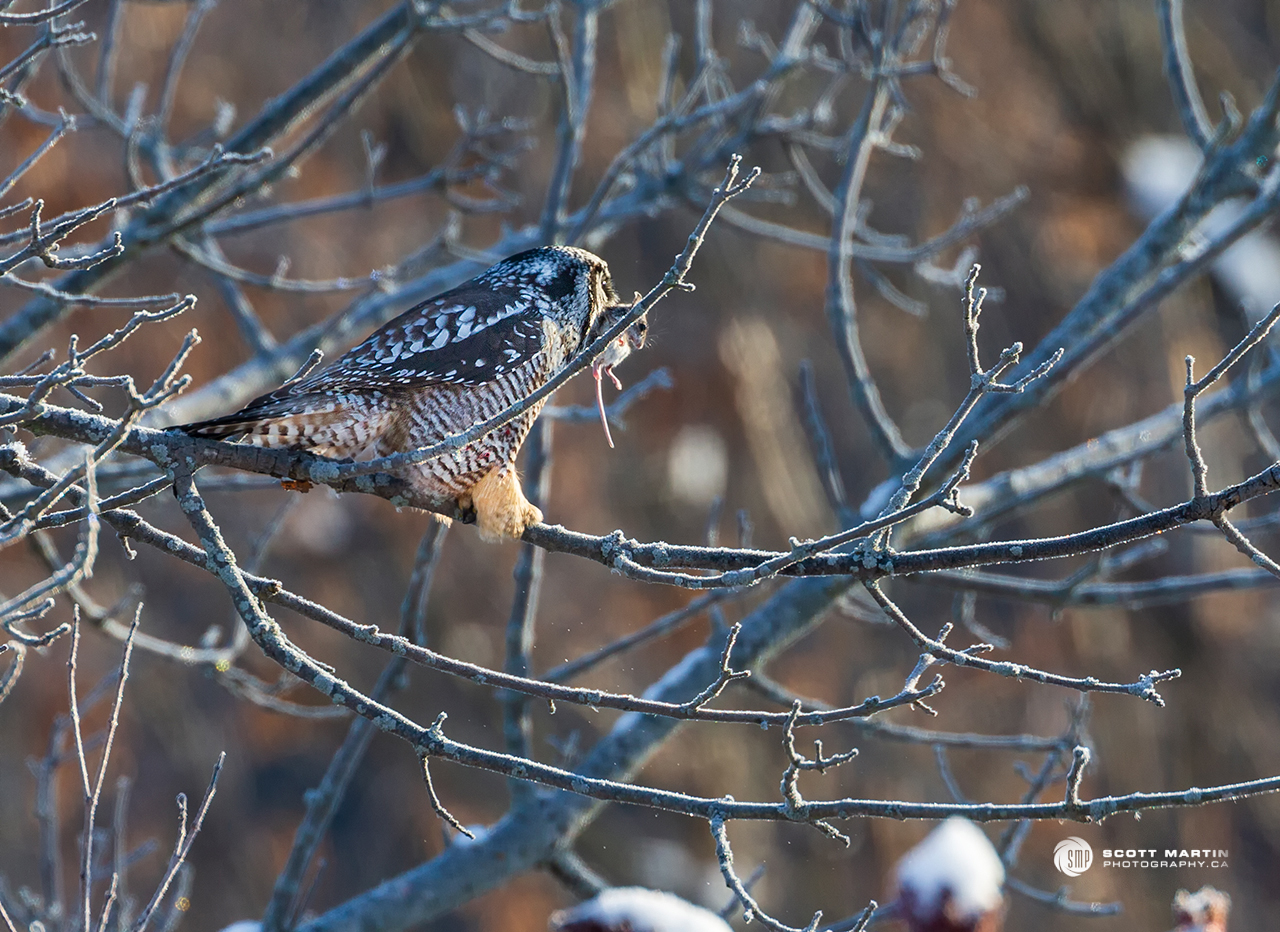
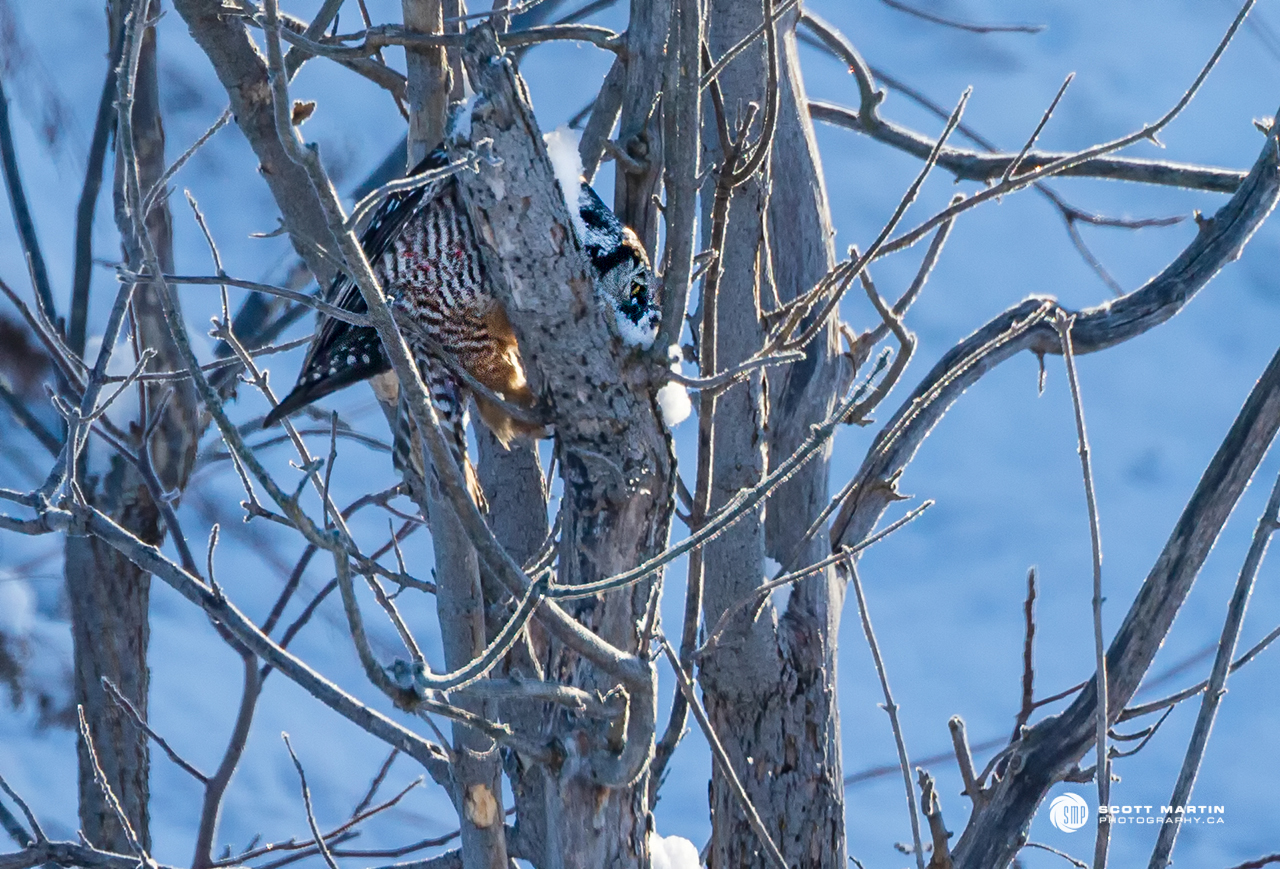
After catching its prey, the owl will often use its wings to spread out around the prey shielding it from the attention of nearby raptors and predators in a behaviour known as mantling. Although not a classic mantling example, you can see in the next image how the Hawk Owl has completely consealed (well, almost) its prey while on its perch.
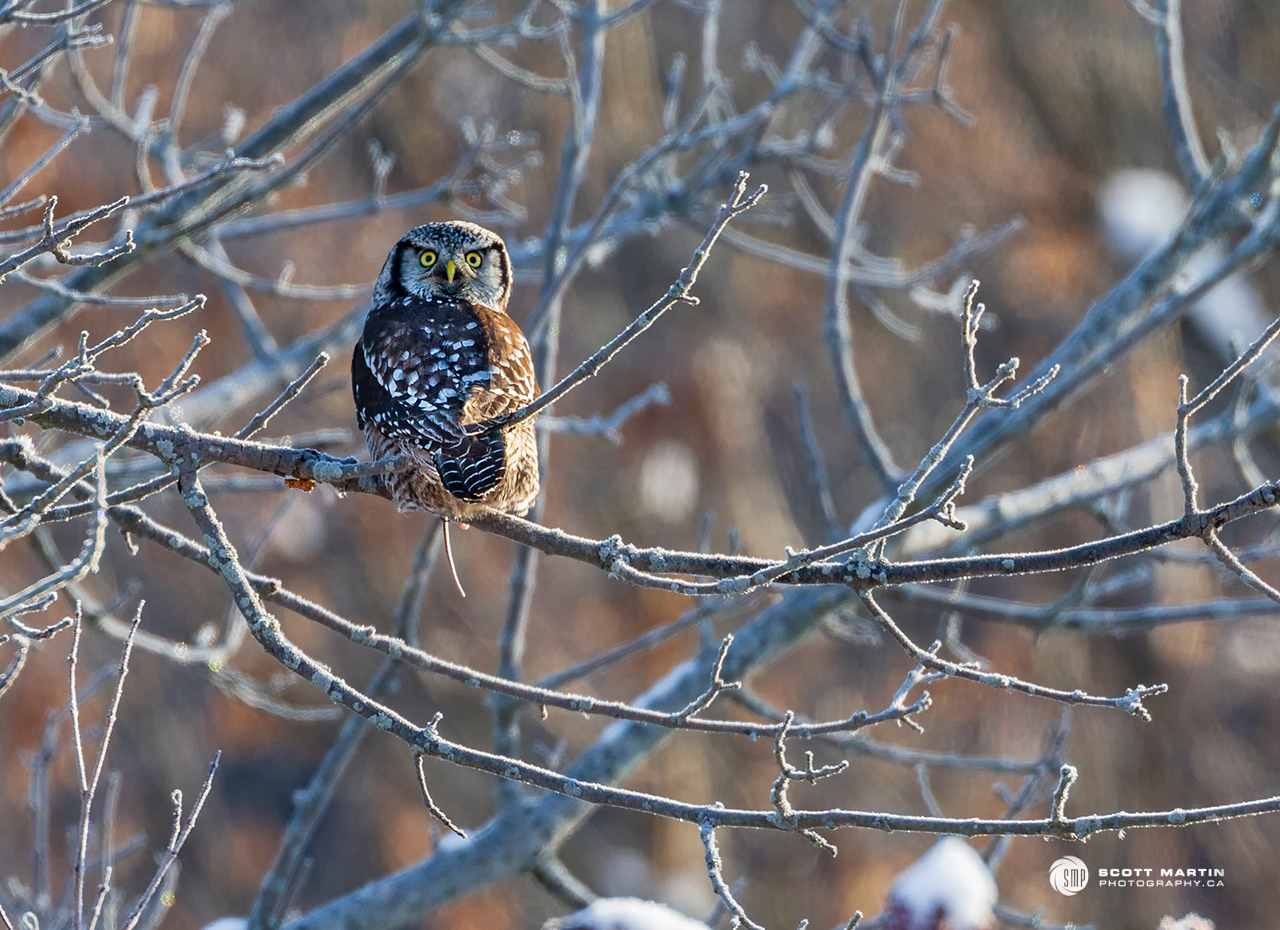
After closely surveying the area and detecting no threats, the owl moved to its chosen cache site in the fork of a small nearby tree.
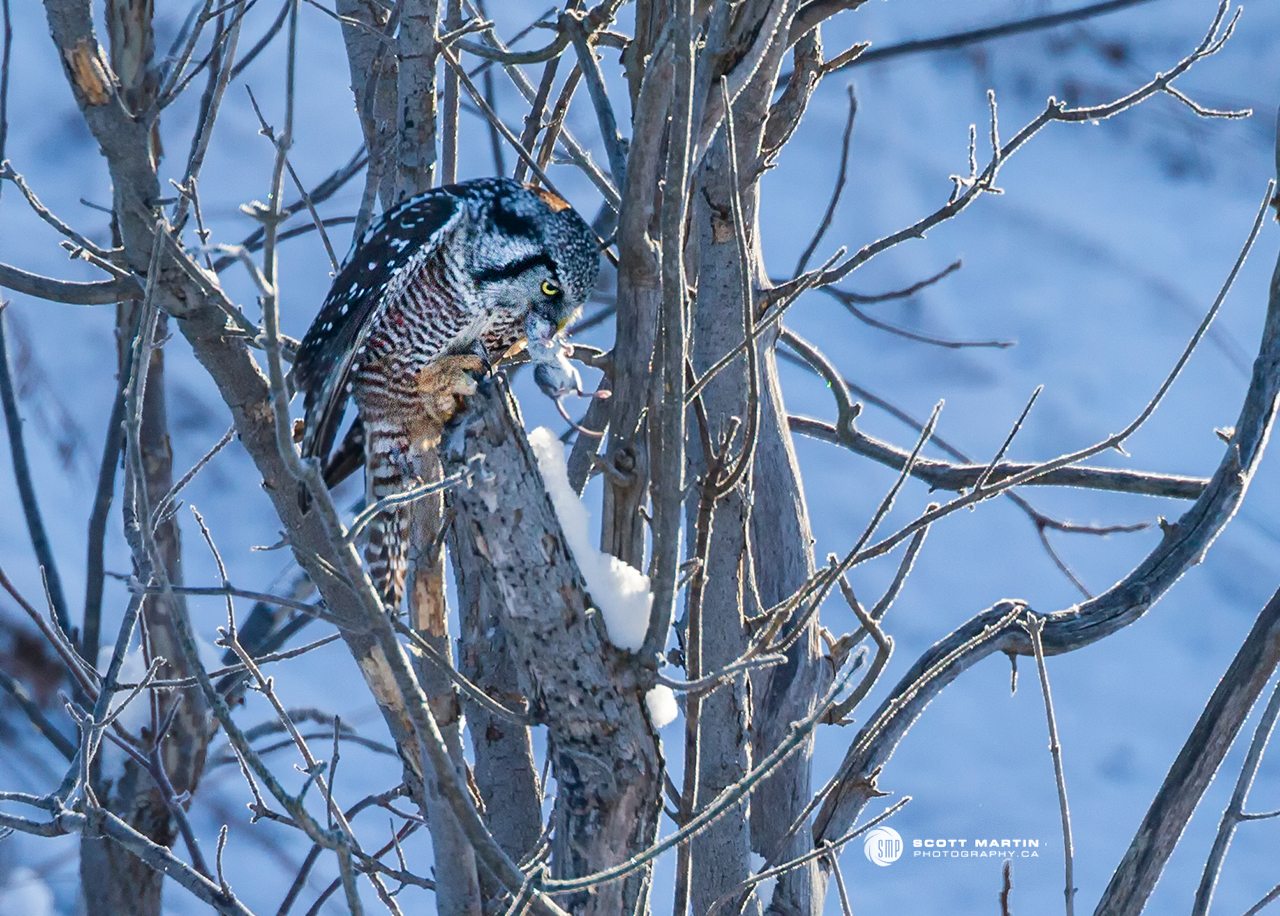
The Hawk Owl deftly and rather forcefully placed the vole into the crook of the tree trunk and branches.
Once the vole was securely placed and well hidden in the tree the Northern Hawk Owl repositioned himself on a nearby perch and immediately began hunting for its next catch.
It was interesting to observe that the owl, as well as looking for new food, also kept watch on the locations of its cached food sources. At one point the owl took flight from its perch and travelled about fifty yards to knock a large black squirrel out of a tree that was presumably getting too close to a cached vole. The squirrel fell about 40′ to the ground and didn’t seem to be harmed in the process. The Northern Hawk Owl returned to its original perch and continued to hunt, confident that the squirrel would leave the cache alone. Those of you who have been following this blog will notice two things; its been two years since the last post, and the website looks very differnt now compared to when you last saw it. The old website was so dated in its appearance that I was embarassed to post anything and athough not a good excuse, there just wasn’t enough free time to take the time required to learn how to create a new fresher looking website. Today’s version is better than the old one, however still requires lots of tweaking to get it to where it needs to be. If you find any bugs or have any design suggestions please feel free to leave a comment and I’ll do my best to make the improvements.
Happy New Year to everyone and I look forward to keeping in touch via this website, Facebook or Instagram.
by Scott Martin Photography | Feb 2, 2018 | Blog, Educational, Landscapes, Naturescapes, Travel
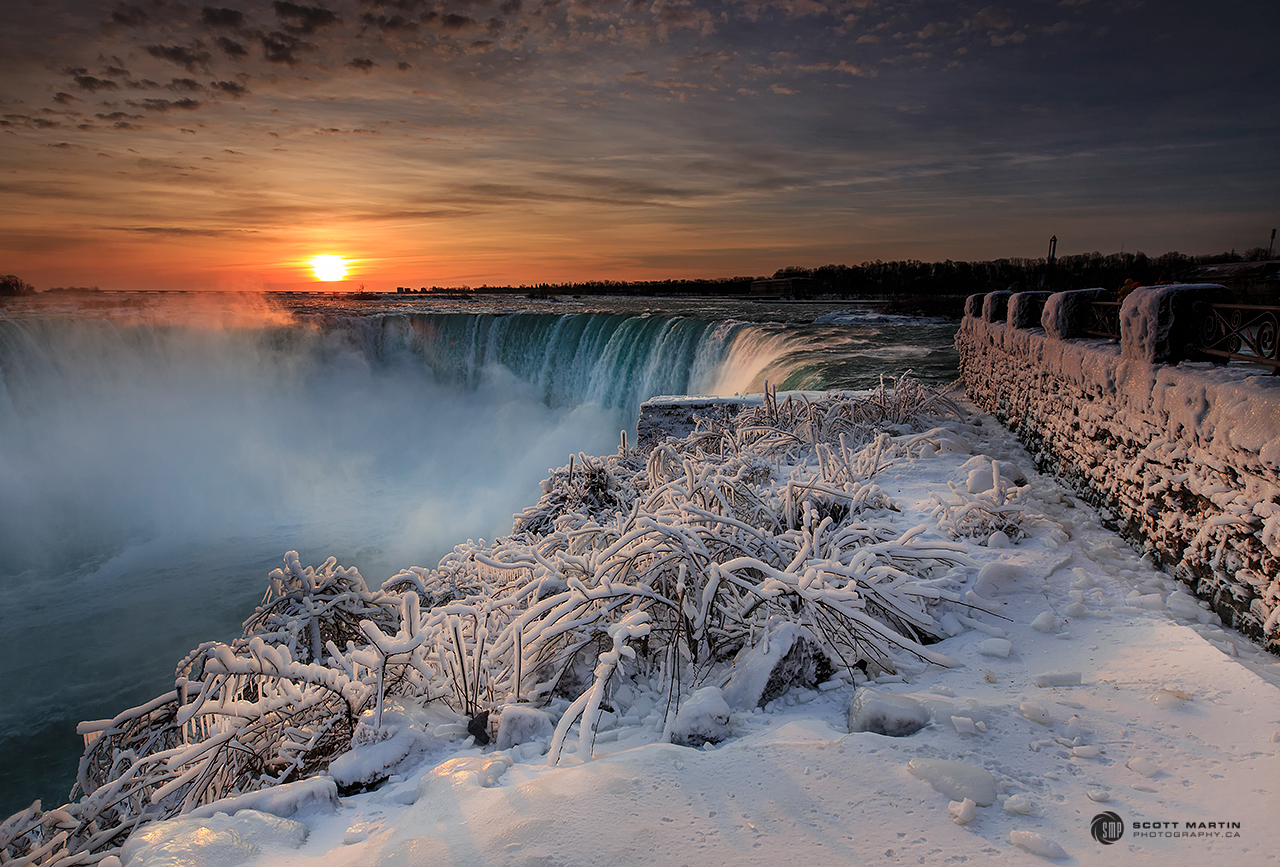
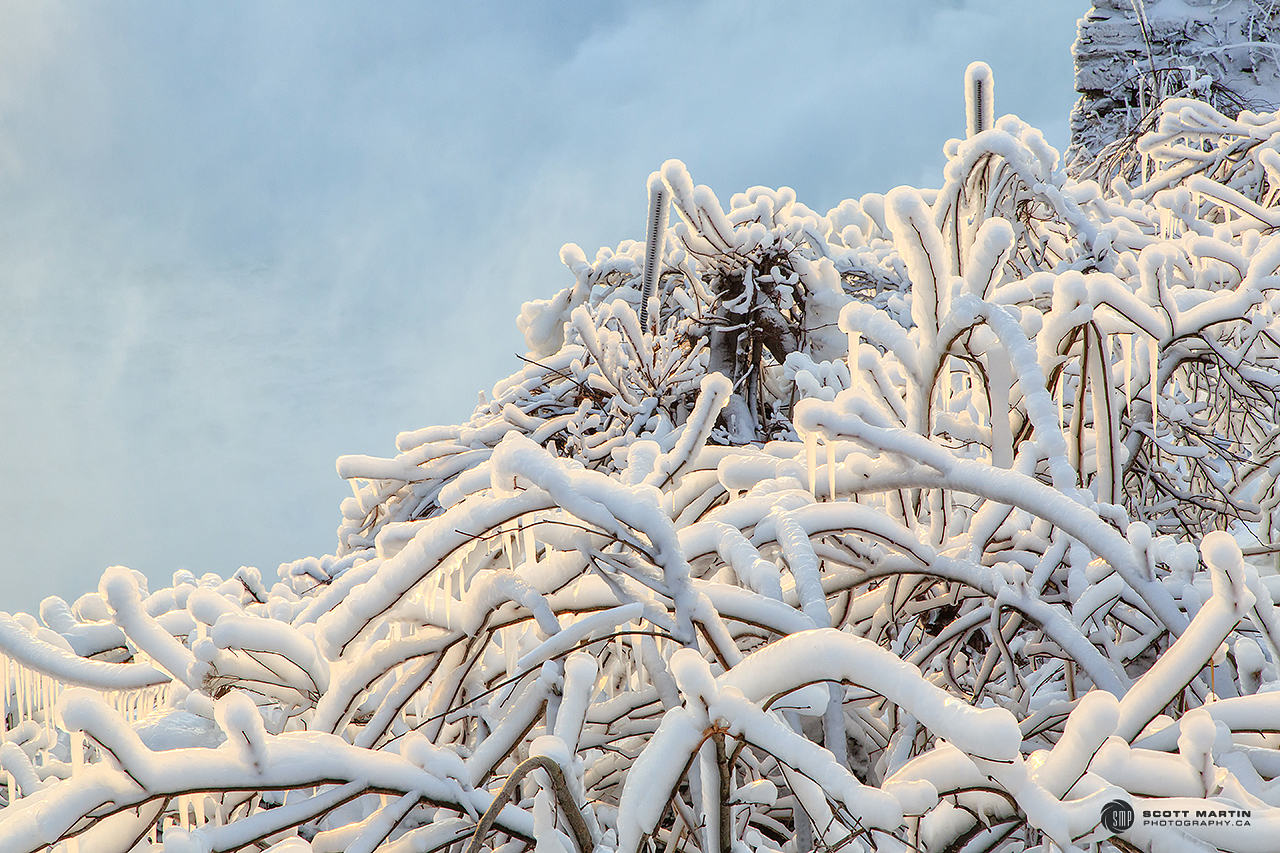
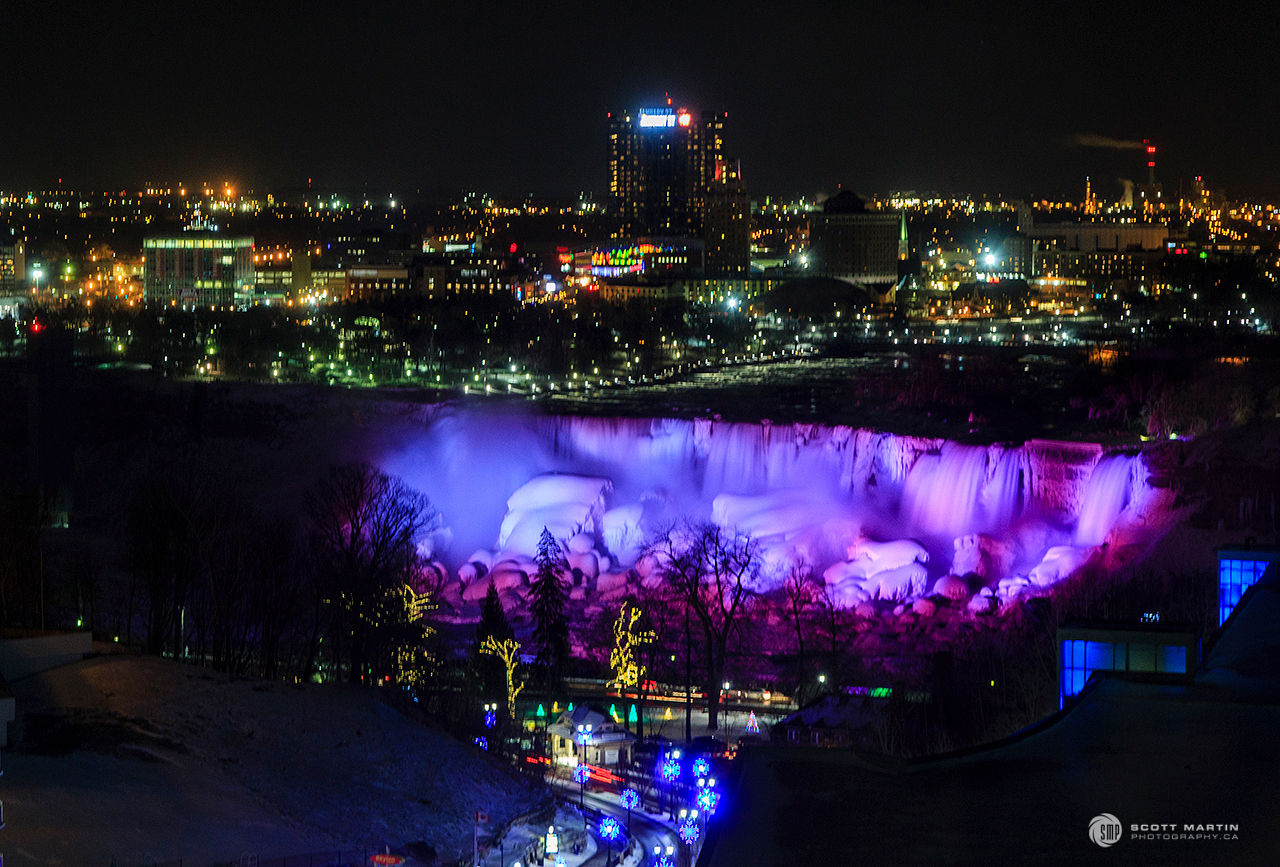
For the past number of years we have enjoyed an extended family weekend in Niagara Falls in January. It is a great time of the year to see the falls dressed in her winter splendour with snow and ice abounding and the ever-present mist laminating layer after layer of ice on everything it touches. Also during winter the sun rises over the Horseshoe Falls creating the opportunity for that ‘perfect’ Niagara Falls sunrise photograph.
So on a very cold Saturday morning Deb & I made the short walk from our hotel to the brink of the falls arriving in the dark about twenty minutes before sunrise. It’s wise to arrive early for three reasons; you will likely be first on scene and thus the prime spot to take the image is available (the early bird…), you have time to scout out and determine the best vantage point, and you have time to set up your gear and take test images to determine the correct, perspective, composition and exposure details to successfully record the image you have in mind.
With your smartphone it is possible to do much of the advance planning long before you arrive on the scene. There are many apps that help in this process and after testing many of them my two favourites are LightTrac and PhotoPills. LightTrac is a great little app that allows you to see rise and set times for the sun and moon on any date anywhere in the world. PhotoPills is a very robust app that is essential for every landscape photographer. It allows you to determine where and when the sun or moon will be positioned where you desire and how to position yourself to photograph it. PhotoPills also provides a wealth of information to help calculate complex photographic challenges including time lapse, long exposure and HDR (High Dynamic Range) photography.
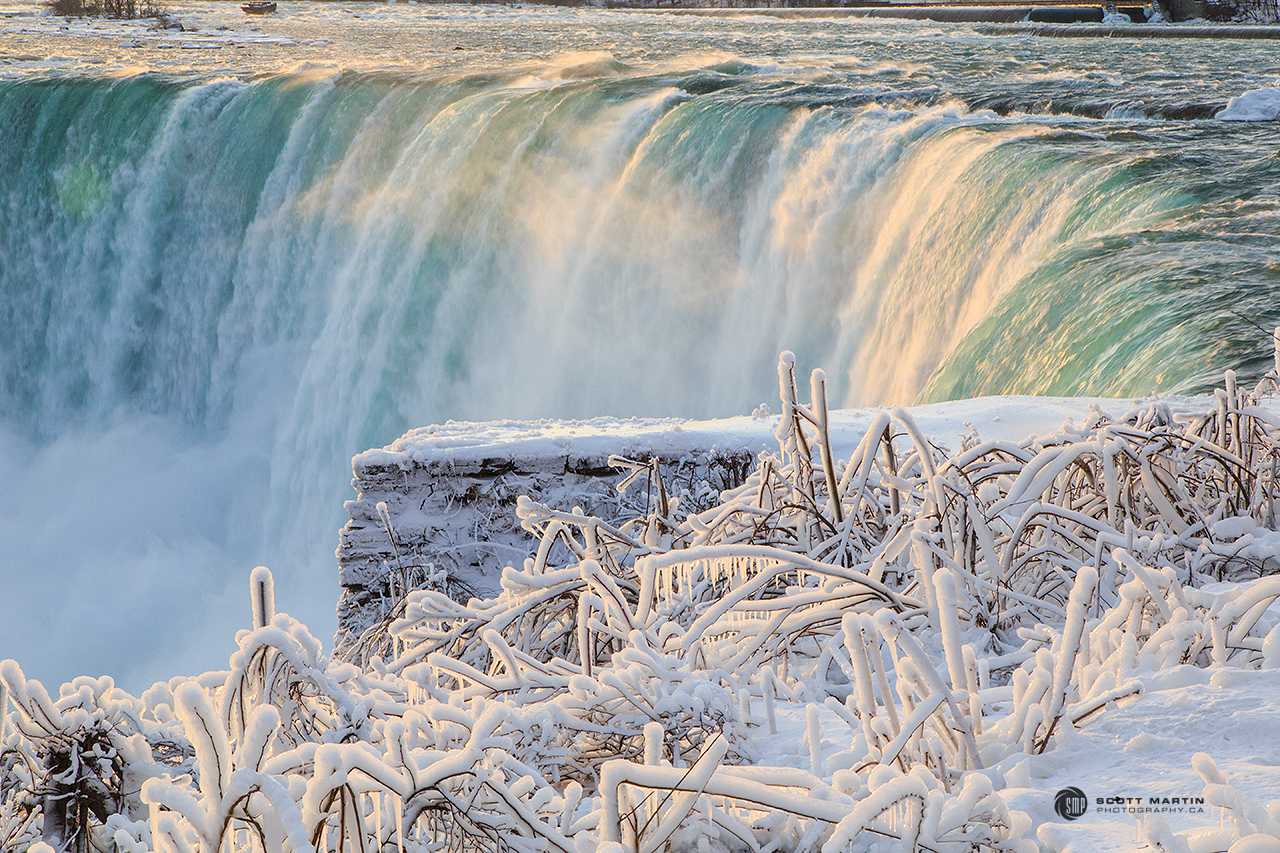
Once we pinpointed our location and set up the tripod, we waited patiently for the sun to rise, very happy that there were some clouds in the sky and the wind was sufficient to be blowing the mist from the falls away from the spot where the sun was going to rise.
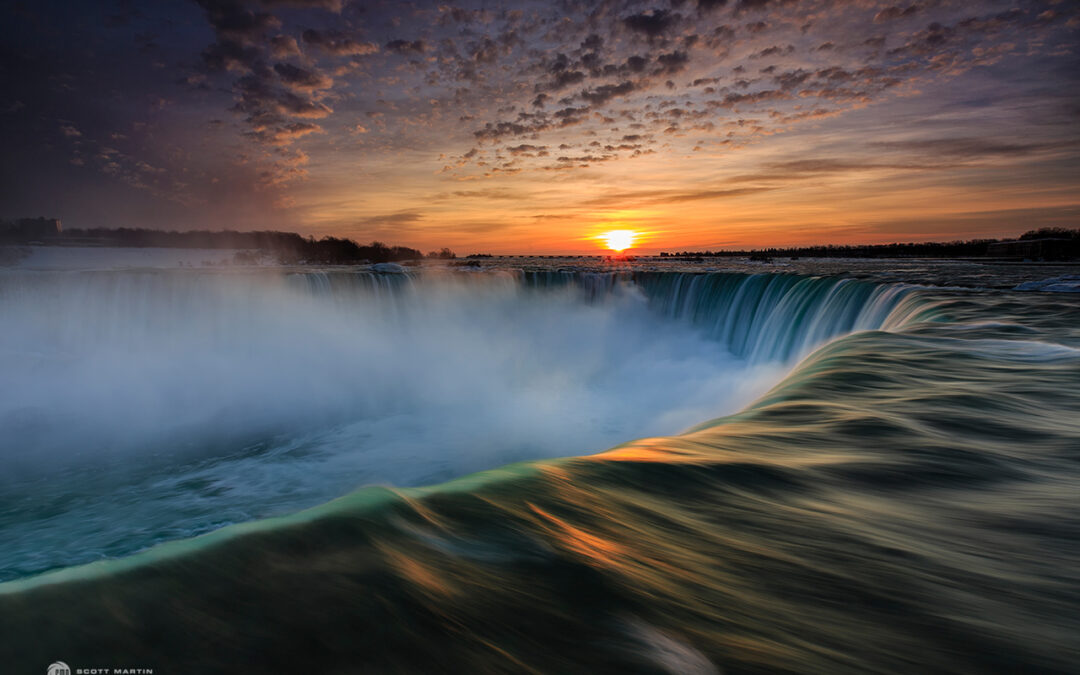
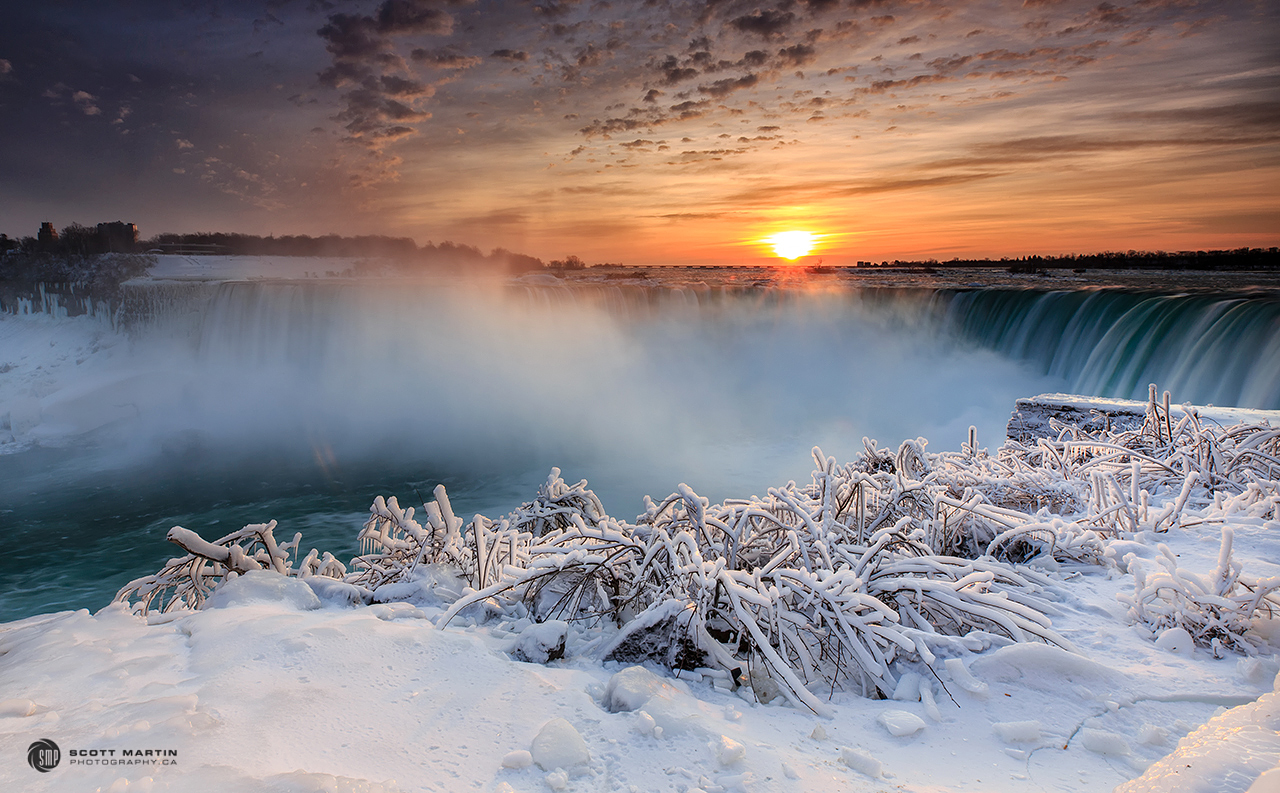
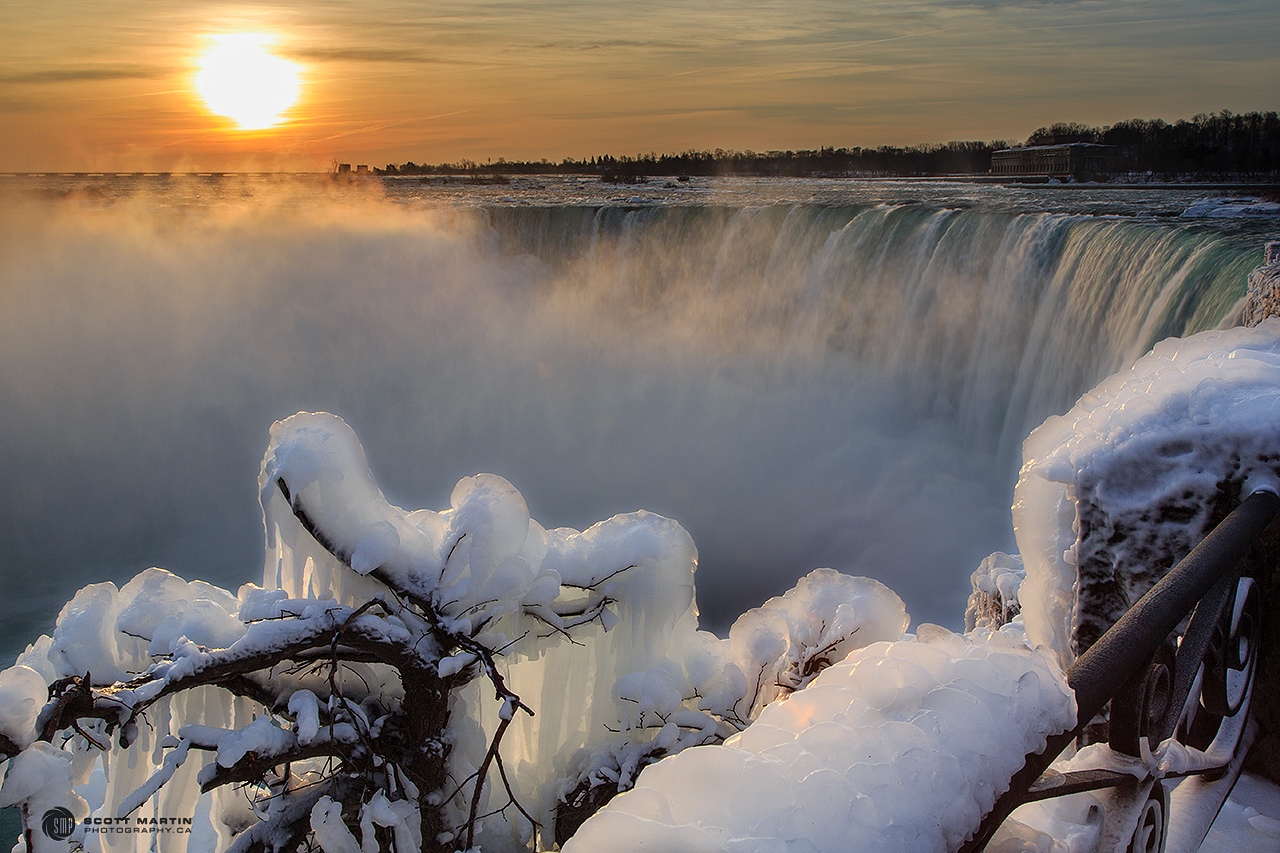
Sunrise, January 20, 2018
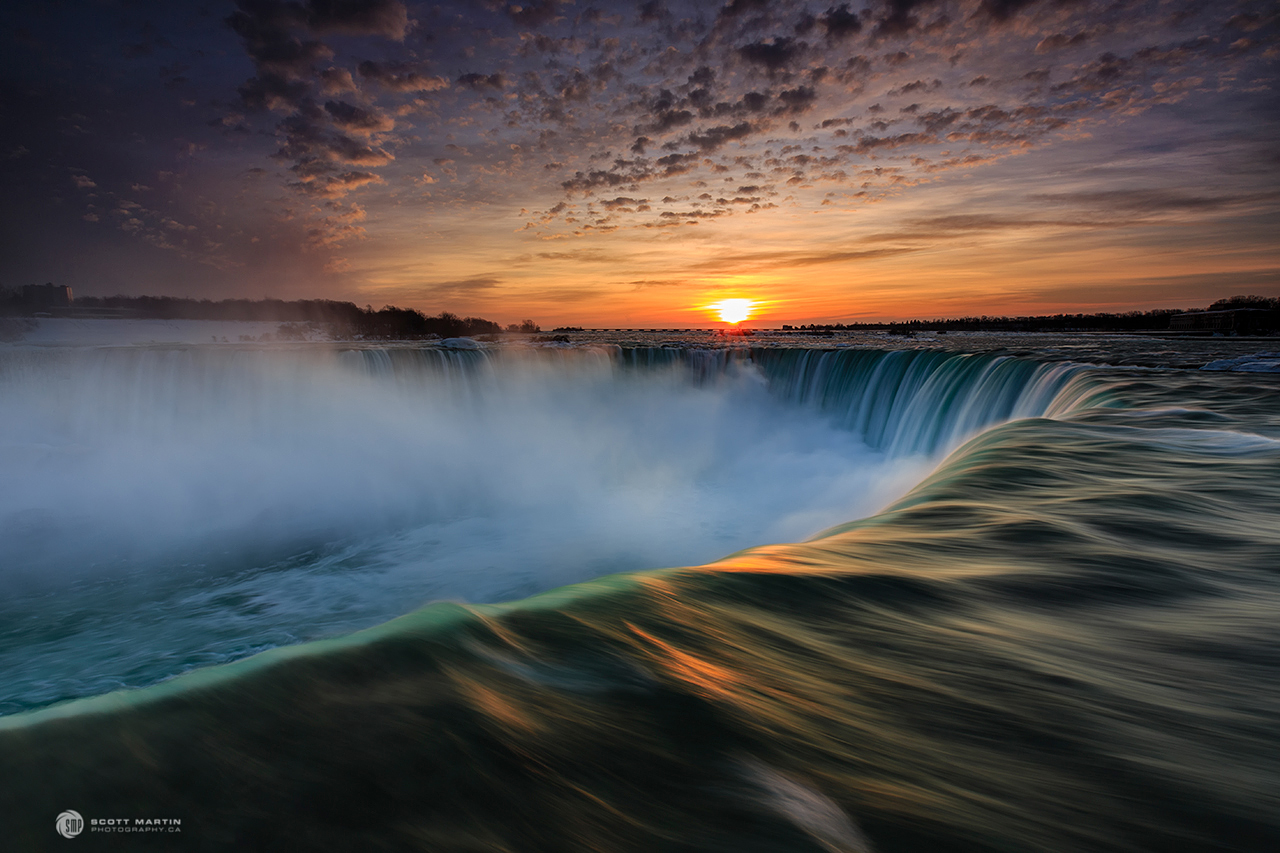
This image was taken using a Canon 5D Mk III with an EF 16-35mm f/2.8L III lens; ISO 50, f/22, 1/2 sec at 16mm focal length. I was able to take this image with a single frame by using a Singh Ray reverse three stop ND grad filter to darken the sun by three f-stops which evens the light intensity at the camera sensor. Without the filter, in order to get a well exposed image you would require at least two images, one exposed for the bright sky and the other for the darker falls and combining them later on the computer. It’s always easier and less time consuming to take one image and filters help make that possible.
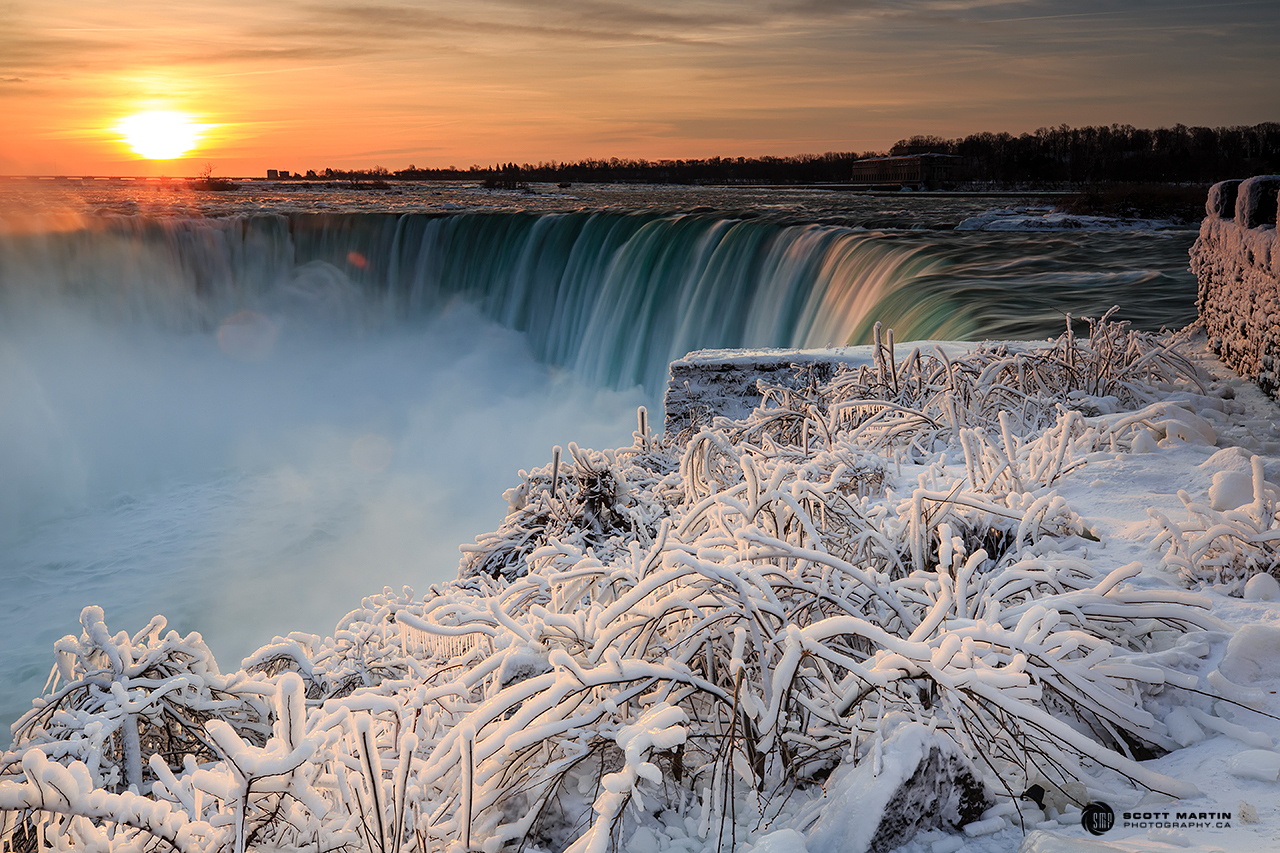
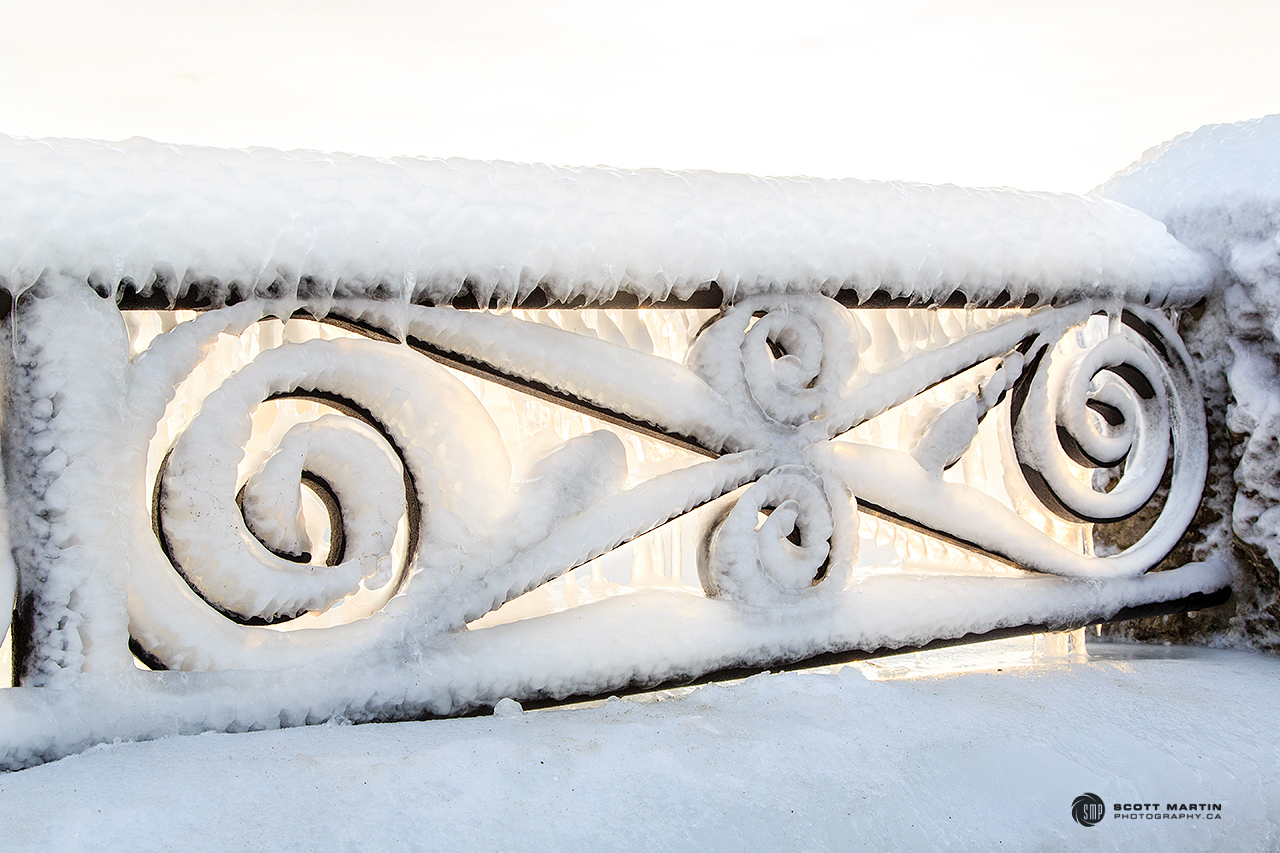
After capturing a ‘few’ sunrise images we wandered around the falls enjoying a great start to new day. Making more memories of Niagara Falls on a cool winter’s morning before heading back to the hotel for breakfast. I hope you enjoy these images.
.
.
.
.
.
.
.
The view from our hotel room.
Other images taken at the falls can be seen in the Naturescapes Gallery on the website.
As always, your comments and questions are welcomed and I trust that you will grab a tripod and camera and head out early one morning soon to photograph the sunrise. You will be glad you did.
Although this is a little late, Happy New Year and all the best in 2018 to you and yours!
by Scott Martin Photography | Dec 30, 2017 | Birds, Blog, Educational, Raptors, Wildlife
The Survey Period Has Ended. Thank You For Your Interest.
Each year as the cold weather moves in and winter arrives, those of us who count ourselves as birders, photographers or a combination of thereof look forward to seeing owls, especially those that make their way south from the Arctic in search of food. In our area (Southern Ontario) the Snowy Owl is the most common followed by the Great Gray Owl and even more elusive Northern Hawk Owl.
It is also the time of year that the topic of discussion on many birding and photography forums as well as other social media platforms turns to the subject of baiting, specifically the baiting of raptors. These discussions are often emotionally charged and it has been my observation that little is accomplished by them.
If you search the literature there is not a plethora of information regarding baiting, especially with respect to the modes of baiting nor any objective parameters to even define what constitutes baiting. It is no wonder baiting discussions take the course they do.
The desire to gather information that will provide context for future baiting discussions became the genesis for this survey. It has been in development for a while and I greatly appreciate the input and edits suggested by five respected colleagues (including birders, conservationists and photographers) who reviewed the survey prior to its release.
The survey will remain open through January 31, 2018 with results available shortly afterwards. Please invite others to complete the survey and feel free to promote it among groups you interact with.
The Survey Period Has Ended. Thank You For Your Interest.

by Scott Martin Photography | Feb 10, 2017 | Blog, Cityscapes, Educational, Landscapes, Travel
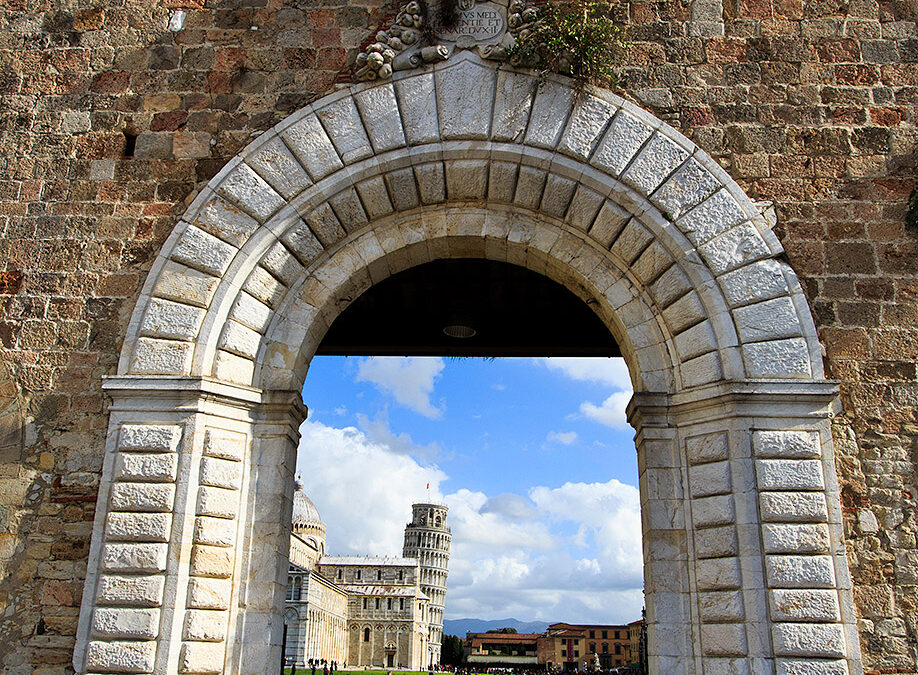
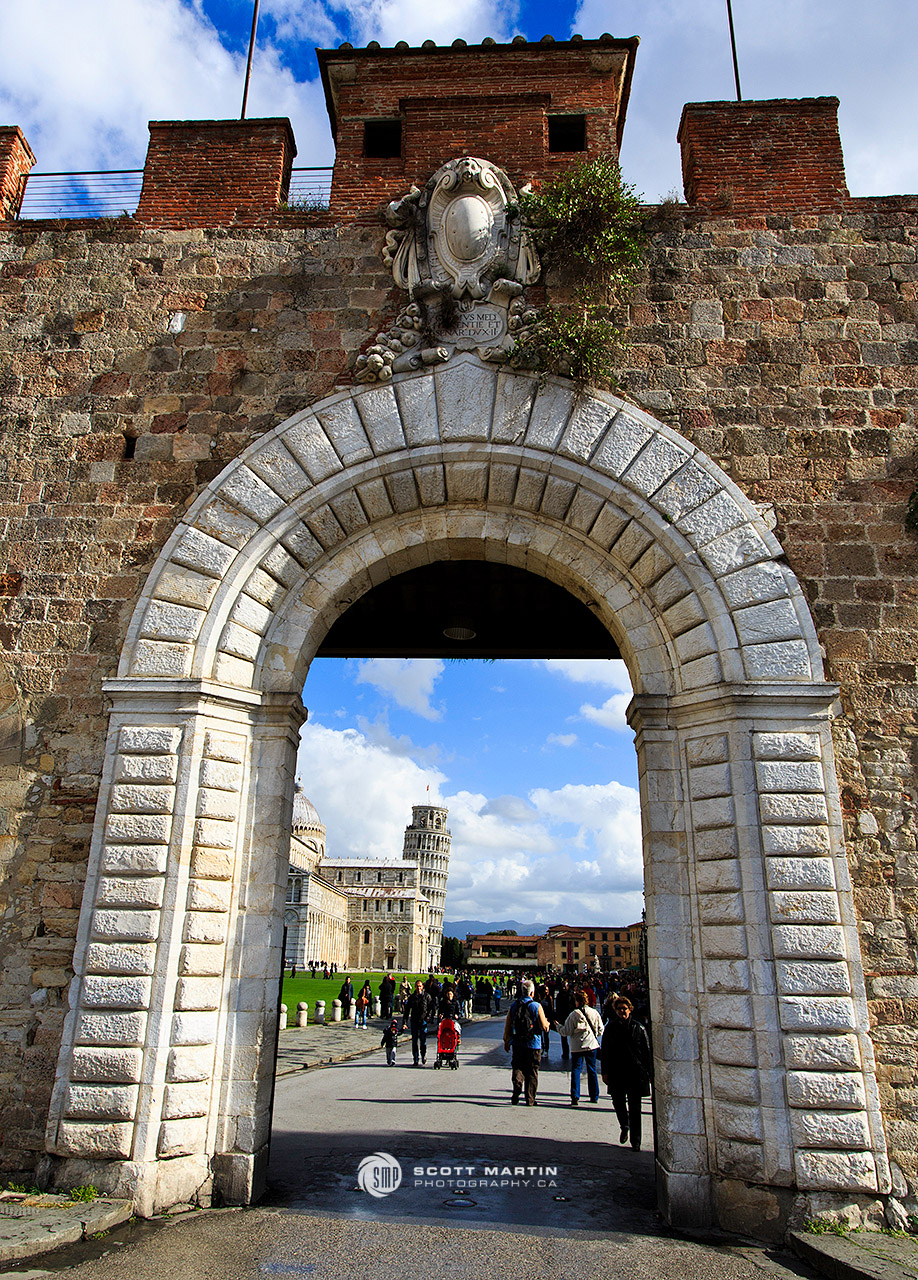
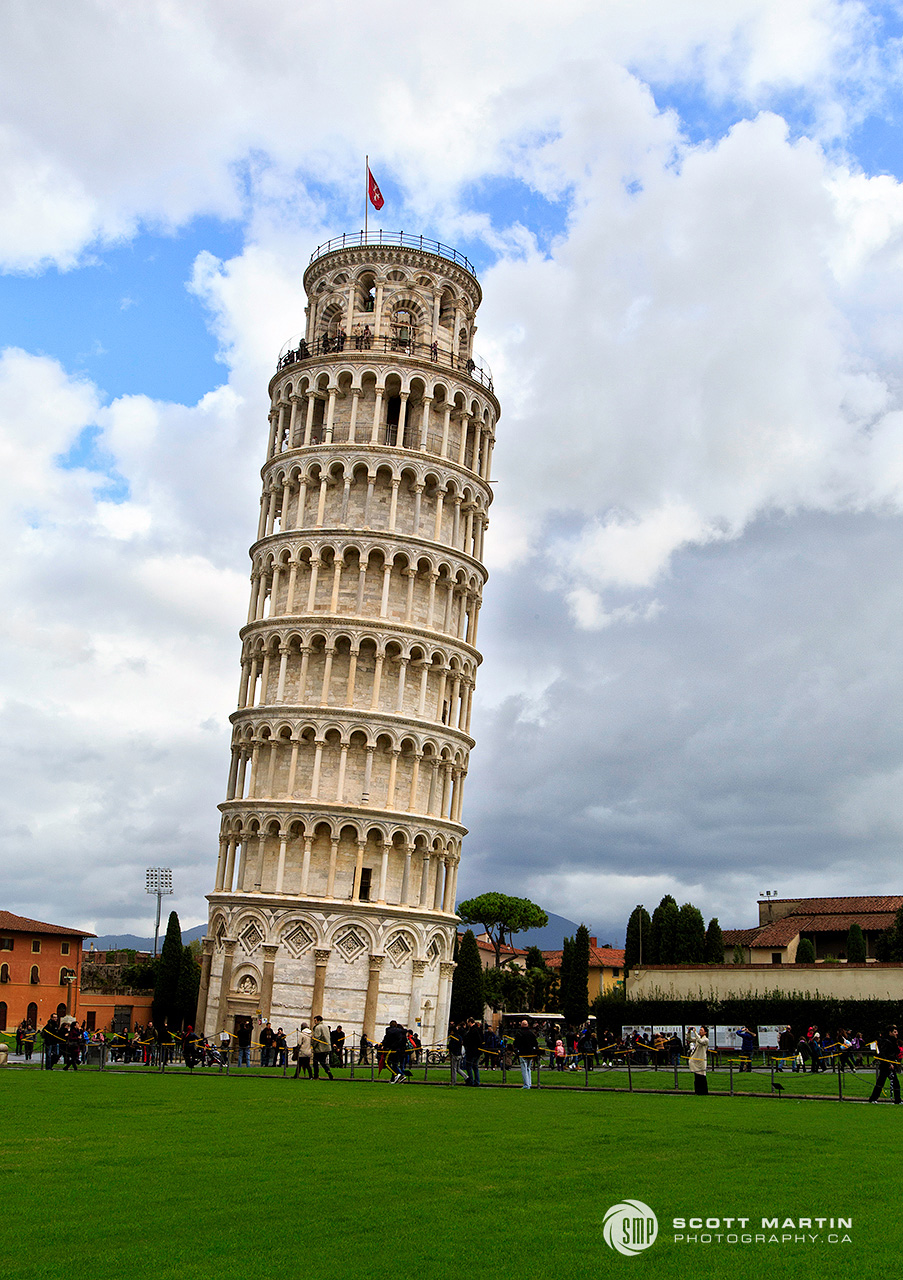
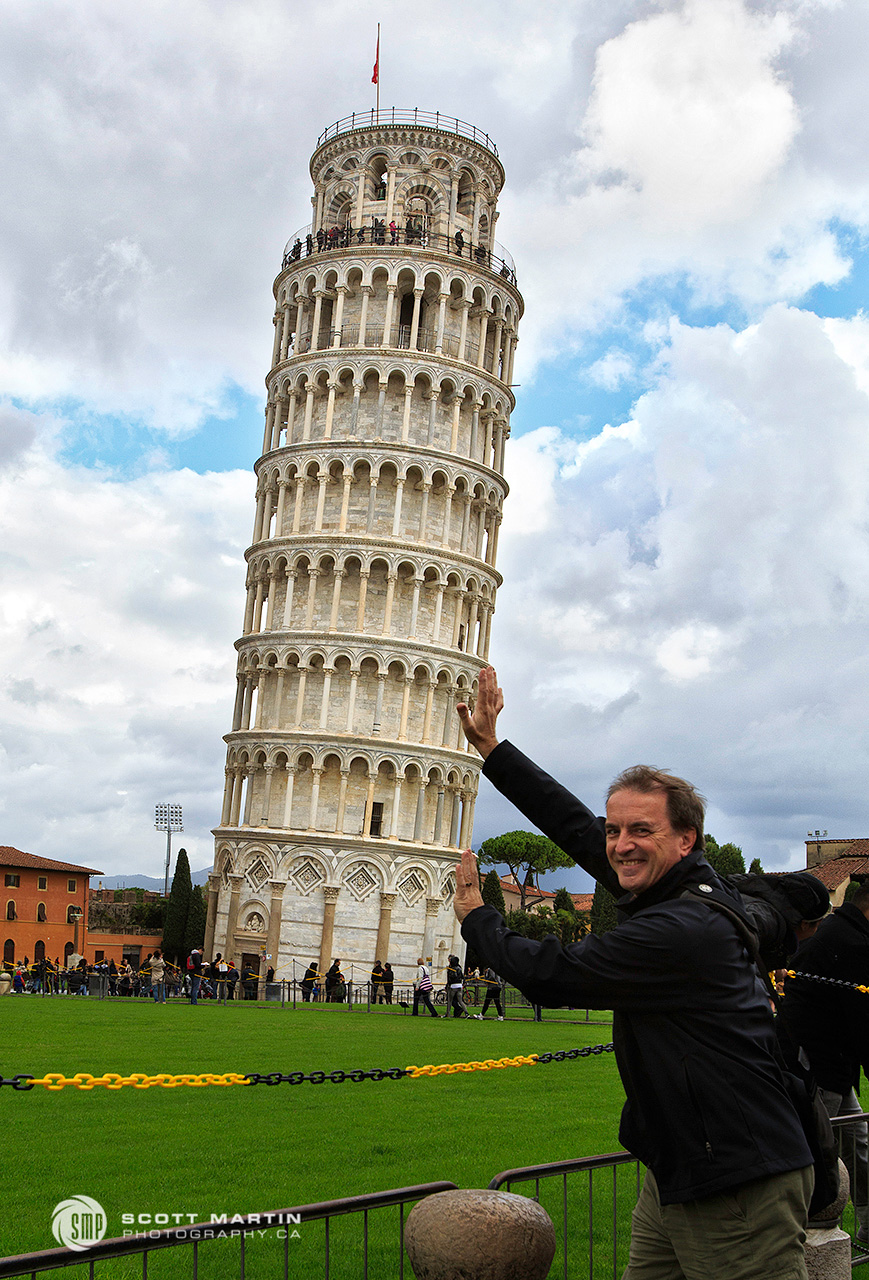
The beautiful country of Italy is home to many unique and well known buildings with the Leaning Tower of Pisa being among the most iconic. As Deb & I left Cinque Terre and headed to the Amalfi coast for a few days in Positano we made it a point to stop and visit the Leaning Tower.
Pisa is a coastal city of over 90,000 people in the famous Italian region of Tuscany. The Leaning Tower of Pisa is a free standing bell tower, or campanile, of the Pisa Cathedral. The partially walled grounds of the cathedral have three primary buildings; the cathedral, the baptistery and the campanile. As we approached one of the gateways to the campus we experienced our first glimpse the Leaning Tower. One of the many joys of travel is the feeling engendered when seeing an iconic landscape or building in person for the first time and this image captures that moment with the famous bell tower.
The tower is ~185 feet high and took many many years to complete. The tilting of the tower began to occur during its initial construction primarily due the sandy ground on one side of the tower being too soft to support the extreme weight of the structure (14,500 metric tons).
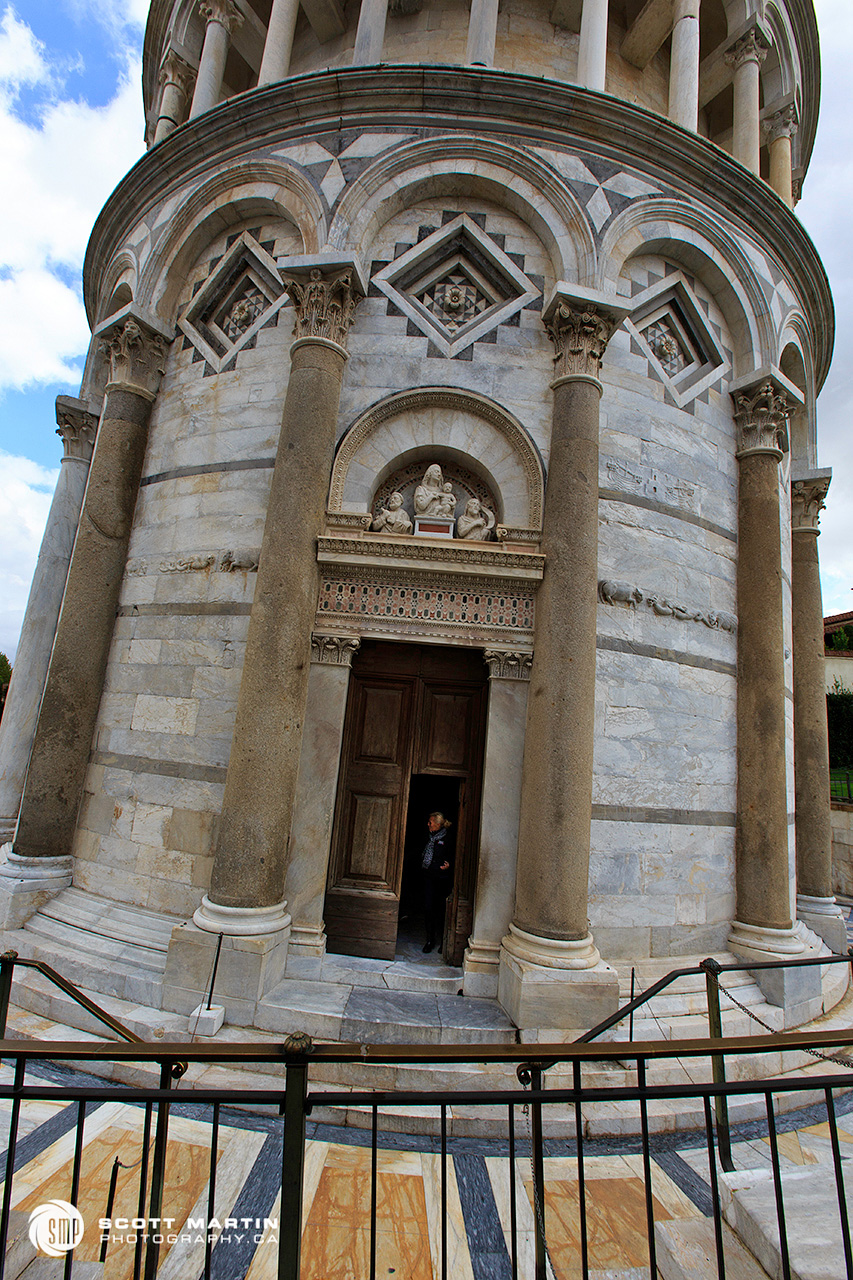
The walls at the base of the tower are made of solid white marble and are an incredible eight feet thick in order to create a sufficient support on which to build the seven stories above. Unfortunately, the ground below didn’t do as well! It’s hard to believe that the below grade foundation is only ten feet deep for a structure that is almost 200′ high. Certainly the design of the tower was flawed from the outset.
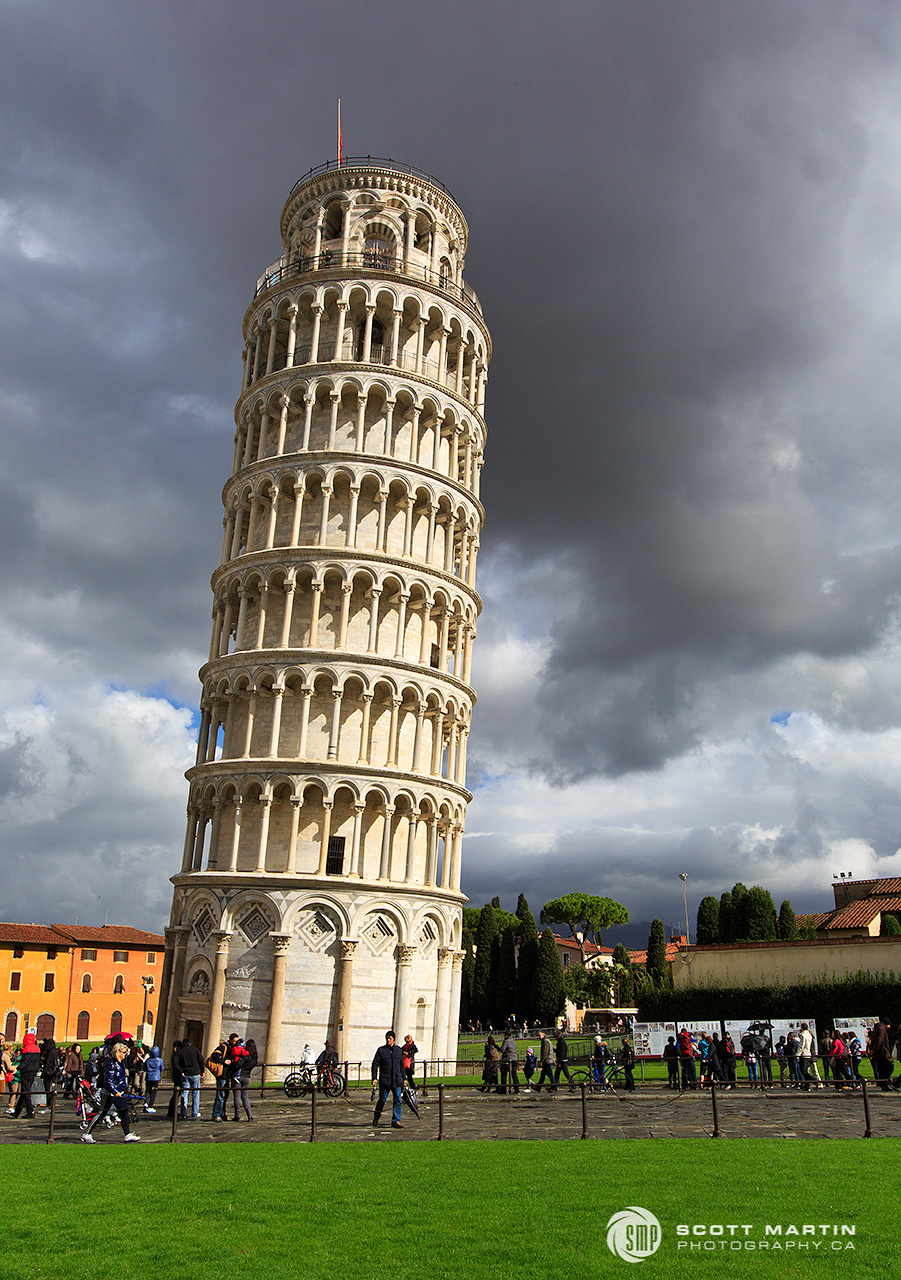
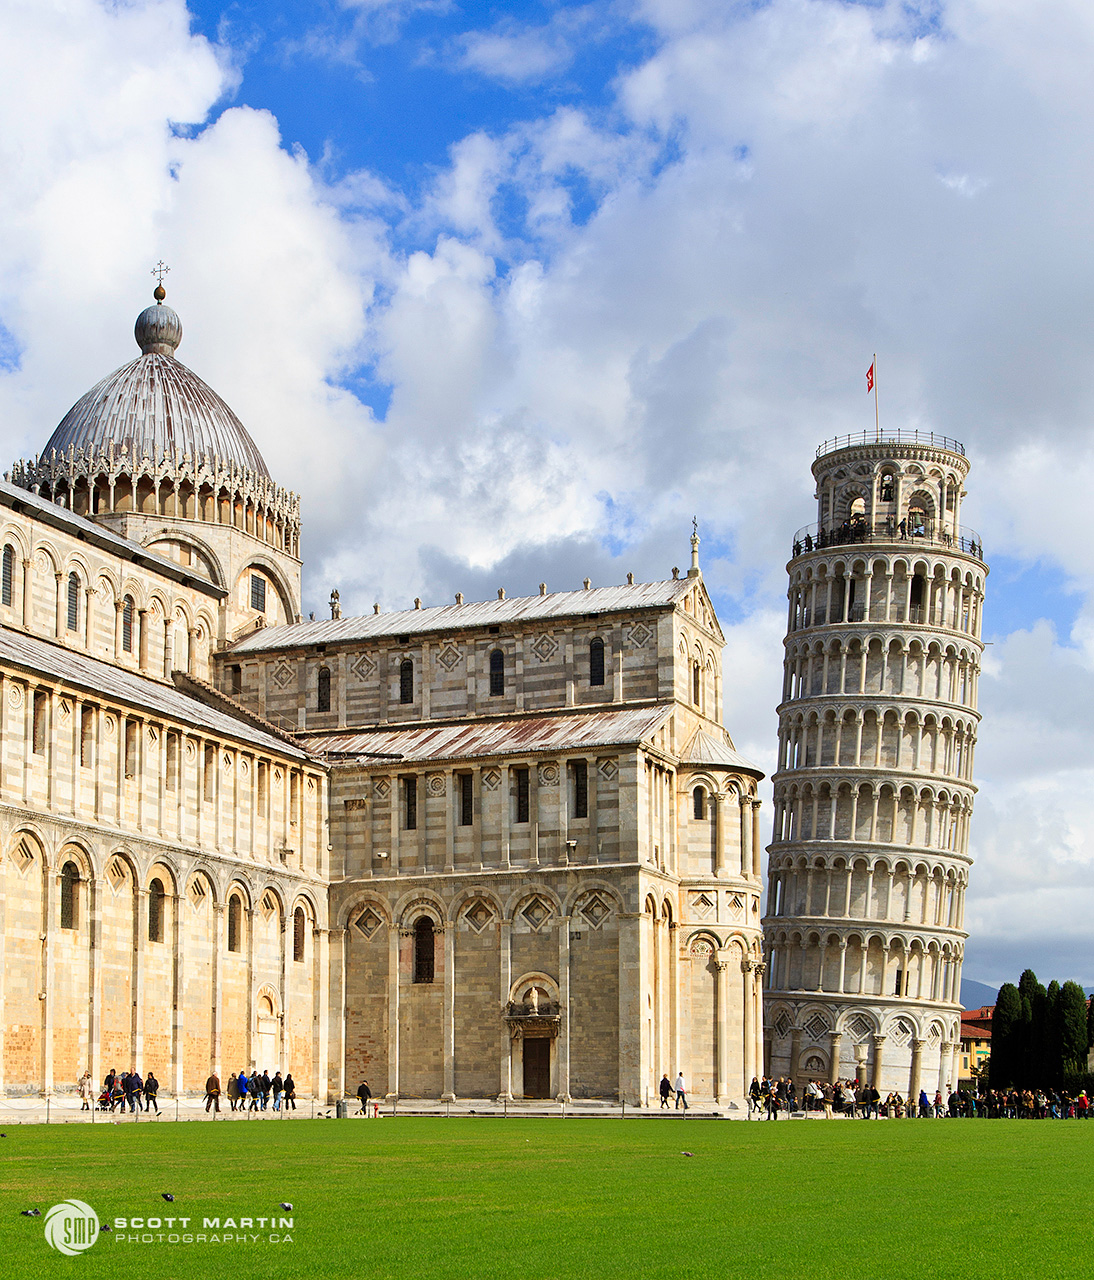
Construction of the tower began on August 14, 1173 and wasn’t completed until 1372 when the bell chamber was finished atop the tower 199 years after the ground breaking. Recent cleaning and surface restoration of the tower removed centuries of dirt & grime from the industrial revolution which had darkened the tower to a dirty grey colour. This next image shows the beautiful white sunlit marble against a stormy dark back ground. It really is a beautiful structure.
By 1990 the tower’s lean reached 5.5° and the campanile was closed to the public. Steel guy wires were attached to the third level, the seven bells were removed from the bell chamber and nearby apartment buildings were evacuated due to fear of spontaneous toppling of the tower. Between 1990-2001 the tower was straightened and stabilized. This was accomplished by removing 1350 cubic feet (77 tons) of earth from below the high side of the foundation. This restored the lean of the tower to about 3.9° which it was in the late nineteenth century. The decision was made not to place the tower in a vertical orientation largely due to tourism considerations. Its present lean means that the centre point at the top of the tower is 12’10” from the centre point at the base.
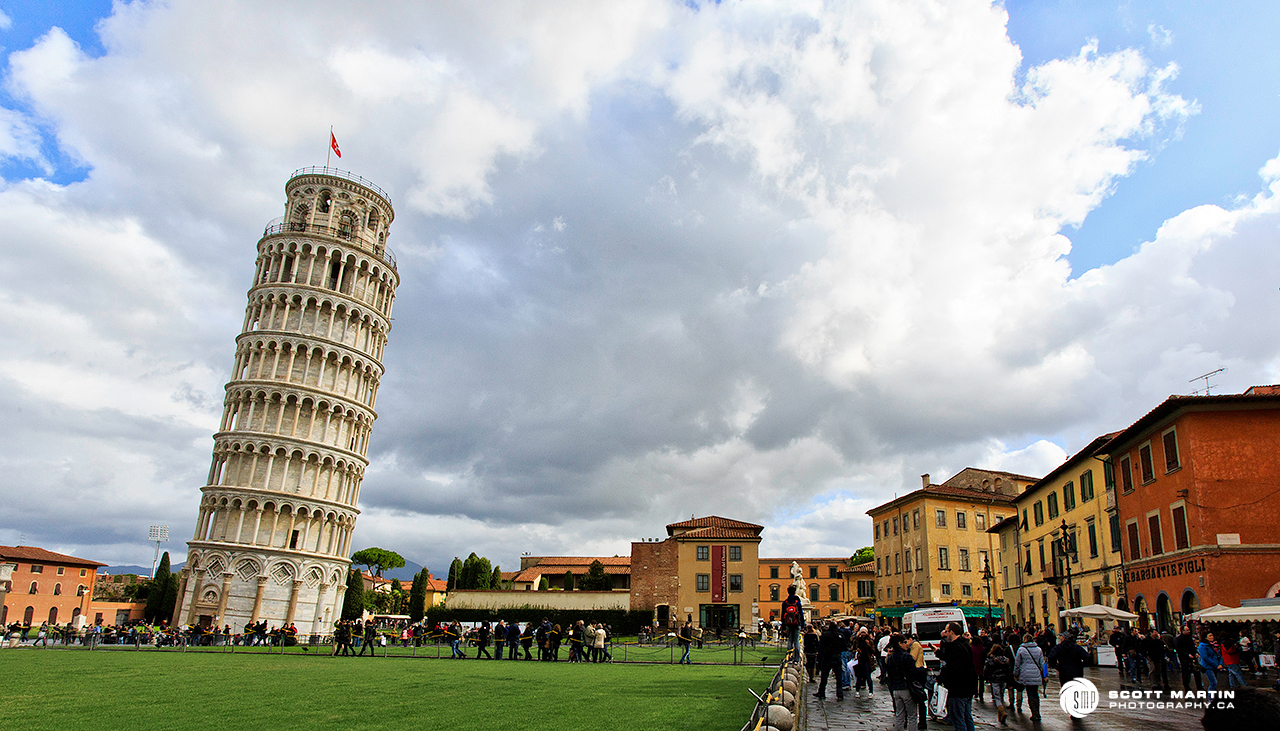
Although this next image has not been manipulated, it was taken at a focal length of 16mm on a full frame camera and the native optics of the lens creates an exaggerated perspective of the tower.
The Pisa Cathedral is an impressive structure in its own right, designed in the shape of a latin cross and constructed of white & grey marble. The cathedral began construction in 1063 and was completed in 1092.
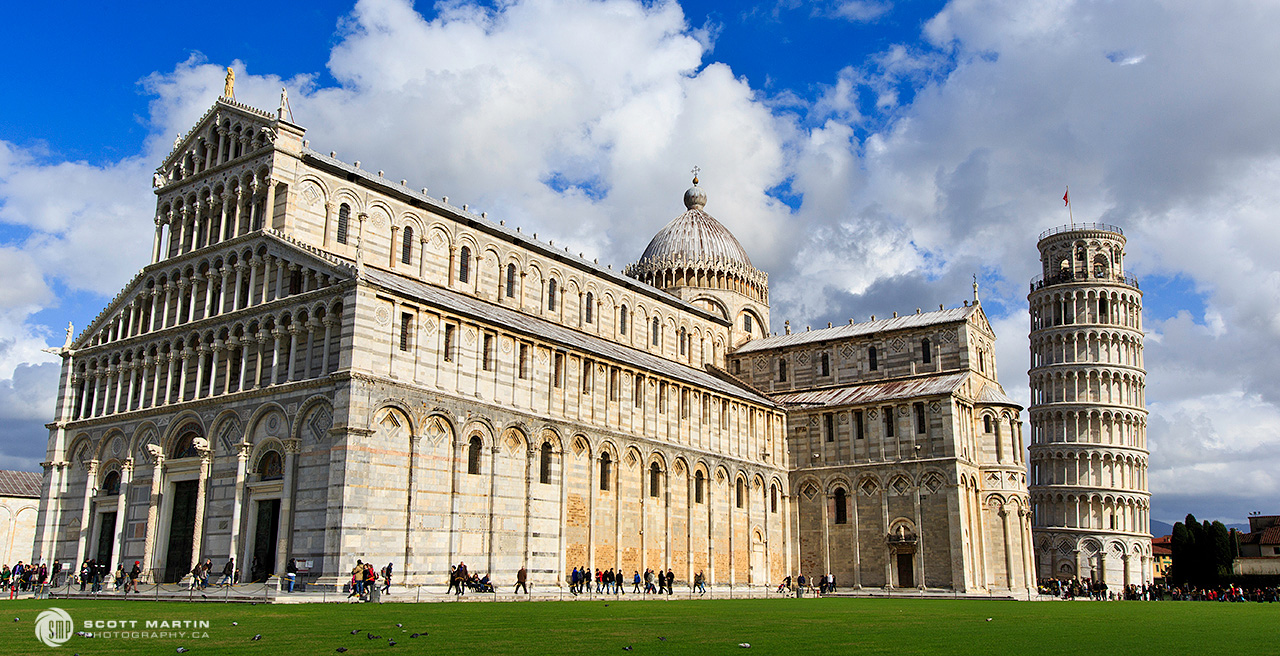
It’s hard to believe when walking through the campus that these buildings are almost one thousand years old.
The third major building on the cathedral grounds is the baptistery. It was the second structure chronologically, with construction starting in 1152 and completed in 1363, two hundred and eleven years later. The Pisa Baptistery is the largest in Italy and like the adjacent structures is constructed of marble. The interesting thing to note when looking at the baptistery is the different architectural styles of the building, presumably a result of the 200+ years it took to build. The base of the building is in Roman styling with rounded arches above the columns while the upper sections of the building are of gothic styling with pointed arches atop the columns.
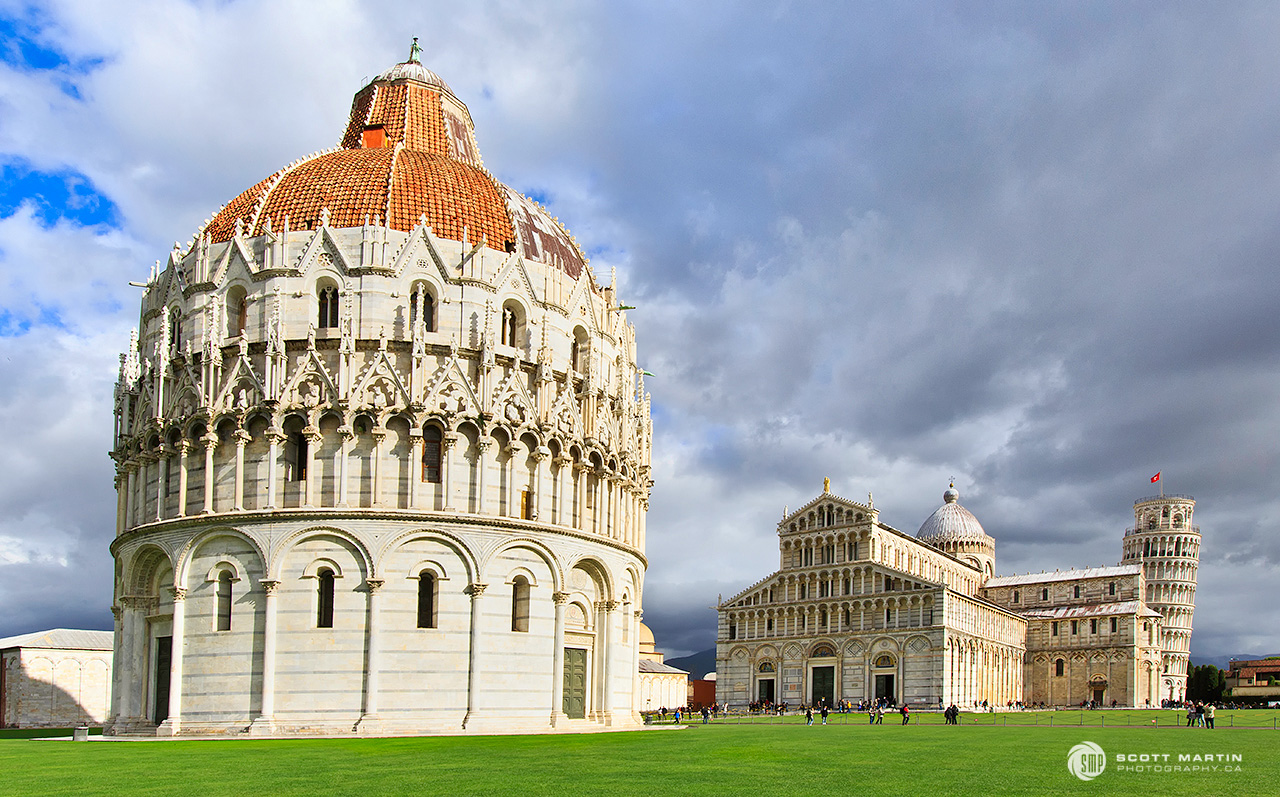
The baptistery also has a relatively small foundation and shares the sandy earth of the cathedral & bell tower so it also leans, however an almost imperceptible 0.6° towards the cathedral.
Although we only spent a few hours visiting Pisa, it was a great time and a pleasure to see and learn a little about its iconic landmark.
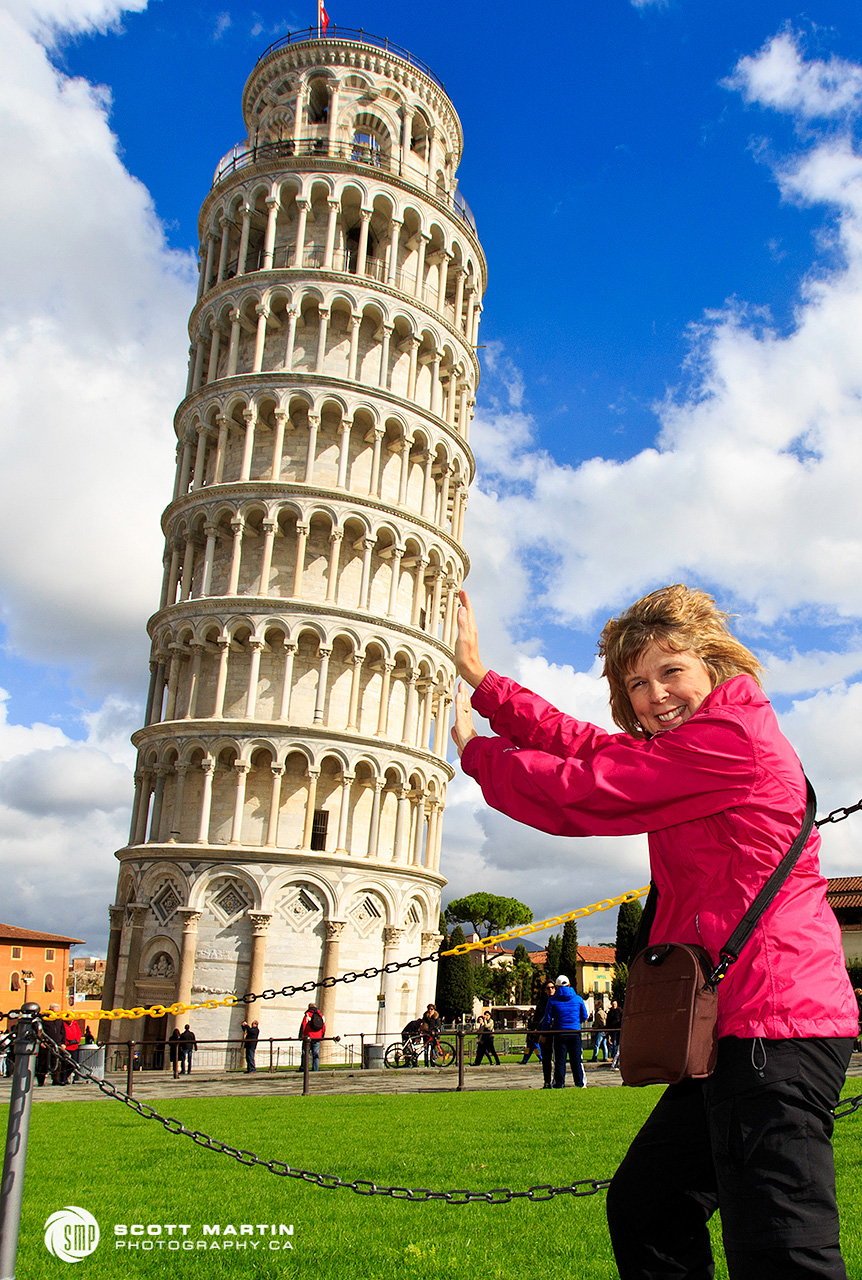
Deb & I couldn’t help taking some classic tourist shots of the tower while we were there. As a photographer, one always looks for that ‘original shot’, especially of the well known landmarks…..I’m quite certain these next two images don’t qualify 🙂
.
Other images from Pisa can be seen by clicking on this link plus there are a number of other galleries from various locations in Europe that are also posted on the website.
All of the images in this post were taken using a Canon 5D Mk III and EF 16-35 f2.8 wide angle zoom lens.
Thanks for taking the time to read through this post and I trust you’ve enjoyed the Leaning Tower of Pisa. As always you comments and questions are much appreciated.
by Scott Martin Photography | Oct 21, 2016 | Blog, Educational, Wildlife
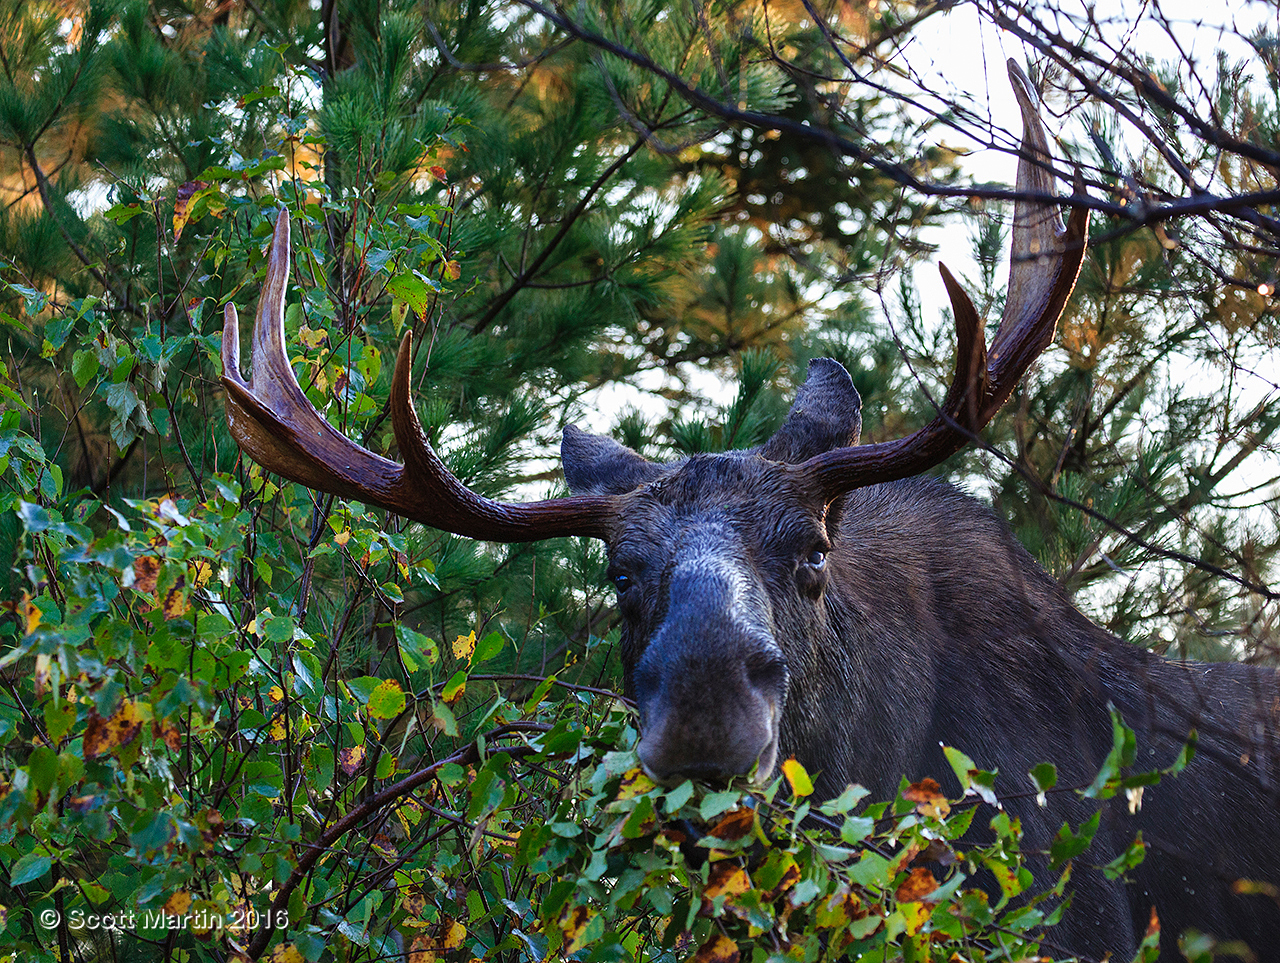
The Moose is Algonquin Park’s largest animal (by both size and weight) and is certainly one of its primary and most recognizable icons. A trip to Algonquin Park is complete when you are privileged to see a moose, especially if it is a bull moose with an impressive array of antlers.
Deb and I have often seen moose over the years we’ve been visiting Algonquin Park but unfortunately the opportunity to photograph a bull moose with its majestic antlers had always eluded us. However this fall it was especially gratifying to see a bull moose after so many years of trying.
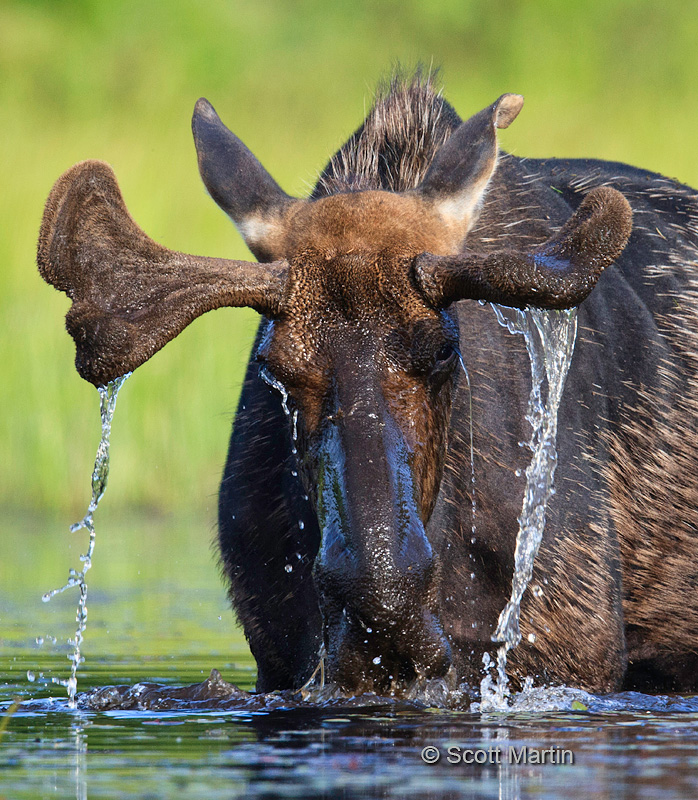
A while back my friends Arni, Eleanor, Joyce and I joined Michael Bertelsen (Algonquin Park Photography Tours) in the spring of the year where we saw a number of moose including bulls, cows and calves. You can read the account of this trip via this link (Moose In Algonquin Park). In the spring of the year moose are largely feeding on aquatic vegetation and the antlers on the bulls are covered with velvet which supplies blood for the rapidly growing antlers. Every fall the bull moose scrapes its antlers on trees causing the velvet to be torn off revealing the mature antlers beneath. This action causes the bull’s testosterone levels to rise and is part of the process that marks the onset of the mating season, or rut, which is typically between mid September and mid October. In the early winter months the bull moose sheds its antlers by breaking them off on a tree and soon thereafter starts work on growing next seasons bigger and better antlers.
Moose calves are born in early June each year and the cows have one or sometimes two calves. The calves stay with the cow for almost a year when mom forcibly releases her calf to fend for itself before she gives birth to her next calf.
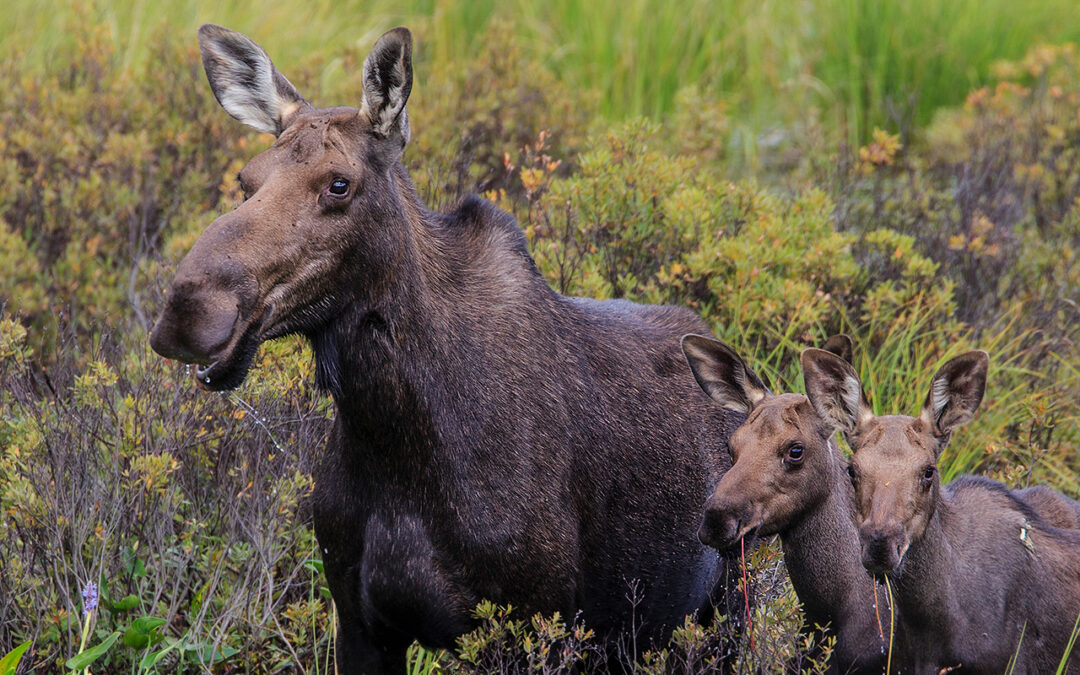
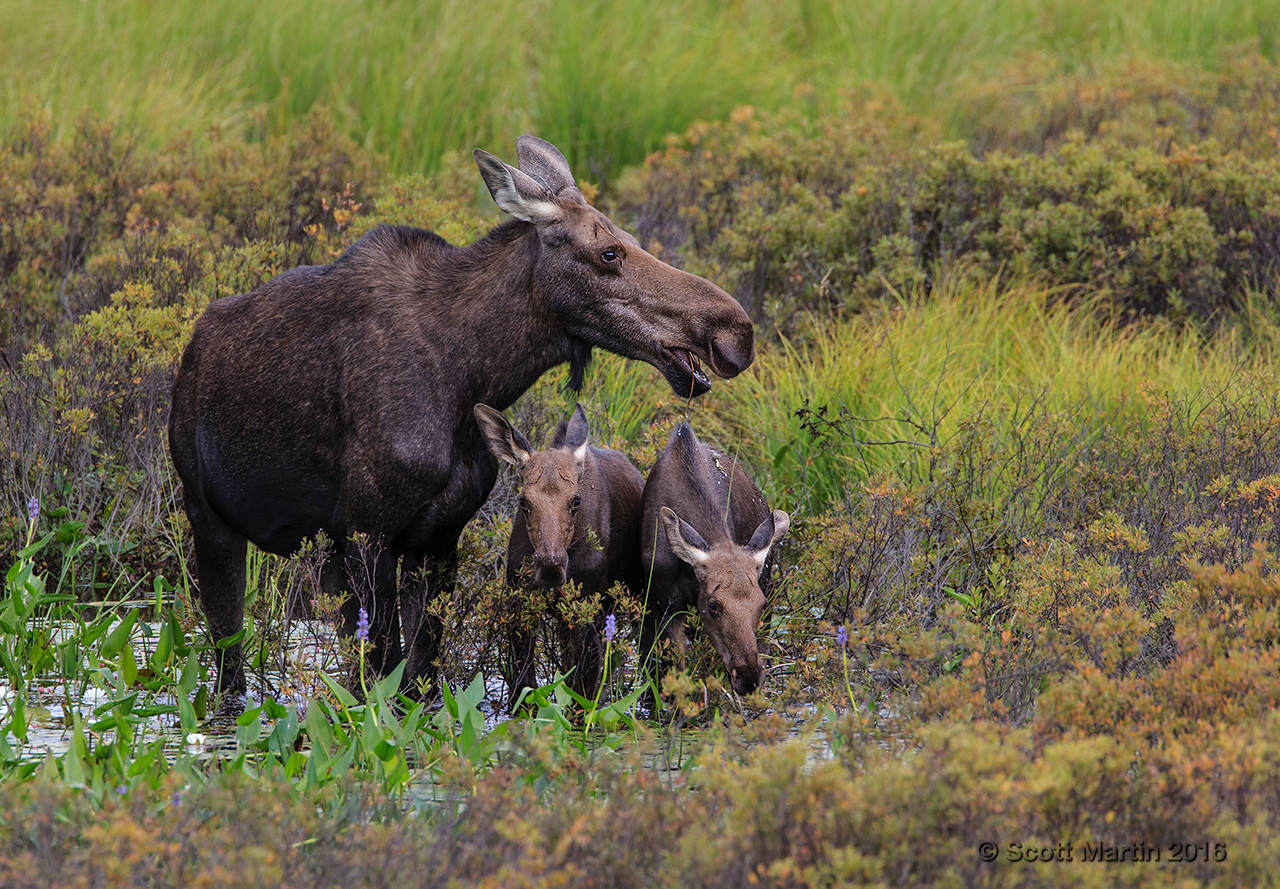
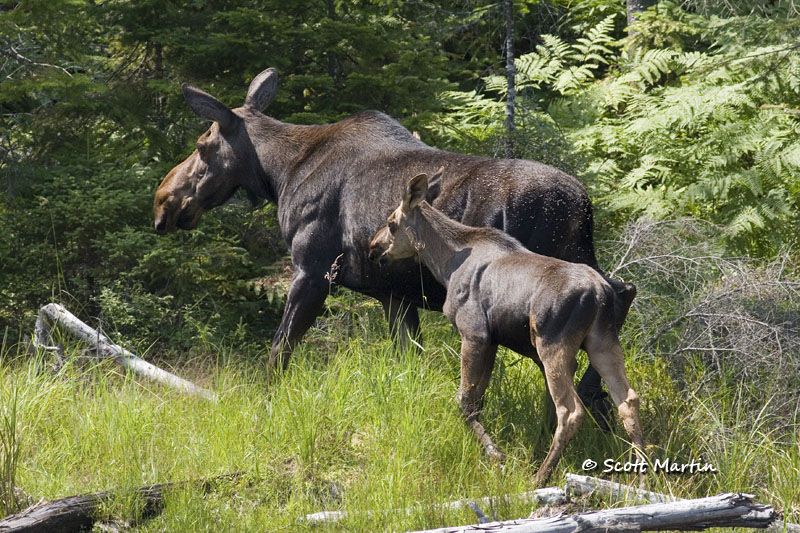
Below is a cow with her two calves photographed in the park late this summer. We enjoyed watching this family graze in the marsh for at least thirty minutes before they wandered off into the forest.
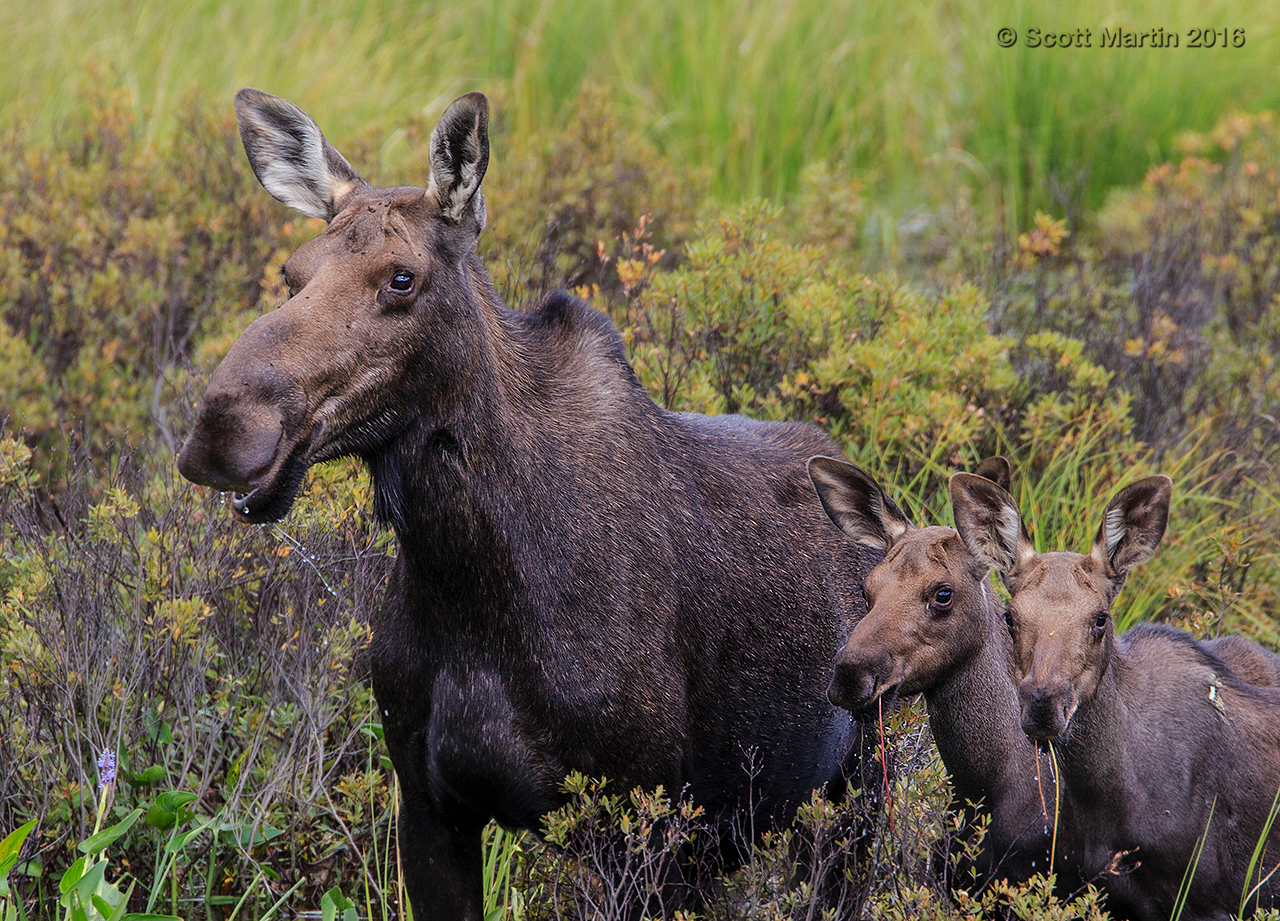
I was happy to capture this next image with all three moose having mouths full of lily pads.

For their first year of life the little ones are never far from their mom.
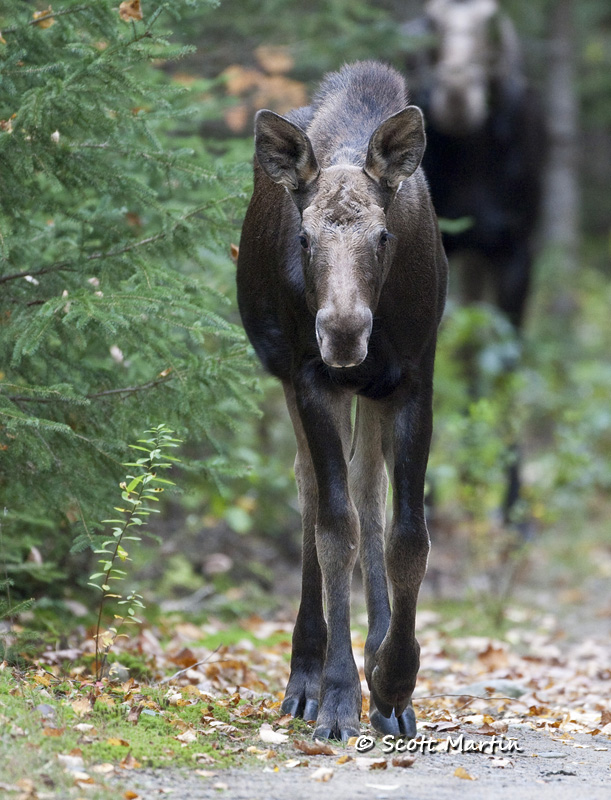
Another cow with a single calf alongside Highway 60 that runs through Algonquin Park.
An inquisitive calf with mom watching closely in the back ground along the Mizzy Lake Trail.
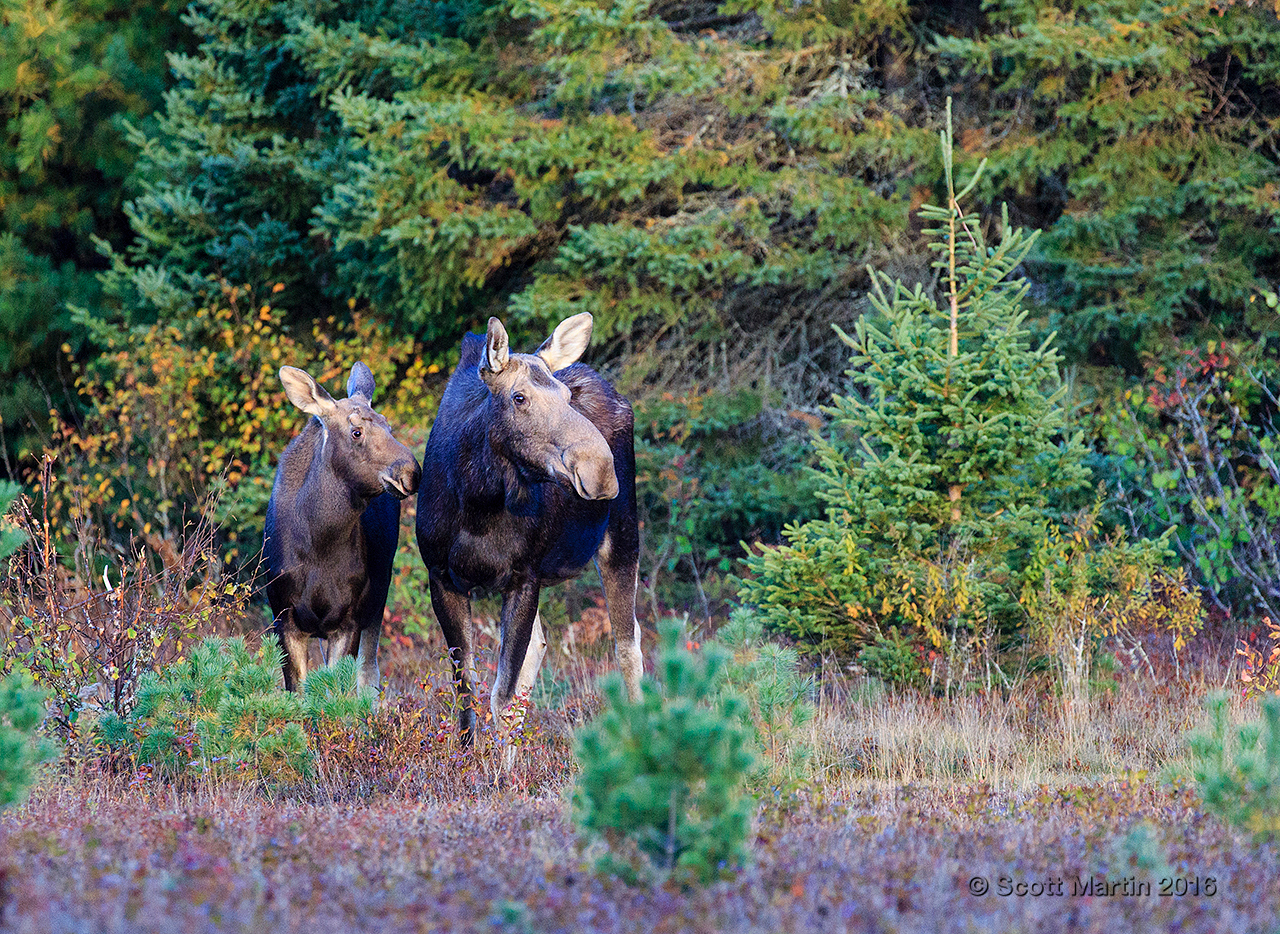
Another young family near Lake of Two Rivers along the edge of the Madawaska River.
A portrait of the cow.
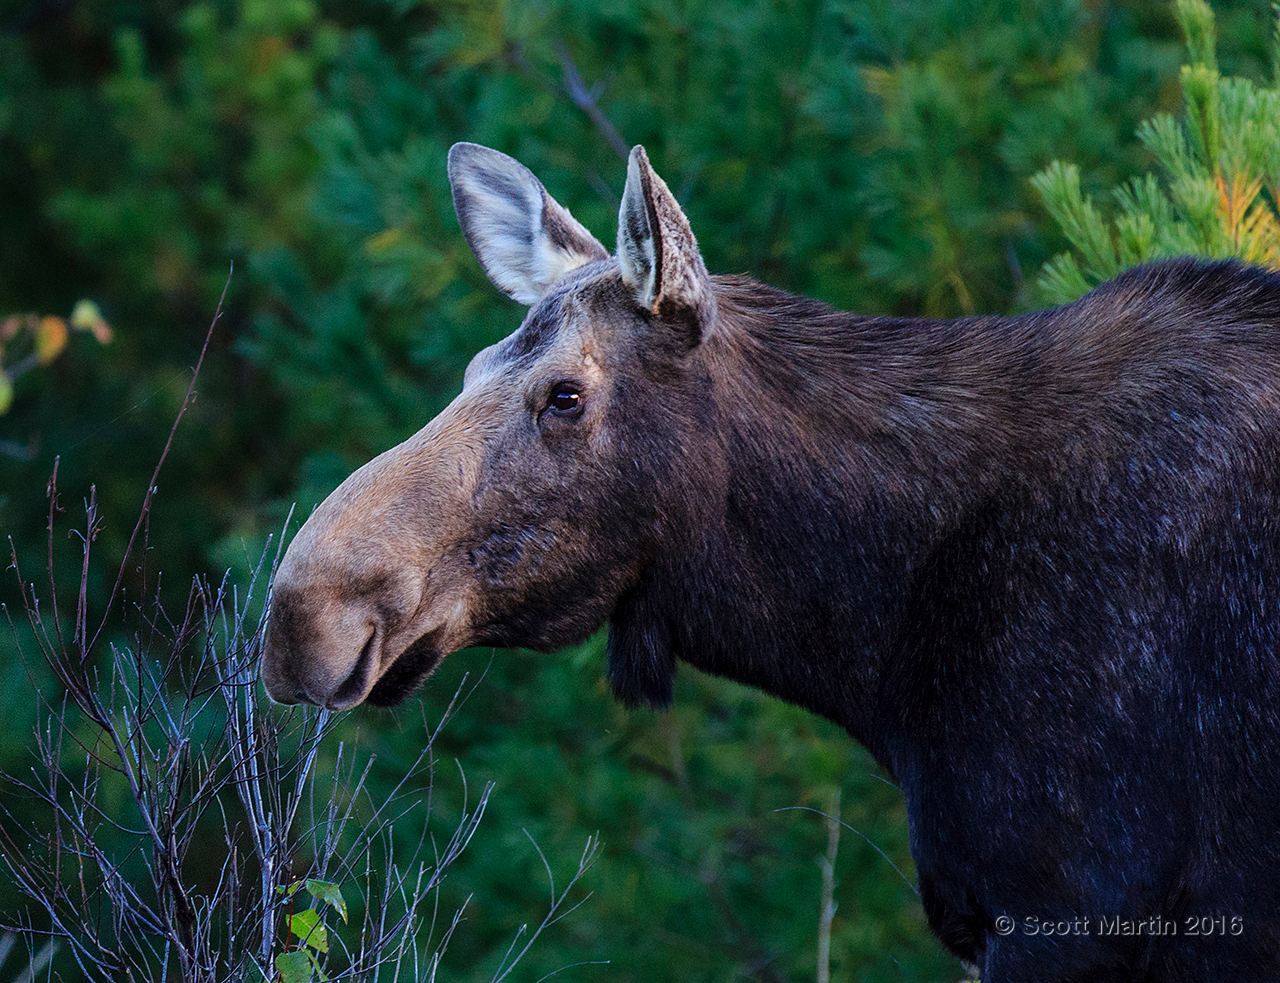
….and a young calf in the meadow.
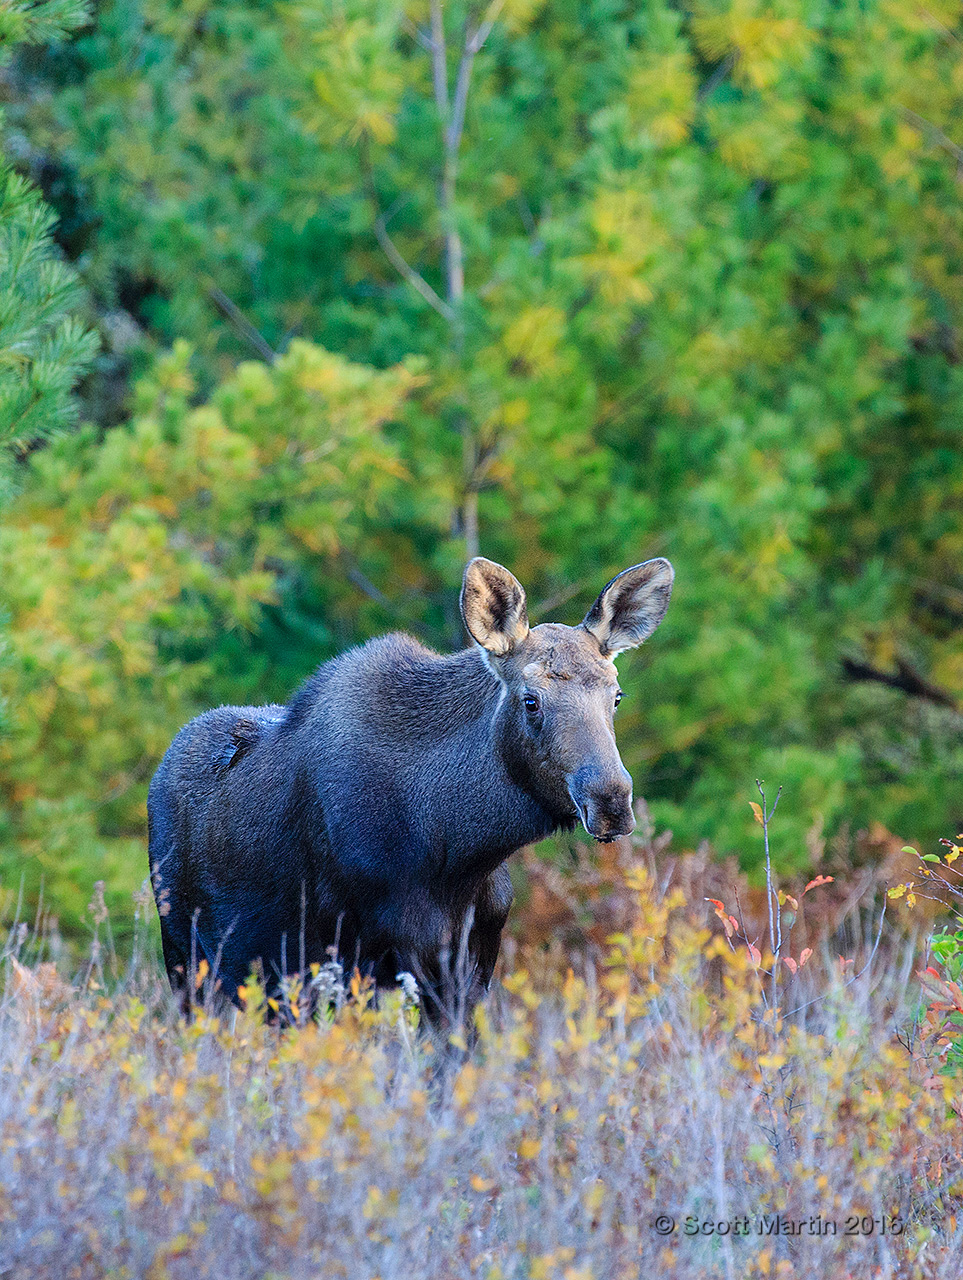
These next two images are included to provide a profile of the cow and calf. The biggest difference between the two is found in the head shape.
Moose are the second largest animals in North America (the Bison is the largest) with shoulder heights ranging from 4.5 to 6.9′.
Over the past month I’ve visited Algonquin Park and been blessed to see and photograph a bull moose a number of times. This first image of a bull was taken a few years ago in June when the antlers are early in the growth stage and covered with velvet as mentioned earlier.
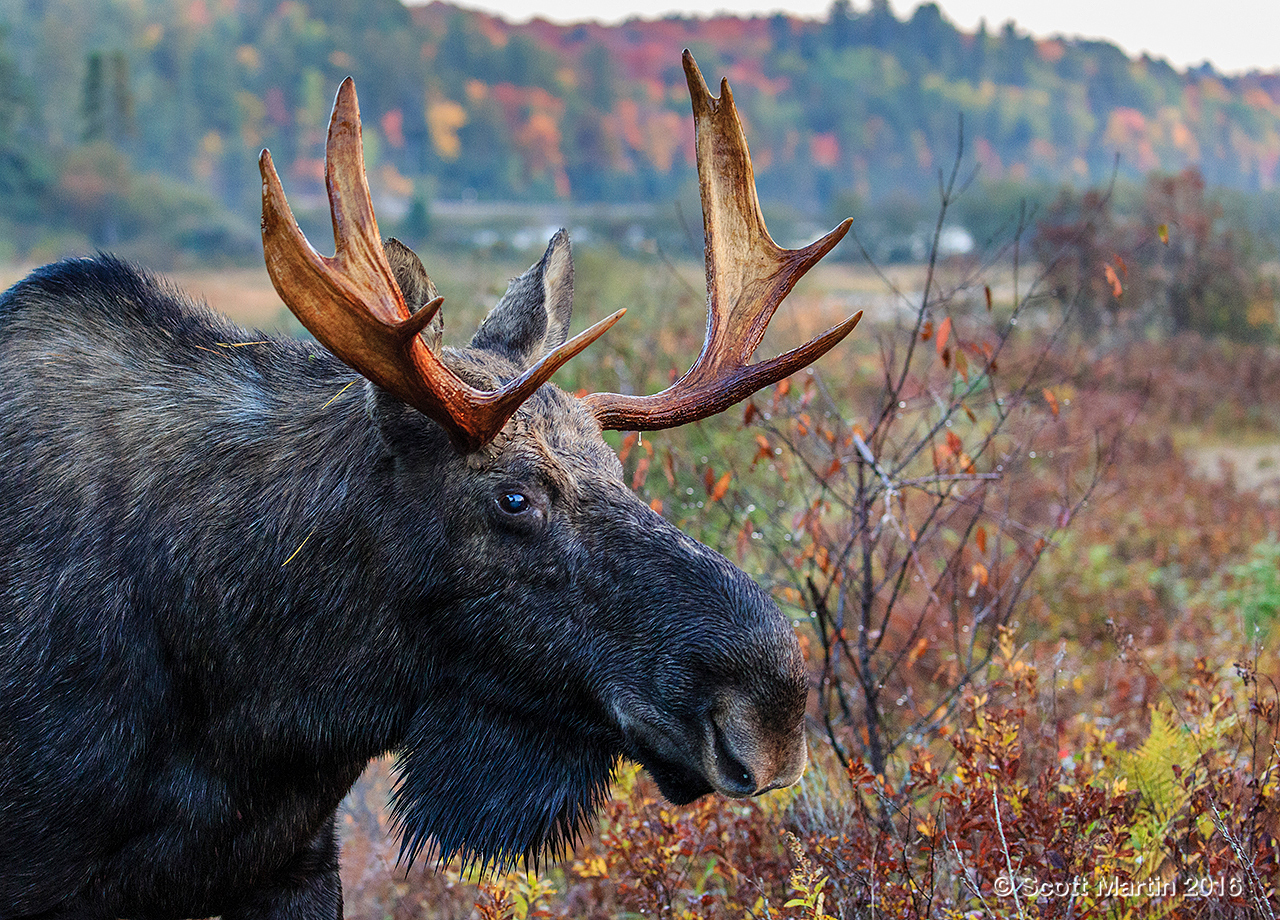
In the early fall the bull moose sheds its velvet and the antlers are revealed. Antlers are used for displaying to potential cows and challenging any bulls that may encroach on a cow that has shown interest in another bull. This next image shows the antlers of a fairly young bull moose, probably two years old based on the size and shape of the antlers.

This bull moose was photographed just after sunrise and the autumn leaves provided a great back drop.
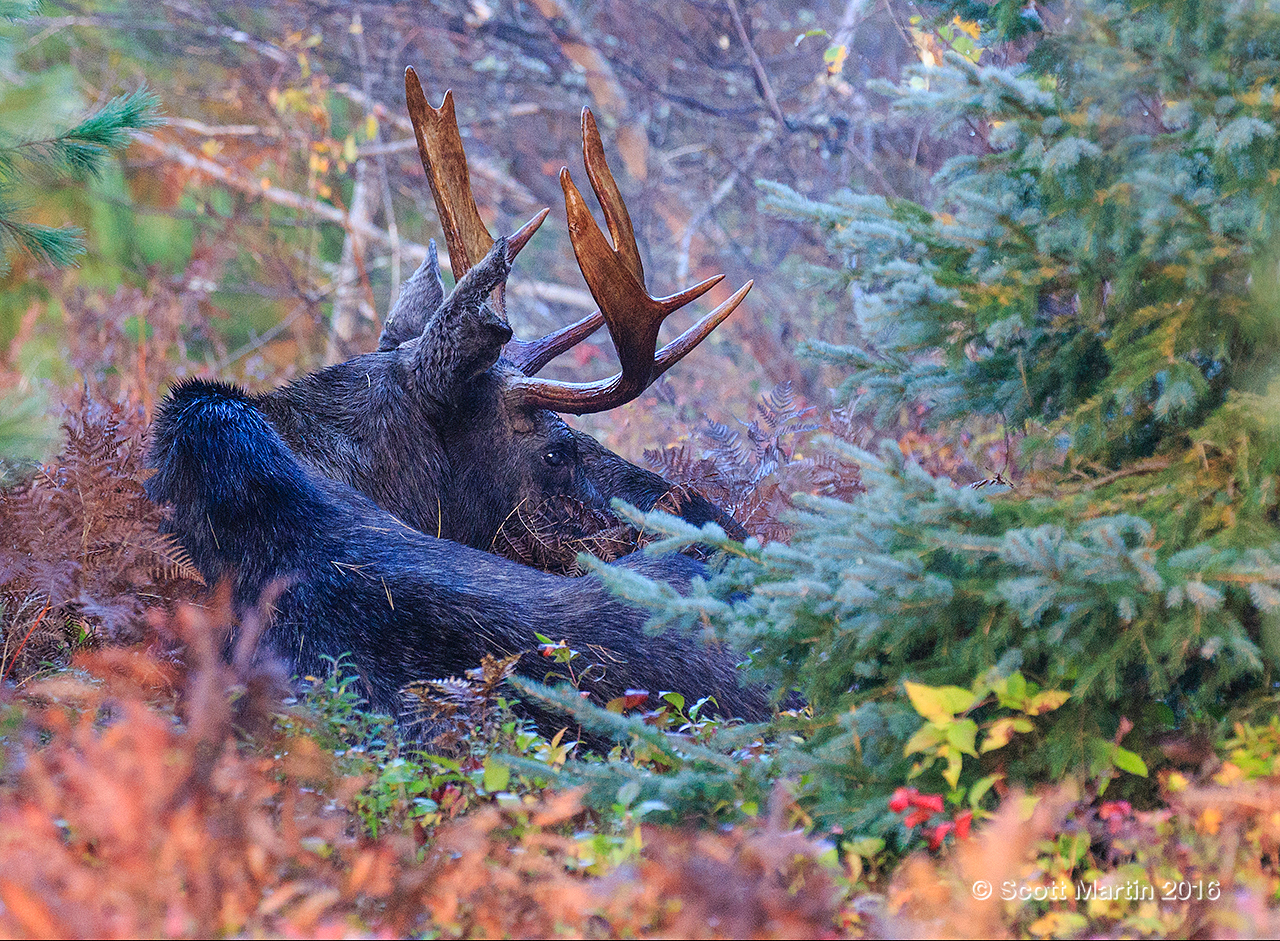
I was surprised that this moose ambled slowly by and bedded down at the edge of a large meadow for about half an hour.
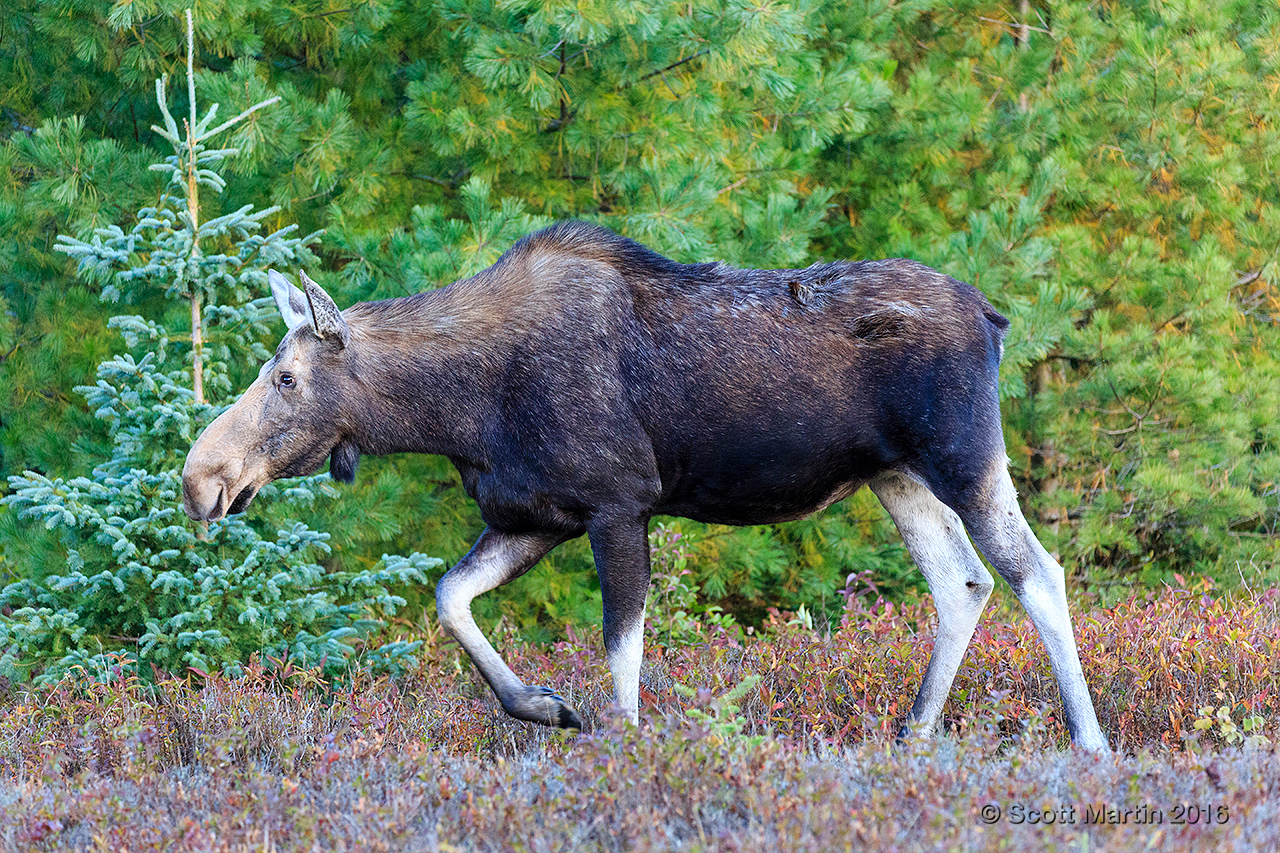
Adult bull moose weigh between 850 and 1,550 pounds while the cows are a little smaller ranging from 450 to 1,100 pounds.
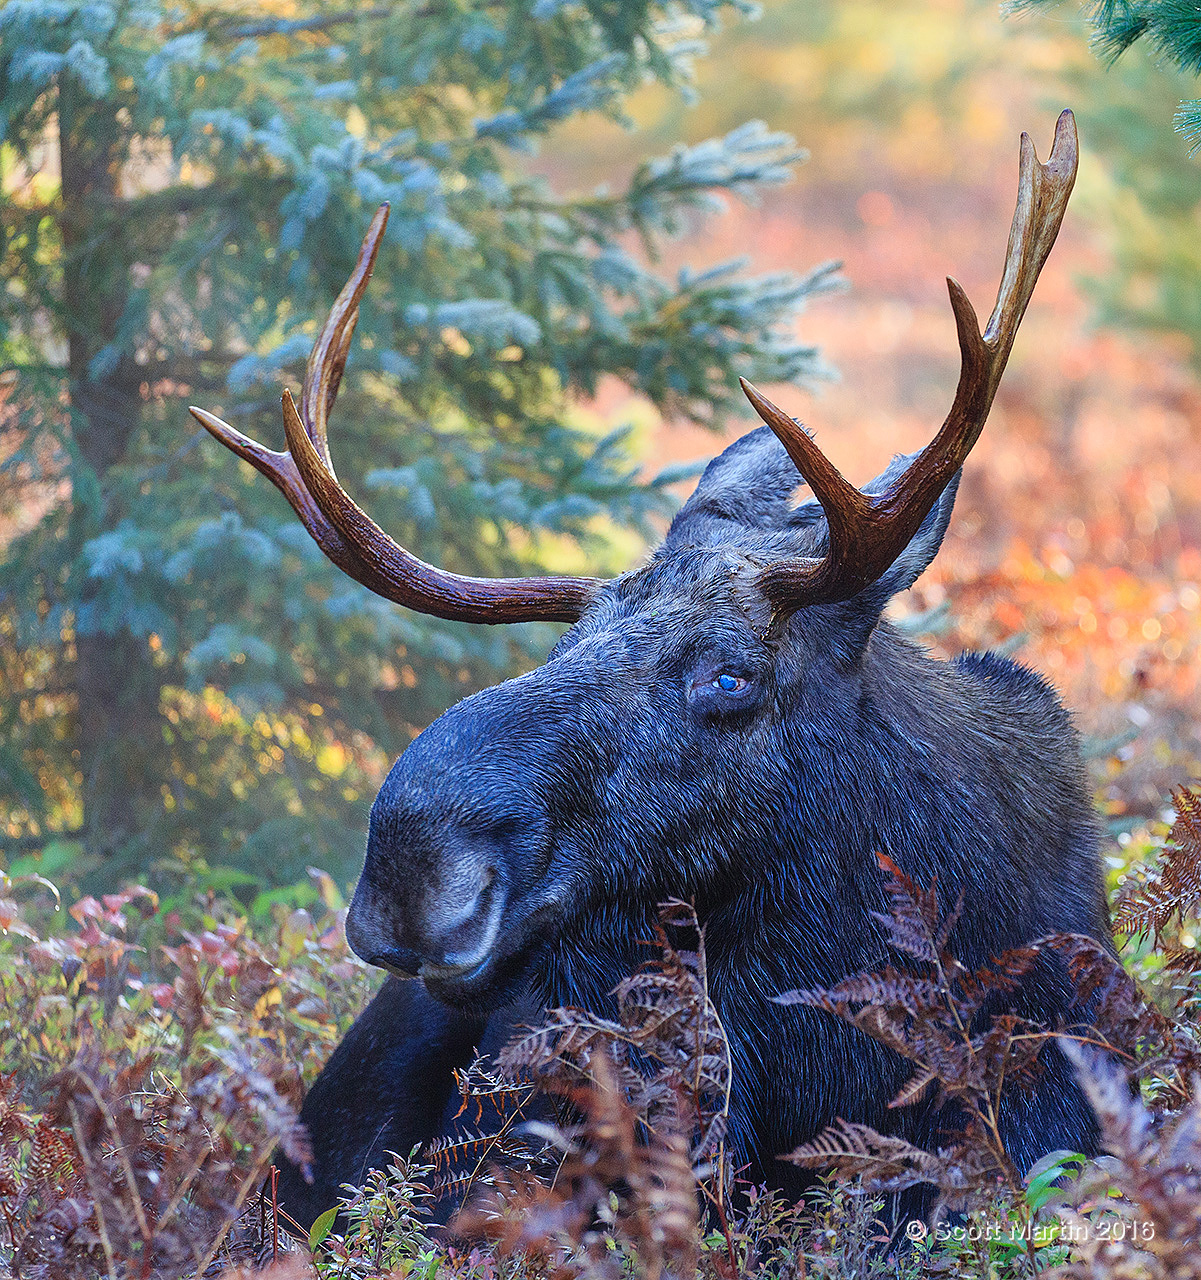
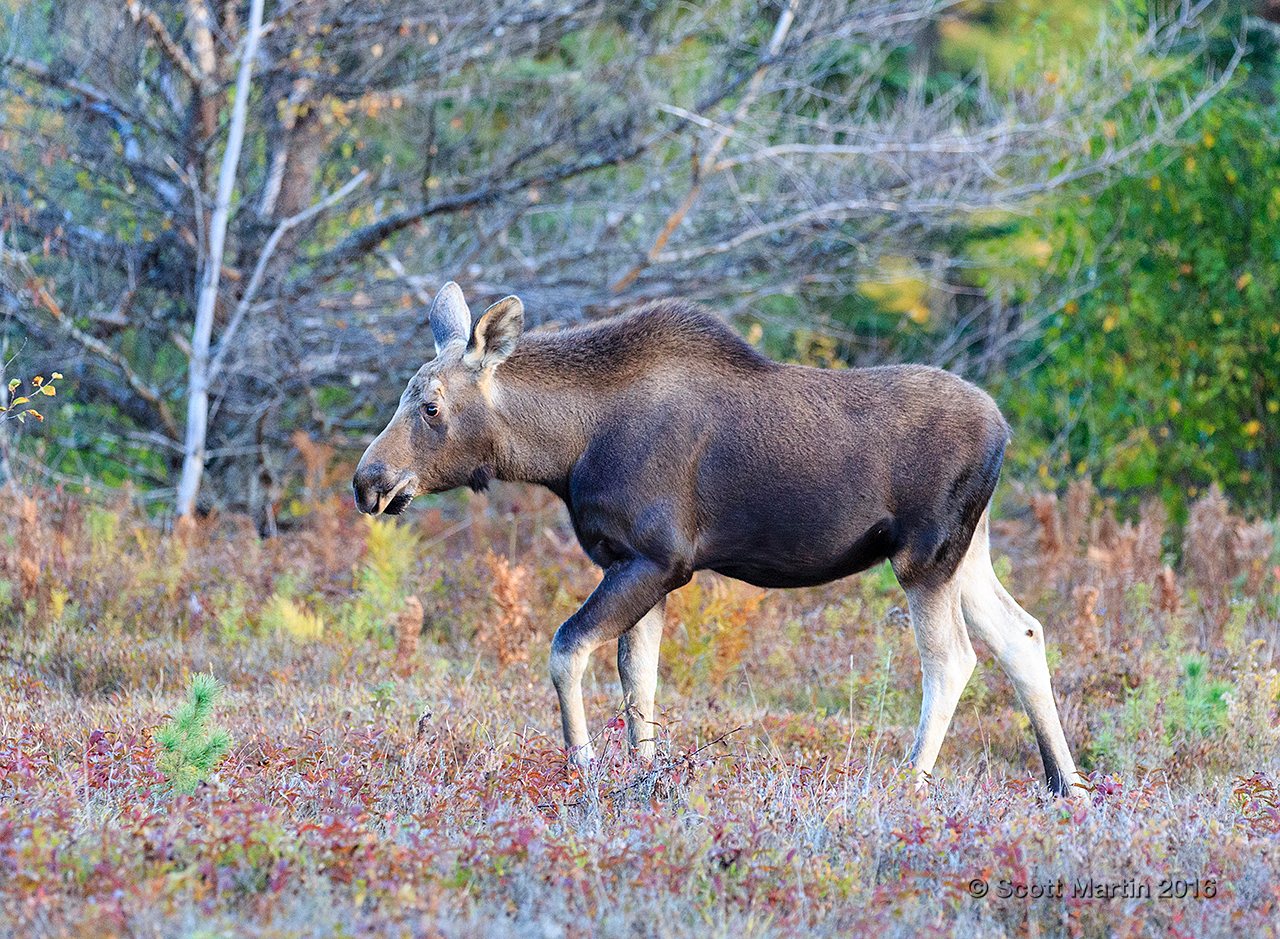
After resting for about thirty minutes the young bull got up and continued in his morning grazing.
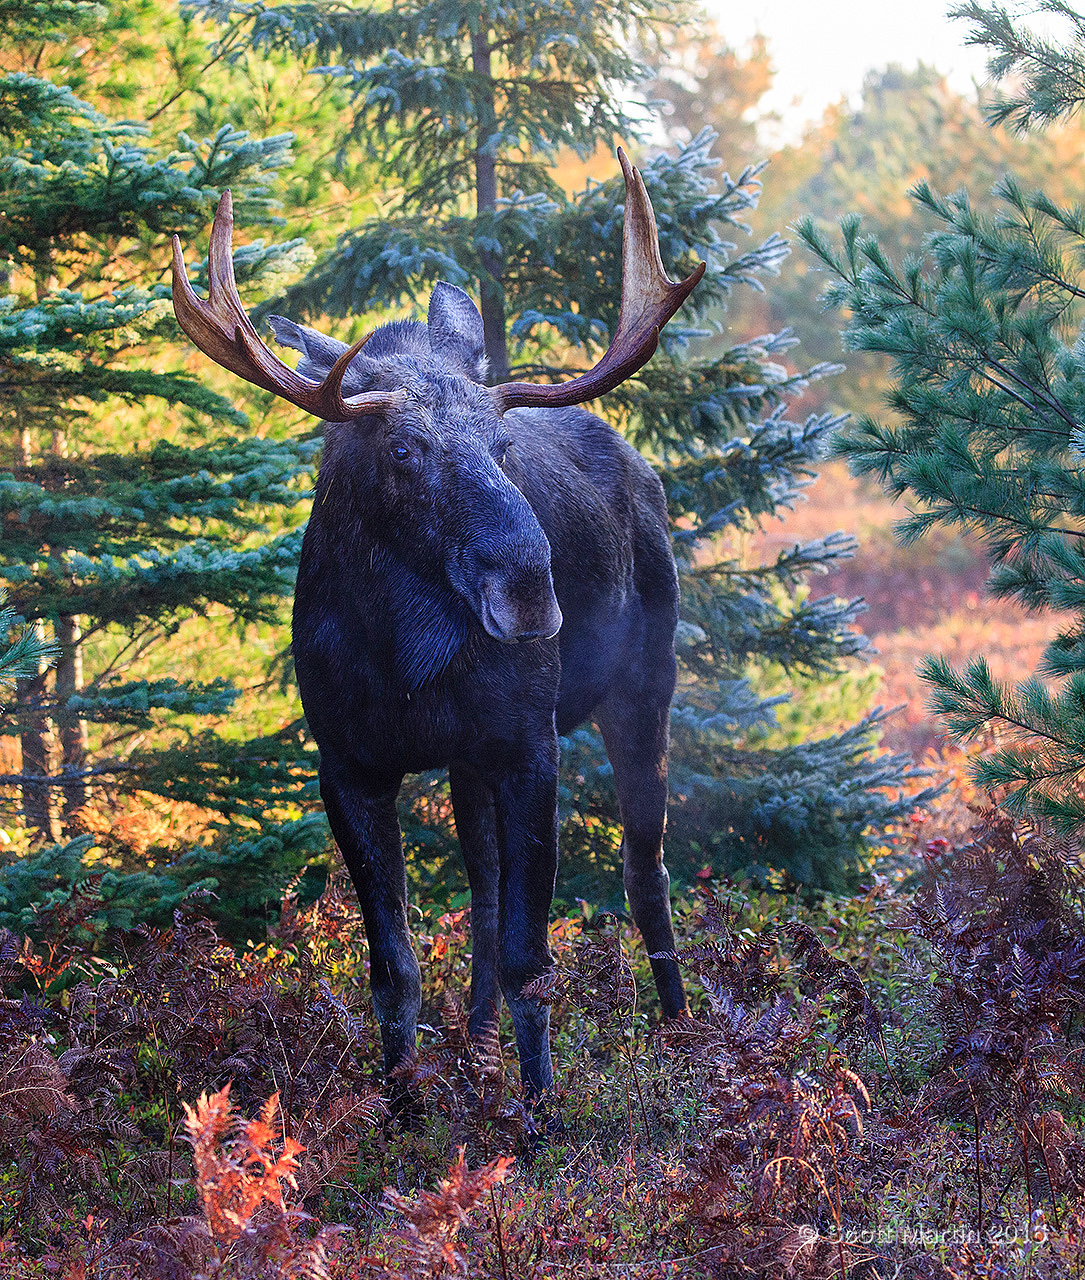
Moose are vegetarians and aptly named as ‘moose’ is a Native Algonquin word meaning ‘twig eater’. Their diet tends to be more aquatic in the spring and terrestrial in the fall and they typically eat leaves, bark, pine cones, twigs, buds of trees and lily pads. This next image shows the twig eater living up to its name!
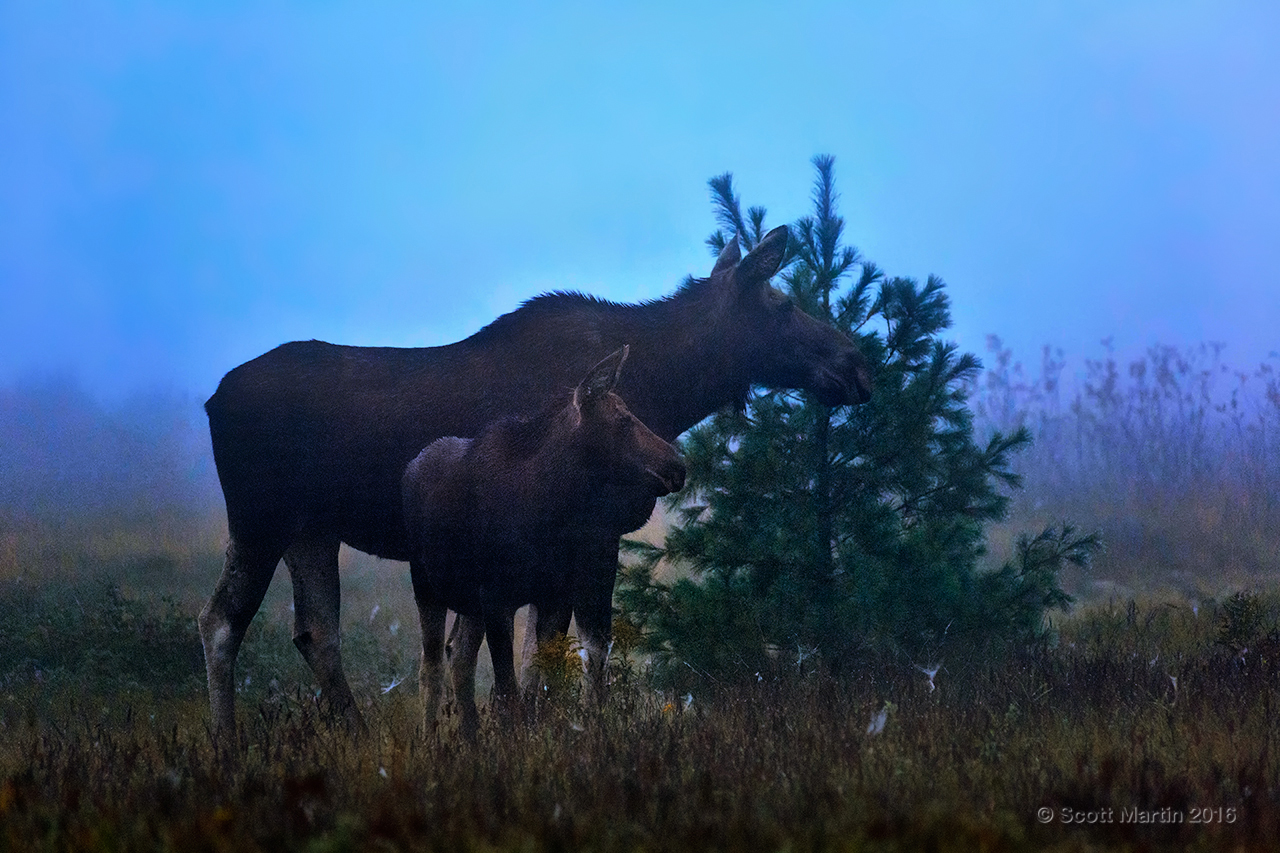
In mid September it was 0°C before sunrise which created an extremely heavy fog around the lake where we were looking for moose. Walking along a trail we were excited to see three moose silhouettes just ahead of us, a calf, a cow and a bull all together, but the fog was so thick it was almost impossible to take a good picture. We watched them feeding for about 15 minutes and as the sun came up there was just enough light to get a couple of images .
This shot of the cow and calf was taken just after the sun had risen immediately behind the moose, creating a subtle back-lit glow.
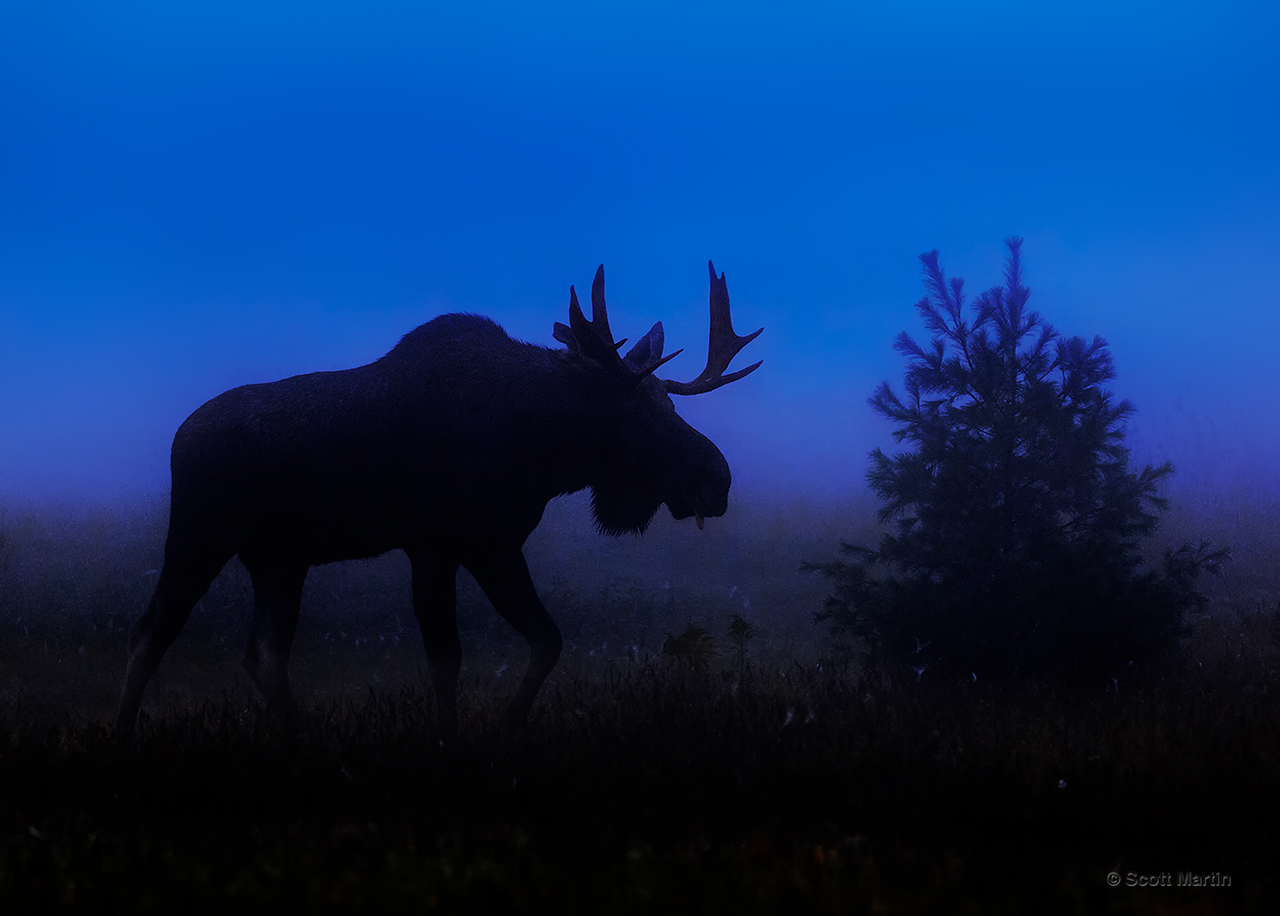
This last image of a bull was taken about ten minutes before sunrise using an ISO of 4000 and aperture of f5 which was necessary to allow a shutter speed fast enough to prevent motion blur of the moose as it was walking toward the tree. You can see why photographers refer to the time before sunrise as the ‘blue hour’.
I trust you have enjoyed these photographs of our majestic Canadian gentle giants. Many more moose images may be seen via this link to the Wildlife Gallery.
Please feel free to share this blog with others and as always your questions and comments are very much appreciated.
by Scott Martin Photography | Aug 23, 2016 | Blog, Educational, Landscapes, Naturescapes, Travel
During summer vacation we spent a day with our great friends, Tim & Cindy, touring around Renfrew county. Both Tim and I were born in Renfrew County so it was great to spend a day on the old stomping grounds. Renfrew County is Ontario’s largest county so there is much to see and plenty to do, certainly more than what can be packed into one day.
Food stops were a delight with ice cream at Brumm’s Dairy in Pembroke then off to Eganville for fries at the Jolly Fryer and latte’s and espresso at Engine House Coffee. How can you beat fries, ice cream and coffee?
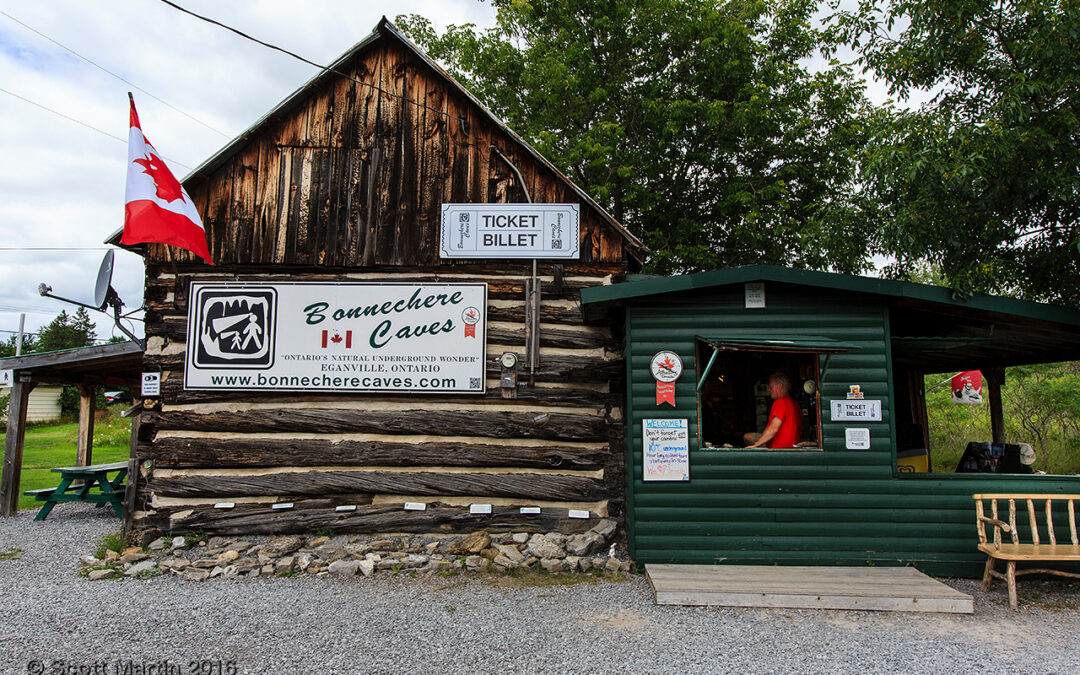
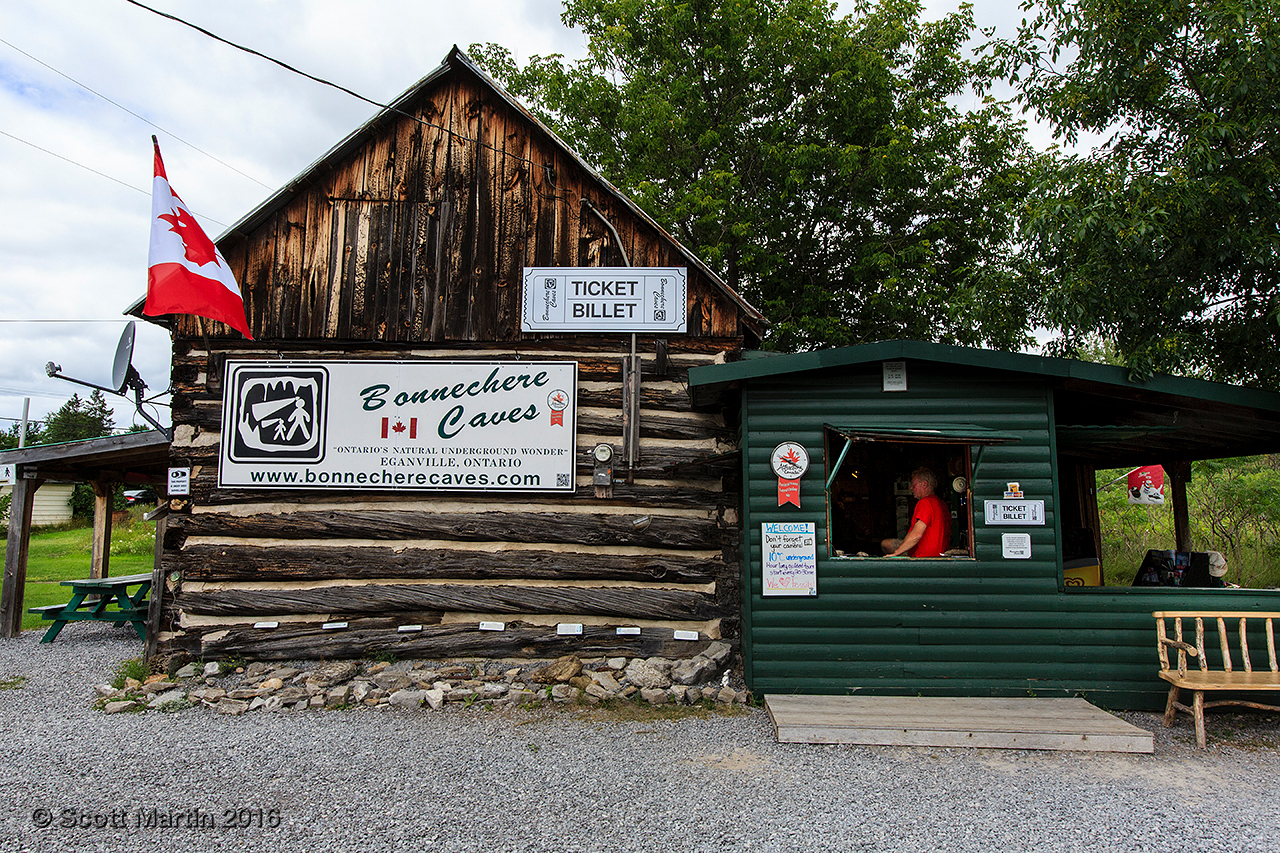
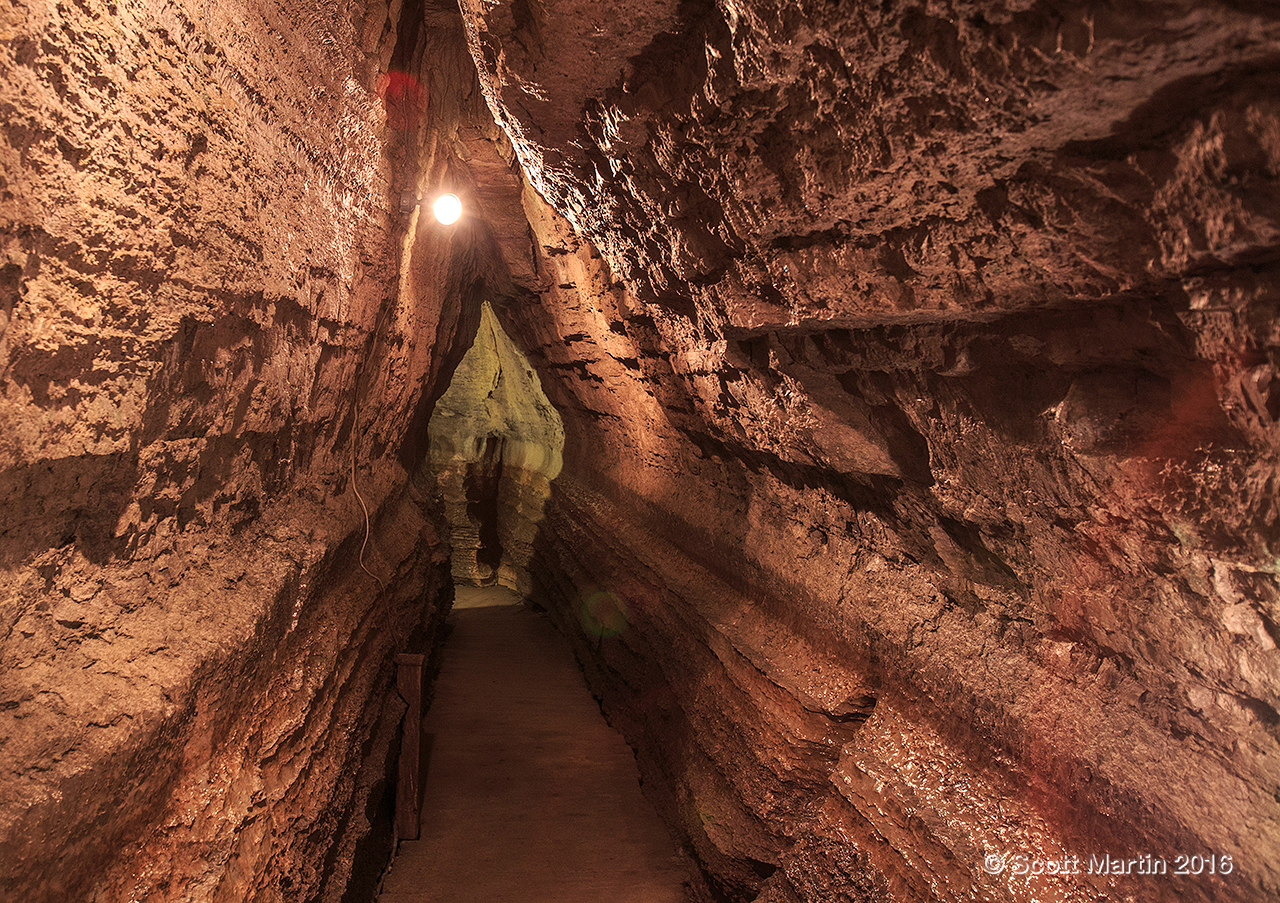
From a photographic perspective the highlight of the day was capturing the Bonnechere Caves and the Bonnechere River which rages through the area providing incredible rapids and waterfalls to photograph.
Although the Bonnechere Caves have been there a lot longer, they have been open to the public since 1955 when Tom and Ruth Woodward purchased the land and explored and developed them for public access. Check out their website via this link if you want to learn more about the caves and their history.
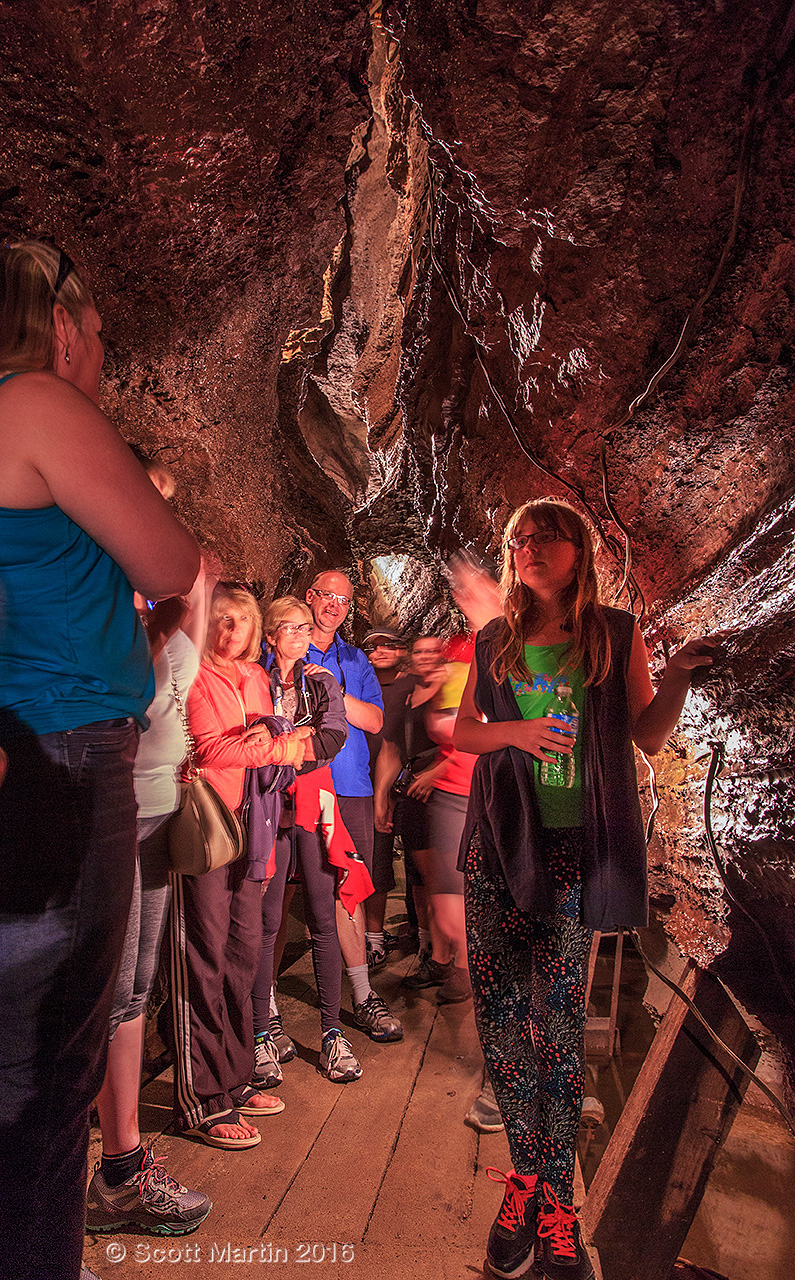
The atmosphere at the caves is laid back and welcoming. Tours leave from the parking lot every half hour and they operate daily from Victoria Day to Thanksgiving. Our tour guide was excellent with a perfect blend of history, education, story telling and lots of humour. It was excellent and brought back fond memories from when I last visited the caves 45 years ago.
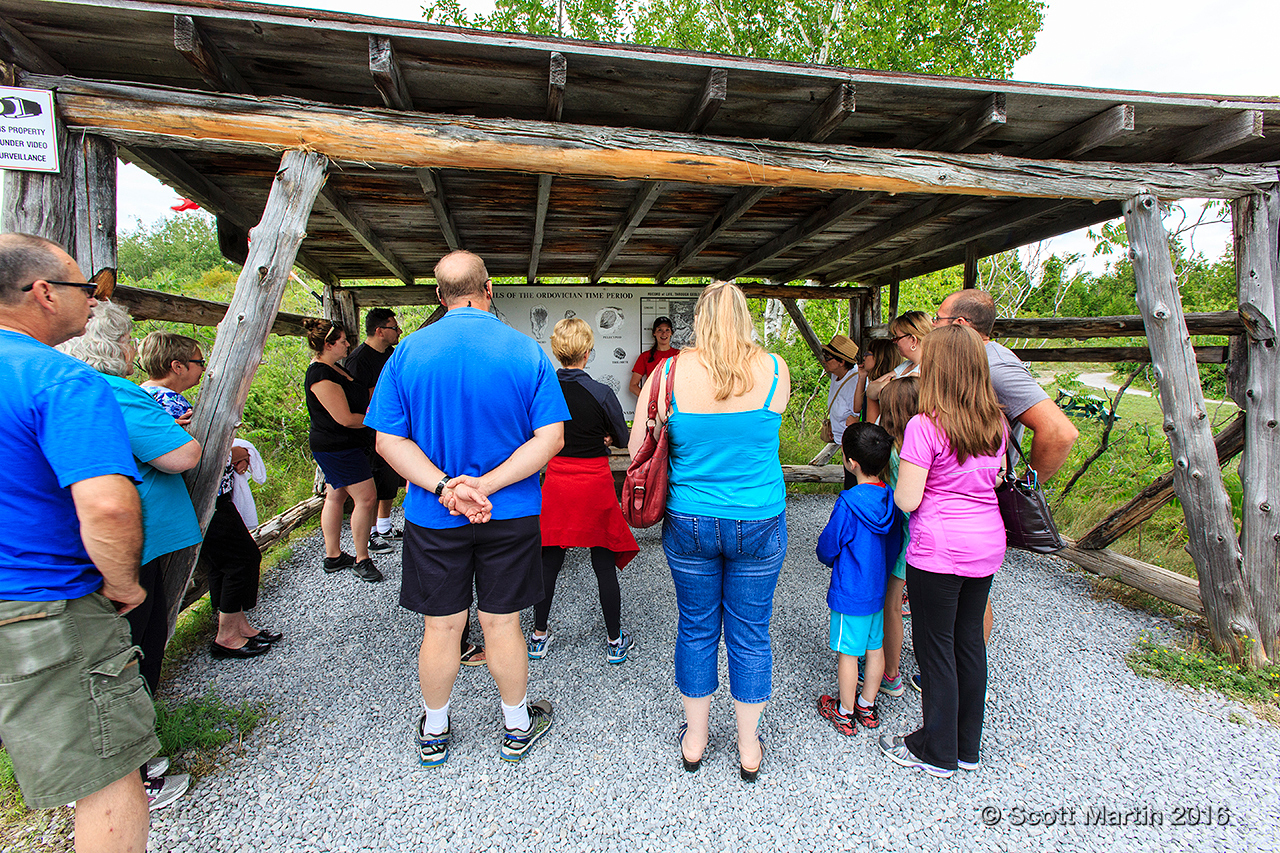
Our group being introduced to samples of the many fossils that are found in the area.
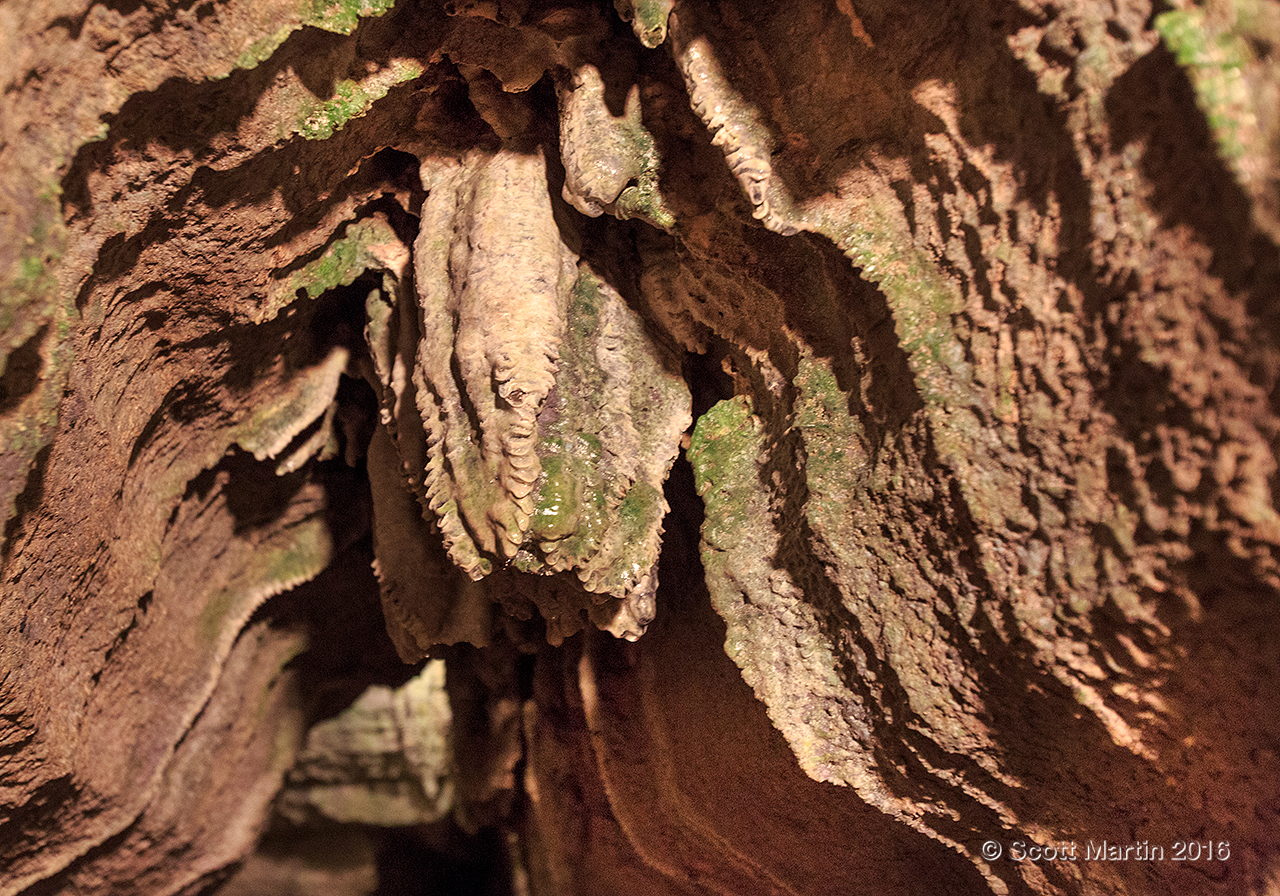
This is the stalactite formation known as the beehive, for obvious reasons!
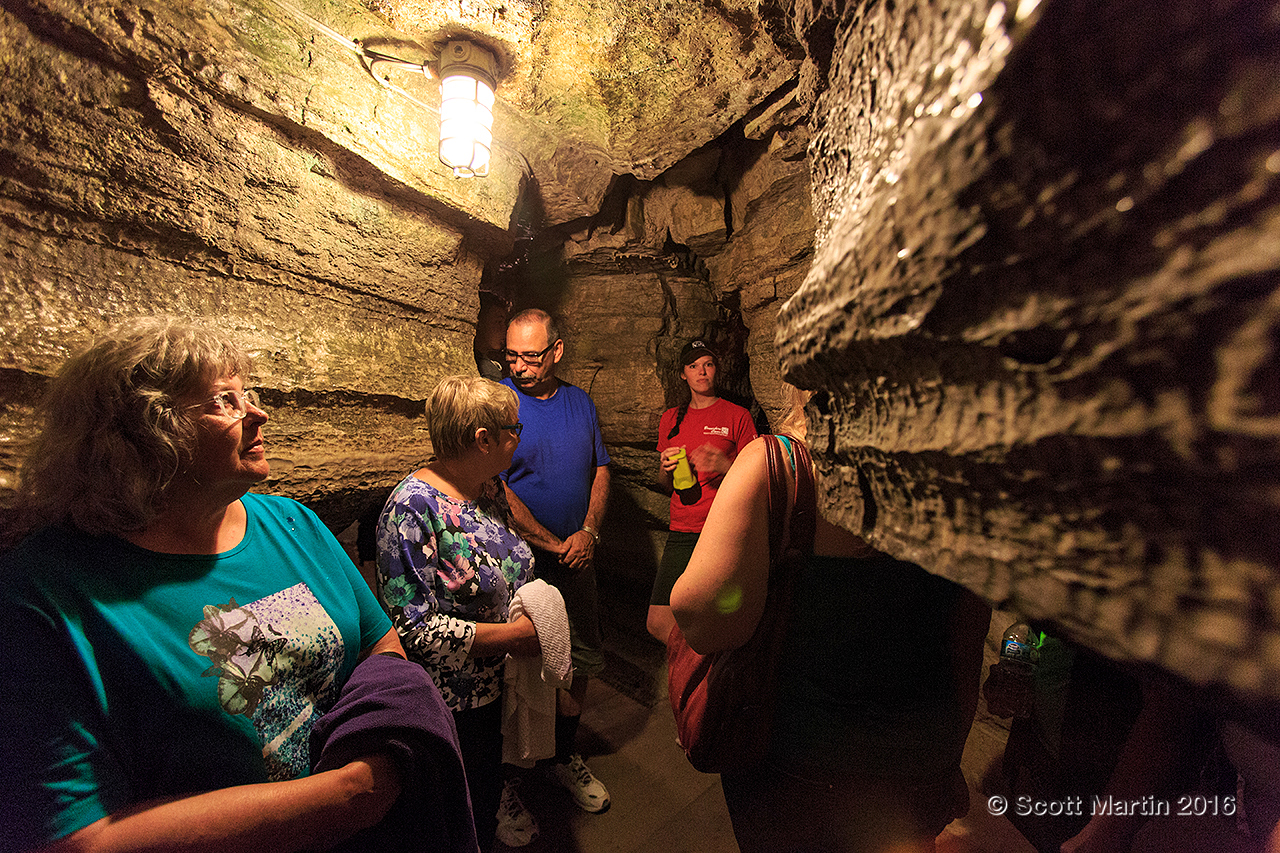
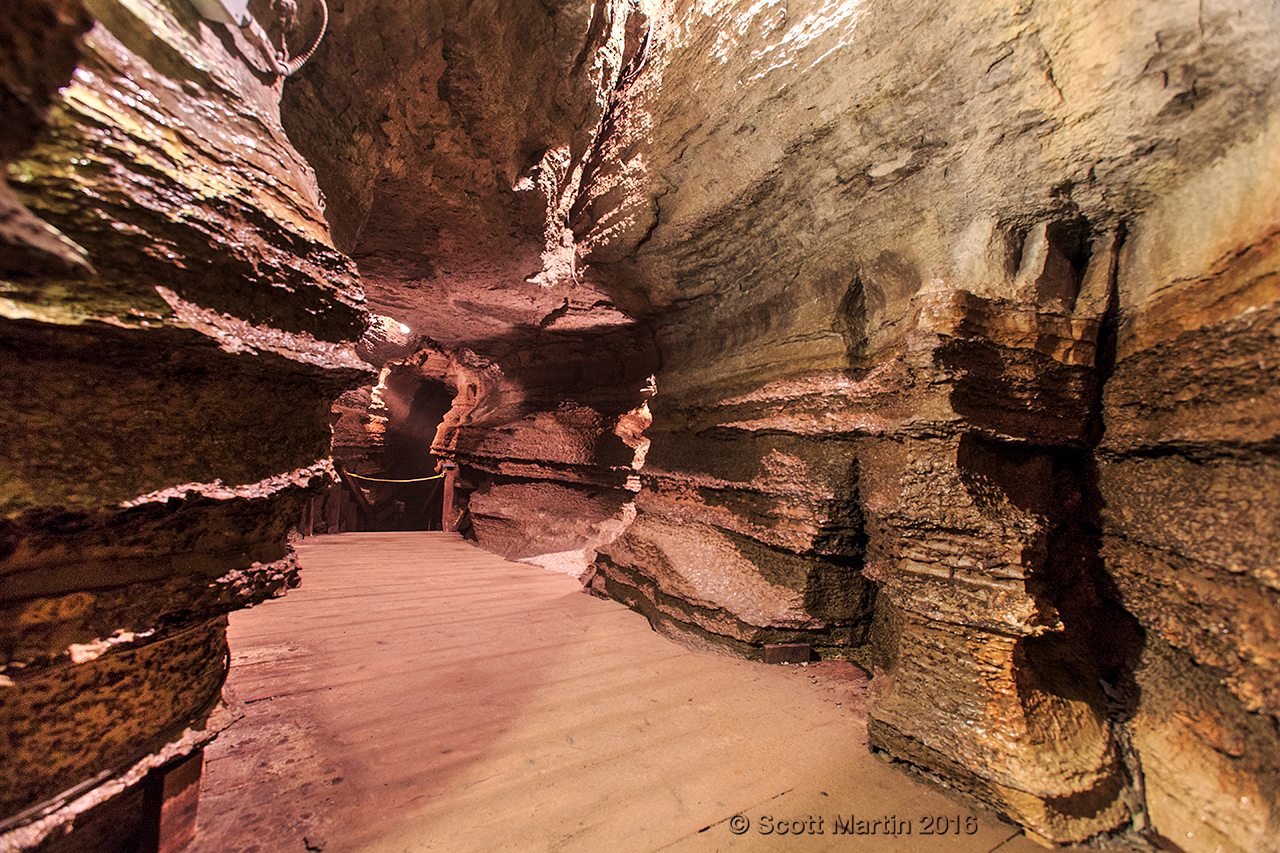
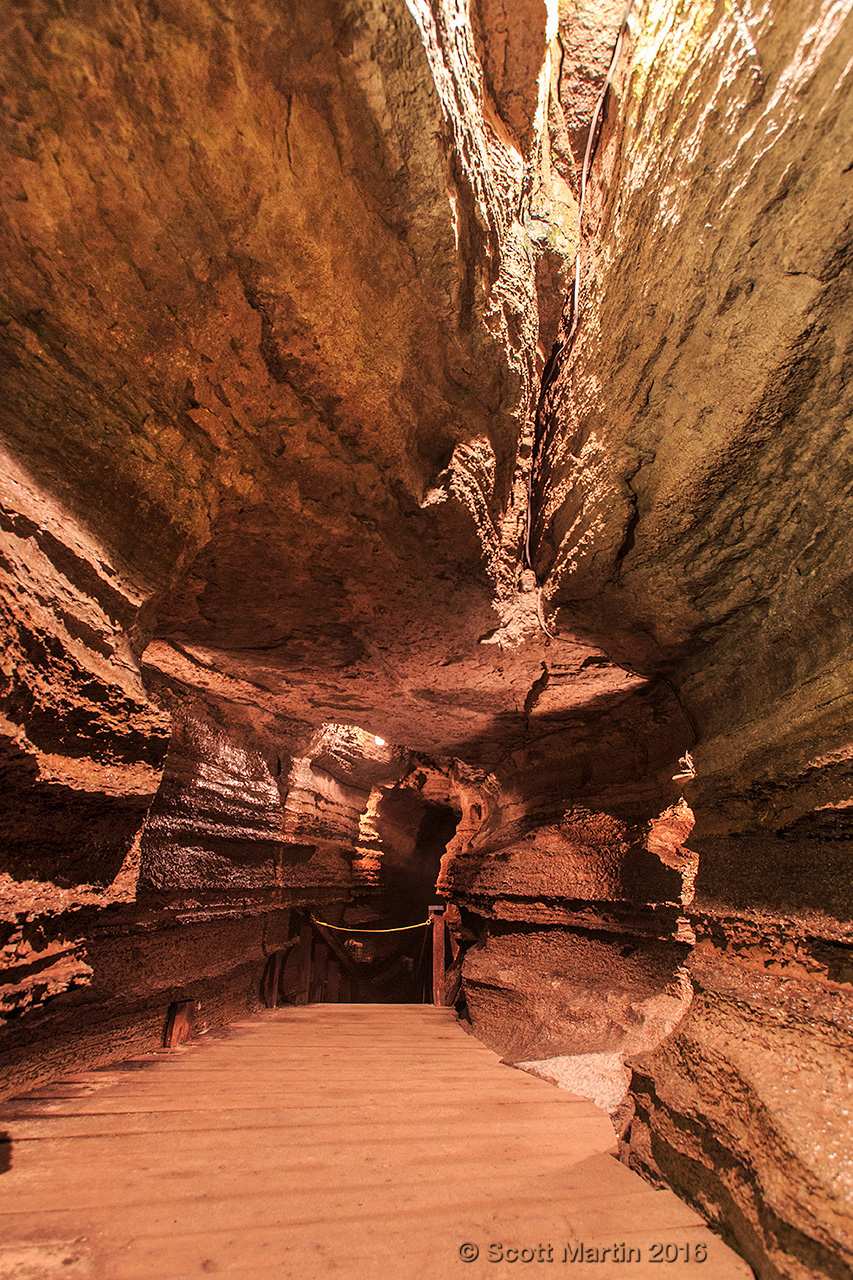
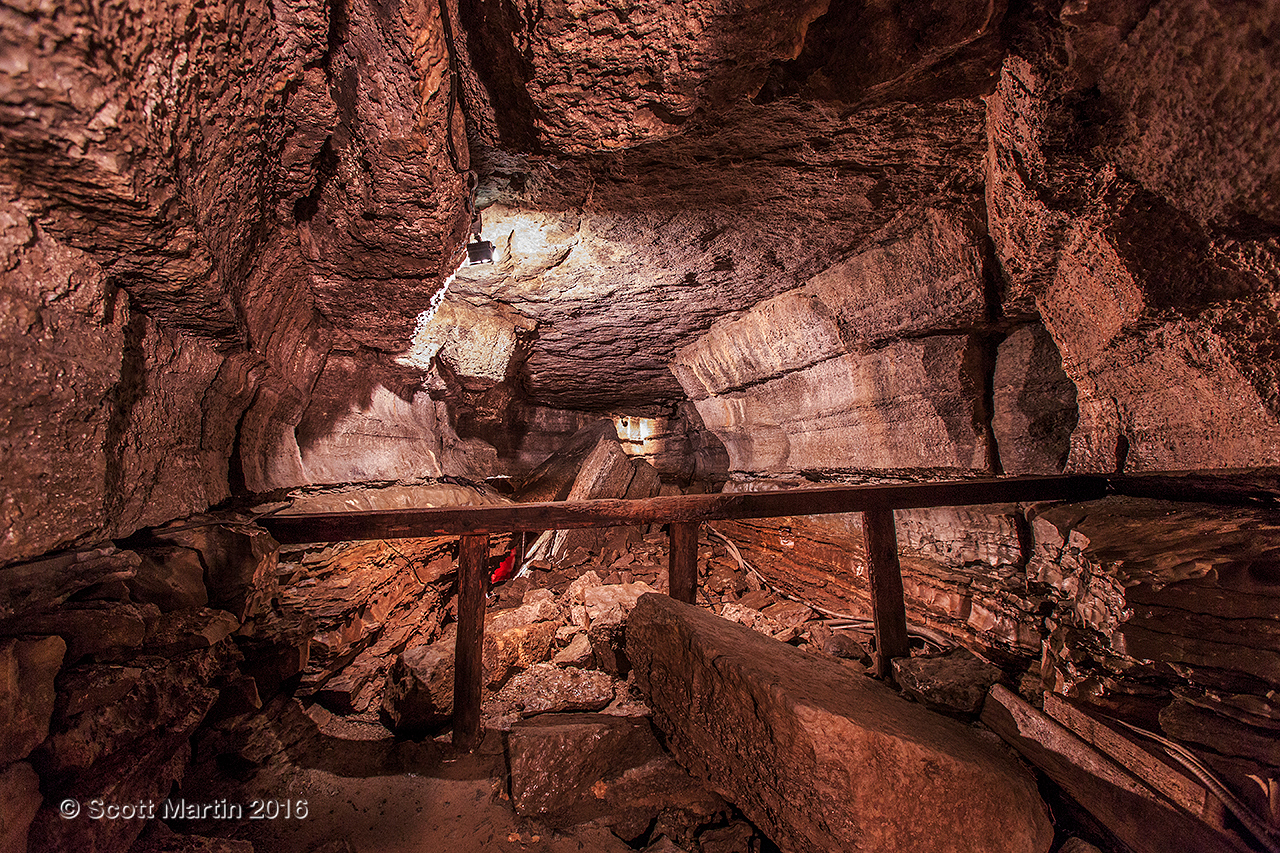
These next images show various views of the caves as we proceeded through on our tour. I was thankful they allowed me to take a tripod and take as many images as desired. Most of the pictures in the caves were taken at a fairly high ISO with shutter speeds ranging from three to five seconds.
.
.
.
.

.
This last shot of the caves shows an area that suffered a collapse….fortunately this was at the end of the tour. As an introduction it would have been unnerving 🙂
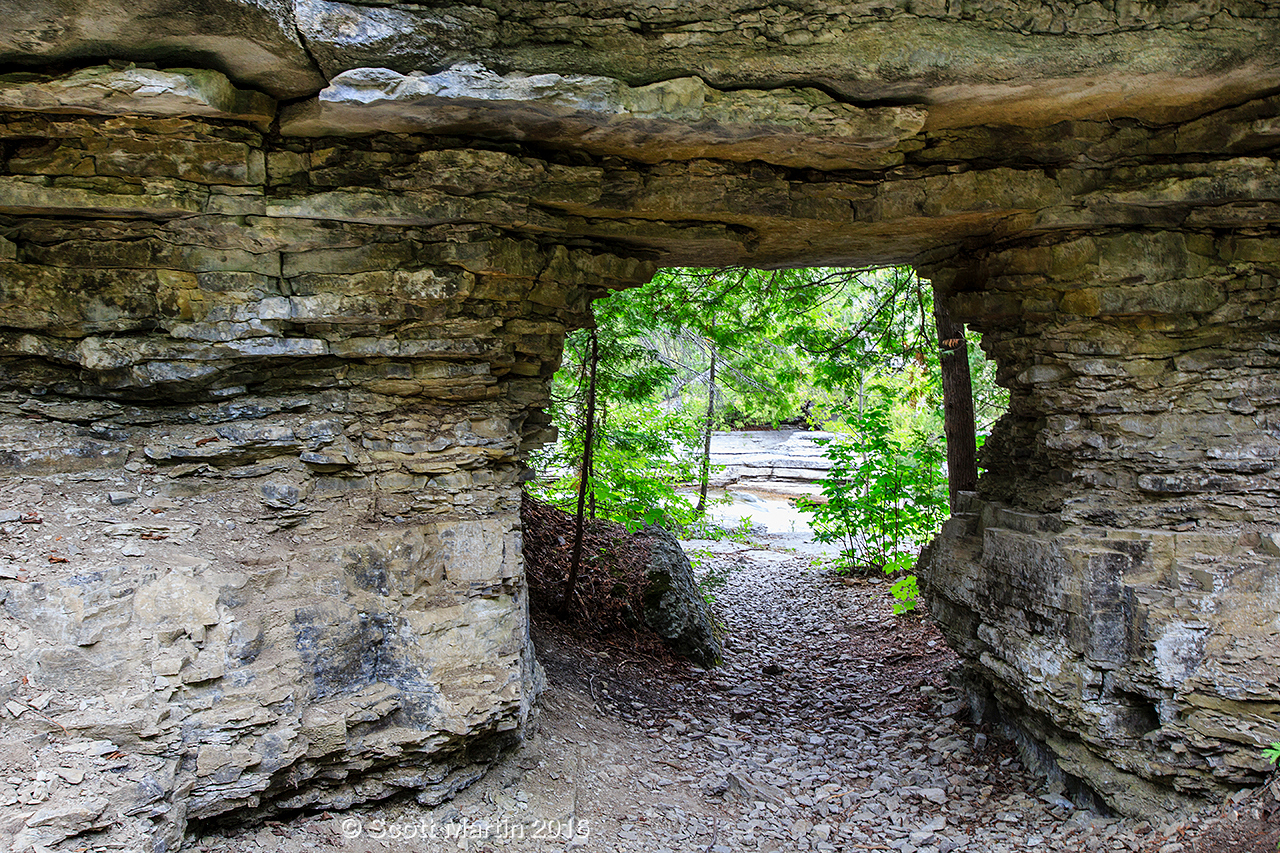
After touring the caves we crossed the bridge to the opposite side of the Bonnechere River and made the short hike to the river’s edge and rushing waters that awaited.
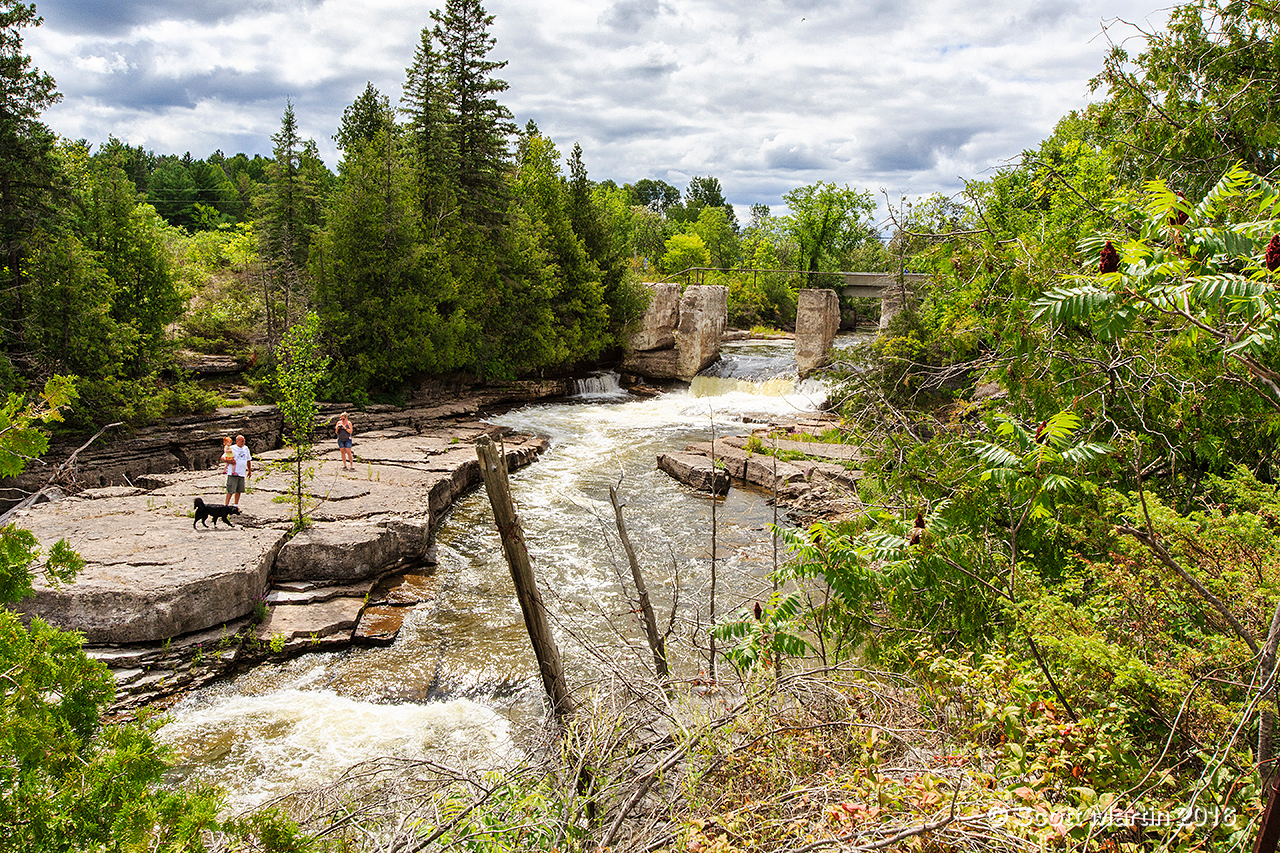
Even the hike to the river was enjoyable with many interesting formations in the relatively soft limestone formed by the Bonnechere River when water levels were much higher.
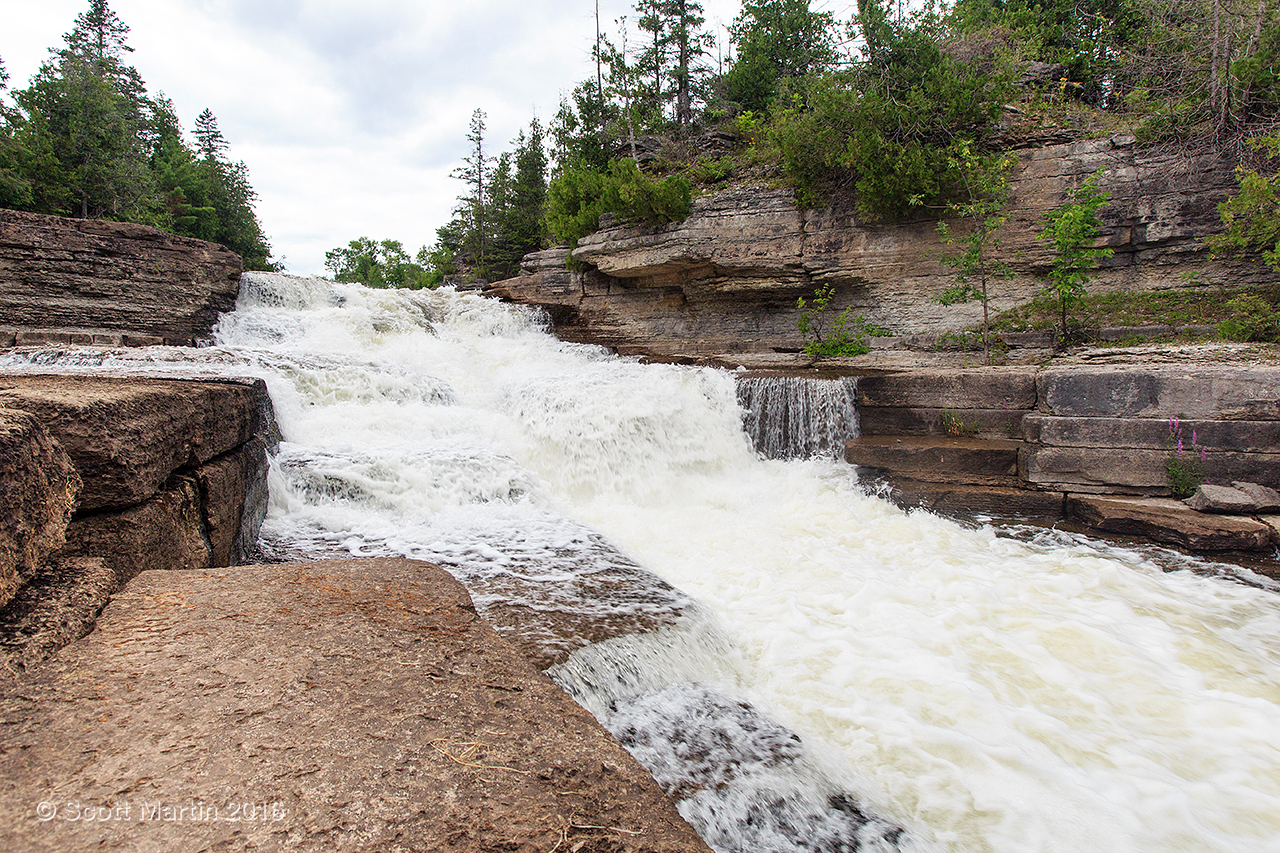
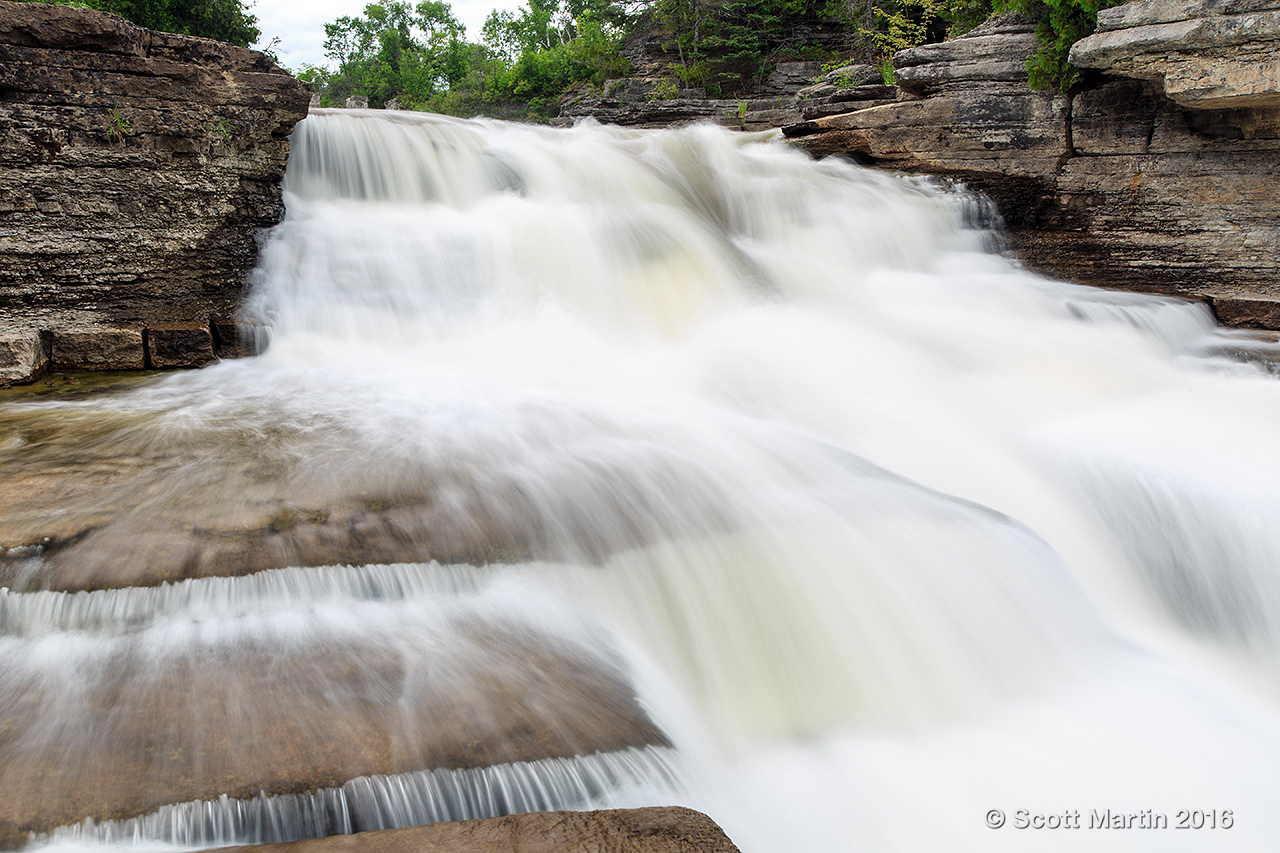
When photographing rivers, rapids and waterfalls, shutter speed is the factor that has the most influence on the image. It is shutter speed that will determine whether the water movement is stopped with perfect focus, freezing the action of the water perfectly, or creates an image in which the water appears etherial with smooth white waters flowing over the rocks beneath conveying the motion and power of the flowing water.
As a matter of practice, first determine the composition you desire and position the tripod accordingly; secondly determine the aperture required to create the necessary depth of field (generally a smaller aperture is preferred in order to keep all elements in focus – anywhere from f/11 to f/22 is usually fine, especially when using wide angle lenses). Finally choose a shutter speed that creates the amount of motion you wish in the water. This is often a matter of trial and error until the proper exposure time to create the desired effect is achieved.
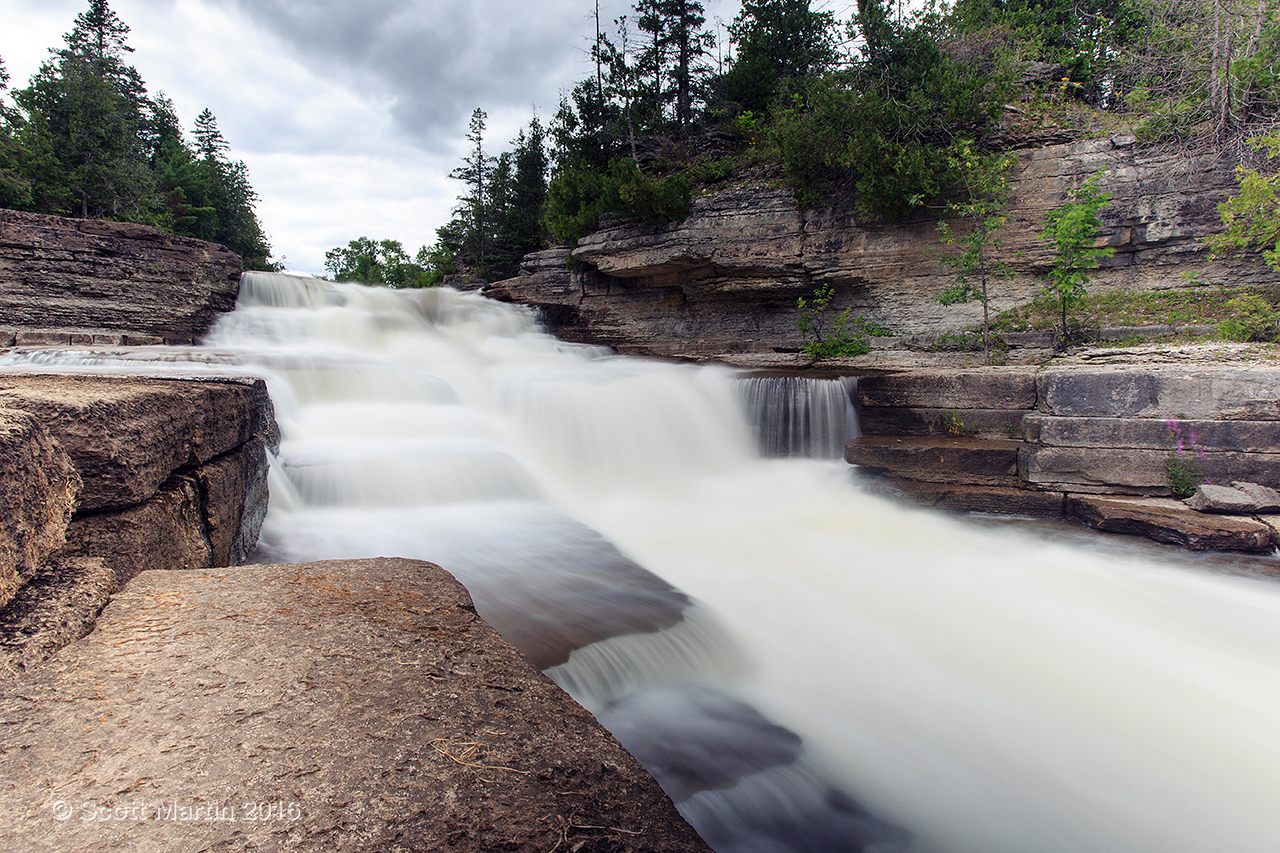
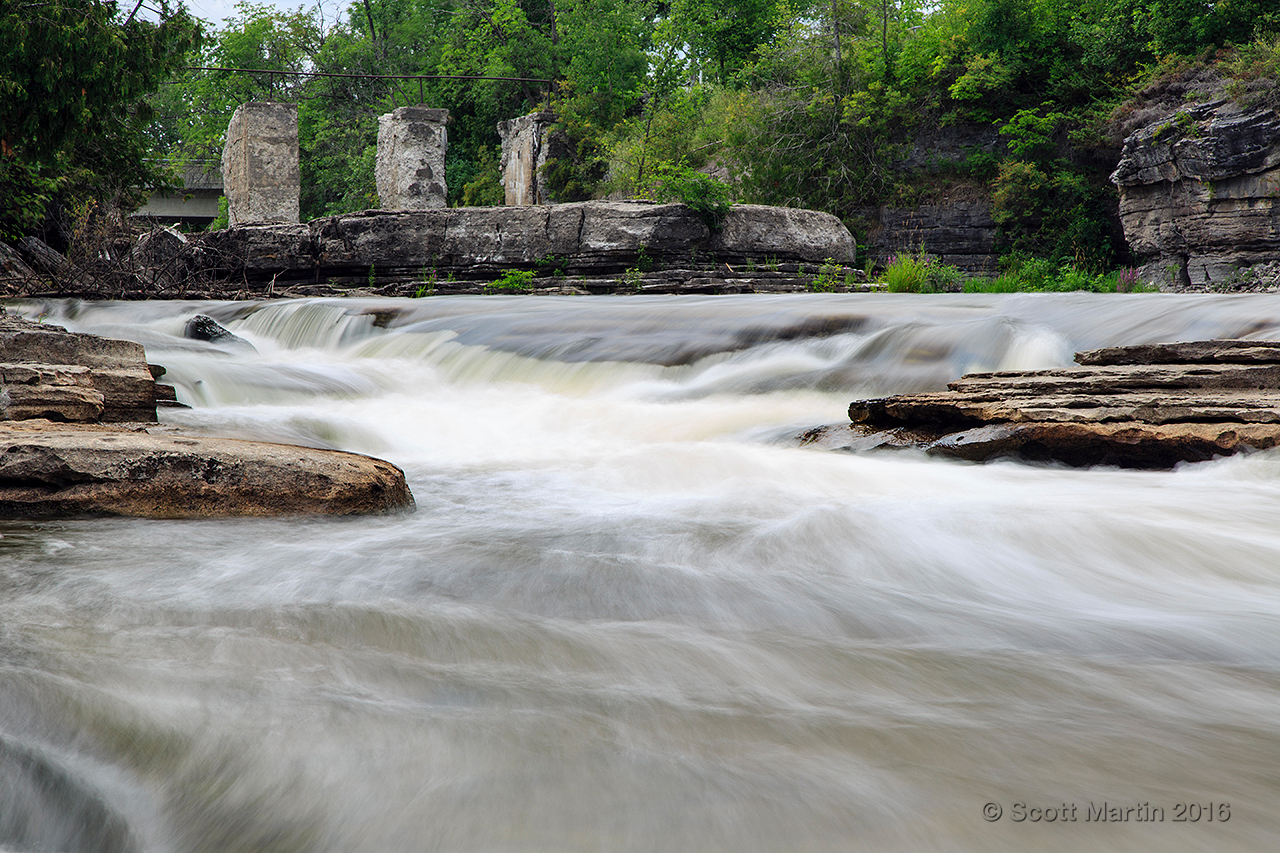
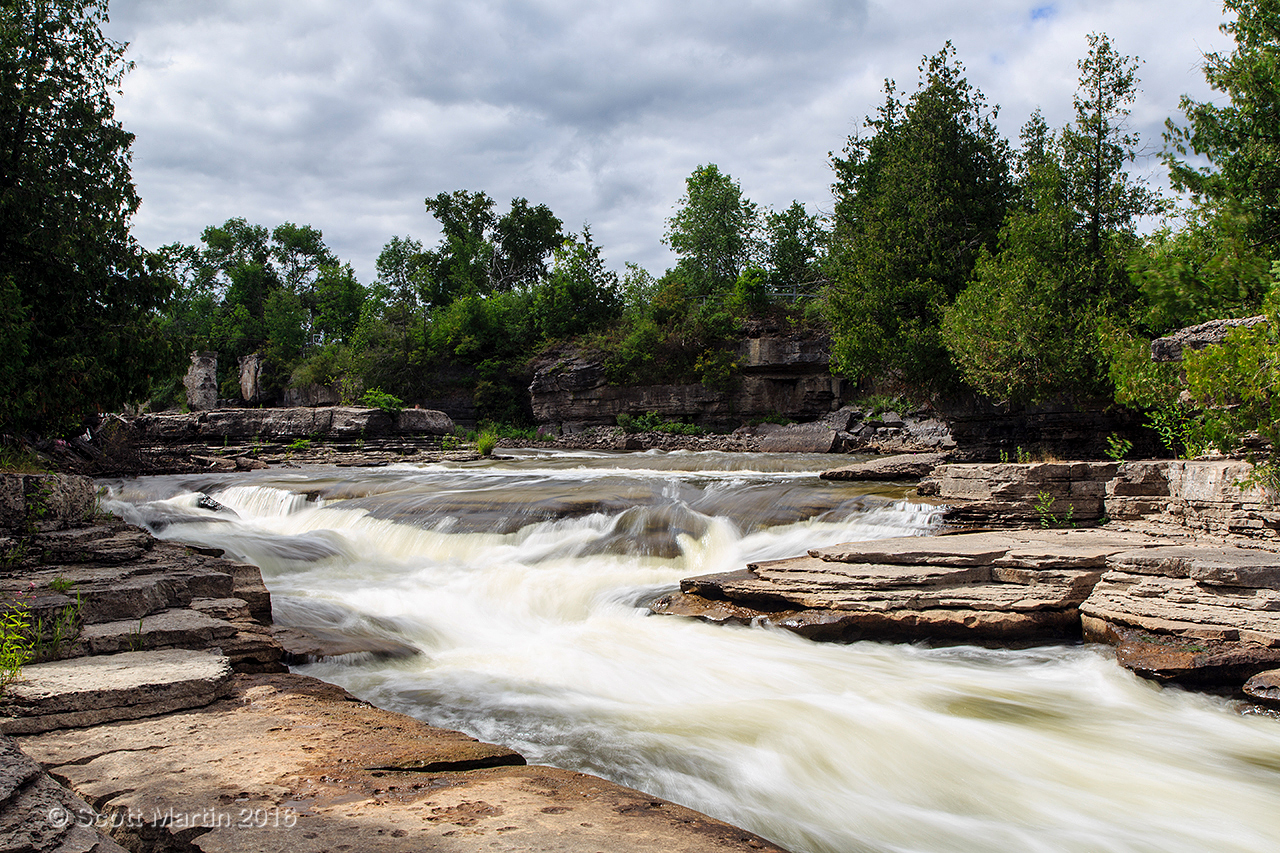
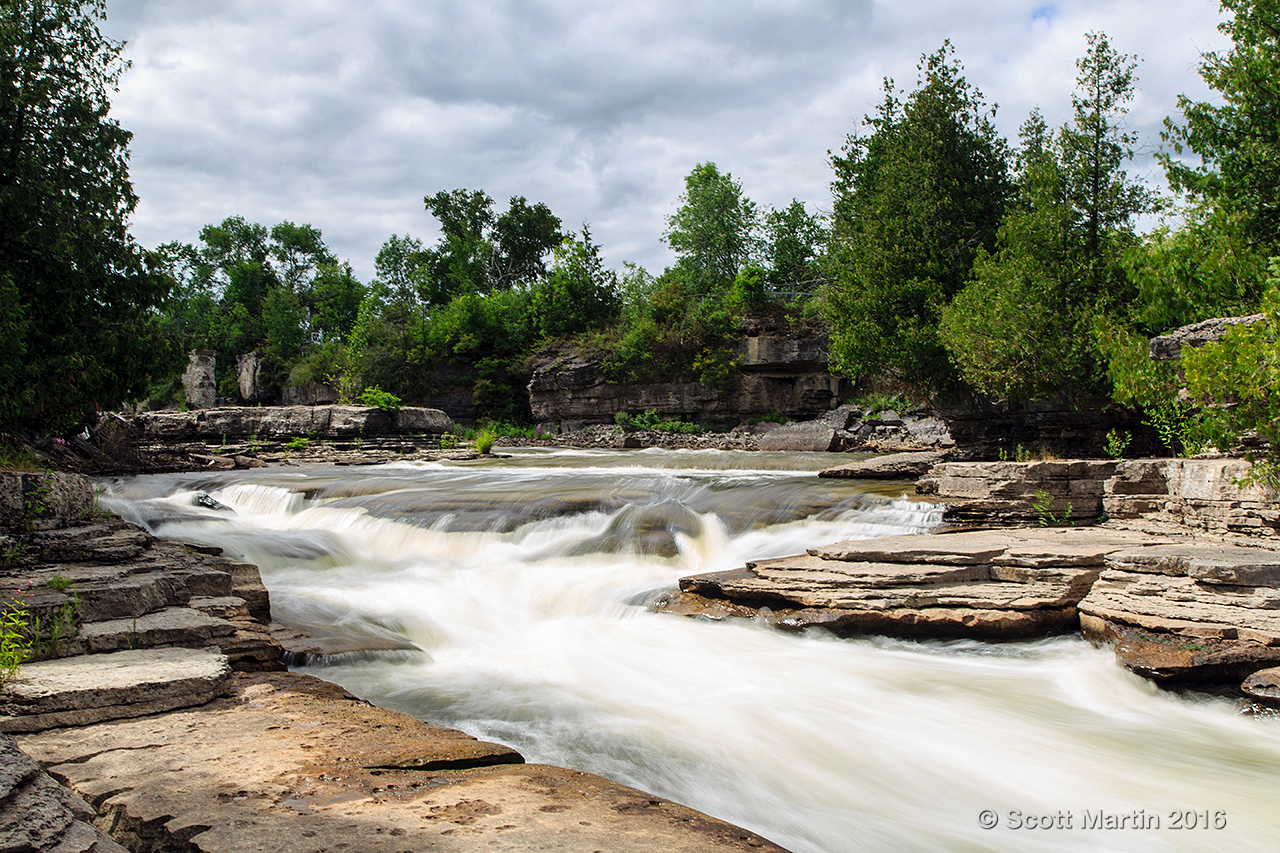
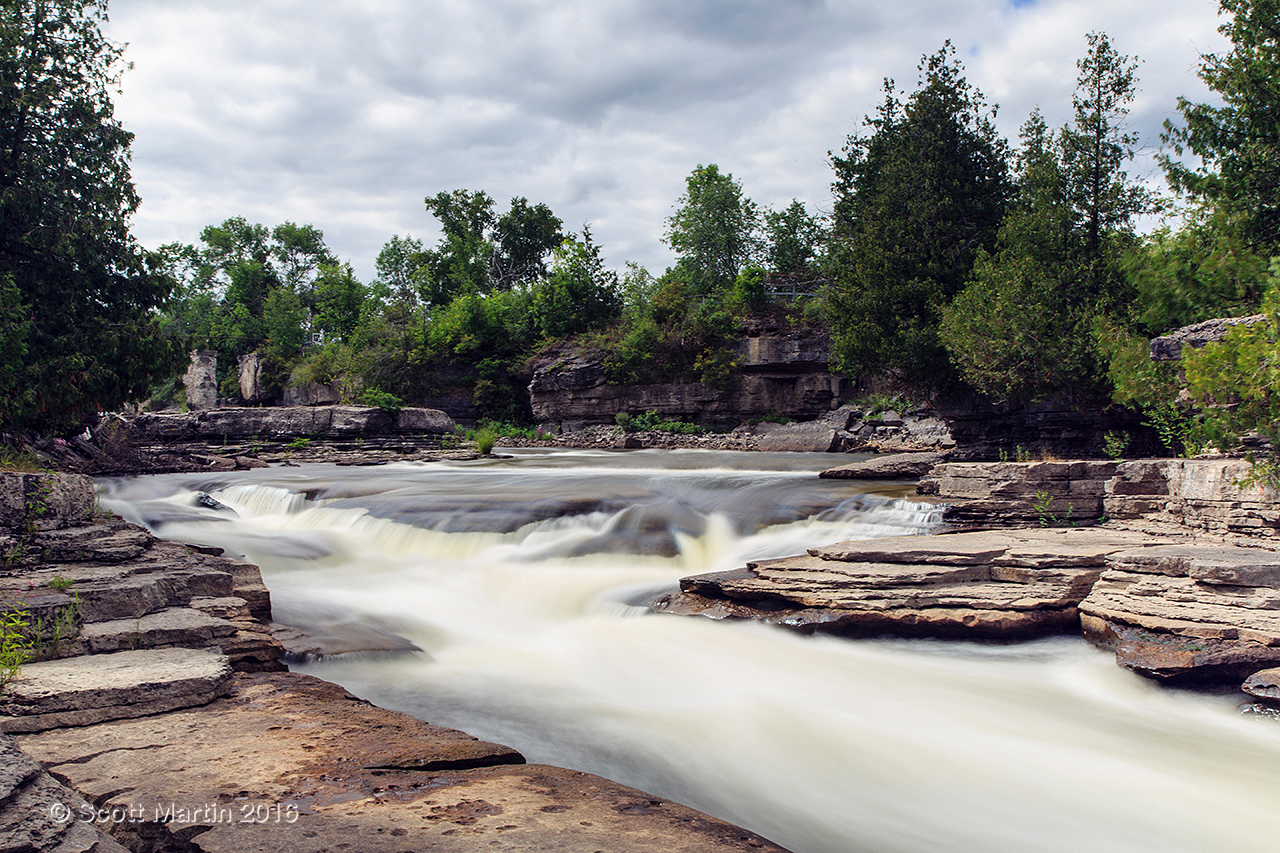
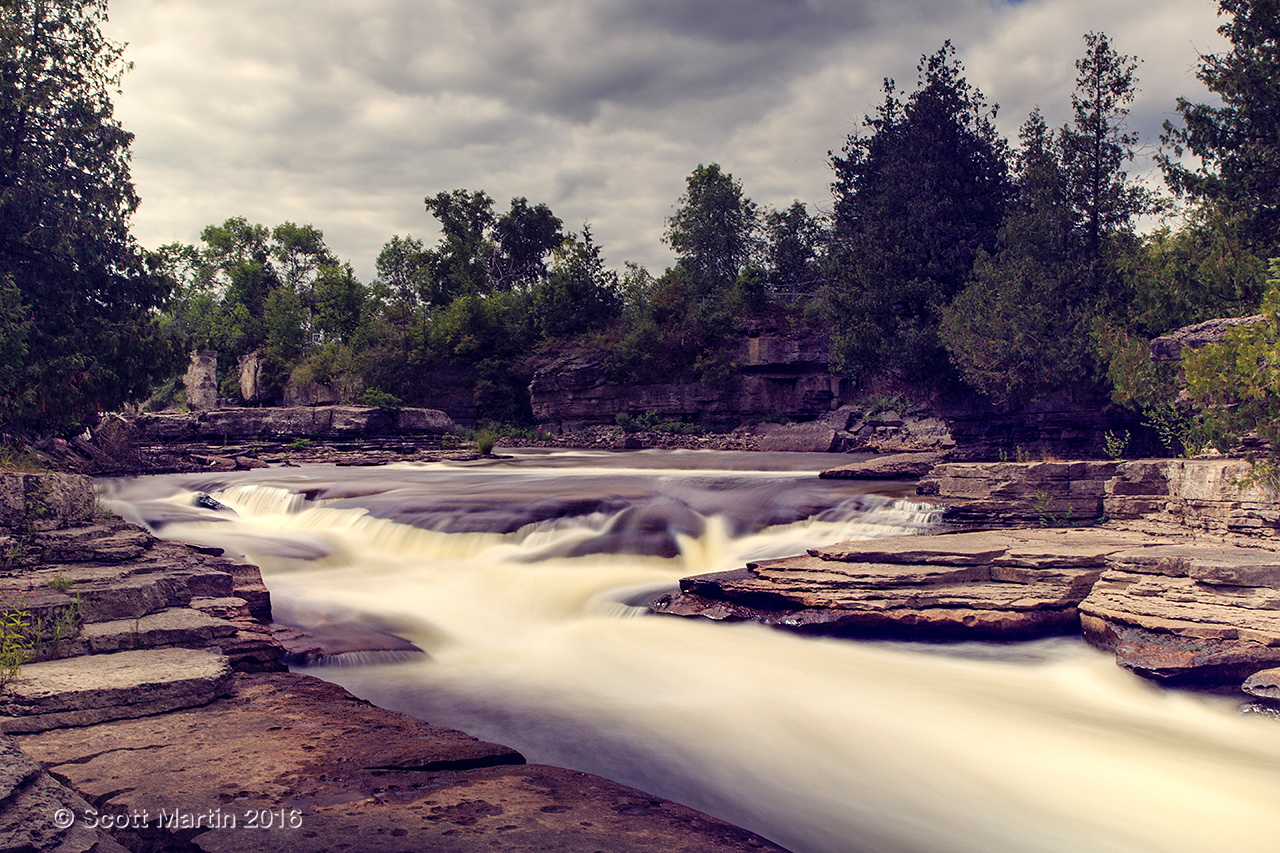
In this next series of images we will look at the effect shutter speed has on the moving water. Everyone’s favourite image will be different based on their subjective preferences and I’d be interested in knowing your choice. Leave a comment with your preference and we will see if there is a clear winner or whether the variety of choice is large. Remember the shutter speed of your favourite and use that speed as a starting point the next time you are photographing rushing waters.
A. 1/100 second
B. 1/2 second
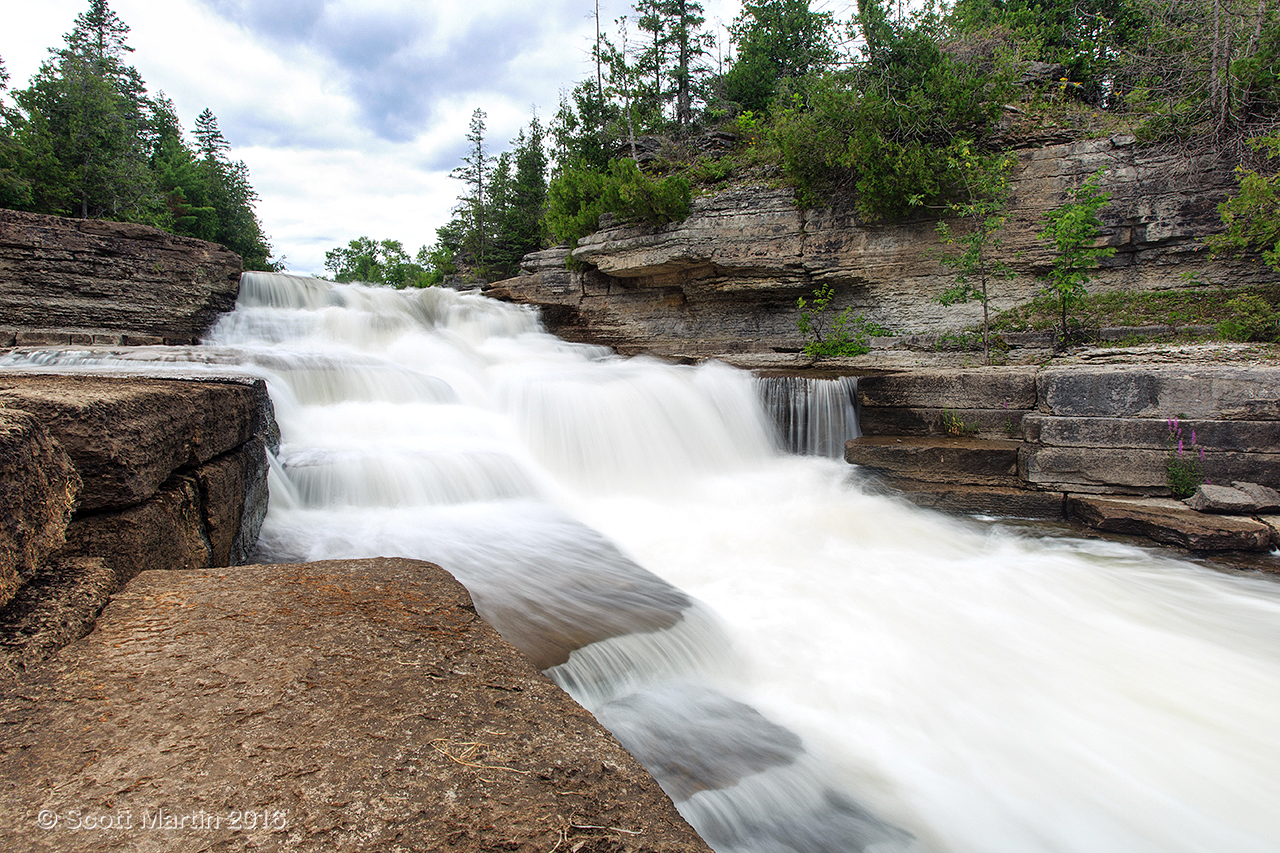
C. 2 seconds

D. 4 seconds
Although there was a cloudy sky when these images were taken, you may be wondering how we were able to achieve such slow shutter speeds. During the daylight even with an aperture of f/22 and an ISO of 50 you can not typically get to exposures of much more than 1/4 to 1/2 second. To achieve slower shutter speeds you require filters for the lens that reduce the light entering the lens. If you have a polarizing filter, you can use that to gain about 1.5 more stops. Otherwise you require Neutral Density filters to further reduce the light reaching the sensor. Neutral density filters come in many forms and are found in every landscape photographer’s tool box. For the pictures in this post I used a Singh-Ray Vari ND filter which is a great filter that allows you to vary the amount of light reduction from 2 to 8 stops which is extremely helpful.
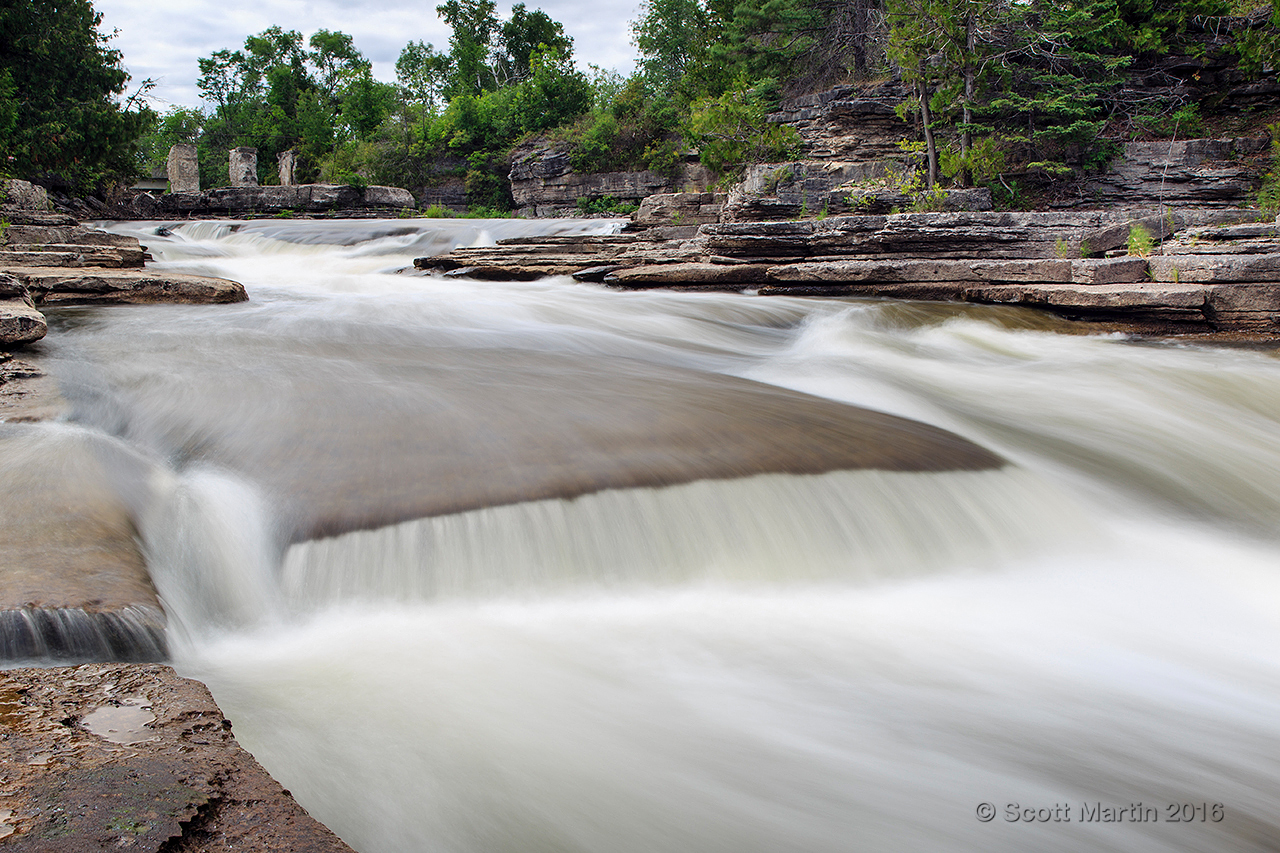
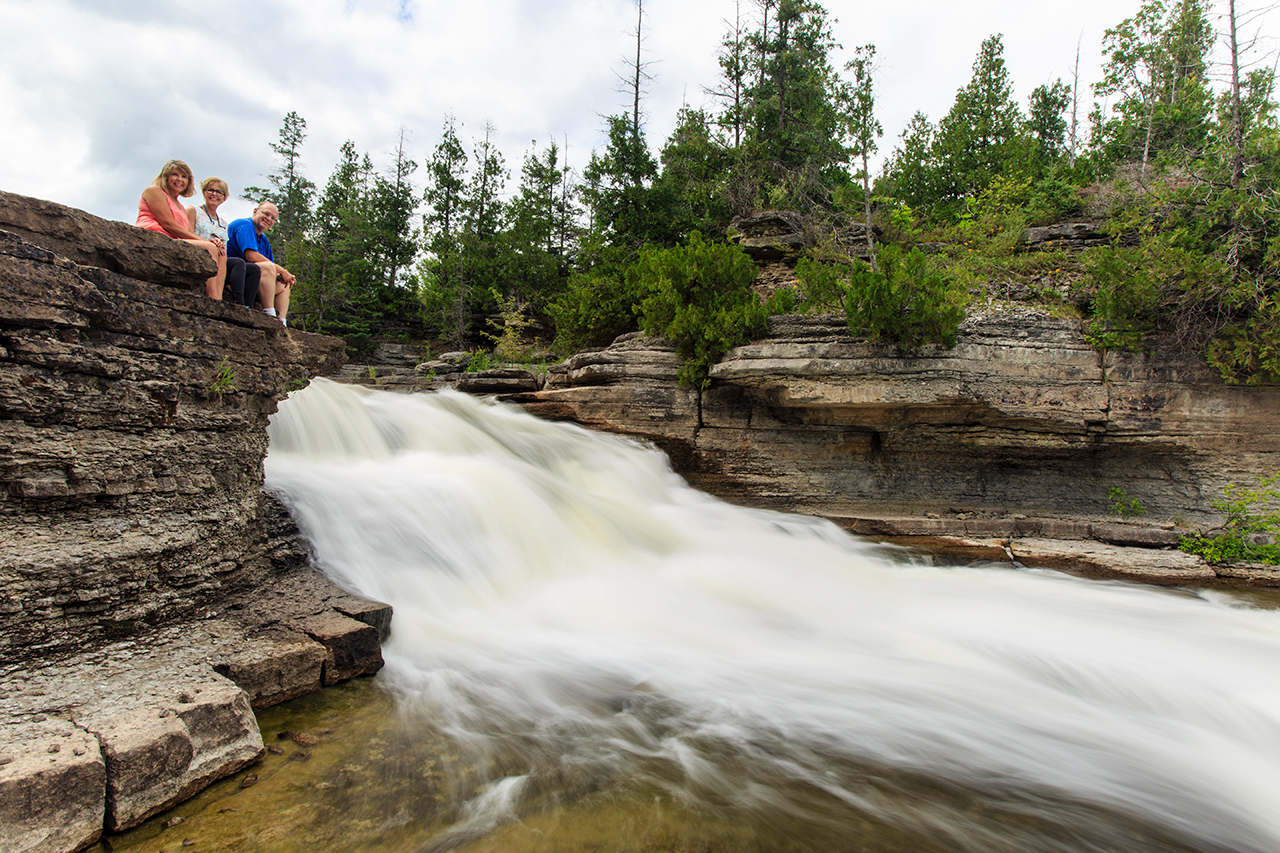
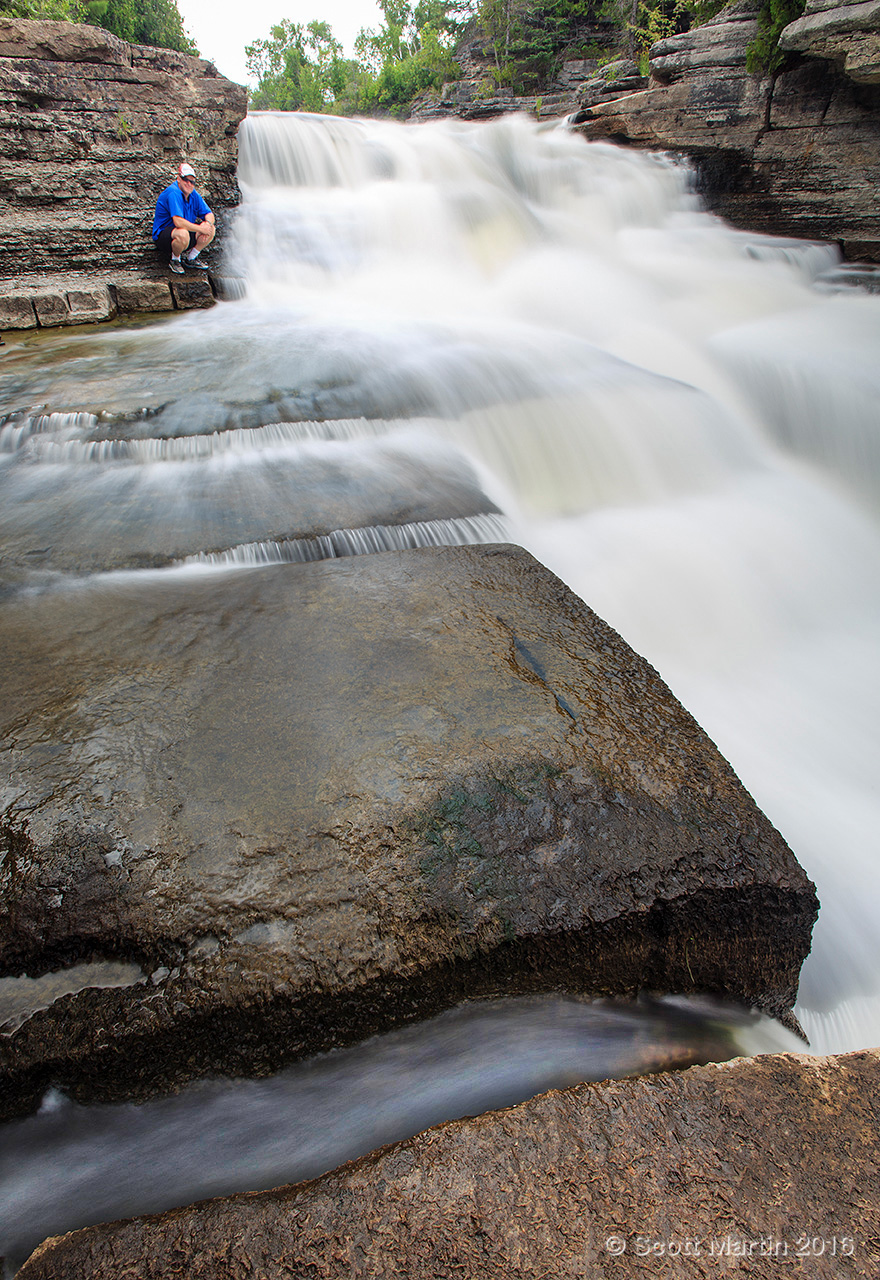
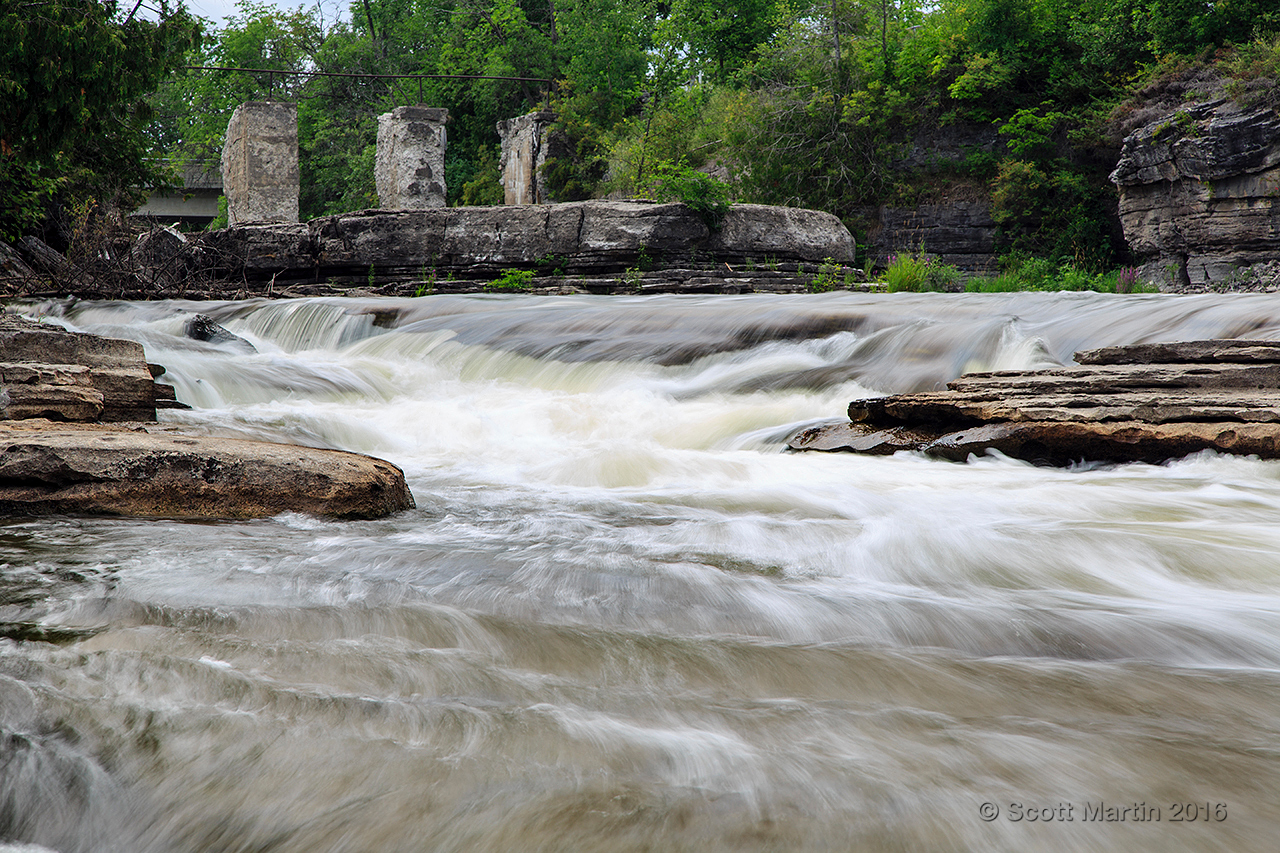
We will close today’s blog with a few more shots of the Bonnechere River. I will include some similar scenes at different shutter speeds for your critique which I always appreciate.
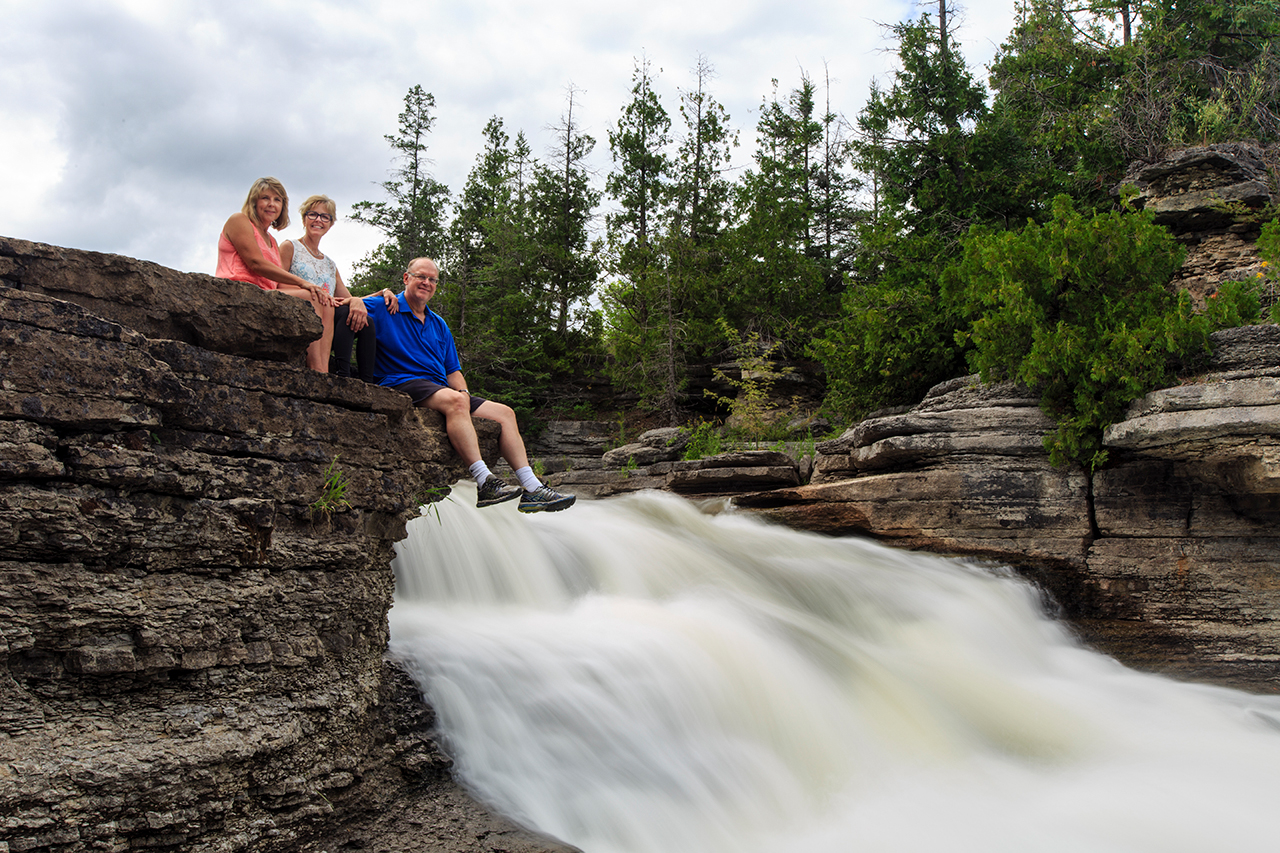
For long exposure shots including people, ask them to hold as still as possible and always use a flash to help freeze any motion (I used a +3 flash exposure compensation for this pic).
.
.
.
.
.
1/3 second
1 second
5 seconds
10 seconds
I trust the pictures from this post will encourage you to plan a trip to the Ottawa Valley and include the Bonnechere Caves and the Bonnechere River on your itinerary. It will take about half a day to see them both but if the light is nice you could certainly spend another half day exploring the river in search of that perfect shot.
All of the images in today’s blog were taken with a Canon 5D Mk III and either a 16-35mm or 24-105mm lens using a Gitzo GT1545T traveler tripod and Markins Ball head. More images of our day can be seen in the Bonnechere Caves, Eganville ON gallery.
As always, thanks for taking time to visit the blog. It is much appreciated.
Follow Scott Martin Photography