Time lapse photography is something that has always been of interest and recently both my son and I have been experimenting with this fascinating niche in the photographic world. The basic premise of time lapse is quite simple; you record several images at regular intervals over an extended period of time and then after processing them, add the images into a video file. When you play the resulting video file, you have a video that shows everything captured in the still images over the period of time they were taken compressed into a few seconds. For example, if you take one image every fifteen seconds for an hour you will take a total of 240 images. Placing these 240 images into a video file of 24 frames per second will produce a video of ten seconds duration. Thus the resulting video will display in ten seconds what occurred over a period of an hour.
This first sample time lapse is exactly as described above; 240 images taken over an hour ending with sun down and displayed in a 24 fps video file. The images were taken from our hotel room in Niagara Falls.
Besides your DSLR you require two other pieces of equipment to get into the time lapse game, a tripod and an intervalometer.
The tripod is required to ensure that the camera is stable and records the exact same frame with every exposure over the time lapse period. Next to the camera and lens, the tripod is arguably the most important piece of equipment and I would certainly buy a tripod before a flash. As tripod technology hasn’t changed much since the advent of carbon fibre, I would recommend investing in the best possible as they will, for all intents and purposes, last a lifetime. I use Gitzo tripods which have proven very reliable over the years. They are well constructed, very stable and lightweight. As time lapse photography generally involves wide angle or short telephoto lenses, I use a smaller Gitzo 1542T traveller tripod with a Markins Q3 ball head.
The intervalometer is simply a timer remote switch for the camera that allows you to program a remote timer (delay from activation to shutter release), interval timer (the amount of time between successive exposures), long exposure timer (defines exposure time with camera on bulb setting) and exposure count setting (how many exposures will be taken). I use the Canon TC-80N3. Some of the new cameras have an intervalometer built into the camera itself so make sure you check for this feature on your camera before buying an intervalometer.
The easiest time lapses to take are those with a constant exposure over the duration of the time lapse. Changing exposures within the time lapse often causes flickering in the final product which is very distracting and must be avoided. Even slight exposure variations when shooting in any of the automatic exposure modes will result in flickering which is why it is essential to shoot time lapses manually. Similarly you want to disable the autofocus on the camera for time lapse photography to ensure that that the camera focus does not change during the shoot.
This next time lapse is of the American Falls and consists of about 380 images taken over a ninety minute period.
Moving from a CF card with hundreds of images on it to the finished time lapse is surprisingly easy as long as you have a video editing software program. I use Adobe Premier Pro CS6, but any editor will work fine. You are not too concerned with post processing the images and any post processing done must be applied equally to every image to avoid flickering in the video. My workflow is to open all the RAW files in ACR (Adobe Camera Raw), select all, level and crop if needed (but care should always be taken to do this in camera so it is not needed in post processing), adjust for lens correction, contrast, clarity and vibrance and save the images as jpegs in their own folder. Open a new file your video editor (I prefer 24 frames per second), import your time lapse images, render the file and export it as you like it and you are ready to go. I’ve been playing around with both YouTube and Vimeo formats (you can find me at both sites under Scott Martin Photography). When watching the time lapse videos on full screen on the desk top, the Vimeo format appears better than YouTube, however for embedding videos in WordPress blogs like this the YouTube plugins are infinitely better than any of the Vimeo plugins I looked at.
Here is a 240 image, ten second time lapse of the Horseshoe Falls, again taken from our hotel room window on the 44th floor of the Hilton Fallsview Hotel in Niagara Falls.
I would encourage you to experiment with time lapse photography. It provides a lot of enjoyment and is one of those things you can truly multi-task with. My intent is to set up a camera for time lapse when I’m out doing landscape photography and that way as I’m moving about shooting sunrises and sunsets or exploring an area for landscape images I can simultaneously be recording images for a time lapse of the same scene.
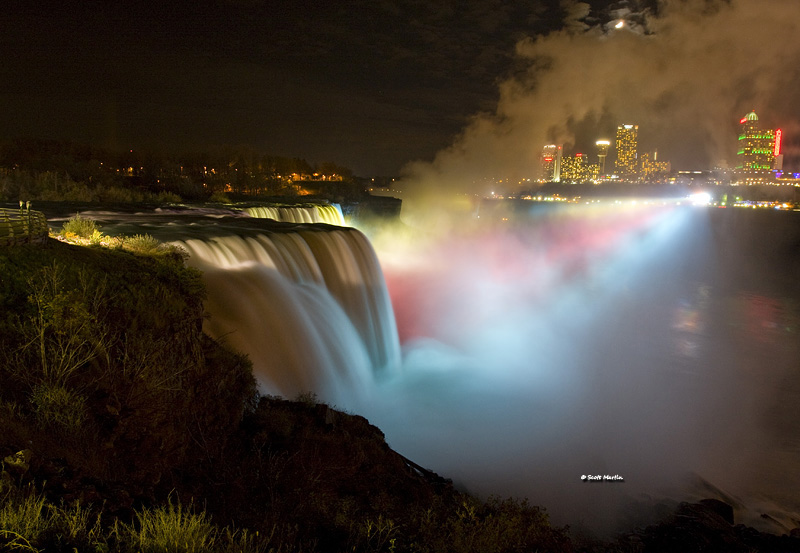
Although this last image is not a time lapse, it is a time exposure taken from the American side of the falls, looking across the American Falls towards the Horseshoe Falls in the back ground.

Very nice Scott. I have had one go on the go pro but have to have a try on the 5d. The results you have achieved are beautiful. My trip up North would have been great but us on hold due to me starting a new job. Have to look for something else to try at
Thanks Rob and they are a lot of fun to play around with. I wish I had been doing them on all of our past travels, but its given us good reason to go back and revisit them again 🙂 Sorry your trip has been delayed but new job responsibilities are always more important!
Very impressive Scott. These pictures are great! There are sure many possibilities using time lapse photography.
Thanks Dad and they will always be a reminder of the great view from the hotel!
I think after reading this very informative post, I could easily buy an intervalometer and get started right away. Sigh! So much to do, so little time!
Thanks Arni and you are right, it never seems to end does it! But that’s what makes photograph such a great hobby.
Hi Scott,
I’d love to see the photos, but all I get is a black screen. Is this likely a problem on my end?
Hi Claudia and thanks for letting me know about the black screen. The problem was not on your end, but within a program I use to play YouTube videos on the blog. I’ve changed to another program and it seems to be working now. Thanks again and let me know if it works for you now.